GEPpp/iances.com
|
©
Safety Instructions ............. 2-7
Operating Instructions
Baking or Roasting .............. 11
Broiling, Broiling Guide .......... 14
Clock and Timer ................ 15
Control i,ockout ................ 15
Convection .................. 18-22
Cookware ....................... 9
Oven ....................... 10-30
Probe .......................... 17
Pro(Nng ....................... 23
Sabbath Feature ................. 30
Self'Cleaning ................ 25, 26
Special Features .............. 27-29
Surface Burners ............... 8, 9
Thermostat ..................... 24
Timed Baking & Roasting ........ 16
Warming ....................... 23
Care and Cleaning
Burner Assembly ................ 31
Burner (;rates and
Vent Grille ..................... 32
Control Panel .................. 35
Door .......................... 34
Floor .......................... 35
(;lass Cooktop ............... 36, 37
F_obs ......................... 31
,lcs96s
PG5968
i,itt-()ff Oven Door .............. 34
Light Bulbs ..................... 33
Packa_ng Tape ................. 31
Painted Surfaces ................ 35
Racks .......................... 32
Stainless Steel Surfaces ........... 35
Storage Drawer ................. 32
Vent ....................... 32, 35
Troubleshooting Tips ....... 38-42
Accessories .................... 45
Consumer Support
Consumer Support .............. 48
Ownership Registration
tbr Customers in
Canada only .............. 43, 44
Warranty fbr Customers
in Canada ...................... 47
Warranty fbr Customers
in the U.S.A .................... 46
In Canada:
_.GEAppliances.ca
Printed in the UnitedStates
Write themodel and serial
numbers here:
Model #
Serial #
You can find them on a label
behind the open oven door
on the lower leR corner of the
range flame.
49-80542-3 07-09 JR

iMPORTANTSAFETYINFORMATION.
READALLiNSTRUCTiONSBEFOREUSING.
WARNING:If theinformation
in this manual is not followed exactly,
a fire or explosion may result causing
property damage, personal injury
or death.
-- Do not store or use gasoline or other
flammable vapors and liquids in the
vicinity of this or any other appliance.
- WHATTODOIFYOU
SMELLGAS
Do not try to light any appliance.
Do not touch any electrical switch;
do not use any phone in your building.
Immediately call your gas supplier
from a neighbor's phone. Follow the
gas supplier's instructions.
If you cannot reach your gas supplier,
call the fire department.
-- Installation and service must be
performed by a qualified installer,
service agency or the gas supplier.
GAS-FIRED
C
LISTED
US
2
GEPpp/iance&corn
m
Foryour safety, theinformation in this manual must be foflowed tominimize therisk offire or
explosion, electric shock, or toprevent property damage, personal injury, or loss offife.
ANti-TIPDEVICE
•All ranges can tip.
• BURNS or other SERIOUS
INJURIES can result.
•INSTALL and CHECKthe
ANTI-TIP bracket following
the instructions supplied
with the bracket.
Toreduce the risk of tipping therange, therange must be
secured bya properly installed anti-tip bracket. See installation
instructions shipped with thebracket for complete details before
attempting toinstall.
Tocheck ff thebracket is installed and engaged properly,
remove the storage drawer or kickpanel and look underneath
the range tosee that theleveling leg isengaged in the bracket.
If the range is pulled from thewall for anyreason, always repeat
this procedure toverify the range isproperly secured
by theanti-tip bracket.
Kyou did not receive an and-tip bracket with your
purchase, call 1.800.626.8774 to receive one at no
cost (in Canada, call 1.800.561.3344). For installation
instructions of the bracket, x,isit GEAppliances.com
(in Canada, GEAppliances.ca).
IMPORTANTSAFETYNOtiCE
The California Safe Drinking Water and Toxic Enforcement Act requires the Governor of Cafifomia to
publish a list ofsubstances known tothestate to cause birth defects or other reproductive harm, and
requires businesses towarn customers ofpotential exposure tosuch substances.
Gasappliances can cause minor exposure to four ofthese substances, namely benzene, carbon
monoxide, formaldehyde and soot, caused primarily by theincomplete combustion ofnatural gas or
LP fuels. Properly adjusted burners, indicated by a bluish rather thana yellow flame, will minimize
incomplete combustion. Exposure to these substances can be minimized by venting with an open
window or using a ventilation fan or hood.
The fiberglass insulation in self-clean ovens gives off a very small amount of carbon monoxide during
the cleaning cycle. Exposure can be minimized by venting with an open window or usinga ventilation
fan or hood.
3
iMPORTANTSAFETYiNFORMATiON.
READALLiNSTRUCTiONSBEFOREUSING.
m
SAFETYPRECAUTIONS
When using electrical appliances, basic safety precautions should be followed, including the
following:
}} Use this appliance only for itsintended
purpose as described in this Owner's
Manual.
iii}i}i
Be sure your appliance isproperly installed
and grounded by a qualified technician in
accordance with the prox_idedinstallation
instructions.
iii}i}i
iii}i}}li_
Befbre perfbrming any ser_ice, disconnect
the range power supply at the household
distribution panel by remox_ing the filse or
switching off the circuit breaker.
Have the installer show you the location of
the circuit breaker or fllse. Mark it fbr easy
reference.
iii}i}i
iii}i}}li_
iii}i}}li_
iii}i}}li_
Do not leave children alone--children
should not be left alone or unattended in
an area where an appliance is in use. They
should never be allowed to sit or stand on
any part of the appliance.
Have the installer show you the location
of the range gas shut-off valve and how to
shut it off ff necessary.
Have your range installed and properly
grounded by a qualified installer, in
accordance with the Installation
Instructions. Auy a£1justment and ser_,ice
should be perfbrmed only by qualified gas
range installers or ser_,ice technicians.
Locate the range out of kitchen tragic path
and out of drafty locations to prevent poor
air circulation.
iii}i}i
iii}i}}li_
Be sure all packa_ng mamrials are
removed flom the range befbre operating
it to prevent fire or smoke damage should
the packa_ng material ignim.
Do not leave chiktren alone or unattended
where a range is hot or in operation. They
could be seriously burned.
}}Do not attempt to repair or replace any
part of your range unless it is specifically
recommended in this manual. All other
serx,ice should be referred to a qualified
technician.
::_ Be sure your range is correcdy a£1jusmd
by a qualified ser_,ice technician or installer
for the type of gas (natural or LP) that is
to be used. Your range can be converted
for use with either type of gas. See the
Installation Instructions packed with
the range.
_:_Plug your range into a 120-volt grounded
outlet only. Do not remove the round
grounding prong flom the plug. If in
doubt about the grounding of the home
electrical sysmm, it is your personal
responsibility and obligation to have
an ungrounded outlet replaced with a
properly grounded, three-prong outlet in
accordance wkh the National Electrical
Code (U.S.). Do not use an exmnsion cord
with this appliance.
WARNING:theseadjustments
must be made bya qualified service
technician in accordance with the
manufacturer's instructions and all codes
and requirements ofthe authority having
jurisdiction, Failure tofollow these
instructions could result in serious injury or
property damage, Thequalified agency
performing this work assumes responsibility
for the conversion,
}} Keep the hood and grease filters clean to
maintain good venting and to avoid grease
fires.
}}Teach chiktren not to play with the
controls or any other part of the range.
}}Alwayskeep dish towels, dish cloths, pot
homers and other linens a sNE distance
from your range.
4
GEPpp/iances.com
SAFETYPRECAUTIONS
_:_Alwayskeep wooden and plastic utensils
and canned fbod a s_e distance flom your
range.
_:_Always keep combustible wall coverings,
curtains or drapes a s_e distance from
your range.
_:_Do not clean the range ;_dth flammable or
volatile cleaning fluids.
_:_After prolonged use of a range, high floor
mmperatures may resuh and many floor
coverings ;_ill not ;_dthstand this kind of
use. Never install the range over x,inyltile
or linoleum that cannot ;_dthstand such
type of use. Never install it directly over
inmrior kitchen carpeting.
_:_Avoid scratching the glass cooktop ;_dth
sharp instruments, or ;_dthrings and other
jewelry.
iii::vDo not allow anyone to climb, stand or
hang on the oven door, storage drawer or
cooktop. They could damage the range
and even tip it over, causing severe
personal injury.
CAUTION:itemsinteresttoch,dren
shouldnot bestoredin cabinetsabovea rangeor
onthebacksplashof a range--childrenclimbing
ontherangeto reachitemscouldbeseriously
injured.
WARNING:NEWRusethis
appliance as a space heater to heat or
warm the room. Doing st) may result
in carbon monoxide poisoning and
overheating of the cookmp or oven.
iii_:_For your s_ety, never use your appliance
fbr warming or heating the room.
iii_:_Large scratches or impacts to glass doors
can lead to broken or shattered glass.
iii::vDo not clean the range when the appliance
isin use.
iii::vNever wear loose-,fitting or hanging
garments while using the appliance.
Be careflfl when reaching fbr imms su)red
in cabinets over the range. Flammable
mamrial could be ignited if brought in
contact with flame or hot oven surfaces
and may cause severe bums.
iii::vDo not store flammable materials in an
oven, a range storage drawer or near a
cookmp.
iii_:_Do not store or use combustible mate, rials,
gasoline or other flammable vapors and
liquids in the x;icinityof this or any other
appliance.
iii_:_Do not let cooking grease or other
flammable materials accumulam in or
near the range.
iii::vDo not use wamr on grease fires. Never
pick up a flaming pan. Turn the controls
o_, Smod_er aflaming pan on asurface
burner by covering the pan completely
_ith awell4itting lid, cookie sheet or flat
tray. Use a multi-purpose dry chemical or
foam-type fire extinguisher.
Flaming grease outside a pan can be put
out by covering it ;_dth baking soda or,
if available, by using a multi-purpose dry
chemical or fbam-type fire extinguisher.
Flame in the oven can be smothered
complemly by closing the twen door and
turning the control m off{ or by using a
multi-purpose dry chemical or fbam-type
fire extinguisher.
iii::vLet the burner grams and other surfaces
cool befbre touching them or leax,ing
them where children can reach them.
iii::vNever block the vents (air openings) of
the range. They proxdde the air inlet and
outlet that are necessary fbr the range to
operate properly ;_ith correct combustion.
Air openings are locamd at the rear of the
cooktop, at the top and bottom of the
oven door, and at the bottom of the range
under the storage drawer or kick panel.
iii::_Do not lift the cooktop. Lifting the
cooktop can lead to damage and improper
operation of the range.
5
iMPORTANTSAFETYiNFORMATiON.
READALLiNSTRUCTiONSBEFOREUSING.
6
A
,!
m
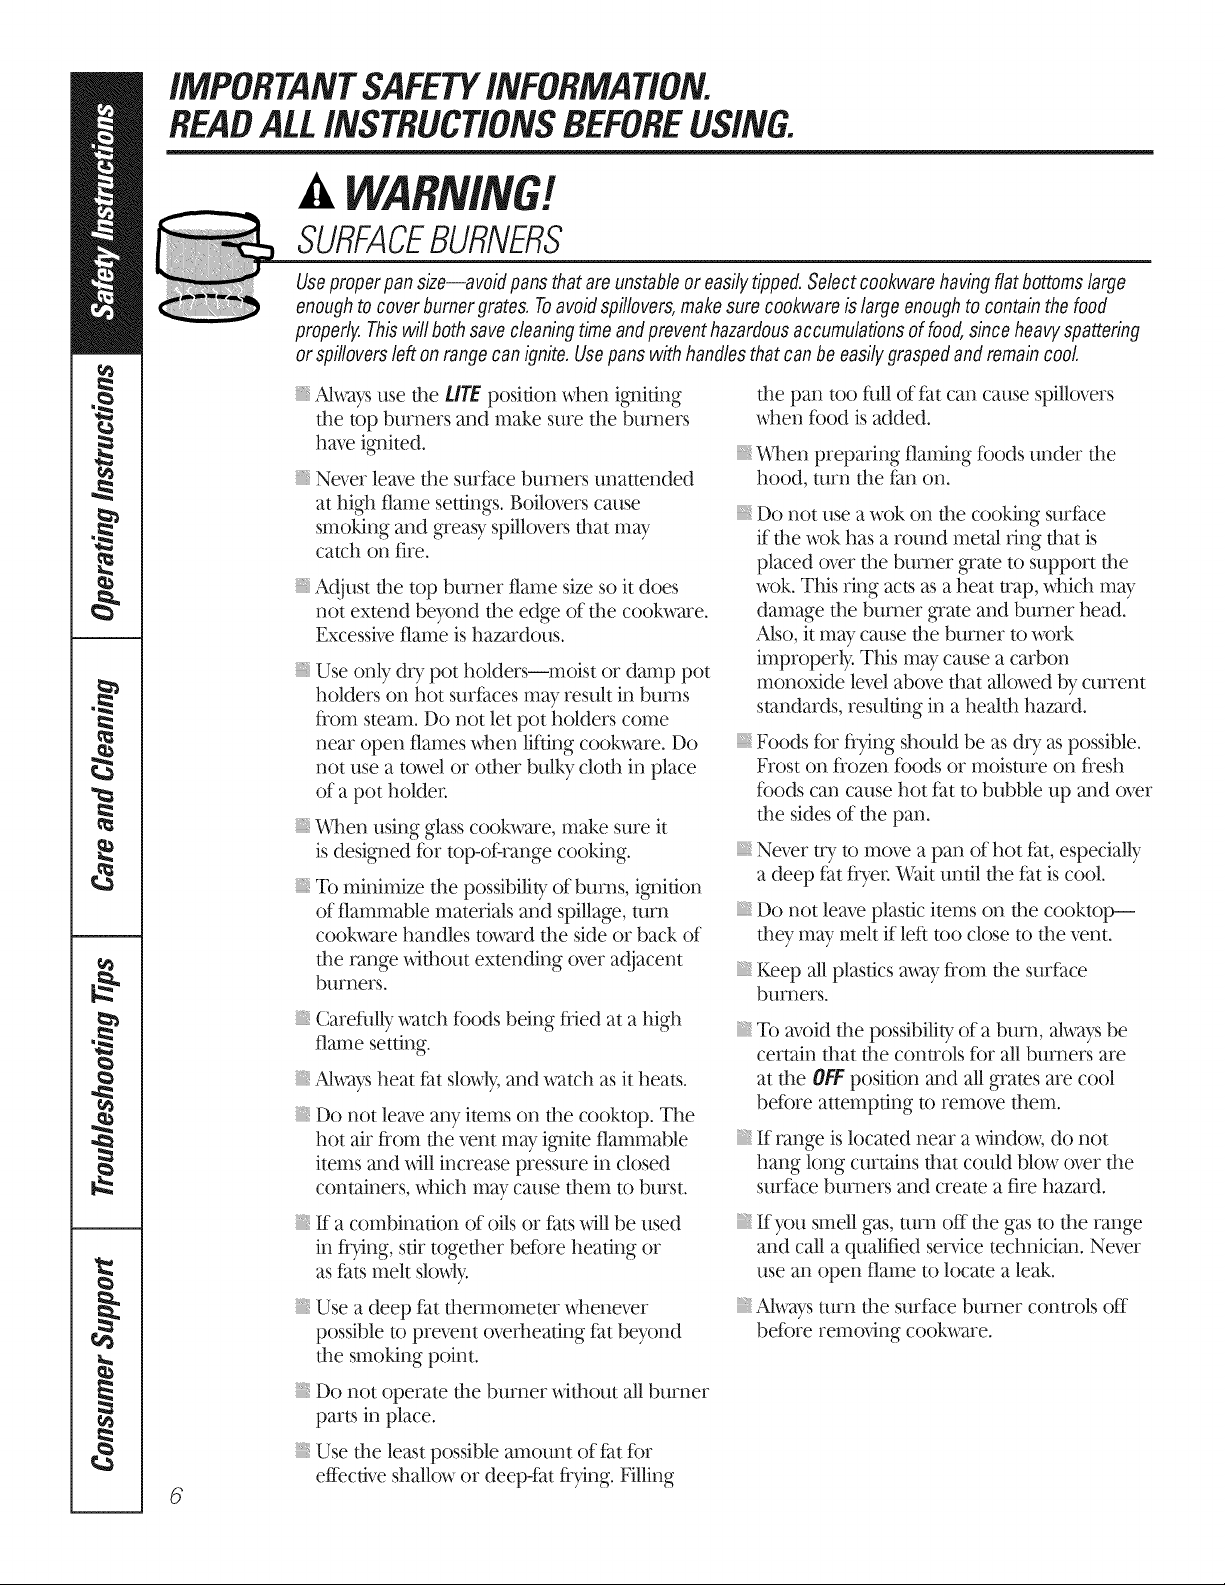
SURFACEBURNERS
Useproperpan size--avoidpansthatare unstable or easilytipped.Select cookware having fiat bottomslarge
enoughtocoverburnergrates. Toavoid spillovers,makesurecookwareislargeenoughtocontain the food
properly.This willbothsave cleaningtimeand preventhazardousaccumulationsof food,since heavyspattering
orspilloversleft onrange can ignite.Usepans with handlesthat canbeeasilygraspedandremain cool
Always use the Life posidon when iofidng
the top bm_ners and make sm_ethe bm_mrs
have i_fited.
Never leave the surface btm_ers unattended
at high flame settings. Boik)vers cause
smoking and _easy spillovers that may
catch on fire.
Adjust the top burner flame size so it does
not extend beyond the edge of the cookware.
Excessive flame is hazardous.
Use only dU pot holders--moist or damp pot
holders on hot surtaces may result in bums
flom steam. Do not let pot holders come
near open flames when liNng cookware. Do
not use a towel or other bulky clod1 in place
of a pot holder.
_%en using glass cook, s-are,make sure it
is designed fbr top-of:range cooking.
To minimize the possibility of bums, i_fition
of flammable materials and spillage, turn
cookware handles toward the side or back of
the range without extending over adjacent
burners.
Carefldly watch fbods being flied at a high
flame setting.
Always heat fat slowly, and watch as it heats.
Do not leave any items on the cooktop. The
hot air from the vent may i_fite flammable
items and _sdllincrease pressure in closed
containers, which may cause them to burst.
K a combination of oils or fats will be used
in fi}4ng, stir together befbre heating or
as fats melt slowly.
Use a deep fat the_nometer whenever
possible to prevent overheating fat beyond
the smoking point.
Do not operate the btmmr without all btmmr
parts in place.
Use the least possible amount of tat fbr
effective shallow or deep-fat fi?4ng. Filling
the pan too fldl of fat can cause spillovers
when fbod is added.
_4%en preparing flaming fbods under the
hood, turn the fan on.
Do not use a wok on the cooking surface
if the wok has a round metal ring that is
placed over the burner _ate to support the
wok. This ring acts as a heat trap, which may
damage the burner _ate and burner head.
Also, it may cause the burner to work
improperly. This may cause a carbon
monoxide level above that allowed by cmTent
standards, resulting in a health hazard.
Foods fbr fi}4ng should be as dU as possible.
Frost on flozen tbods or moisture on flesh
tbods can cause hot tat to bubble up and over
the sides of the pan.
Never try to move a pan of hot tat, especially
a deep fat flyer Wait until the fat is cool
Do not leave plastic items on the cooktop--
they may melt if left too close to the vent.
Keep all plastics ms'ay fiom the surface
bm_ ers.
To avoid the possibility of a bum, always be
certain that the controls fbr all burners are
at the OFFposition and all grates are cool
befbre attempting to remove them.
If range is located near a window, do not
hang long curtains that could blow over the
surface burners and create a fire hazard.
Ifyou smell gas, mm off the gas to the range
and call a qualified sen,ice technician. Never
use an ()pen flame to locate a leak.
Always turn the surtace burner controls off
befbre rem(Mng cookware.

GEPpp/iances.com
COOKMEATANDPOULTRYTHOROUGHLY...
(CookmeatandpoultryttToroughly--meattoat leastanINTERNALtemperatureof160°F(71°C)andpoultrytoat leastan
INTERNALtemperatureof180°F(82°C).Cookingto thesetemperaturesusua!lyprotectsagainstfoodborneillness.
Stand away from the range when opening the ovendoor.Hot air or steam which escapes can cause
bums to hands, face and/or eyes.
: Do not heat unopened food containers.
Pressure could build up and the container
cotfld burst, causing an injury.
: Keep the oven vent unobstructed.
: Keep the oven flee flom grease buildup.
: Place the oven rack in the desired posidon
while the oven is cool. If rocks must be handled
when hot, do not let pot holder contact the
heating elements.
: E,l_en using cooking or roasdng bags in the
oven, follow the mamzfacmrer's directions.
: Ptflling out the rack to the stopqock isa
convenience in lifting hea_.y ff)ods. It isalso a
precaution against burns flom touching hot
surfaces of the door or oven _-alls.
: Do not use the oven to dry newspapers.
If ovefl_eated, they can catch on fire.
: Do not use the oven for a storage area. Items
stored in an oven can ignite.
: Do not leave paper products, cooking utensils
or food in the oven when not in use.
WARNING:N WRco,,er
any dots, holes or passages in the oven bottom
or cover an endre rock with materials such as
aluminum foil. Doing so blocks air flow
through the oven and may cause carbon
monoxide poisoning. Aluminum foil linings
may also trap heat, cruising afire hazard.
: Do not use aluminum foil to line oven bottoms.
Improper installation of aluminum foil may
result in a risk of electric shock or fire.
: Make sure a broiler pan isin place correcdy to
reduce the possibility of grease fires.
: If you should have a grease fire in a broiler
pan, press the CLERR/OFFpad and keep the
oven door dosed to contain fire until it
burns ()tit.
SELF-CLEANINGOVEN
Donotuse oven cleaners.Nocommercial ovencleaner or ovenliner protectivecoating of any kindshould be
usedin or aroundany partof the oven. Residuefrom oven cleanerswill damagethe inside of theovenwhen the
self-clean cycle isused.
: Do not clean the door gasket. The door gasket
is essential for a good seal. Care should be
taken not to rob, _'tamage or move the gasket.
: Before self:cleaning the oven, remove shiny,
silver<ok)red oven rocks (on some models) and
all other cookware.
: Be sure to wipe up excess spillage before
stardng the self:cleaning opemdon.
: Ifthe self:cleaning mode malfunctions, mrn the
oven off and disconnect the power supply. Have
it ser_4ced by a qualified technician.
: Clean only parts listed in this O_oer's Manual.
READAND FOLLOWTHISSAFETYINFORMAtiONCAREFULLY.
SAVETHESEiNSTRUCTiONS
Using the gassurface burners.
Throughout this manual, features and appearance may vary from your model
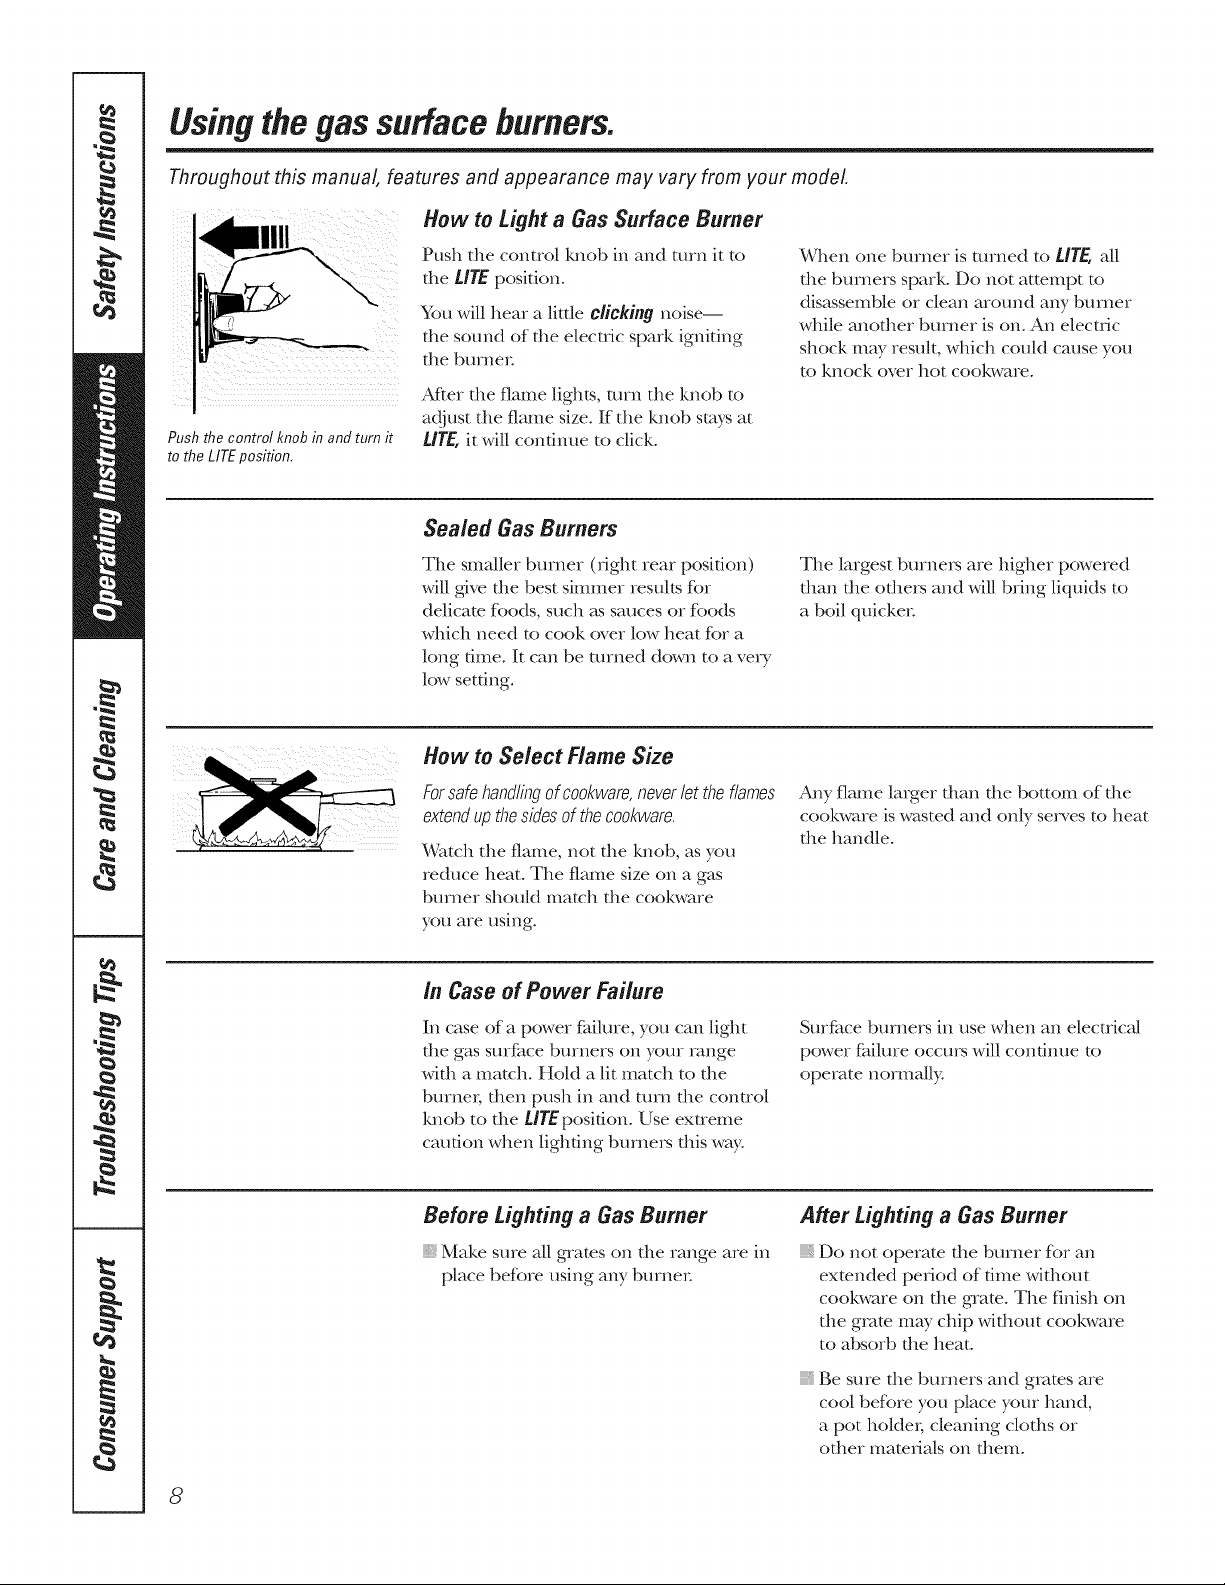
Pushthe control knob inandturn it
tothe LITEposition,
How toLight a Gas Surface Burner
Push the control knob in and mrn it to
the LITE position.
You will llear a little C/iCMng noise--
the sound of the electric spark igniting
the burner
After the flame lights, mrn the knob to
adjust the flame size. If the knob stays at
UTE, it will continue to click.
When one burner is turned to UTE, all
file burners spark. Do not attempt to
disassemble or clean around any bmner
while another burner is on. An electric
shock may result, which could cause you
to knock over hot cookware.
Sealed Gas Burners
The smaller burner (fight rear position)
will give the best simmer results fur
delicate foods, such _ssauces or foods
which need to cook (we, low heat for a
long time. It can be turned down to ave, T
low setting.
The largest bmne,_ are higher powered
than the others and will bring liqukts to
a boil quicke,:
How toSelect Flame Size
Forsafehandlingof cookware,neverlet theflames
extendupthesidesof thecookware.
Watch the flame, not die knob, as you
reduce beat. The flame size on a gas
burner should match the cookware
you are using.
Any flame larger than the bottom of the
cookware is wasted and only serves to heat
the handle.
/n Case of Power Failure
In case of a power thilme, you can light
the gas surface burners on your range
with a match. Hold a lit match to the
bmne,; then push in and mrn the control
knob to the UYEposidon. Use extreme
caution when lighting bmne,_ this way.
Surfime burners in use when an electrical
power fhilure occm_ will condnue to
operate normally.
Before Lighting a Gas Burner
Make sure all gTates on the range are in
place before using any burner
After Lighting a Gas Burner
Do not operam die burner for an
exmnded period of dine witbot_t
cookware on the g_am. The finish on
the gram may chip without cookware
to absorb the beat.
Be sure file burners and grates are
cool befbre you place your band,
a pot holde,; cleaning clodls or
other mamHals on them.
8
GEApp/iances.com
Top-of-Range Cookware
Aluminum: Medium-weight cookware is
recommended because it heats quickly
and evenly. Most foods brown evenly in
an aluminum skillet. Use saucepans with
fight-fitting lids when cooMng with
ItliniIlltllIl _t/IlOtllltS of _,V_t{eI-
Cast-Iron: Ifheated slowly, most skillets
will give safisfimtory results.
Enamelware: Under so)me conditions,
the enamel of some cookware may
melt. Follow cookware manuf_cturer's
recommendations for cooking methods.
Glass: There are two types of glass
cookware--those for oven rise only
and those for tel>of:range cooking
(saucepans, coffee and reapers).
(;lass conducts heat very slowly.
Heatproof Glass Ceramic: Can be used
for eidler surfi_ce or oven cooking. It
c(mducts heat very slowly and cools very
slowly. Check cookware mamffhcmrer's
directions to be sure it can be used on gas
ranges.
Stainless Steel: This metal aJone has
poor heating properties and is usually
combined with coppei; ahmlinum
or other metals for improved heat
disuibudon. Combination metal skillets
usuMly work sadsfimtorily if they are used
with medium heat as the manufimmrer
recommends.
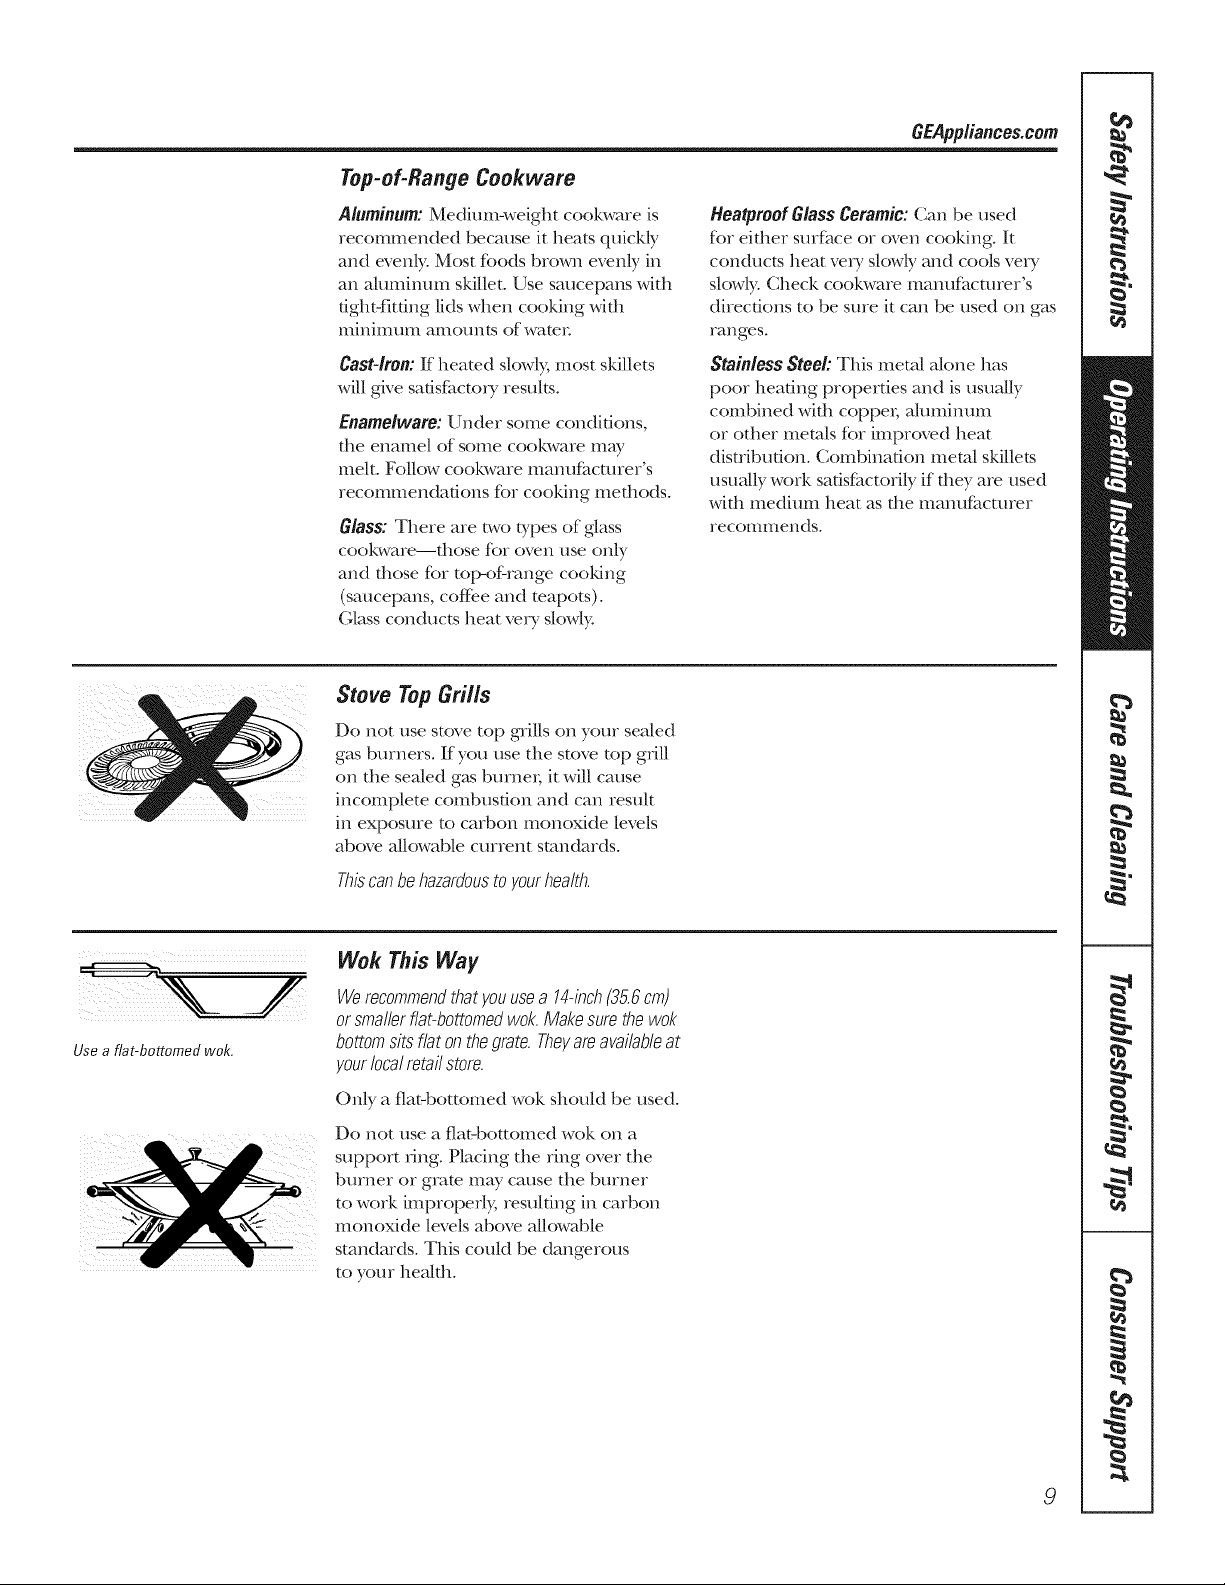
Stove TopGrills
Do not use stove top g_ills on your sealed
gas burners. If you use the stove top grill
on the sealed g_ksburnei; it will cause
incomplete colnbtlsfion and can result
in exposure to carbon monoxide levels
above allowable current standards.
Thiscanbehazardousto yourhealth.
Use a fiat-bottomed wok,
Wok This Way
Werecommendthatyouusea 14-inch(35.6cm)
orsmallerflat-bottomedwok.Makesurethewok
bottomsits flatonthegrate. Theyareavailableat
yourlocalretailstore.
Only a fiat-bottomed wok shouM be used.
Do not use a fiat-bottomed wok on a
support ring. Placing the ring over the
burner or grate may cause the burner
to work improperly, resulting in carbon
Inonoxide levels above allowable
standards. This couM be dangerous
to your heakh.
9
Usingtheovencontrols.
(Throughout this manual, features and appearance may vary from your mode/,)
NCON S TRUETENP _IME Cc qTROLS
NuLTt/1 RACK
Features and appearance may vary.
@ --
10
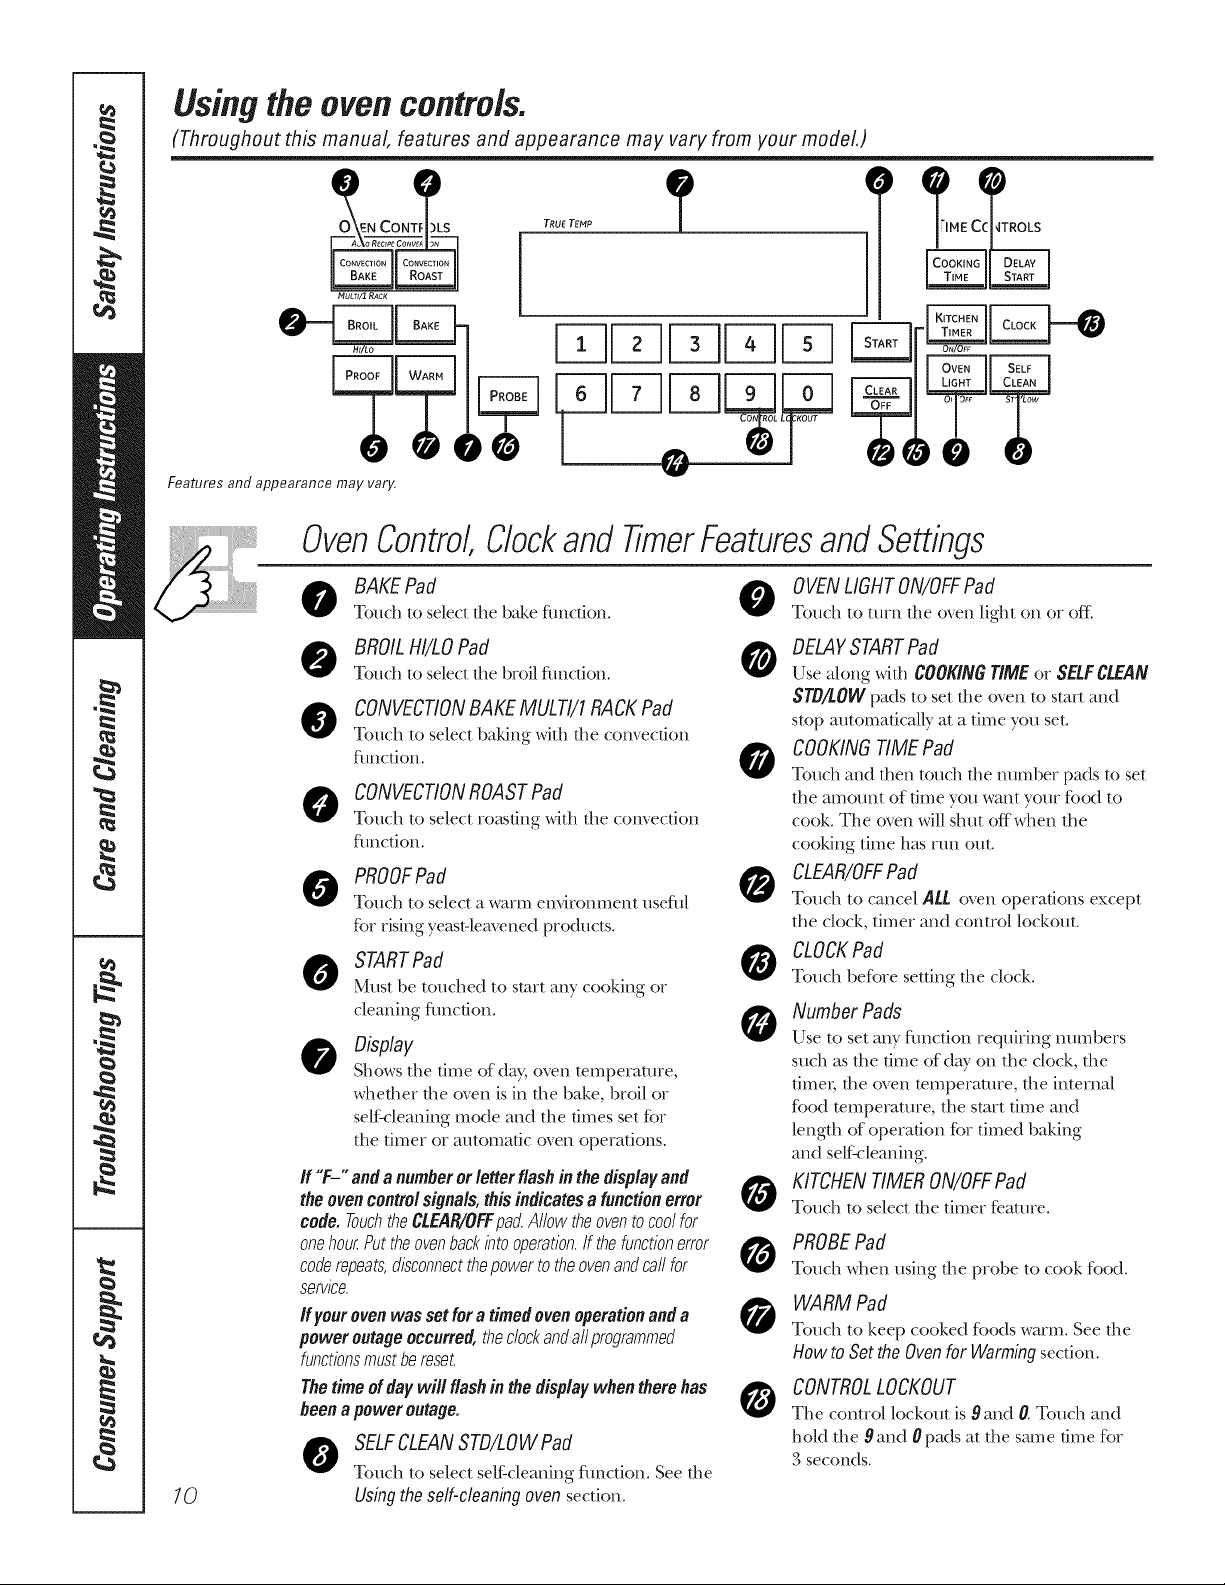
OvenControl,Clockand TimerFeaturesand Settings
BAKEPad
Touch to select file bake function.
OVENLIGHTON/OFFPad
Touch to turn file oven light on or ore
BROILHI/LOPad 0
Touch to select file broil function.
CONVECTIONBAKEMULTI/I RACKPad
Touch to select baking with the convection
flmction.
CONVECTIONROASTPad
Touch to select roasting with the convection
fhnction.
PROOFPad
Touch to select a warm environment usefid
fbr rising _east-leavened products.
STARTPad
Must be touched to start an_ cooking or
cleaning fimction.
Display
Shows the time of day, oven temperature,
whether the oven is in the bake, broil or
serf:cleaning mode and the times set for
the timer or m/tomatic oven operations.
O
Ifyourovenwasset fora timedovenoperationanda
poweroutageoccurred,theclockandallprogrammed
functbnsmustbereset.
e
If"F-" and a numberor letter flash in thedisplay and
theoven control signals, this indicates a functionerror
code.TouchtheCLEAR/OFFpad.Allow theoventocoolfor
onehour,Puttheovenbackbto operatbn, if thefunctbn error
coderepeats,d/sconnectthepower totheovenand ca//for
serwce.
0
The timeof daywill flash in thedisplay when therehas
beena poweroutage.
Y_e
SELFCLEANSTD/LOWPad
Touch to select self:cleaning fimction. See file
Using the self-cleaning oven section.
DELAYSTARTPad
Use along widl COOKING TIME or SELFCLEAN
STD/LOWpads to set the oven to stmt and
stop automatically at a time you set.
COOKINGTIMEPad
T(mch and fllen touch file number pads to set
the amount of time you want your food to
cook. The oven will shut offwhen the
cooking time has run out.
CLEAR/OFFPad
Touch to cancel ALL oven operations except
the dock, timer and control lockout.
CLOCKPad
T(mch before setting file clock.
Number Pads
Use to set any fimction requMng numbers
such as the time (ffday on the dock, the
timel; the oven temperature, the internM
food temperature, file start time and
length of operation fbr timed baking
and self:cleaning.
KITCHENTIMERON/OFFPad
Tot/ch to select the timer feature.
PROBEPad
To//ch when using file probe to cook food.
WARMPad
T(mch to keep cooked foods warm. See the
How toSetthe Ovenfor Warmingsection.
CONTROLLOCKOUT
Tile control lockout is 9 and 0.T(mch and
hold the 9 and 0pads at the stune time for
3 seconds.
GEApp/iance&com
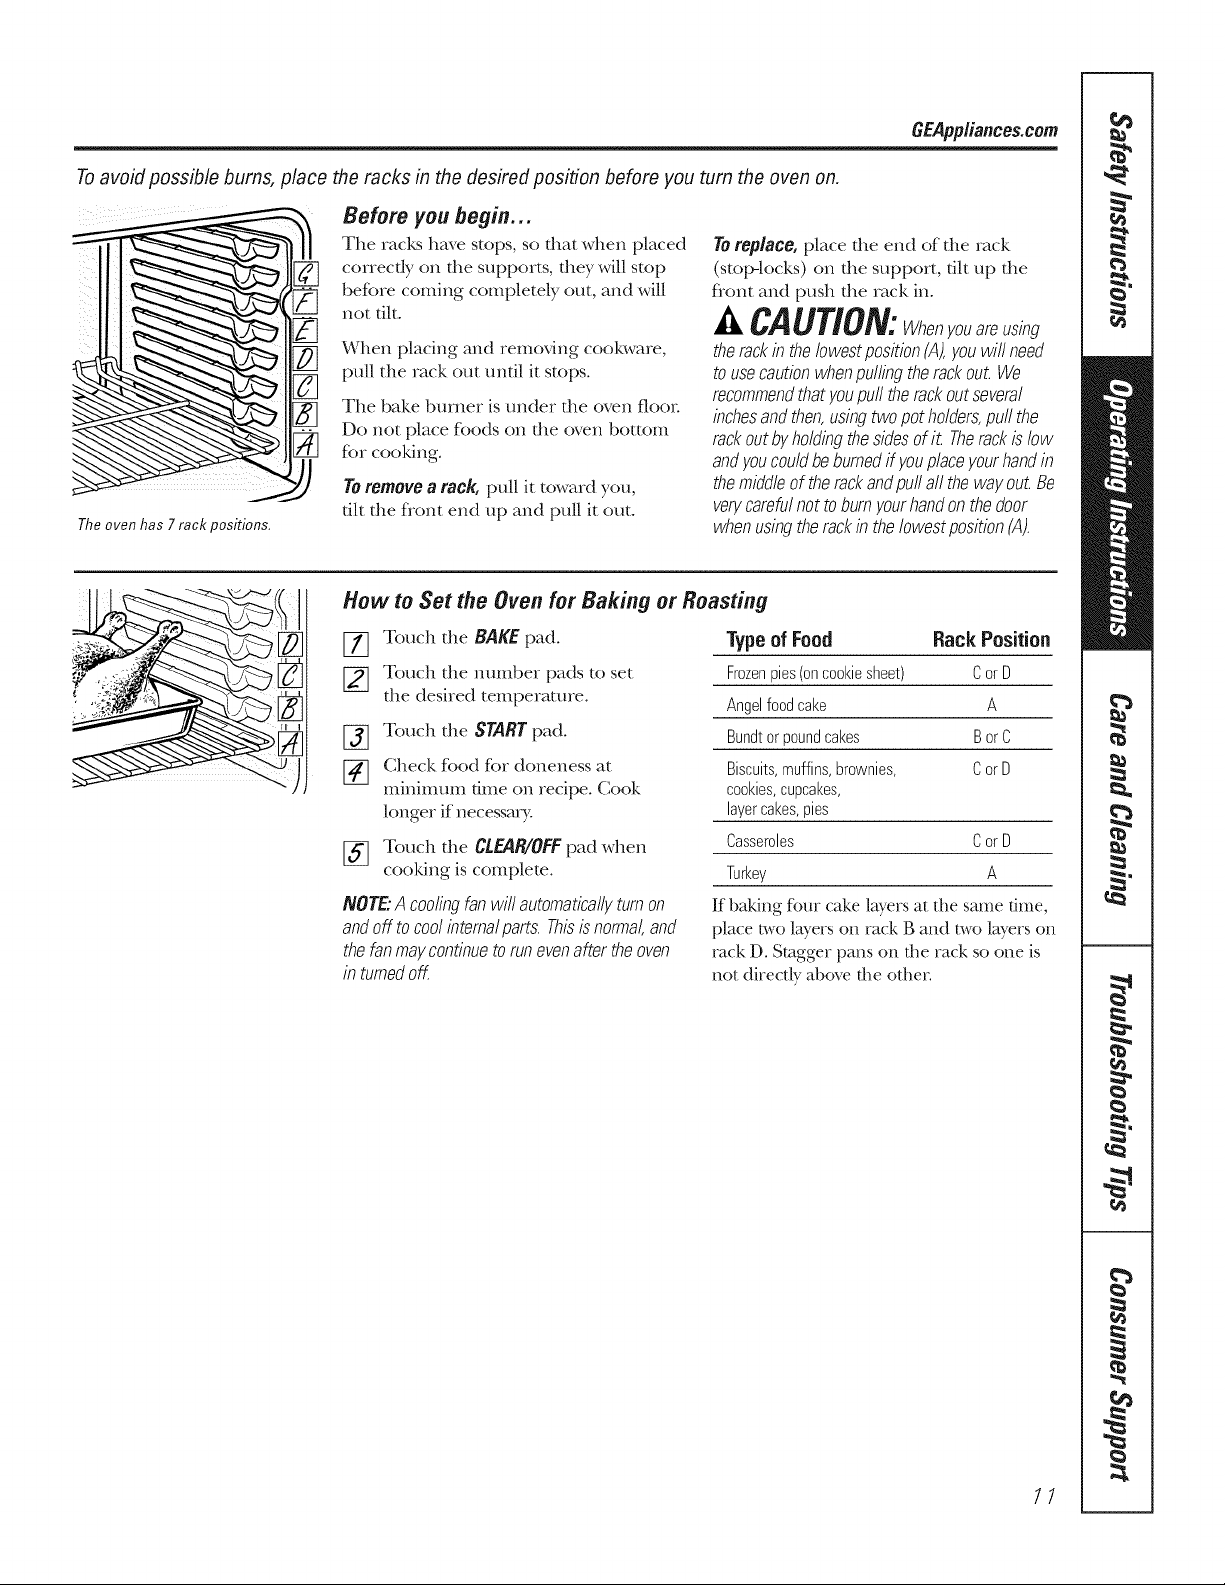
Toavoid possible bums, place theracks in the desired posifion before you turn the oven on,
The oven has 7rack positions.
Before you begin...
The racks have stops, so dmt when placed
correcdy on file supports, flley will stop
before coming completely out, and will
not flit.
When placing and removing cookware,
pull tile rack out unfll it stops.
Tile bake burner is under tile oven floon
Do not place foods on tile oven bottom
for cooking°
Toremove a rack, pull it toward you,
flit tile flont end up and pull it out.
Toreplace, place die end of die tack
(stop-locks) on die support, flit up file
flont and push the rack in.
the rackin the Iowest position (A), youwill need
touse cautionwhenpulling therackout We
recommendthatyou pull the rackout several
inchesand then, using two potholders,pull the
rackout&holding the sides ofit Therack islow
and youcouldbeburned ffyouplaceyour handin
the middle of therackandpull all the way out.Be
verycarefulnot toburnyour handonthe door
when usingthe rackin theIowest position (A).
How toSet the Oven forBaking or Roasting
177 Touch tile BAKE pad.
[_ Touch tile nmnber pads to set
tile desired temperature.
[_ Touch tile START pad.
[_ Check K_od Kn" doneness at
minimum flme on recipe° Cool<
longer if necessat T.
[_ Touch tile CLEAR/OFFpad when
cooking is complete.
NOTE."A coolingfanwill automaticallyturnon
andoff tocoolintemalparts.Thisisnormal,and
thefanmaycontinuetorunevenafter theoven
in turnedoF
Type ofFood RackPosition
Frozenpies(oncookiesheet) CorD
Angelfoodcake A
Bundtorpoundcakes BorC
Biscuits,muffins,brownies, CorU
cookies,cupcakes,
layercakes,pies
Casseroles CorU
Turkey A
If baking four cake layers at file same time,
place two lwers on rack g and two layers on
rack D. Stagger pans on tile rack so one is
not directly above the othen
11
Usingtheoven.
Do not place foods fl/recfly on the
oven floor,
Preheating and Pan Placement
Preheat the oven if die recipe calls R_rit.
Preheating is necessa_y fbr good results
when baking cakes, cookies, pasu y and
breads.
Topreheat,settheovenatthecorrecttemperature.
Thecontrolwill beepwhentheovenis preheated
andthedisplaywiflshowyourset temperature.
Thepreheattimewillvarydependingonthe
temperaturesetting.
Baking results will be better ifbaldng
pans are cenmred in file oven as much
as possible. If baking with more than one
pan, place the pans so each has at least
1" (2.5 cm) to 1½" (3.8 cm) of air space
around it.
Aluminum Foil
Donotusealuminumfoilonthebottom
oftheoven.
Never entirely cover a rack with
ahnninunl foil. This will disturb the heat
circulation and result in poor baking.
A smaller sheet offf>ilmay be used to
catch a spillover by placing it on a lower
rack several inches below the food.
Oven Moisture
As your oven heats up, file temperature
change of the ah in the oven may cause
wamr droplets to form on file door glass.
These droplets are harmless and will
evaporate as the oven contintles to
heat up.
12
GEApp/iances.com
Oven Vent
Your oven is vented fluough one vent
located toward the rear of the range. Do
not block this vent when cooking in the
oven--it isimportant that the flow of hot
air f}om the oven and f_esh oh to the
oven burner be uninmrrup[ed. Avoid
touching the vent openingsor nearby
surfaces duringovenorbroileroperation--
theymay becomehot.
,, Handlesof potsandpanson thecooktopmay
becomehotifleft toocloseto thevent.
Donotleaveplasticitemson theco&top
theymaymeltifleft toocloseto thevent
Donotleaveanyitemson thecooktop.Thehot
airfromtheventmayigniteflammableitems
andwifl increasepressurein closedcontainers,
whichfraycausethemto burst.
Metalitemswill becomeveryhotiftheyare
left on thecooktop,andcouldcausebums.
Power Outage
A CAUTION: not,rakeany
attemptto operatetheelectricignitionovenduring
anelectricalpowerfailure.
The oven or broiler canno[ be lit during
a power fidlure. (;as will not flow unless
the glow bar is hot.
Ifdie oven is in use when a power fidlure
occurs, the oven burner shuts off and
cannot be reqit until power is restored.
This isbecause the flow of gas is
automatically stopped and will not resume
when power isrestored undl the glow bar
licksreached operating mmperature.
13
Usingtheoven.
HowtoSet the Oven for Broiling
IMPORTANT:Toavoidpossiblebums,place
theracksin thedesiredpositionbeforeyouturn
theovenon.
[_ Place the meat or fish on a broiler
grid in a broiler pan designed
for broiling.
_] Follow suggested rack positions
in the Broiling Guide.
[_ The oven door mustbe closed
during broiling.
[_] Touch the BROILHI/LOpad once fbr
HI Broil.
To change to LO Broil,touch
the BROIl.HI/LO pad again.
Use tO Broil to cook foods such as pouluy
or thick cuts of meat thoroughly without
eve>browning them.
[_ Touch the STARTpad.
[_ When broiling is finished, totlch
the CLEAR/OFFpad.
Serve die food immediately, and leave
the pan outside the oven to cool during
the meal for easiest cleaning.
NOTE:Broil will not work if the temperature
probe is plugged in.
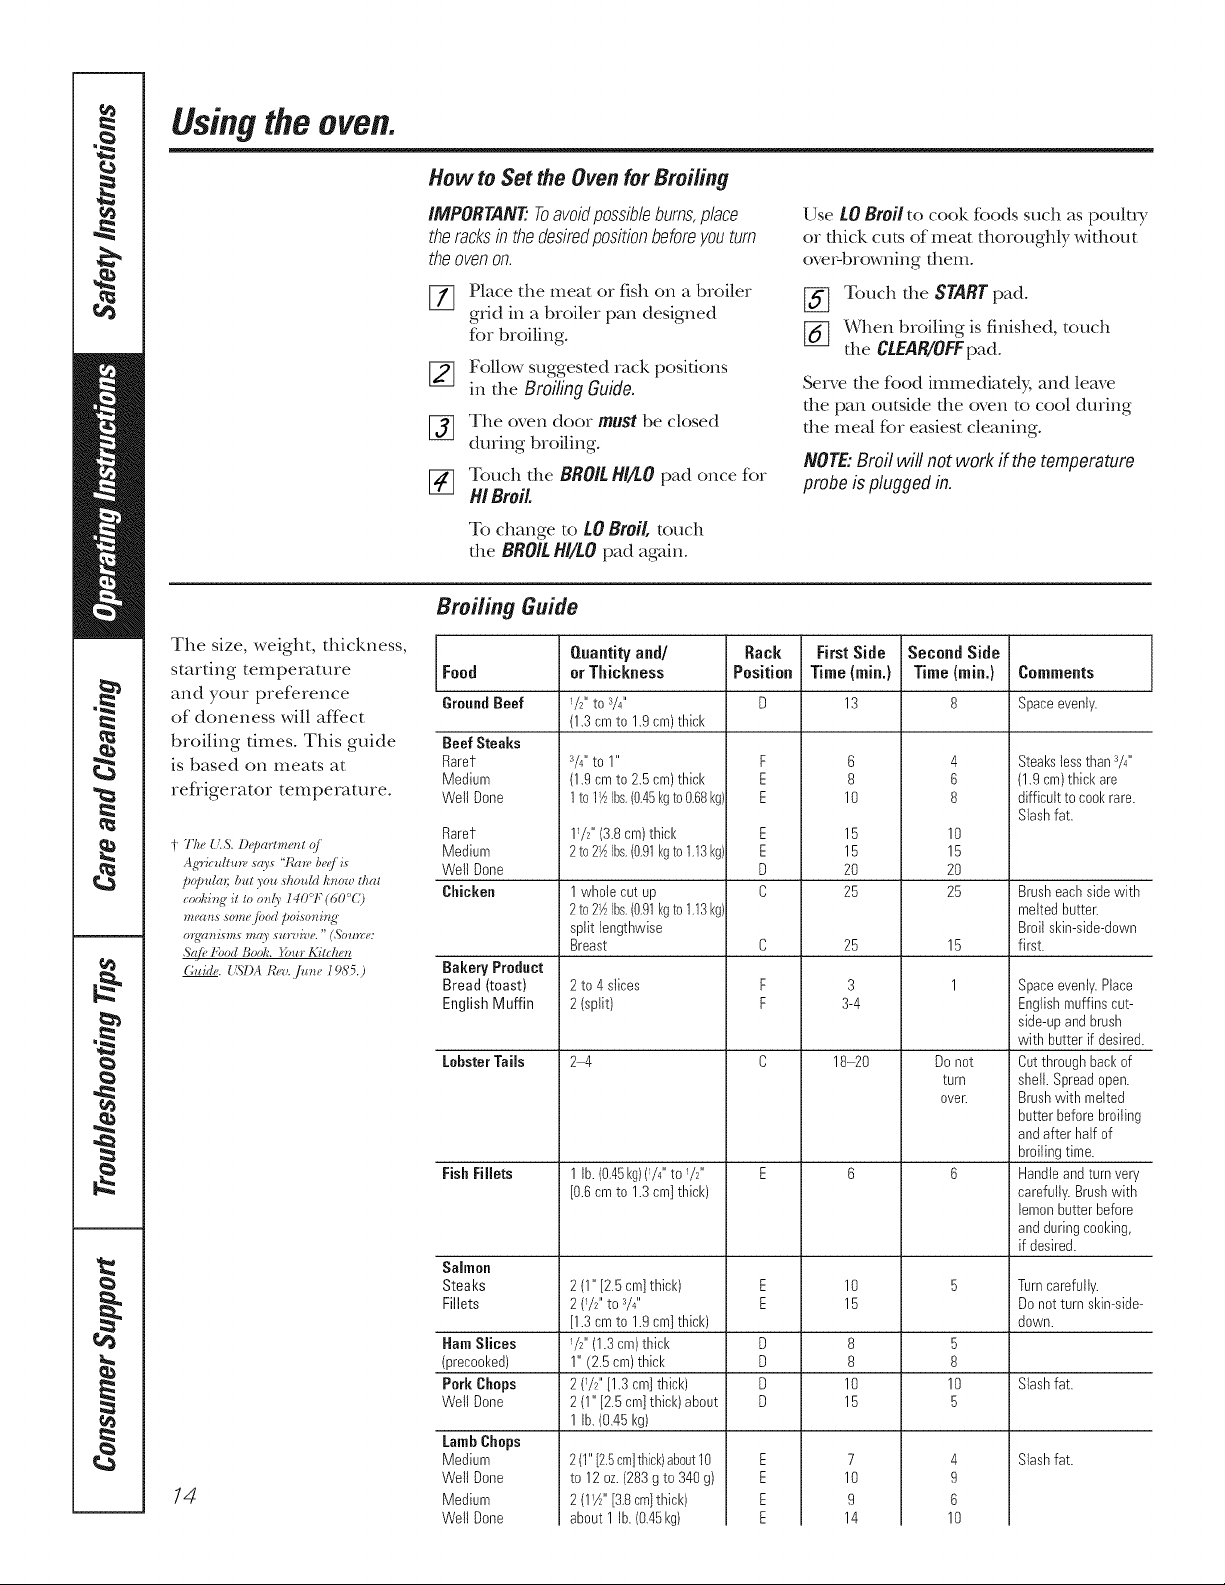
Broiling Guide
The size, weight, thickness,
starting temperature Food
and your preference GroundBeef
of doneness will affect
broiling dines. This guide BeefSteaks
is based on meats at Rarer
Medium
ref)igerator temperature. WellDone
Rarer
t The {LS.De/aarlmenl_!/ Medium
Ag'r_cu/tlm,,w0_ 't/bin'b_',:/i_ Well Done
po/aula_;butyou ,st_ouldh_ow that
codging it too_151407"(60'C) Chicken
metros some fl_od poi_m_ing
0)'_711ttS!#5 !#( 0 S_tF_t_*_t#. " (,_Olt!_:#:
S@_ t_bod Bodg. _bur Kitchen
Guide. USDA Ib,v. /u_e 19<'¢5.)
14
Bakery Product
Bread (toast)
EnglishMuffin
LobsterTails
FishFillets
Salmon
Steaks
Fillets
HamSlices
(precooked)
Pork Chops
Well Done
LambChops
Medium
Well Done
Medium
Well Done
Quantityand/
orThickness
W' to a/4"
(1.3cmto 1.9cm)thick
a/4"to1"
(1.9cmto 2.5 cm)thick
1to 1Y_Ibs,(0,45kgto0.68kg
1!/2" (3.8 cm)thick
2to2_Ibs.(0.91kgto 1.13kg
1wholecut up
2to2½Ibs.(0.91kgto 1.13kg
split lengthwise
Breast
2to 4 slices
2(split)
24
1lb.(0,45kg)(74"to !/F
[0.6cmto 1.3cm]thick)
2 (1" [2.5cm]thick)
2 (W' to 3/4"
[1.3cmto 1.9cm]thick)
W' (1.3cm)thick
1" (2.5cm)thick
2(W' [1.3 cm]thick)
2(1" [2.5cm]thick) about
1lb.(0.45I<g)
2(1"[2.5cm]thick)about10
to 12oz.(283gto 340g)
2(I_A'' [3.8cmlthick)
about 1 lb.(0.45kg)
Rack
Position
F
E
E
E
E
D
C
C
F
F
E
E
D
D
D
D
FirstSide
Time{rain.)
13
6
8
10
15
15
20
25
25
3
3-4
18-20
10
15
8
8
10
15
7
10
9
14
Second Side
Time {min.)
4
6
8
10
15
20
25
15
I
Donot
turn
over.
5
8
10
5
4
9
6
10
Comments
Space evenly.
Steakslessthan3/4"
(1.9cm)thick are
difficult tocool<rare.
Slashfat.
Brusheachside with
meltedbutter.
Broilskin-side-down
first.
Spaceevenly.Place
Englishmuffins cut-
side-upandbrush
with butterif desired.
Cutthroughbackof
shell. Spreadopen.
Brushwith melted
butterbeforebroiling
and afterhalfof
broilingtime.
Handleandturnvery
carefully.Brushwith
lemonbutterbefore
and duringcooking,
if desired.
Turncarefully.
Donot turnskin-side-
down.
Slashfat.
Slashfat.
Usingtheclock, timer and controllockout. CEApplia,ce .com
Make sure the clock is set to the
correct time of day.
To Set the Clock
The clock nmst be set to die correct time
of day for die autonlafic oven timing
flmcfions to work properly. The dine of
day cannot be changed during a timed
baldng or selfXcleaning cycle.
[77 Touch tile CLOCK pad.
[_] Touch tile nmnber pads.
[_] Touch tile STARTpad.
ON/OF_
The timer is a minute timer only.
The timer does not control oven
operations, The maximum setting on
the timer is 9 hours and 59 minutes.
To Set the Timer
Touch tile KITCHEN TIMER
ON/OFF pad.
Touch die number pads undl die
a[noLlnt of dine you _,VitIlt sho_,vS
in tile display. For example, to set
2 hems and 45 minums, touch 2, 4
and 5 in that or(let: ff you make a
mistake touch the KITCHEN TIMER
ON/OFF pad and begin again°
[_ Touch tile STARTpad.
After touchingtheSTARTpad,SETdisappears,
thistellsyouthetimeis countingdown,although
thedisplaydoesnotchangeuntiloneminutehas
passec_Secondswill notbeshownin thedisplay
untilthelastminuteiscountingdown.
_-] When tlle diner reaches :00, die
control will beep 3 times R_llowed
by one beep eve_ T 6 seconds until
tile KITCHEN TIMERON/OFFpad
is touched.
The6-secondtonecanbe canceledbyfollowing
thestepsin theSpecialfeaturesof youroven
controlsectionunderTonesat theEndof a
timedCycle.
To Reset the Timer
If die display is still showing die time
remaining, you may change it by
touching the KITCHEN TIMERON/OFF pad,
then touch tile number pads until the
time you want appears in tile display.
If file remaining dine is not in die display
(clocl<, delay start or cooldng time are in
the display), recall tile remaining dine by
touching the KITCHEN TIMERON/OFF pad
and then touching the number pads to
enter the new dine you want.
To Cancel the Timer
Touch die KITCHEN TIMERON/OFF
pad lwice.
Control Lockout
Yourcontrol will allow youto lock outthe touch
pads sotheycannotbeactivatedwhen pressed.
To lock/unk_ck tile controls:
[77 Touch tile 9 and 0pads at tile same
time for 3 seconds, until tile display
shows LOC ON.
To mllock die control, touch
tile 9 and 0pads at die same time
for 3 seconds, until tile disphy
shows LOC OFF.
When dlis feature ison and file touch
pads are touched, the conuol willbeep
and the display willshow LOCON.
Thecontrollockoutmodeaffectsa// touch
pads.No touchpadswit workwhenthis
featureis activatec_
Theadjustmentwi//be retainedin memory
afterapowerfailure.
15
Usingthetimedbakingandmastingfeatures.(onsomemodels)
NOTE: Foods that spoil easily--such asmilk, eggs, fish, stuffings, poultry and pork--should not be afiowed tos#for
more than I hour before or after cooking. Room temperature promotes thegrowth ofharmful bacteria, Be sure that
the ovenlight is off because heat from thebulb will speed harmful bacteria growth,
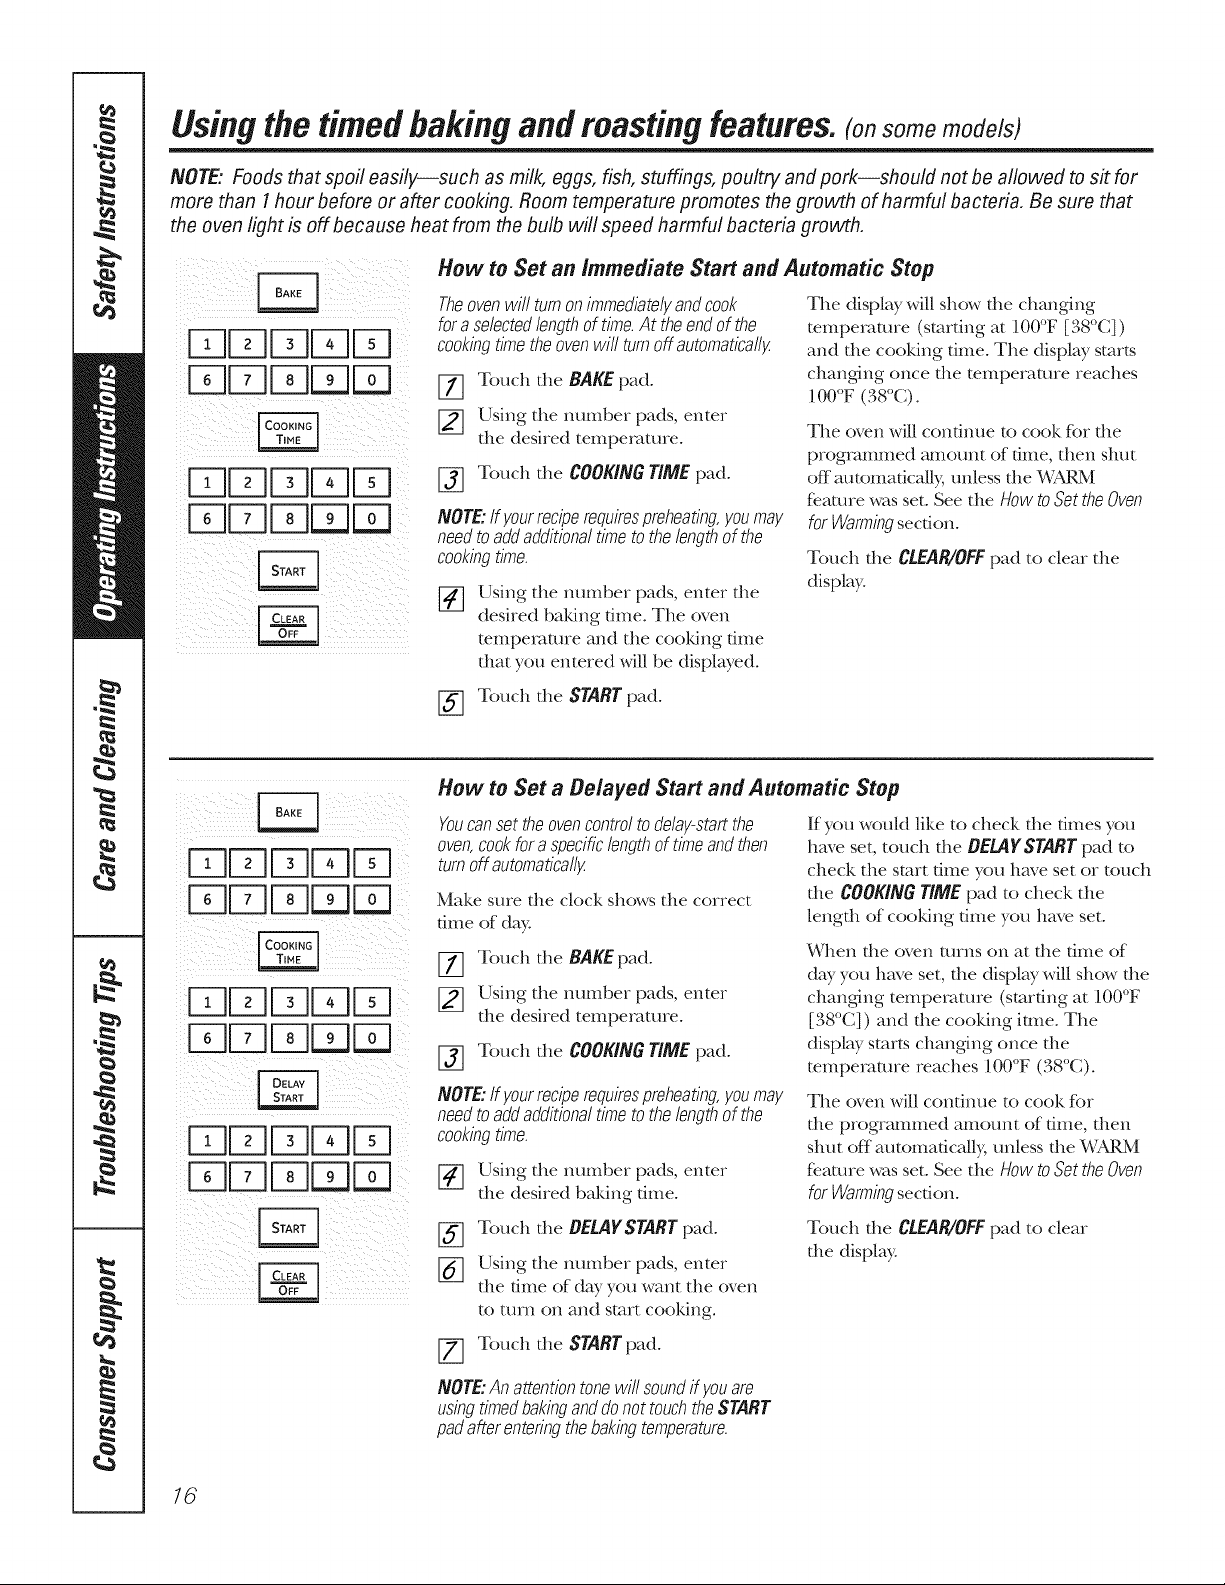
How toSet an Immediate Start and Automatic Stop
Theovenwillturnon immediatelyandcook
for a selectedlengthof time.Attheend of the
cookingtirnetheovenwillturnoff automaticallg
[77 Touch the BAKE pad.
[_] Using the nmnber pads, enter
the desired temperature.
[_ Touch the COOKINGTIME pad.
NOTE: If your recipe requirespreheating,youmay
needto add additional timetothe lengthofthe
cooking tirne.
[_] Using the number pads, enter tile
desired baldng dine. The oven
temperature and the cooMng time
that you entered will be disphyed.
The display will show the changing
temperature (smrdng at 100°F [38°C])
and the cooldng time. The display starts
changing once tile mmpemmre reaches
100°F (38°C).
The oven will condnue to cook for die
programmed amount of time, then shut
off automatically, unless the WARM
feature was set. See the How to Set the Oven
for Warming section.
Touch the CLEAR/OFF pad to clear the
display.
[-_ Touch the START pad.
How to Set a Delayed Start and Automatic Stop
Youcanset theovencontroltodelay-startthe
oven,cookfora specificlengthof tirneandthen
turnoff automatically
Make sure tile clock shows tlle correct
time of day.
[77 Touch the BAKE pad.
_] Using the number pads, enter
the desired temperature.
[_] Touch the COOKINGTIME pad.
NOTE:Ifyourreciperequirespreheating,youmay
needtoaddadditionaltimeto thelengthof the
cookingtirne.
[-_ Using the number pads, enter
the desired baking dine.
If you would like to check die dines you
have set, touch the DELAYSTART pad to
check the start time you have set or touch
the COOKING TIMEpad to check the
length of cooldng dixie you have set.
When rite oven turns on at file dine of
day you have set, tlle display will show tile
changing temperature (starting at 100°F
[38°C]) and the cooking lime. The
display starts changing once the
mmpemmre reaches 100°F (38°C).
The oven will condnue to cook fbr
die programmed amount of dine, dlen
shut off automatically, unless the WARM
fe.ature was set. See the How toSet the Oven
for Warming section°
[_ Touch the BELAYSTART pad.
[_ Using the number pads, enter
tile time of day you want tile oven
to mrn on and start cooldng.
Touch the CLEAR/OFFpad to clear
the display.
[Z] Touch the STARTpad.
NOTE:Anattentiontonewill soundifyouare
usingtimedbakinganddonottouchtheSTART
padafterenteringthebakingtemperature.
16
Formany foods, especially roasts and poultry, internal food temperature isthe best testfor aloneness.The
temperature probe takes theguesswork out ofroasting by cooking foods to the exact doneness you want.
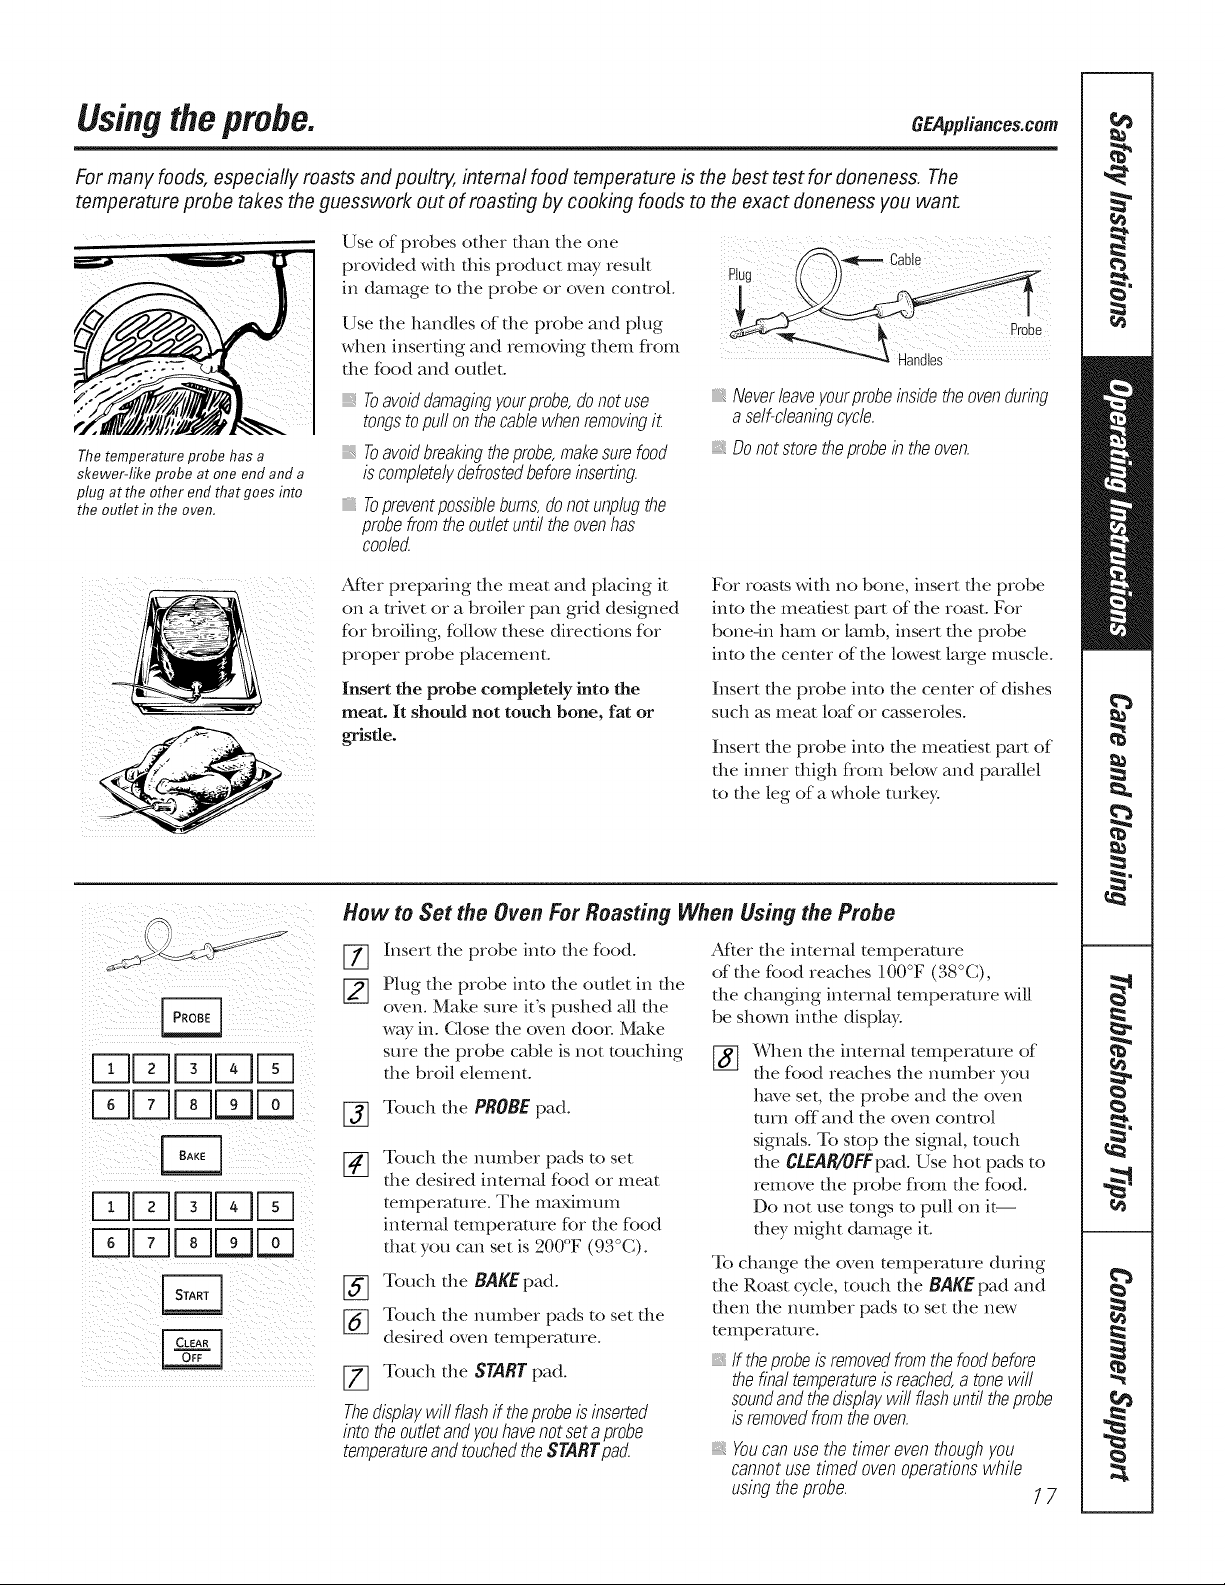
Thetemperature probe has a
skewer-like probe at one end and a
plug at the other end that goes into
the outlet intheoven.
Use of probes other than the one
provided with this product may result
in damage to the probe or oven control°
Use the handles of the probe and plug
when inserting and removing them fiom
the food and outlet°
Toavoiddamagingyourprobe,donot use
tongstopull onthecablewhenremovingit
Toavoidbreakingtheprobe,makesurefood
is completelydefrostedbeforeinserting.
Topreventpossib/ebums,donotunplugthe
probefromtheoutletuntiltheovenhas
coolec_
Probe
Handles
Neverleaveyourprobeinsidetheovenduring
aself-cleaningcycle.
Donot storethe probe in theoven.
After preparing file meat and placing it
on a trivet or a broiler pan grid designed
for broiling, follow these directions for
proper probe placement°
Insert the probe completely into the
meat. It should not touch bone, fat or
gristle.
For roasts widl no bone, insert die probe
into the meatiest part of the ro_st. For
bone-in ham or lamb, insert the probe
into the cenmr of the lowest large muscle.
Insert the probe into the center of dishes
such as meat loaf or casseroles.
Insert the probe into the meatiest part of
the inner thigh flom below and parallel
to the leg of a whole turkey:
How to Set the Oven For Roasting When Using the Probe
FqFqDDFq
D DD q
FqFqDDD
UUE EB q
%
Insert the probe into the food.
Plug the probe into die oudet in die
oven. Make sure it's pushed all die
way in. Close the oven door Make
sure the probe cable is not touching
file broil element.
[_ Touch the PROBE pad.
Touch the number pads to set
the desired internal food or meat
temperature. The maximum
internal temperature for the food
that you can set is 200°F (93°(;).
Touch the BAKE pad.
Touch the number pads to set the
desired oven temperature.
Touch the START pad.
Thedisplaywillflashiftheprobeisinserted
into theoutletandyouhavenotset aprobe
temperatureandtouchedtheSTARTpad.
Aider die internal temperature
of the food reaches 100°F (38°C),
the changing inmrna/mmpemmre will
be shown inthe display.
When the internal temperature of
the food reaches the number you
have set, the probe and the oven
mrn off and the (wen control
signNs. To stop the signN, touch
the gLEAR/0FFpad. Use hot pads to
rernove the probe flom the food.
Do not use tongs to pull on it--
they might damage it.
To change the oven temperature dunng
die Roast cycle, touch die BAKE pad and
then the number pads to set the new
temperature.
If theprobeisremovedfromthefoodbefore
thefinal temperatureisreached,a tonewill
soundandthedisplaywill flashuntiltheprobe
is removedfromtheoven.
Youcan usethetimereven thoughyou
cannotuse timedovenoperationswhile
usingthe probe. 1 7
Usingtheconvectionoven.
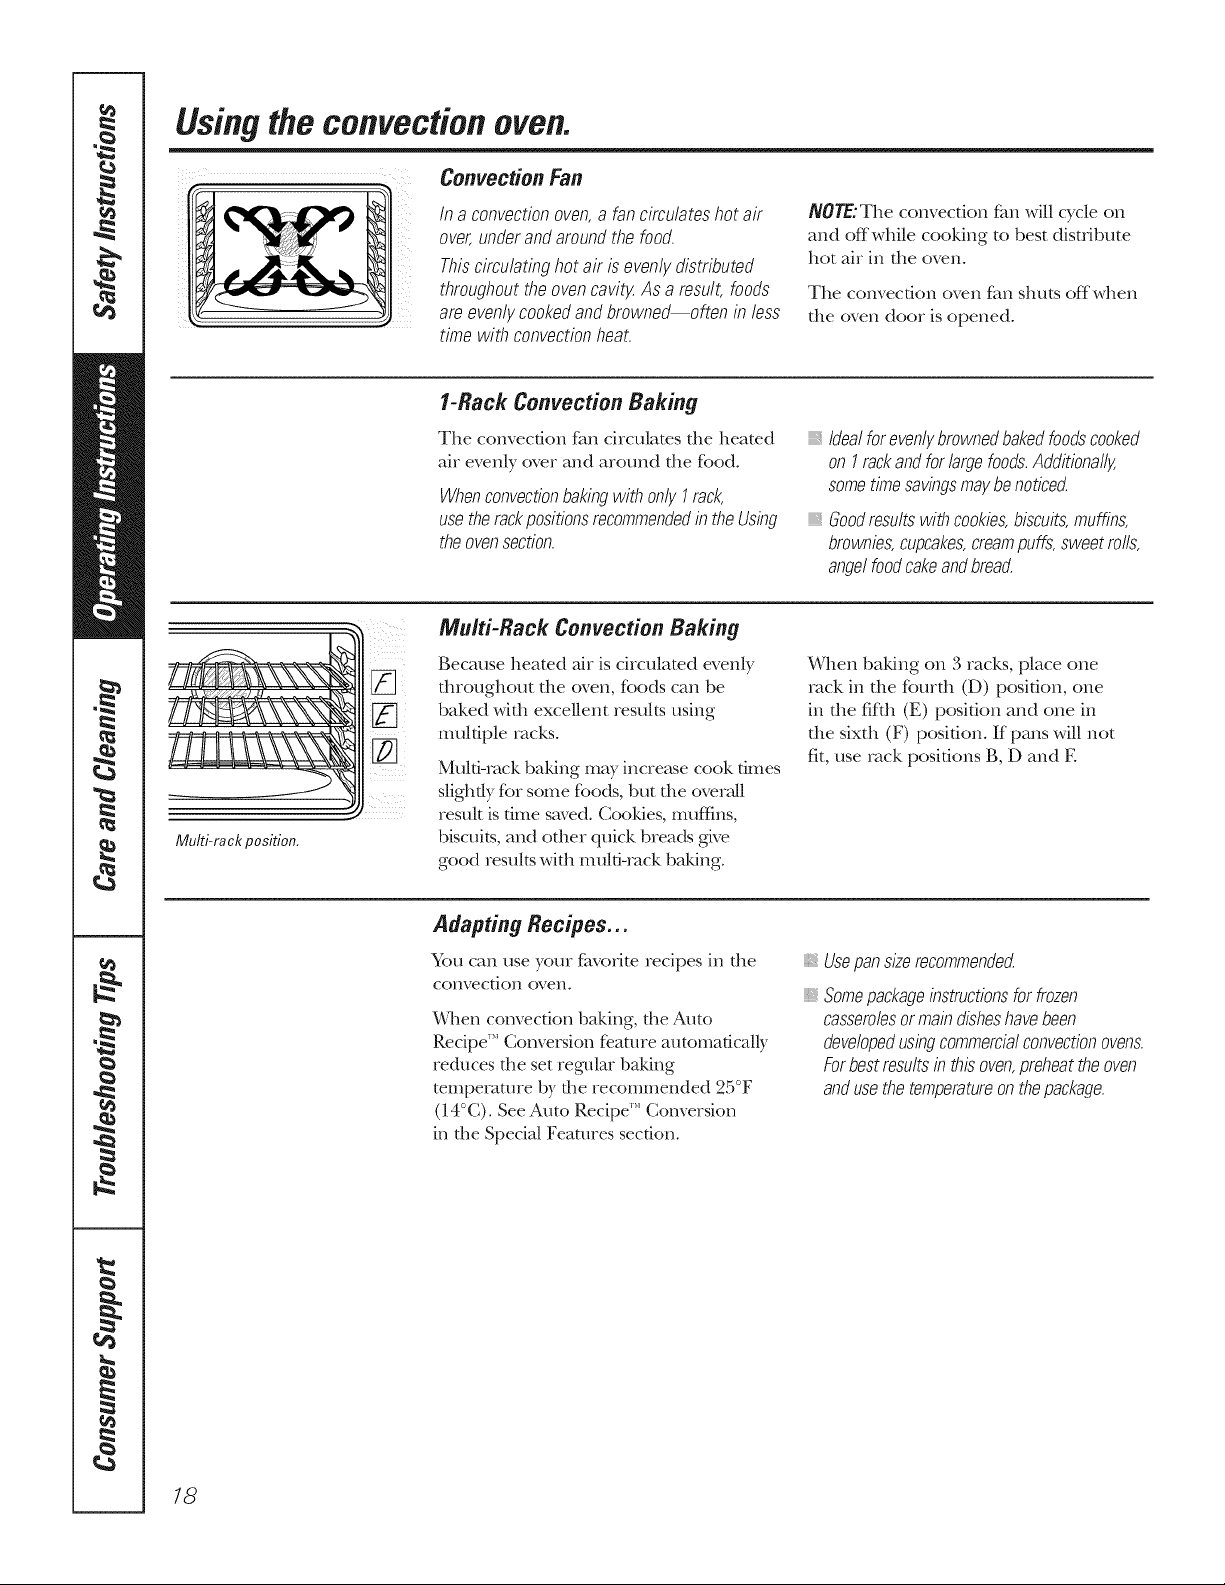
Convection Fan
In a convectionoven,a fancirculateshot air
over,underandaroundthe food.
Thiscirculatinghot air is evenlydistributed
throughouttheovencavity,As a result,foods
areevenlycookedand browne_often in less
timewith convectionheat.
NOTE; Tile convection tim \,viii cycle on
and offwhile cooking to best distribute
hot air in tile oven.
Tile convection oven tim shuts offwhen
tile oven door is opened.
1-Rack Convection Baking
Tile convection tim circulates tile heated
air evenly over and around tile food.
Whenconvectionbakingwith only Irack,
usetherackpositionsrecommendedintheUsing
theovensection.
Idealfor evenlybrownedbakedfoodscooked
on Irackandfor largefoods.Additionally,
sometimesavingsmaybenoticed.
Goodresu/tswith cookies,biscuits,muffins,
brownies,cupcakes,creampuffs,sweetrolls,
angelfoodcakeandbread.
i[] ¸
Multi-ra ckposition.
Multi-Rack Convection Baking
Because heated air iscirculated evenly
duoughout die oven, foods can be
baked wkh excellent results using
multiple racks.
Multi-rack baking may incre;_se cook dines
slightly fbr some foods, but tlle overall
result is time saved. Cookies, muffins,
biscuits, and other quick breads give
good results with multi-rack baking.
When baldng on 3 racks, place one
rack in die fburdl (D) position, one
in tile fifth (E) position and one in
tile sixdl (F) position. Ifpans will not
fit, use rack positions B, D and E
Adapting Recipes..,
You can use your fiwofite recipes in tile
convection oven.
Vdlen convection l)aking, the Auto
Recipe"* Conversion feature automatically
rednces the set regular baking
temperature 1)ythe recommended 25°F
(14°C). See Auto Recipe'" Conversion
in the Special Features section.
}; Usepansizerecommende_
Somepackageinstructionsforfrozen
casserolesormaindisheshavebeen
developedusingcommercialconvectionovens.
Forbestresultsin thisoven,preheattheoven
andusethetemperatureon thepackage.
18
GEApp/iance&com
Convection Roast
_,goodfor large tender cutsof meat,uncoverec_
The convection fan circulates the heated
ah evenly over and around tile food.
Meat and pouluy are browned on all
sides as if dley were cooked on a
rotisserie. Tile heated ah seals ill juices
quickly for a moist and tender product
while, at the same time, creating a rich
goMen brown exterior
¼,qlen you are convection roasting,
it is important that you use a broiler pail
and gIid designed for broiling for best
convection roasting results. The pan is
used to catch gqease spills and the grid
is used to prevent grease spatteIs.
Place the oven rack ill the position
flint centers the K_od between file top
and bottom offile oven.
Whenbaking cookies,youwill
get thebestresults if youuse
a flat cookiesheet insteadof
a pan with lowsides.
Cookware for Convection Cooking
Before using your convection oven,
check to see if your cool<ware leaves
room K)I ah circulation ill die oven.
If you are baldng with several pans, leave
space bet_,veen them. Also, be sure the
pans do not touch each oilier or file
walls of the oven.
Paper and Plastic
Heat-resistant paper and plastic
containers that are recommended fk_)i
use ill regular baldng can a/so be used
for ccmvecdon baldng, but should not
be used at mmpeIaUlres higher than
the temperaUlre recommended by the
cool<ware mamlfacUlreI: Plastic cool<ware
dmt is ]1eat-resistant to mmperamres of
400°F (204°C) call a/so be used.
Metal and Glass
Ally type of cool<ware will work in your
convection oven. Howevei; Illet_J palls
heat the fhsmst and are recommended
for convection bN<ing°
Darkenedor matte-finishedpans will bake
faster thanshiny pans
glassorceramicpans cook moreslowl;_
For recipes like oven-baked chicken,
use a pan with low sides. Hot air cannot
circulam well around food ill a pan with
high sides.
NULTt/I RACK
E [ FqF-qFq
DDFqF;qr-;q
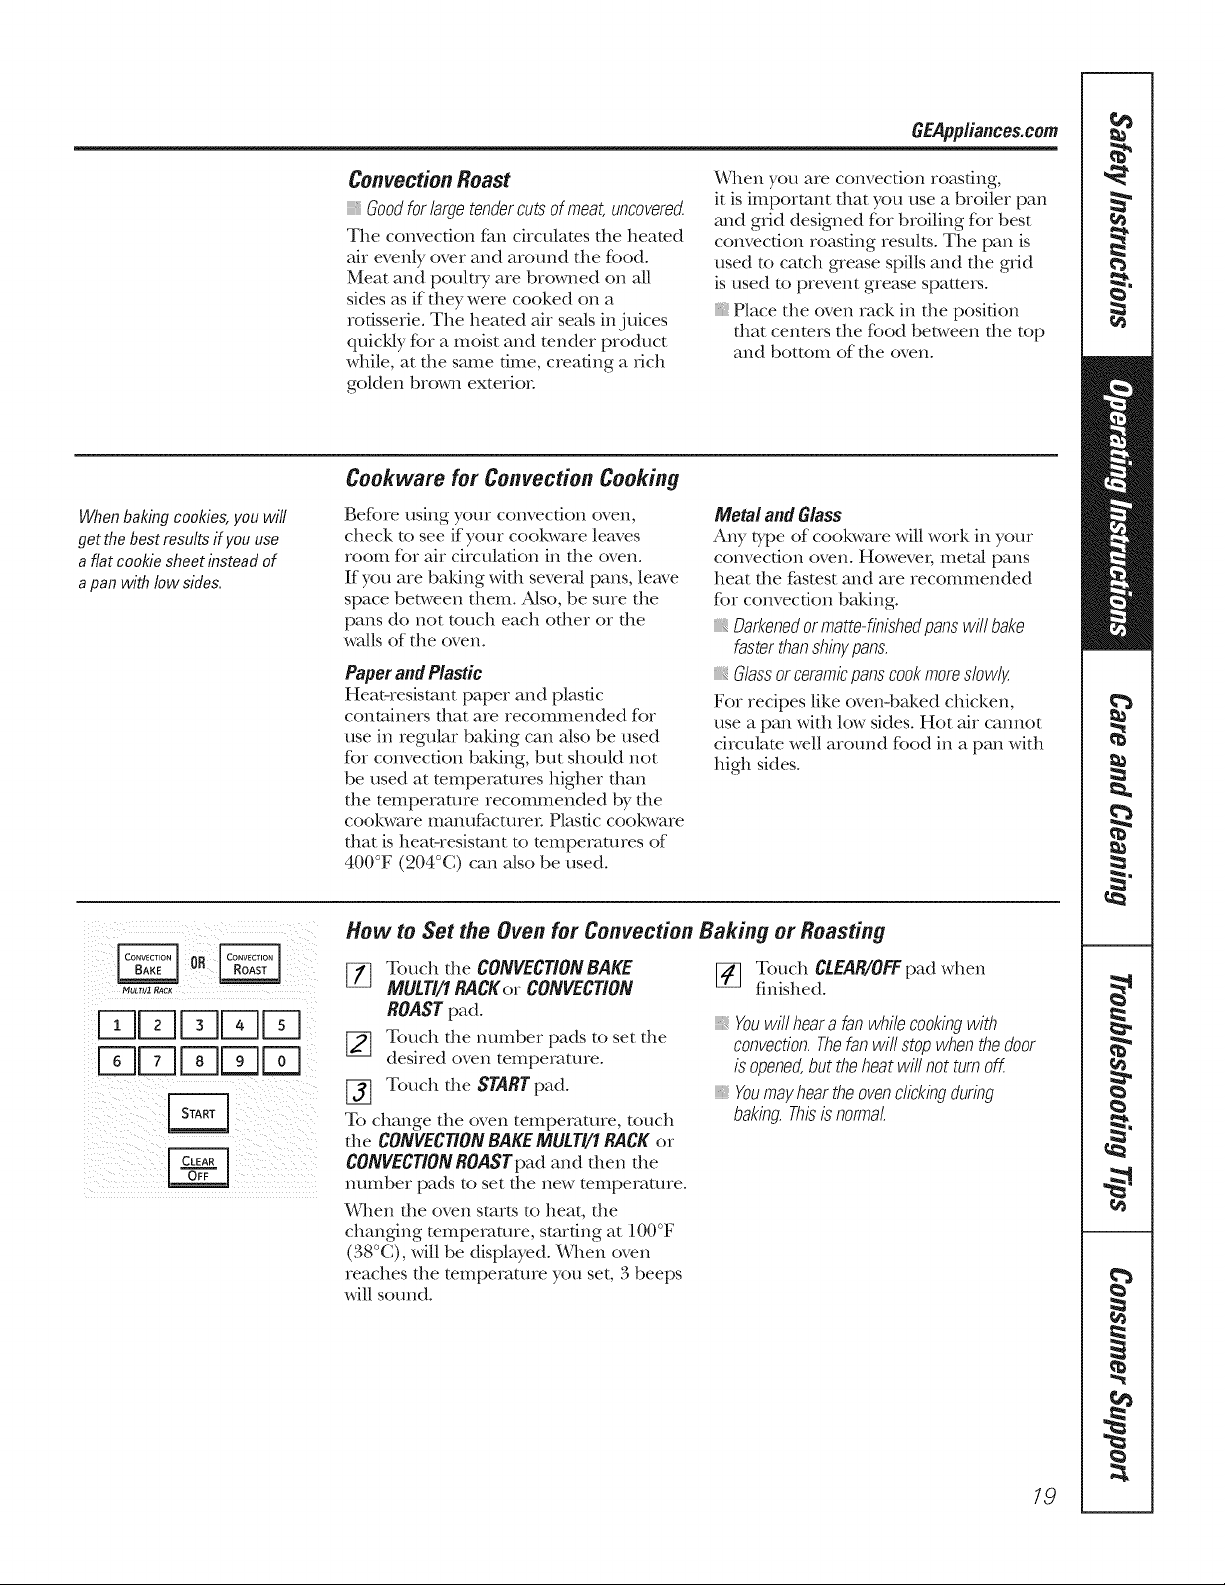
How toSet the Oven for ConvectionBaking or Roasting
_] Touch the CONVECTION BAKE
MULTI/1 RACKor CONVECTION
ROASTpad.
[_ Touch the immber pads to set the
desired oven telnperamre.
[_] Touch the STARTpad.
To change the oven tempeiature, touch
the CONVECTIONBAKE MULTI/1 RACK or
CONVECTIONROASTpad and then the
number pads to set the new teInperature.
When the oven starts to beat, the
changing mlnpeiaalre, starting at ]00°F
(38°C), will be displayed. _&qlen oven
reaches the mmpeIaUlIe you set, 3 beeps
will sound.
[_ Touch CLEAR/OFFpad when
finished.
,, Youwill heara fanwhilecookingwith
convectionThefan will stopwhenthedoor
is opened,buttheheatwill not turnoff
_,Youmayheartheovenclickingduring
baking Thisisnormal
19
Usingthetimed featuresfor convectioncooking.
Youwill hear a fan while cooking with these features. The fan will stop when the door is opened, but theheat
will not turn off.
NOTE: Foods that spoil easily--such asmilk, eggs, fish,stuffings, poultry and pork--should notbe allowed to
sit formore than 1 hour before or after cooking. Room temperature promotes thegrowth ofharmful bacteria.
Be sure that the oven light isoff because heat from the bulb will speed harmful bacteria growth.
Numll RAC_
53FqDDFq
53FqDD
53DDDD
qr-qDD
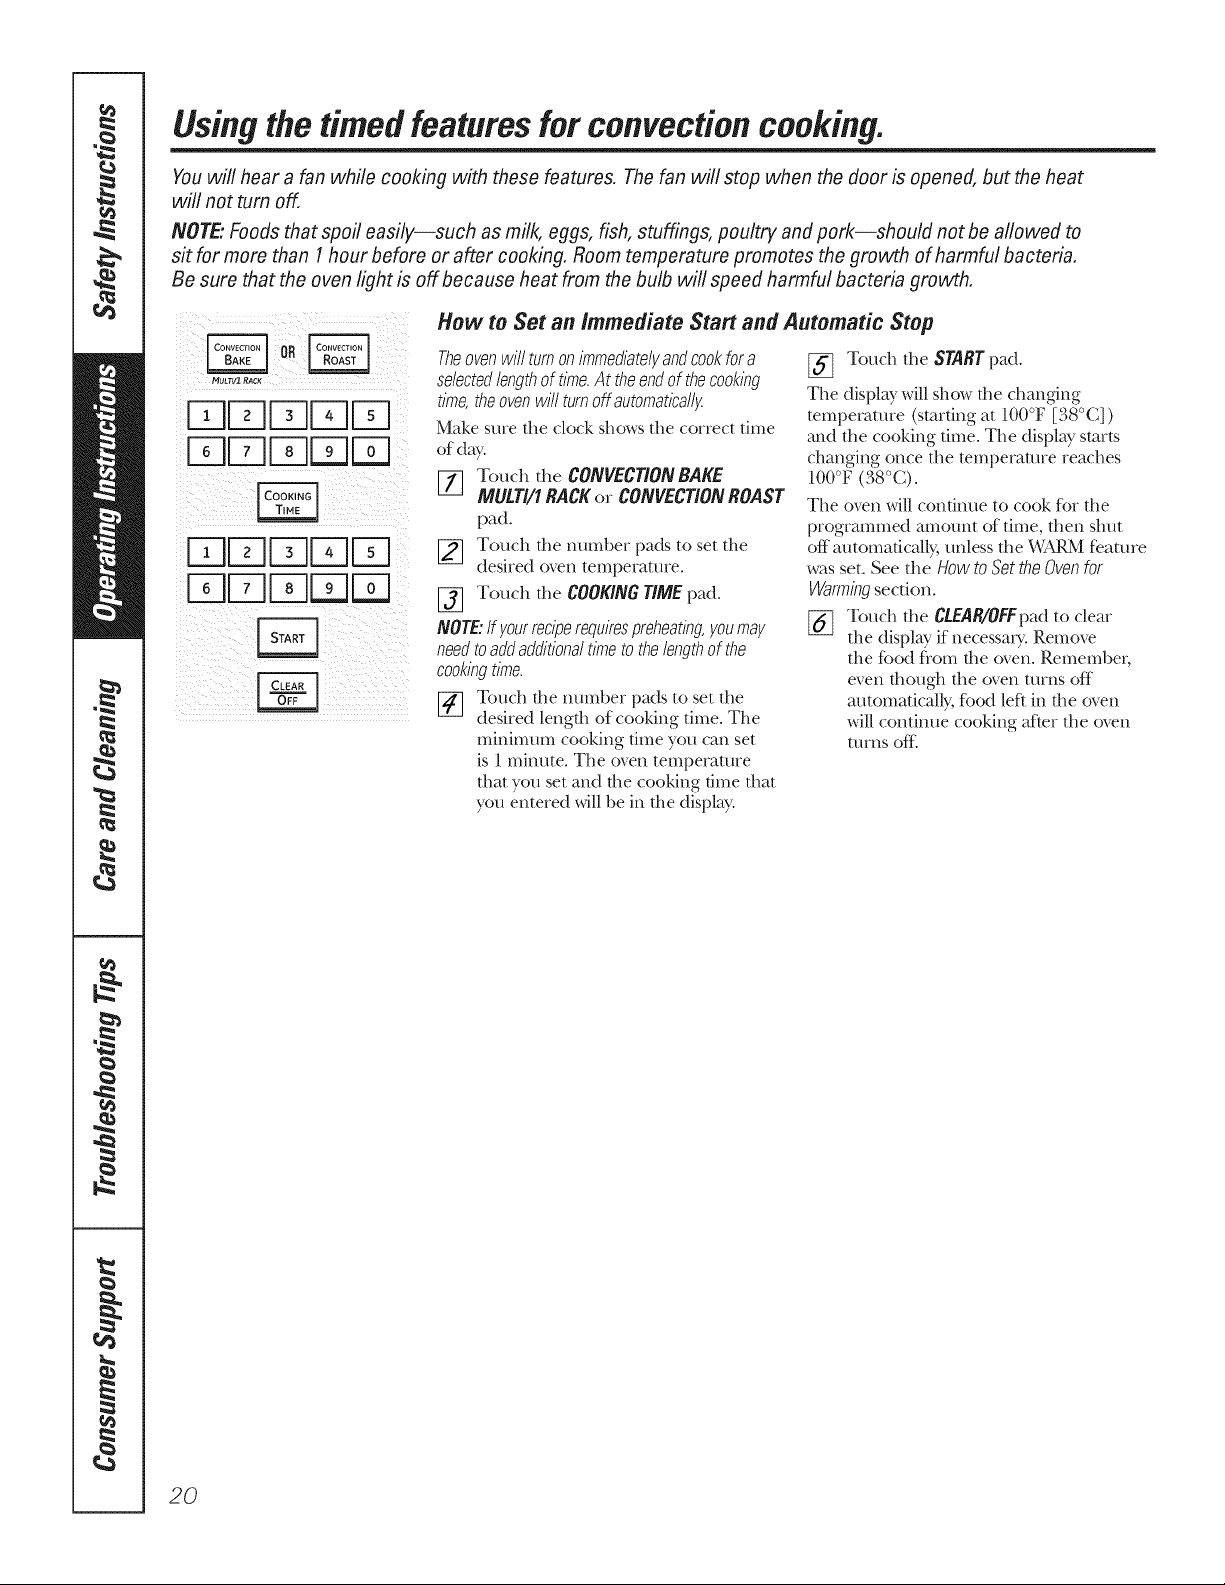
How to Set an Immediate Start and Automatic Stop
Theovenwill turn on immediatelyandcookfor a
selectedlength oftime.At theendofthecooking
time, theovenwill turnoffautomatically.
Make sure file clock shows file correct time
of day.
[7] Touch the CONVECTION BAKE
MULT/fl RACKor CONVECTIONROAST
pad.
[_ Touch the munber pads to set the
desired oxen temperature.
[_ Touch the COOKINGrIME pad.
NOTE."If yourreciperequirespreheating,you may
need to addadditionaltimetothelengthofthe
cookingtime.
[_ Touch file mm_ber pads to set the
desired length of cooking time. The
minimum cooking time you can set
is 1mim/te. The oven temperature
that you set and the cooking time that
you entered will be in the display.
To/lch tile START pad.
The display will show rite changing
wmpemmre (starting at 100T [38°C])
m_d the cooking time. The display starts
changing once the mmperamre reaches
_oooF(38°(3.
The oven will contim]e to cook for the
programmed amount (fftime,/hen shut
off m/tomaficMly, unless/he X_fARM feature
was set. See the HOWtOSetthe Ovenfor
Warmingsection.
[_ T.mch the C£EAR/OFFpadto dear
the displa_ if necessary. Remove
the food fl'om the oven. Remember;
even though the oven turns off
m/tomaticNly, fbod lef/in the oven
will contiime cooking af/er the oven
turns (}fIi
20
GEApp/iances.com
MULTII1RACK
DDDDD
DDDD
DDDDD
DDDDFq
DDDDD
DDDD
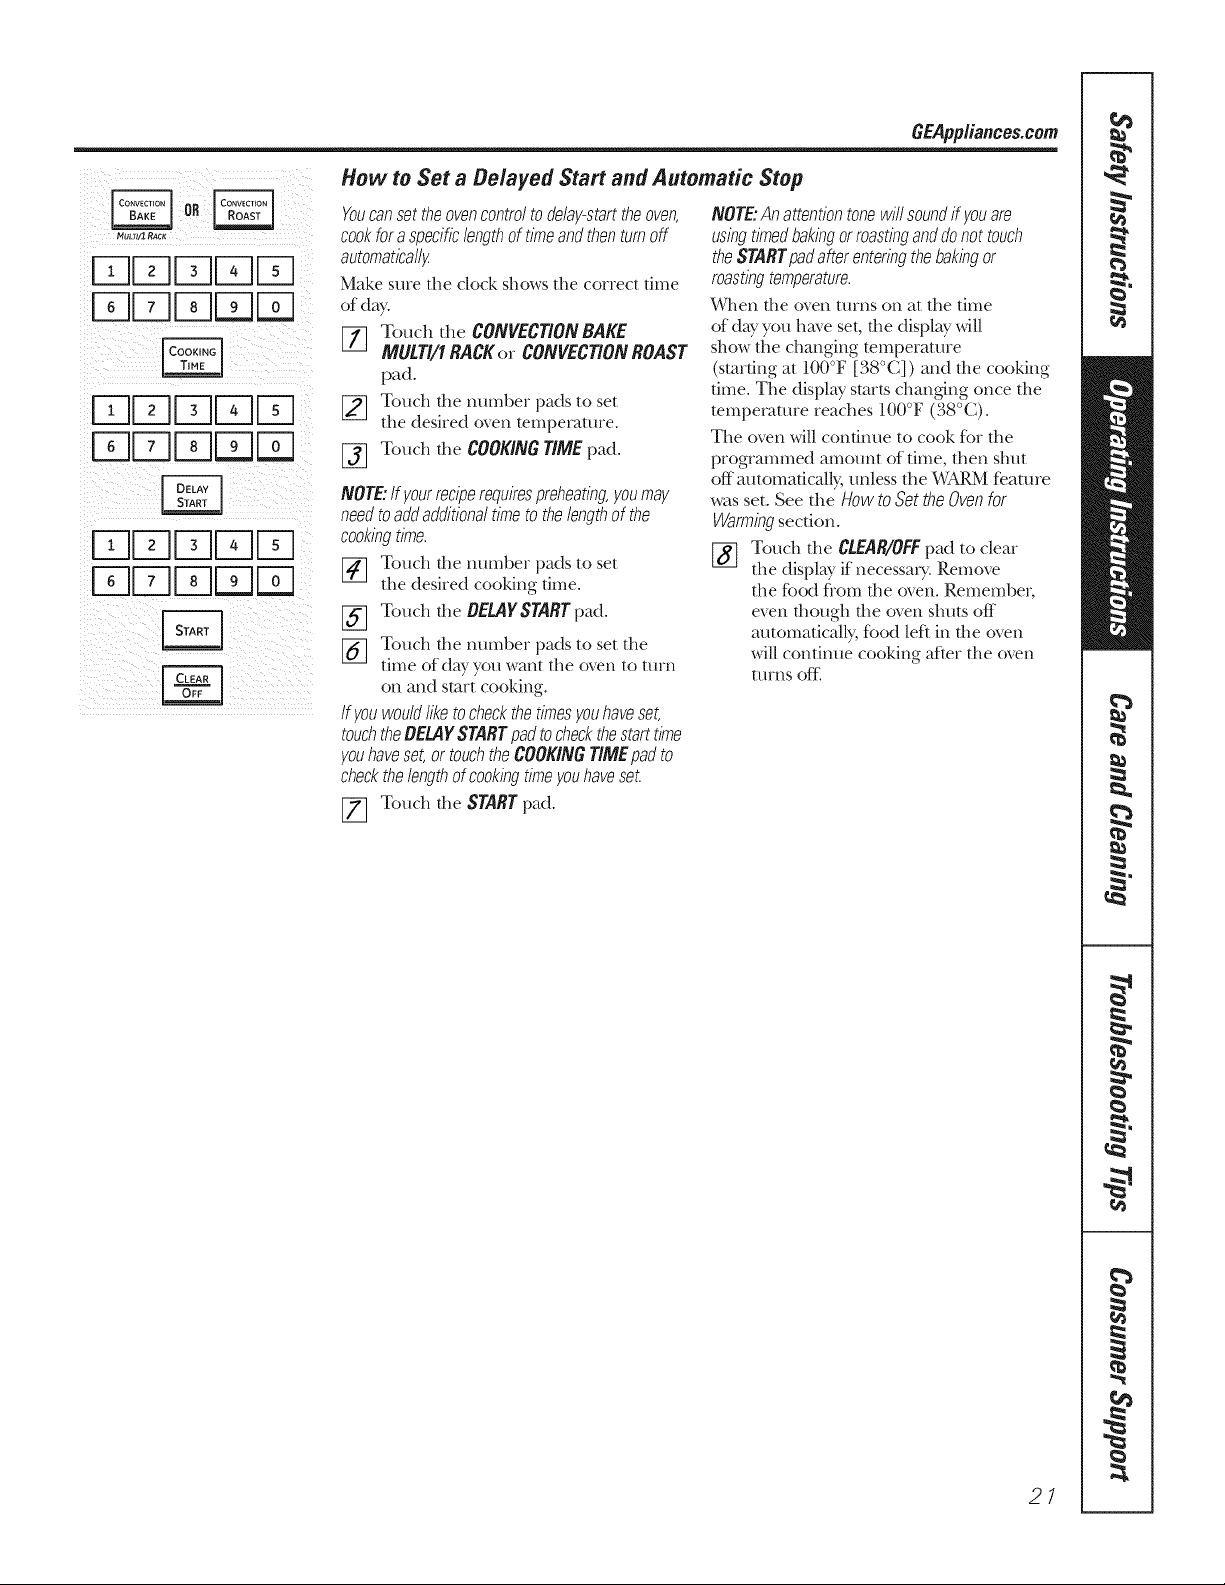
How to Set a Delayed Start and Automatic Stop
Youcanset theovencontrolto delay-starttheoven,
cookfor a specificlengthoftimeand then turnoff
automatically.
Make sure file dock shows file correct time
of day.
[77 Touch the CONVECT/ON BAKE
MULTI/1RACKor CONVECTION ROAST
pad.
[_ Touch the number pads to set
the desired o_en temperature.
[_ Touch the COOKINGT/ME pad.
NOTE."Ifyourreciperequirespreheatingyoumay
needtoaddadditionaltimeto thelengthof the
cookingtime.
_-] Touch rite m_mber pads to set
the desired cooking time.
Touch the OEMYSTARTp_d.
%
%
Touch rite m_mber pads to set the
time of da_ _ou want the oven to turn
on and start cooking.
Iflieu wouldliketocheckthetimesyouhaveset,
touchtheDEL4YSTARTpadtocheckthestarttime
youhaveset,ortouchtheCOOK#VGT/MEpadto
checkthelengthofcookingtimeyouhaveset.
[77 Touch dte STARTpad.
NOTE."An attentiontonewill soundff youare
usingtimedbakingorroastinganddonottouch
theSTARTpadafterenteringthebakingor
roastingtemperature.
When rite oven turns on at rite time
of dW you have set, the displ W will
show fire changing temperature
(starting at 100°F [38°C]) and the cooking
time. The displ W starts changing once rite
temperature reaches 100°F (38°C).
The oven willcontinue to cook for the
programmed amcmnt of time,/hen sht_t
off m/tomafically, unless/he _,kfARMfeature
wasset. See die HOWtOSet theOvenfor
Warmingsection.
[_ Touch the CLEAR/OFFpad to cleat
the displa_ if necessary. Remove
the f}.)odfrom the oven. Remember,
even fltough the oven shuts off
automatically, food left in rite oven
will continue cooking af/er the oven
turns ore
2/
Usingtheconvectionoven.
For best results when masting large
turkeys and masts, we recommend
using the probe included in the
convection oven.
F71FqE DF-q
DF71FqFqFq
r71Fq[Z]r-qr-q
DF71DDFa
To change the oven temperature
during the Convection Roast cycle,
touch the CONVECTION ROAST pad
and then touch the number pads to
set the new desired temperature,
22
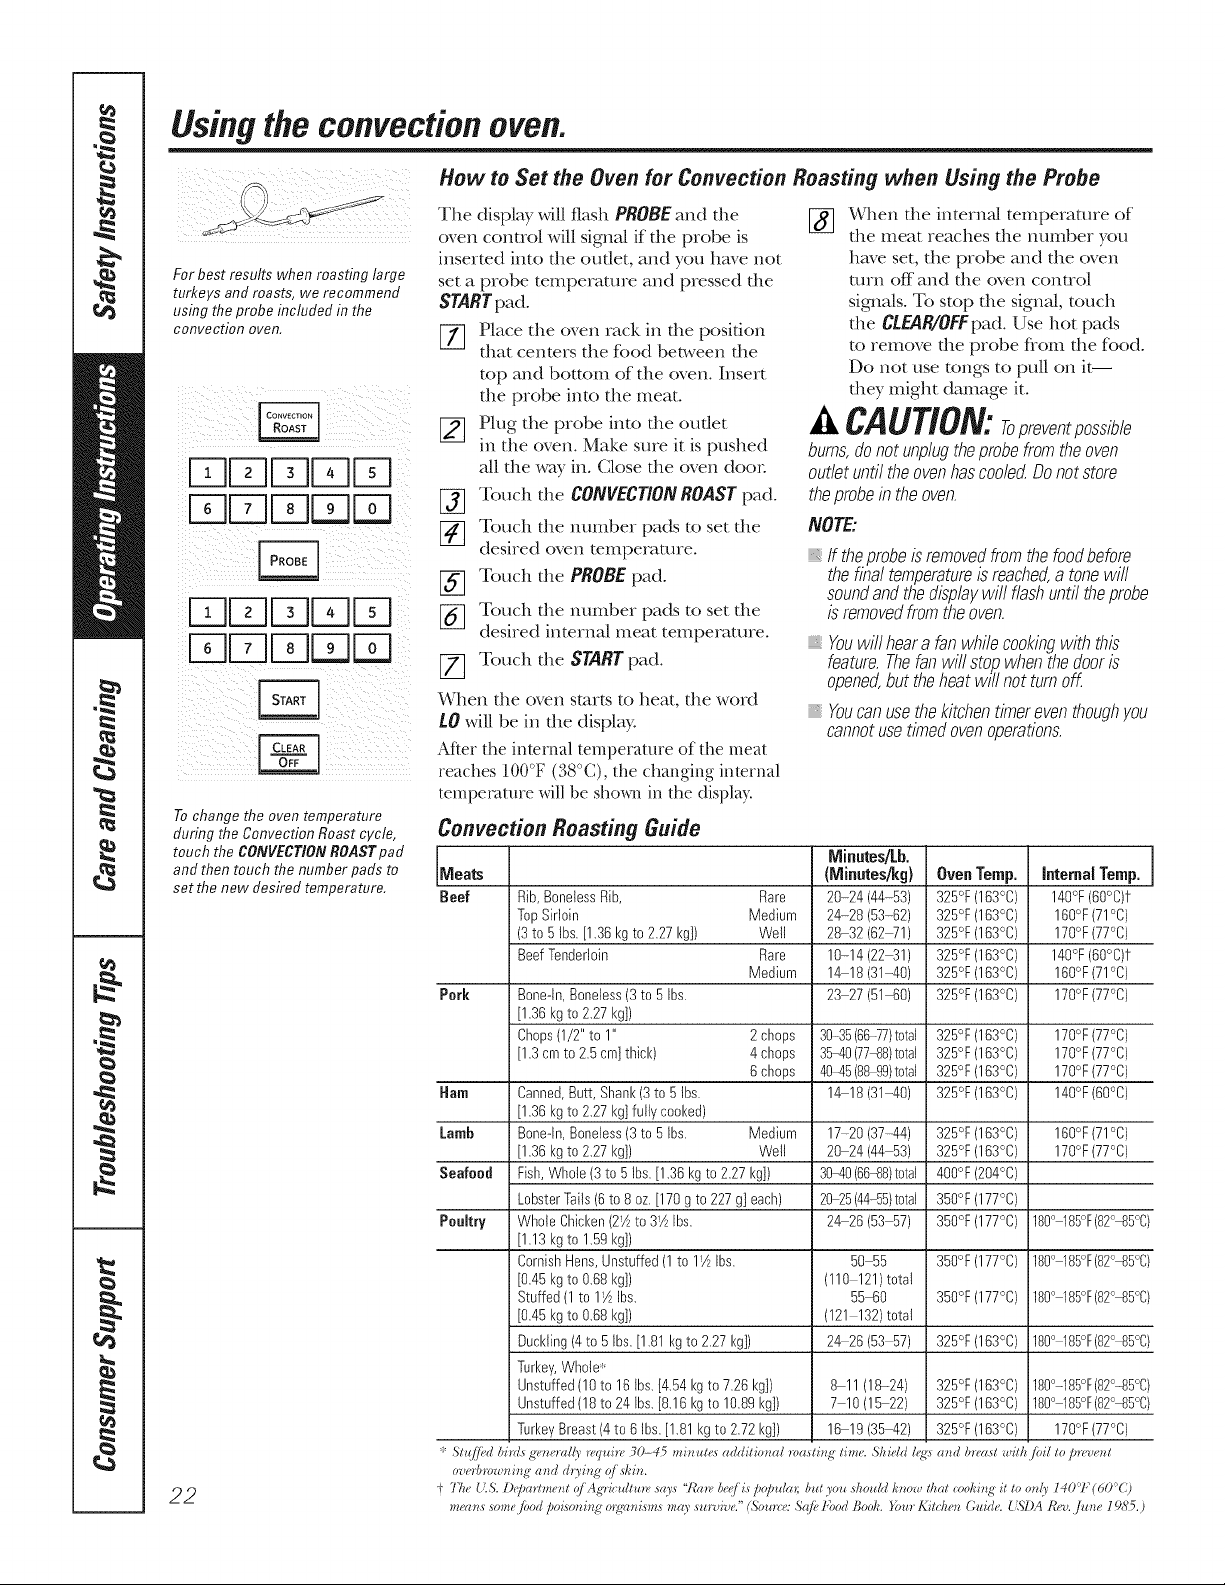
How toSet the Oven forConvection Roasting when Using the Probe
Tile display will flash PROBEand tile [_ _3,qlentlle internal temperature of
oven control will signal if tile probe is tile meat reaches tlle number you
inserted into die oudet, and you have not
set a probe temperature and pressed the
STARTpad.
[] Place tile oven rack in tile position
that centers tlle food be_,veen the
top and bottom of tile (wen. Insert
die probe into tile meat.
[_ Plug tile probe into tile oudet
in tlle oven. Make sure it is pushed
all the way in. (_lose tile oven doon
[_ Touch tile CONVECTIONROASTpad.
[_] Touch tile number pads to set tile
desired oven temperature.
[_ Touch tile PROBEpad.
[_ Touch tile number pads to set tlle
desired internal meat temperature.
Touch the STARTpad.
When file oven starts to heat, film word
tO will be in file display.
After the internal temperature of the meat
reaches 100°F (38°C),/he changing interred
/empmvmue will be sho,_ in the display.
have set, the probe and the oven
mrn off and die oven conUol
sigma/s. To stop tile signal, touch
tile CLEAR/OFFpad. Use hot pads
to remove tile probe from tile food.
Do not use tongs topull on it--
they might damage it.
a,CAUTION:To
burns,donot unplugtheprobefromtheoven
outletuntiltheovenhascoolecZDonotstore
theprobein theoven.
NOTE:
iii}iil;ii;,
If theprobeisremovedfromthefoodbefore
thefinal temperatureisreached,a tonewill
soundandthedisplaywillflashuntiltheprobe
is removedfromtheoven.
iiiiiiiiii:,
iii}i}}ii_
Youwill heara fanwhilecookingwith this
feature.Thefanwill stopwhenthedooris
opened,but theheatwill not turnoK
Youcanusethekitchentimereventhoughyou
cannotusetimedovenoperations.
Convection Roasting Guide
Minutes/Lb.
Meats {Minntes/kg) OvenTemp. InternalTemp.
Beef Bib,BonelessRib, Rare 20-24 (44-63) 325°F(163°C) 140°F(60°C)t
TopSirloin Medium 24-28 (53-62) 325°F(163°C) 160°F(71°C)
(3to5 Ibs.[1.36kgto2.27 kg]) Well 28-32 (62_1) 325°F(163°C) 170°F(77°C)
BeefTenderloin Bare 10-14(22_1) 325°F(163°C) 140°F(60°C)t
Medium 1_18 (31-40) 325°F(163°C) 160°F(71°C)
Pork Bone-In,Boneless(3to5 Ibs. 23 27 (51-60) 325°F(163°C) 170°F(77°C)
[1.36 kgto 2.27kg])
Chops(1/2" to1" 2chops 30-35(66-77)total 325°F(163°C) 170°F(77°C)
[1.3 cmto 2.5 cm]thick) 4chops 3540 (77-88)total 325°F(163°C) 170°F(77°C)
6chops 4045(88@9)total 325°F(163°C) 170°F(77°C)
Ham Canned,Butt,Shank(3to5 Ibs. 1_18 (31-40) 325°F(163°C) 140°F(60°C)
[1.36 I<gto2.27I<g]fully cooked)
Lamb Bone-In,Boneless(3to5 Ibs. Medium 17-20 (37-44) 325°F(163°C) 160°F(71°C)
[1.36 I<gto227 I<g]) Well 20 24 (44 53) 325°F(163°C) 170°F(77°C)
Seafood Fish,Whole(3to5 Ibs.[1.36 I<gto 227 I<g]) 3040 (66-88)total 400°F(204°C)
LobsterTails (6to8 oz.[170 g to227g]each) 20_5 (44-55)total 350°F(177°C)
Poultry Whole Chicken(2_Ato 3_AIbs. 2_26 (53 57) 350°F(177°C) 180° 185°F(82°-85°C)
[1.13 I<gto1.59I<g])
CornishHens,Unstuffed (1to lY2Ibs. 50 55 350°F(177°C) 180° 185°F(82°-85°C)
[0.45 I<gto0.68I<g]) (110 121)total
Stuffed(1to 11AIbs. 55-60 350°F(177°C) 180° 185°F(82°-85°C)
[0.45 I<gto0.68I<g]) (121 132)total
Duckling(4to 5Ibs.[1.81I<gto 227 I<g]) 2_26 (53 57) 325°F(163°C) 180° 185°F(82°-85°C)
Turkey,Whole_
Unstuffed(10to16 lbs.[4£4 I<gto726 I<g]) 8-11 (18-24) 325°F(163°C) 180°-185°F(82°-85°C}
Unstuffed(18to 24Ibs.[8.16 I<gto 10.89I<g]) 7 10(15-22) 325°F(163°C) 180° 185°F(82°-85°C)
TurkeyBreast(4to 6Ibs.[1.81I<gto 2.72I<g]) 16 19 (35_42) 325°F(163°C) 170°F(77°C)
Usingthe proofing and warming features. CEApplia,cos.com
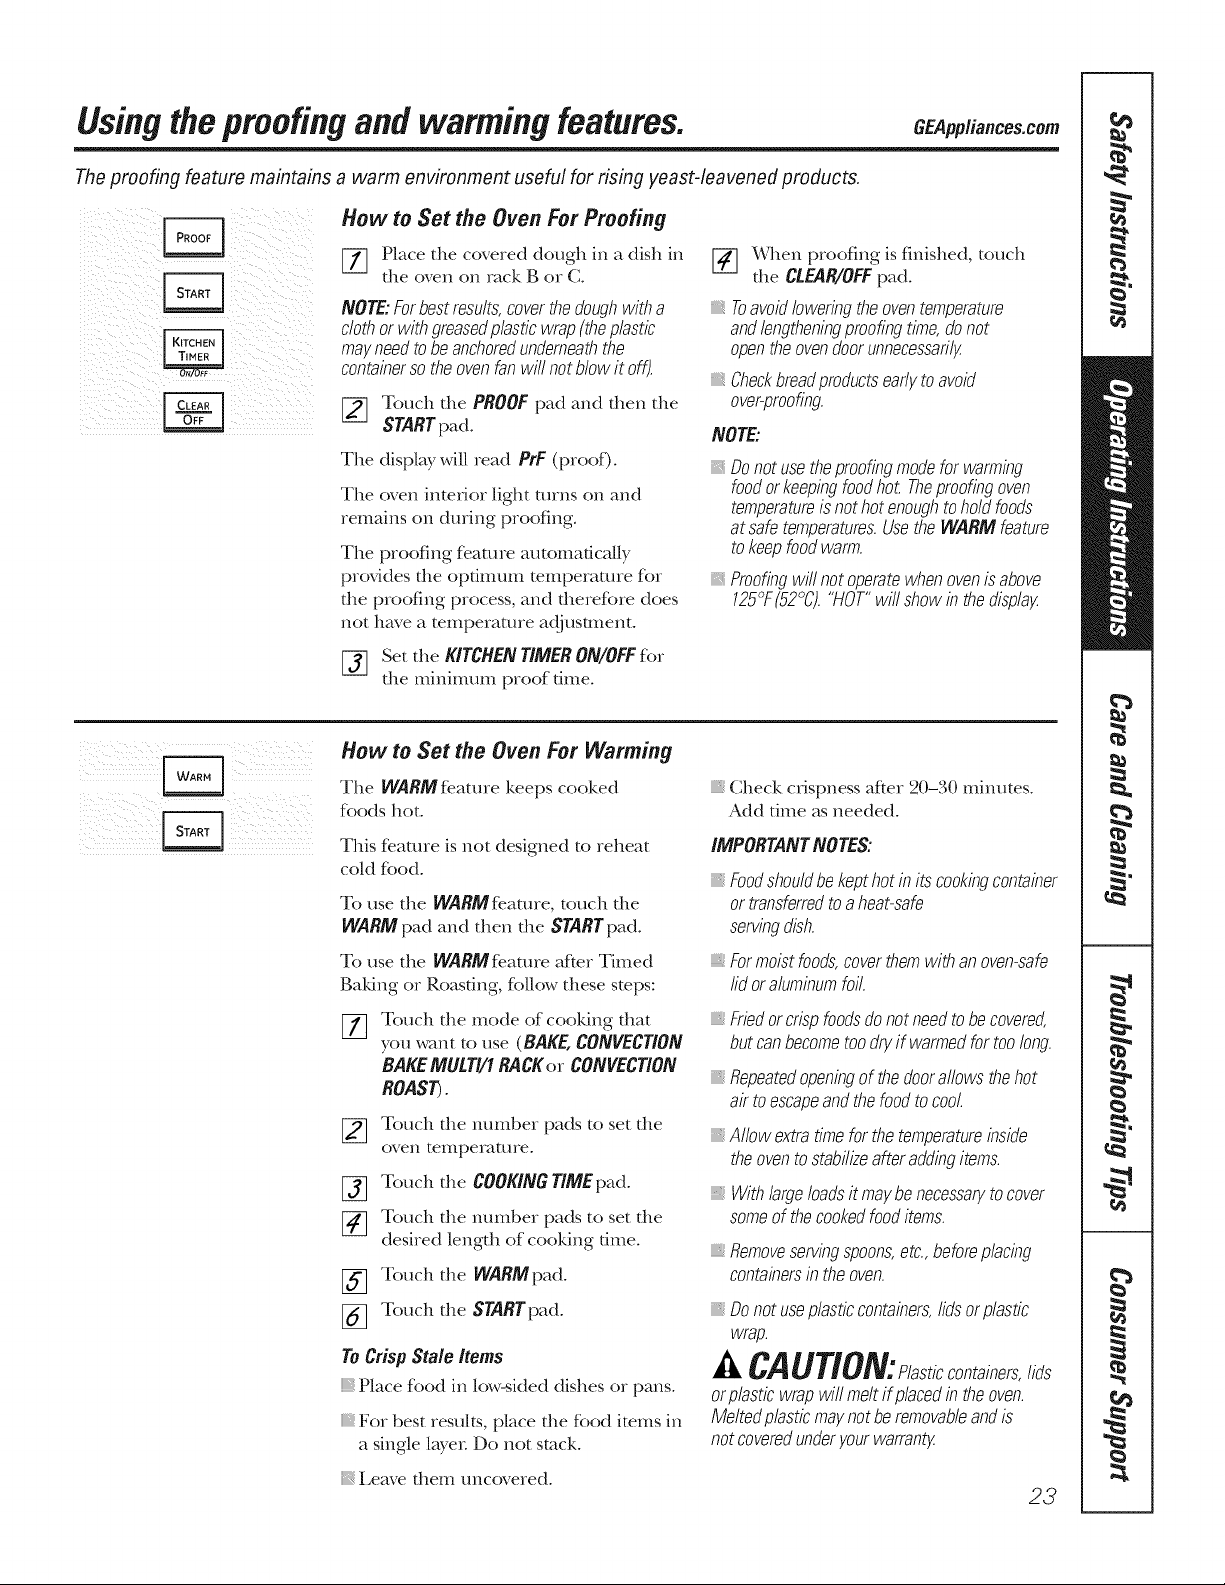
The proofing feature maintains a warm environment useful for rising yeast-leavened products,
How toSet the Oven For Proofing
[77 Place the covered dough in a dish in
the oven on rack B or C.
NOTE:Forbestresults,coverthedoughwitha
clothorwith groasedplasticwrap(theplastic
mayneedto beanchoredunderneaththe
containerso theovenfanwill notblowitoff).
[_ Touch the PROOFpad and then the
STARTpad.
Tile display willread PrF(proof)°
The (wen inm_Jor light rams on and
remmns on during proofing.
The proofing feature automadcNly
provides the optimum mmperamre for
the proofing process, and therefore does
not have a mmperamre adjustment.
[_ When proofing is finished, touch
the CLEAR/0FF pad.
Toavoidloweringtheoventemperature
andlengtheningproofingtin)e,donot
opentheovendoorunnecessarily
Checkbroadproductsearlytoavoid
over-proofing.
NOTE:
Donot usetheproofingmodefor warming
foodorkeepingfoodho£ Theproofingoven
temperatureis nothotenoughto holdfoods
at safetemperaturos.Usethe WARMfeature
to keepfoodwarn).
Proofingwill notoperatewhenovenis above
125°F(52°C)."HOT"will showin thedisplag
Set the KITCHENTIMERON/OFFR_r
the minimum proof time.
How toSet the Oven ForWarming
The WARMfe.ature keeps cooked
foods hot.
This feature isnot designed to reheat
cold food.
To use the WARMfeamre, touch tile
WARM pad and then the STARTpad.
To use the WARM feature after Timed
Baldng or Roasdng, follow these stops:
[77 Touch tile mode of cooldng that
you w_ultto use (BAKE,CONVECTION
BAKEMUtTI/1 RACKor CONVECTION
ROAST_.
[_ Touch tile mmlber pads to set tile
(wen temperature°
[_ Touch the COOKINGTIMEpad.
[_ Touch tile number pads to set the
desired length of cooldng time°
[_ Touch the WARMpad.
[_ Touch the STARTpad.
ToCrisp Stale/toms
Place fbod in low-sided dishes or pans°
For best results, place tile food imms in
a single layer: Do not stuck.
Leave them uncovered°
Check crispness after 20-30 minutes.
Add time as needed.
iMPORTANTNOTES:
iiiiiil;ii;,
Foodshouldbekepthot initscookingcontainer
ortransferredtoaheat-safe
servingdish.
Formoistfoods,coverthemwithan oven-safe
lidor aluminumfoil.
Friedorcrispfoodsdonot needto becovered,
but canbecometoodryifwarmedfortoolong.
Repeatedopeningof thedoorallowsthehot
air toescapeandthefoodtocool.
Allow extratimeforthe temperatureinside
theovento stabilizeafteraddingitems.
Withlargeloadsit maybenecessaryto cover
someofthecookedfooditems.
Removeserving spoons,etc.,beforeplacing
containersin theoven.
Donot useplasticcontainers,lidsor plastic
wrap.
CAUTiON:Plast,ccontainers,lids
orplasticwrapwill meltifplacodin theoven.
Meltedplasticmaynotbe removableandis
notcoveredunderyourwarranty.
23
Adjust the oventhermostat--Do ityourself!
Youmay find that your new oven cooks differently than the one it replaced. Use your new ovenfor a few weeks to
become more familiar with it. If youstiff think your new oven istoo hot or too cold, you can adjust the thermostat
yourself.
Donot usethermometers, such as those found in grocery stores, to check the temperature setting of your oven.
These thermometers may vary 20-40 degrees F (11-22 degrees C).
NOTE: This adjustment will onlyaffect baking and roasting temperatures; it will not affect broiling or self-cleaning
temperatures. Theadjustment will be retained in memory after a power failure.
5]DFqF-qD
E DFqF;q
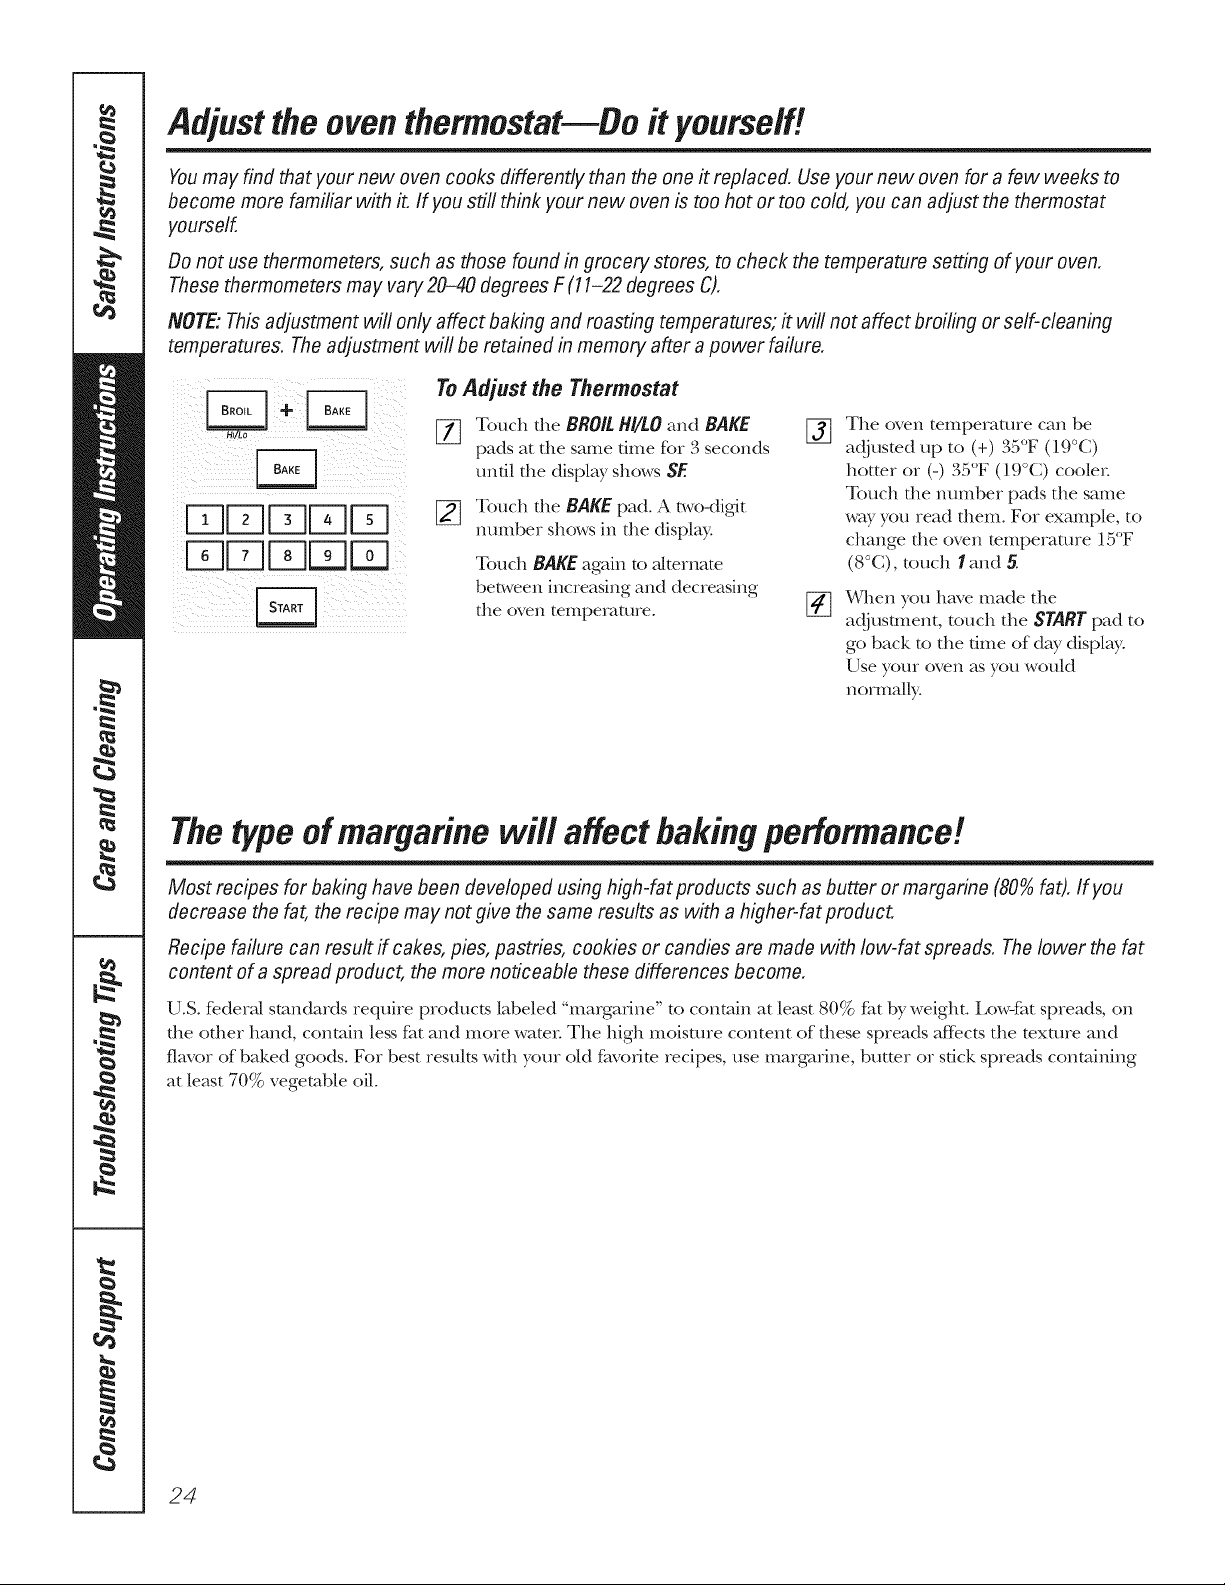
ToAdjust the Thermostat
[_ Touch tile BROILHI/tOand BAKE []
pads at tile same time for 3 seconds
until tile disphy shows SE
[_ Touch tile BAKE pad. A two-digit
number shows in tile display°
Touch BAKE again to alternate
between increasing and decreasing
tile oven temperature° []
The oven temperature can be
adjusted up to (+) 3a F (l. C)
hotter or (-) 35°F (19°C) cooler
Touch the number pads tile same
way you read them. For example, to
change the oven mmpemmre 15°F
(8°C), touch land 5.
When you have made tile
adj usunent, touch tile STARTpad to
go back to tile dine of day disphy.
Use your oven as you woukt
normally:
Thetypeofmargarinewi/! affectbakingperformance!
Most recipes for baking havebeen developed using high-fat products such asbutter or mamarine (80% fat). If you
decrease thefat, the recipe may notgive thesame results as with a higher-fat product
Recipe failure can result if cakes, pies, pastries, cookies or candies are made with low-fat spreads. Thelower thefat
content ofa spread product, themore noticeable these differences become.
U.S. federal standards require products labeled "margarine" to contain at least 80% flit by weight. Low-flit spreads, on
the other band, comain less flit and more water Tile high moistme content of these spreads affects tile texture and
flavor of baked goods. For best results with your old fi_vofim recipes, use margarine, butter or stick spreads containing
at least 70% vegetable oil.
24
Usingthe self-cleaning oven. aapp.a,ce com
The oven door must be closed
and all controls set correctly for the cycle to work properly,
Before a Clean Cycle
We recommend venting your
ldtchen wifll an open window or using a
ventilation tim or hood during the first
self'clean cycle.
Remove racks, broiler pan, broiler grid,
probe, all cookware and any aluminum
fbil flom the oven.
Do not clean die gasket. The fiberglass
material of die oven door gasket cannot
withstand abnksion. It is essential for the
gasket to remain intact. If you nodce it
becoming worn or flwed, replace it.
Wipe up any hem Tspillove,_ on the oven
bottom.
Wipeup heavy soil on the oven
bottom,
The shiny, siNe>colored oven racks
(on some models) can be selfkTleaned,
but they will darl<en, lose their lusmr
and become hard to slide.
Soil on die flont flame of file range
and outside file gasket on file door will
need to be cleaned by hand. Clean these
areas with hot wam_; soal>filled or plastic
scouting pads or cleansers such as Soft
Scrub? Rinse well with clean water
and d_T
Make sure the oven light bulb cover is in
place and the oven light is (fie
IMPORTANT: The health of some birds
is extremely sensitive to the flmles given
off dming the self:cleaning cycle of any
range. Move birds to another well-
vendlamd room.
i i;;;;_ iii _i
iiDDMm[-71 :
i;DU-1U-IDFcq
i _i i i _ _i_ii ii
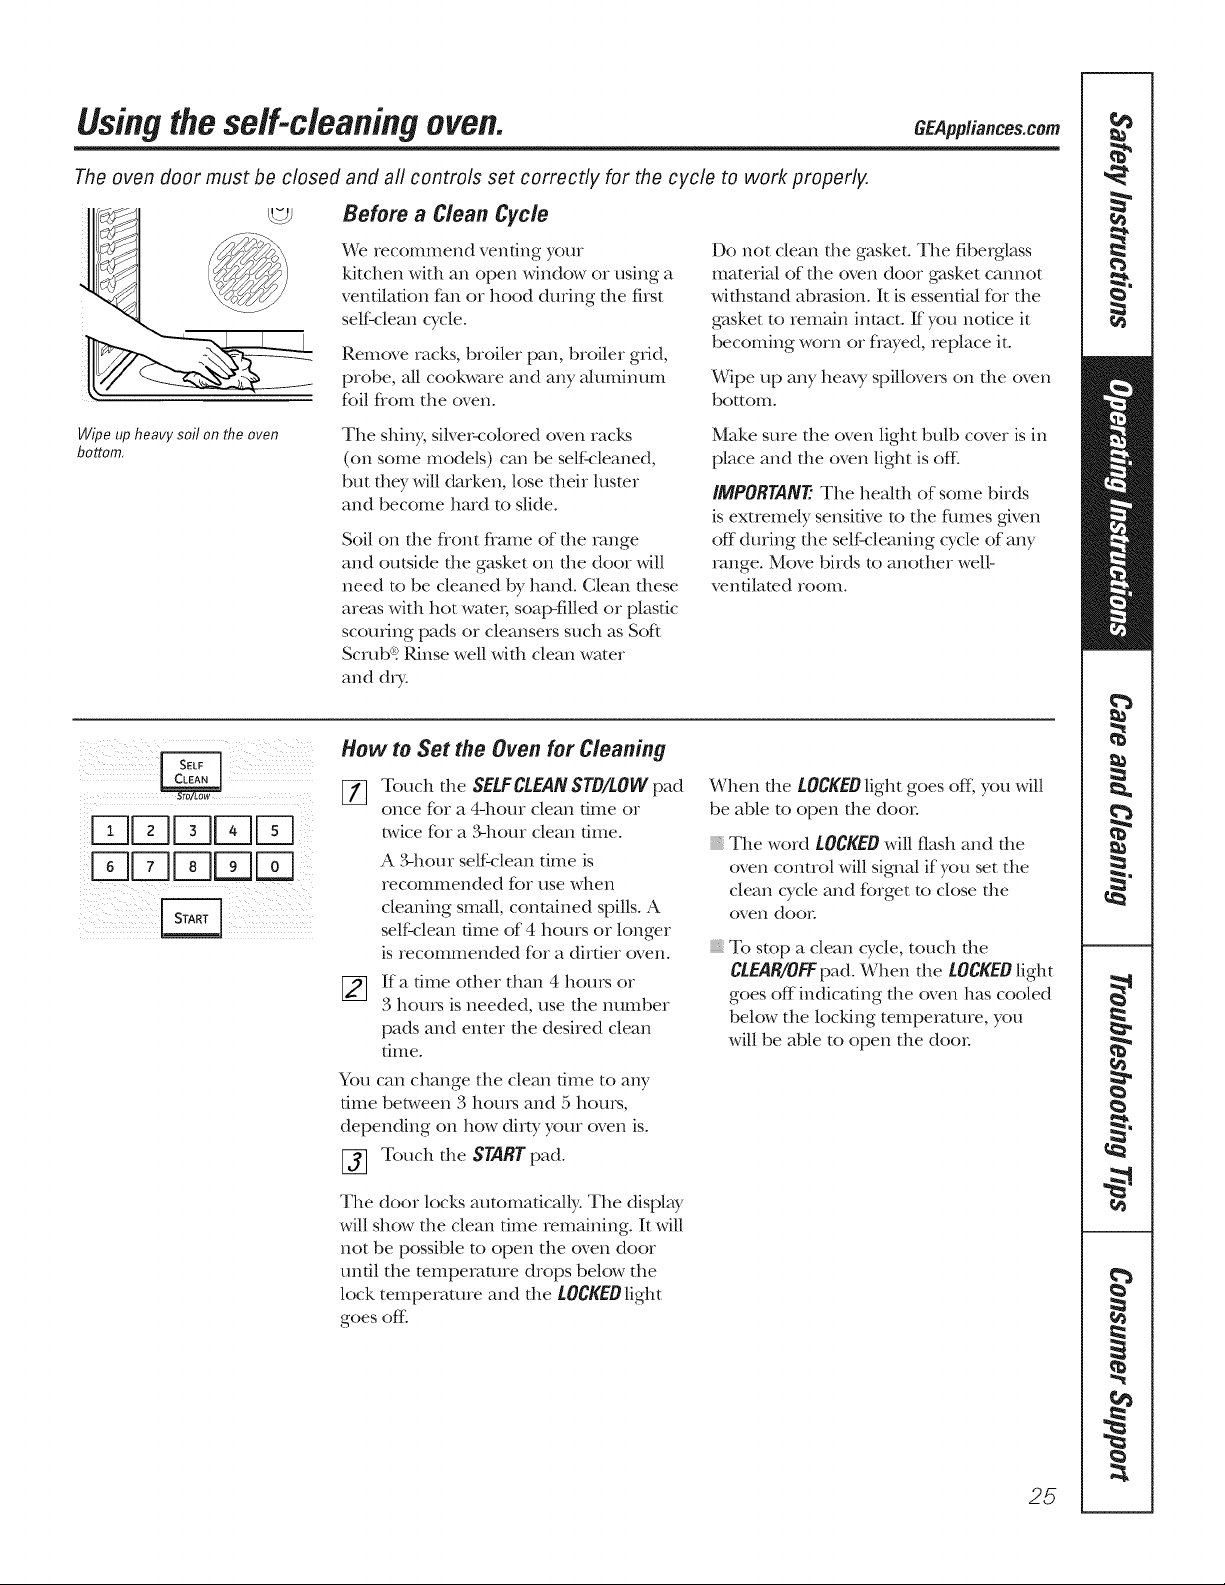
How toSet the Oven forCleaning
[77 Touch the SELFCLEANSTD/LOW pad
once for a 4-hour clean time or
twice for a ,_hour clean dlIle.
A ._ghotn" self clean dine is
recommended for use when
cleaning small, contained spills. A
self clean fillle of 4 hours or longer
is recommended for a dirtier oven.
If a time other than 4 hom_ or
3 hom_ is needed, use the number
pads and enter the desired clean
[ilIle.
You can change the clean time to any
time between 3 hom_ and 5 hom_,
depending on how dirty your oven is.
[_ Touch the STARTpad.
The door locks automatically: The display
will show tlle clean dine remaining. It will
not be possible to open the oven door
until the mmpemmre drops below the
lock temperature and the LOCKEDlight
goes ore
When the LOCKEDlight goes of I; you will
be able to open the door
The word LOCKED will flash and die
oven conuol will signal if you sd file
clean cycle and forget to close file
oven door
To stop a clean cycle, touch file
CLEAR/OFFpad. When die LOCKEDlight
goes off indicating the oven has cooled
below the locking temperature, you
will be able to open the door
25
Usingthe self-cleaningoven.
The oven door must be closed and aft controls must be set correctly for the cycle to work proper/y,
iiFqFqu]U]Fq
iF;qFq[ K35q :?
ii!i
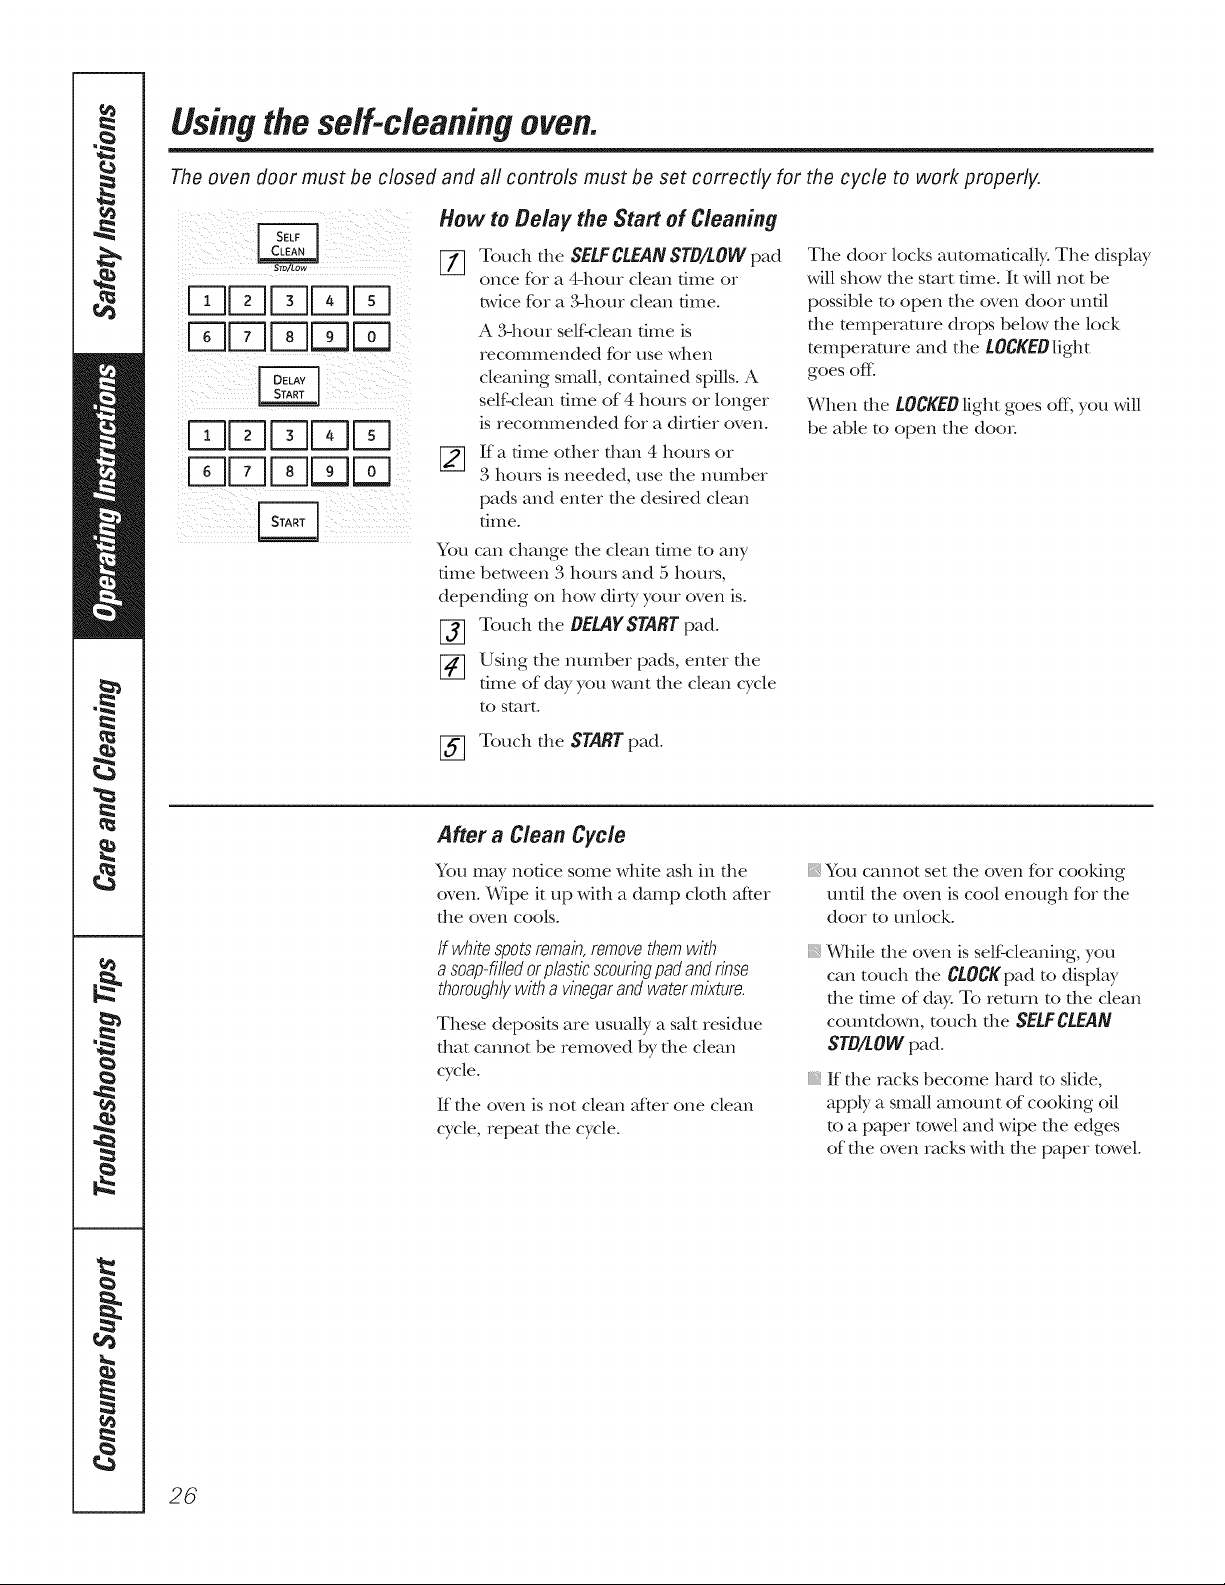
How to Belay the Start of Cleaning
[_ Touch the SELFCLEAN STD/LOW pad
once for a 4-hour clean dine or
h,vice for a ,_hom clean time.
A 3qlour selfkflean dine is
recommended for use when
cleaning small, contained spills. A
self'clean dine of 4 hours or longer
is recommended Kw a dirtier oven.
[]
If a time other than 4 hours or
3 hom_ is needed, use the number
pads and enter the desired clean
{ilIle.
You can change the clean time to any
time between 3 hours and 5 hom_,
depending on how dirty your oven is.
[-_ Touch the DELAYSTARTpad.
[_] Using the number pads, enter the
time of day you want the clean cycle
to start.
The door locks automadcNly: The display
will show the start time. It will not be
possible to open the oven door until
the temperature drops below the lock
mmpemmre and the LOCKEOlight
goes ore
When the LOCKEDlight goes off, you will
be able to open the doo_:
[_] Touch the START pad.
After a Clean Cycle
You may notice some white ash in the
oven. Wipe it up with a damp cloth after
the oven cools.
If white spotsremain,removethemwith
a soap-filledorplasticscouringpadandrinse
thoroughlywitha vinegarandwatermixture.
These deposits are usually a salt residue
that cannot be removed by the clean
cycle.
If the oven is not clean alter one clean
cycle, repeat the cycle.
}_ You cannot set the oven for cooldng
until the oven is cool enough for the
door to unlock.
While die oven is self cleaning, you
can touch the CLOCKpad to display
the time of day. To return to the clean
countdown, touch the SELFCLEAN
STD/LOW pad.
If die racks become hard to slide,
apply a small amount of cooldng oil
to a paper towel and wipe the edges
of the oven racks with the paper towel.
26
Special features of your oven control. CEA,plia,ce_.com
Yournew touch pad control has additional features that youmay choose to use. The foflowing are thefeatures
and how you may activate them.
The special feature modes can onlybe activated while thedisplay isshowing thetime ofday. They remain
in thecontrol's memory until thesteps are repeated.
When thedisplay shows your choice, touch the $TARTpad. The special features will remain in memory after
a power failure, except for the Sabbath feature, which will have tobe reset.
ii !
/_i _i _,_ i i _ i_i_
! i )il¸ _ ! i ¸i
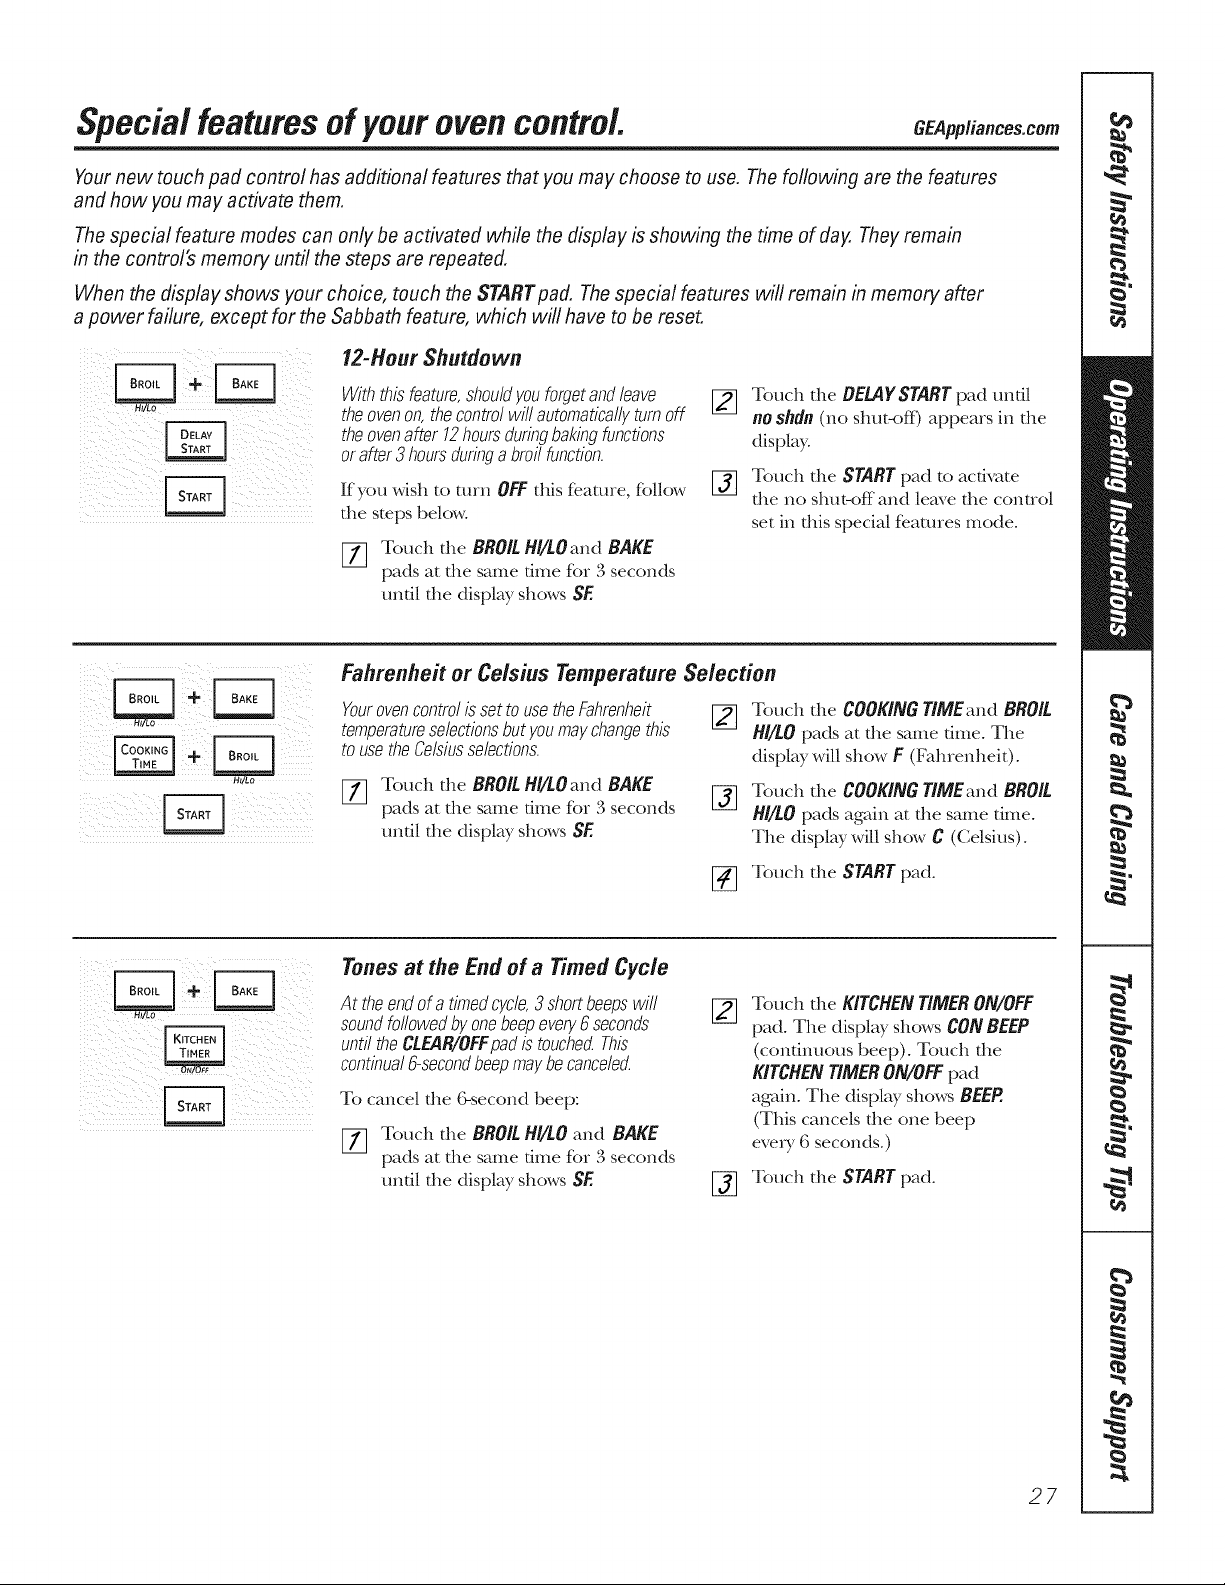
12-Hour Shutdown
Withthisfeature,shouldyouforgetandleave
theovenon,thecontrolwill automaticallyturnoff
theovenafter 12hoursduringbakingfunctions
orafter3 hoursduringa broilfunction.
If you wish to mrn OFF this reaLme, fbllow
the steps below.
[77 Touch the BROIL H//tOand BAKE
pads at the same time for 3 seconds
until the display shows SF.
_q
%
Touch the BELAYSTART pad undl
no shdn (no shut<_ff) appears in the
display°
Touch the START pad to acdvate
the no shut-off and leave the control
set in this special fe.amres mode.
Hi Lo
E_
Fahrenheit or Celsius Temperature Selection
Yourovencontrolis setto usetheFahrenheit
temperatureselectionsbutyoumaychangethis
to usetheCelsiusselections.
[77 Touch the BROIL H//tOand BAKE
pads at the same time for 3 seconds
until the display shows SE
_q
%
Touch the COOKING TIMEand BROIL
/'///tO pads at the same dine. The
display will show F (Fahrenheit)°
Touch the COOKING T/MEand BROIL
H//LO pads again at the same time.
The display will show C (Celsius)°
[_ Touch the START pad.
i_iii_iiiill_i_i_;i!ii_,ii_ii_!iiiii_i!iii_!_i!_
i i i
Tones at the End of a Timed Cycle
Attheendof a timedcycle,3shortbeepswill
soundfollowedby onebeepevery6 seconds
until theCL£4R/OFFpadis touchec_This
continual6-secondbeepmaybecanceled.
To cancel the (bsecond beep:
[77 Touch the BROIL Hi/tO and BAKE
pads at the same time for 3 seconds
until the display shows SE
Touch the KITCHEN TIMERON/OFF
pad. The display shows CON BEEP
(continuous beep) oTouch the
KITCHEN TIMERON/OFF pad
again. The display shows BEEP.
(This cancels the one beep
every 6 seconds.)
[_ Touch the START pad.
27
Special features ofyour oven control
m/Lo
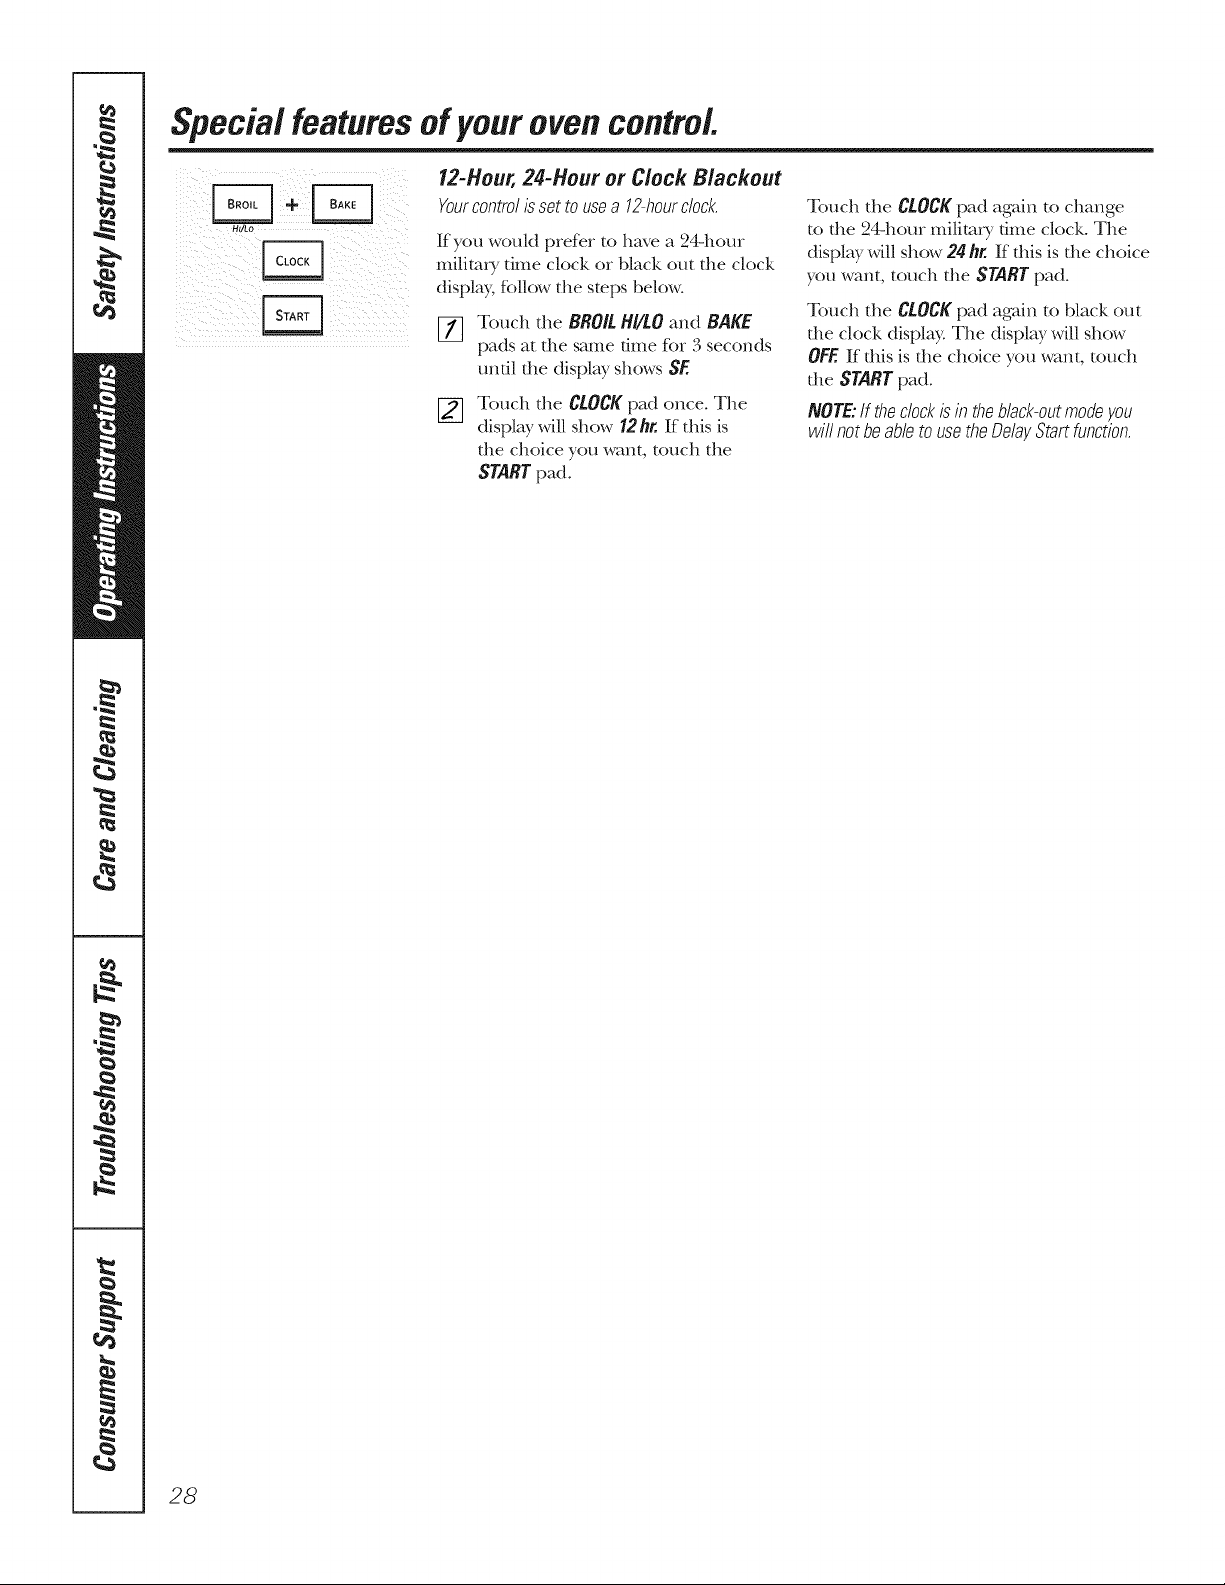
12-Hour,24-Hour or Clock Blackout
Yourcontro/ is settouse a 12-hourdock,
If you wouM prefer to have a 24-hour
military dine clock or black ()tit tile clock
display, R)llow tile steps below°
[] Touch the BROILH//LO and BAKE
pads at the same time for ,'3seconds
until tile display shows SE
Touch tile C!.OCKpad once. The
display will show 12h_ If this is
tile choice you want, touch tile
START pad.
Touch tile CLOCKpad again to change
to file 24-hour milimi y time clock. The
display will show 24 hr. If this is tile choice
you want, touch file START pad.
Touch tile Ci-OCK pad again to black ()tit
die clock display. Tile display will show
OFF.If this is the choice you want, touch
file START pad.
NOTE:If theclock isin theblack-out modeyou
wiflnotbeable tousetheDelay Startfunction.
28
GEApp/iances.com
MULTJII RACK
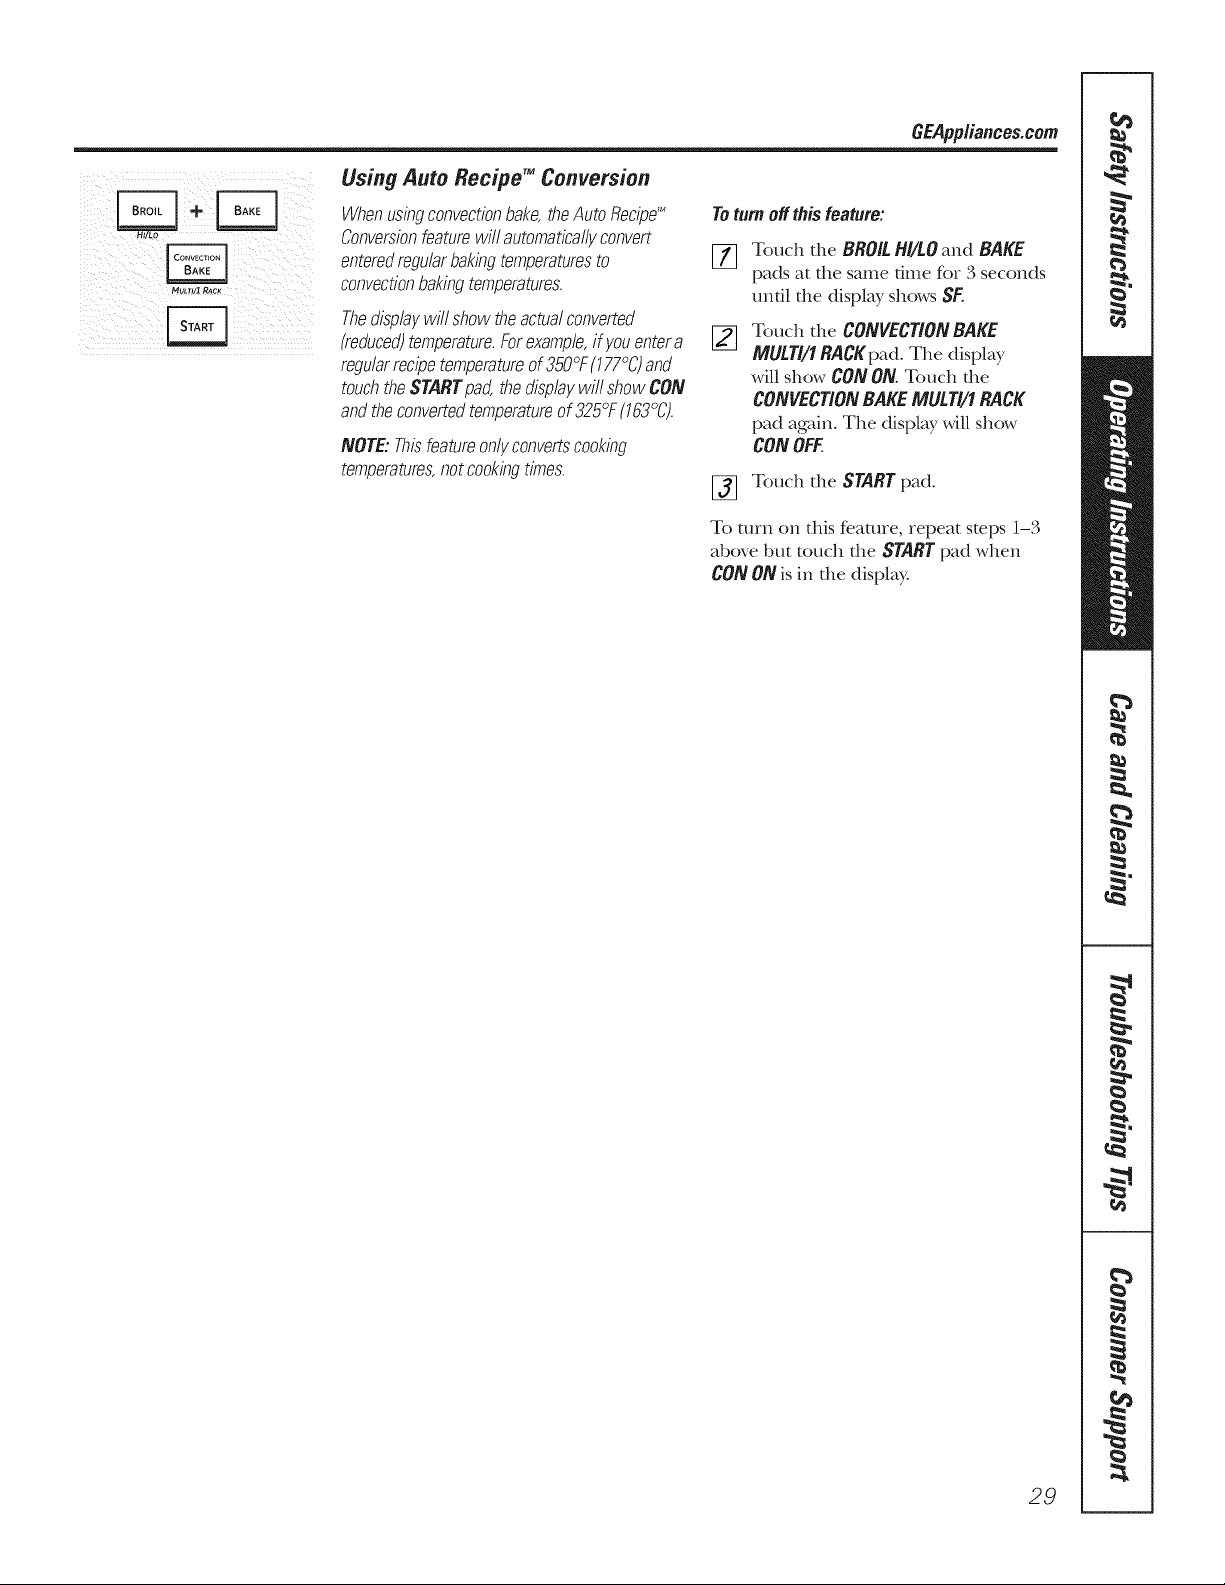
Using Auto Recipe TM Conversion
Whenusingconvectionbake,theAutoRecipe'_
Conversionfeaturewill automaticallyconvert
enteredregularbakingtemperaturesto
convectionbakingtemperatures.
Thedisplaywillshowtheactualconverted
(reduced)temperature.Forexample,if youentera
regularrecipetemperatureof350°F(177°C)and
touchtheSTARTpad,thedisplaywill showCON
andtheconvertedtemperatureof 325°F(163°C).
NOTE:Thisfeatureonlyconvertscooking
temperatures,notcookingtimes.
Toturnoff this feature:
[]
Touch tile BROILH//LOand BAKE
pads at tile same time for 3 seconds
until tile display shows SF.
Touch tile CONVECTIONBAKE
MULTI/1RACKpad. Tile display
will show CON ON.Touch die
CONVECTIONBAKEMULTI/fRACK
pad agahl. Tile display willshow
CONOFF.
Touch tile START pad.
To turn on this feature, repeat steps 1l-3
above but touch tile STARTpad when
CON ON is ill tile display.
29
Using theSabbathFeature.
(Designed for use on the Jewish Sabbath and Holidays.) (on some models)
TheSabbathfeature can be used for baking/roastingonly.It cannot be usedforconvection,broiling, self-cleaningor
DelayStart cooking.
NOTE:Theovenlightcomesonautomaticallywhenthedooris openedandgoesoffwhenthedoorisclosed.Thebulbmayberemoved.SeetheOven
LightReplacementsection.Onmodelswithalightswitchonthecontrolpanel,theovenlightmaybeturnedonandlefton.
ii;¸ bSr-q ¸
i ii ii Fq iiiiiii ii ilI
/ i; /i
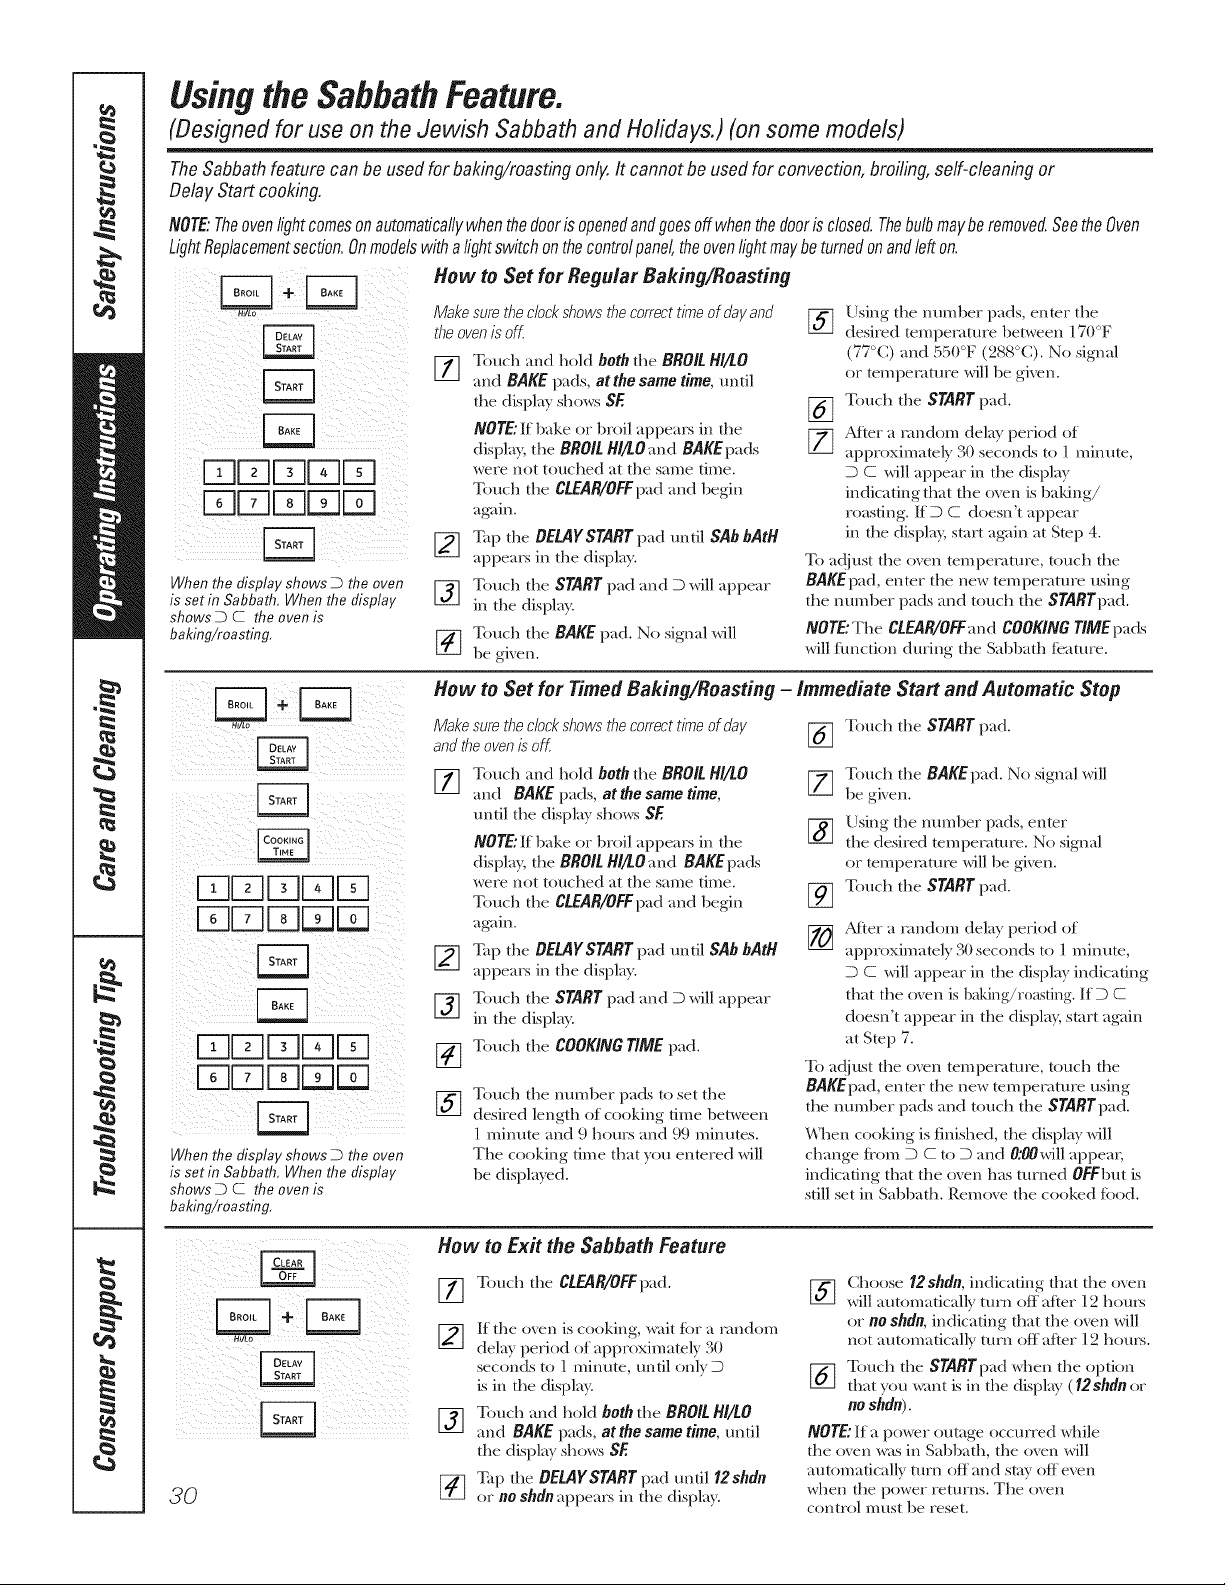
When the display shows D the oven
is setin Sabbath, When the display
shows D C the oven is
baking/roasting,
How toSet for Regular Baking/Roasting
Make sure the dock showsthe correct timeof day and
the ovenisoff.
Ilq Touch and hold beth tile BROR HI/[O
ill
and BAKE pads, at the same time, until
tile display shows SE
NOTE:If bake or broil appears in the
displa_ tile BROIL Hl,/LOand BAKE pads
were not touched at tile same time.
Touch tile CLEAR/OFFpad and l)egin
aKain.
_] ap the OELAYSTARTpad tmtil SAb bath
appears in the display.
Touch tile STARTpad mid D will appear
in tile displa}_
[_ ouch the BAKEpad. No signal will
be gix en.
%
%
Using tile number pads, enter tile
desired temperature between 170°F
(77°C) and 550°F (288 C). N( signal
or tern perature will be given.
Touch tile START pad.
Atter a nmdom delay period of
approximately 30 seconds to 1 minute,
D C will appear in tile display
indicating that the oven is baking/
Teas/inT. ffD C doesn't appear
in tile displa}, start aKain at Step 4.
To adjust tile oven temperature, touch the
BAKEpad, enter the new temperature using
tile numl)er pads and touch tile STARTpad.
NOTE."Tile CLEAR/OFFend COOKING TIME pads
will flmcfion during tile Sabbath t(ature.
When the display shows D the oven
is setin Sabbath, When the display
shows D C the oven is
baking/roasting,
How toSet for Timed BaMng/Roasting - Immediate Startand Automatic Stop
Make sure the dock showsthe correct timeof day
and the ovenisoK
F_ Touch and hold both tile BROIL HI/tO
i/i
and BAKE pads, atthe same time,
until tile display shows SE
NOTE: If bake or broil appears in the
display, tile BROIL H/Iq.Oand BAKEpads
were not touched at tile same time.
Touch tile CLEAR/OFFpad and 1)egin
again.
_i_ Tap the OELaYSTARTpad until SAbbath
appears in the display.
E_ ouch tile STARTpad mid D will appear
in tile displa}_
V_ Touch tile COOKINGTIMEpad.
I7-t
%
Touch tile number pads to set the
desired length of cooking time between
] minute and 9 hours and 99 minutes.
Tile cooking time that you entered will
be displayed.
Touch tile START pad.
77 Touch tile BAKEpad. No signal will
be given.
[-_ Using the nmnber pads, enter
the desired tempentture. No signal
or temperature will be given.
[_ Touch tile STARTpad.
After a nmdom delay period of
approximately 2_}seconds to 1minute,
D C will appear in the display indicating
that the oven is baking/roasting. If D C
doesn't appear in tile displa}, start again
at Step 7.
To adjust tile oven ten_pemture, touch the
BAKEpad, enter tile new temperature using
the number pads and touch tile STARTpad.
When cooking is finished, the display will
change flom D C to D and 0:00will appear,
indicating that the o_en has turned OFF1)ut is
still set in Sabbath. Remoxe tile cooked toed.
How toExit the Sabbath Feature
i ii i
!ii/ii ii ii (
30
%
Touch tile CLE4R/OFFpad.
If tile o_,en is cooking, wait tOTa random
delay period of approximately 30
seconds to 1 minute, until only D
is in the displa}_
Touch and hold both the BROIL HI/LO
and BAKE pads, at the same time, until
tile display shows SE
Tap the BELAYSTART pad tmti112shdn
or no shdn appears in tile display.
_-_ Choose 12shdn, indicating that the oxen
will automatically turn off after ]2 hours
or no shdn, indicating that the oven will
not automatically mrn off after ]2 hours.
Touch tile STARTpad when tile option
[_ that you _<mt is in tile display (12sMn or
no shdn).
NOTE: If a power outage occurred while
the oven was in Sabbath, tile oven will
automatically mrn off and stay off even
when tile power returns. Tile oven
control must be reset.
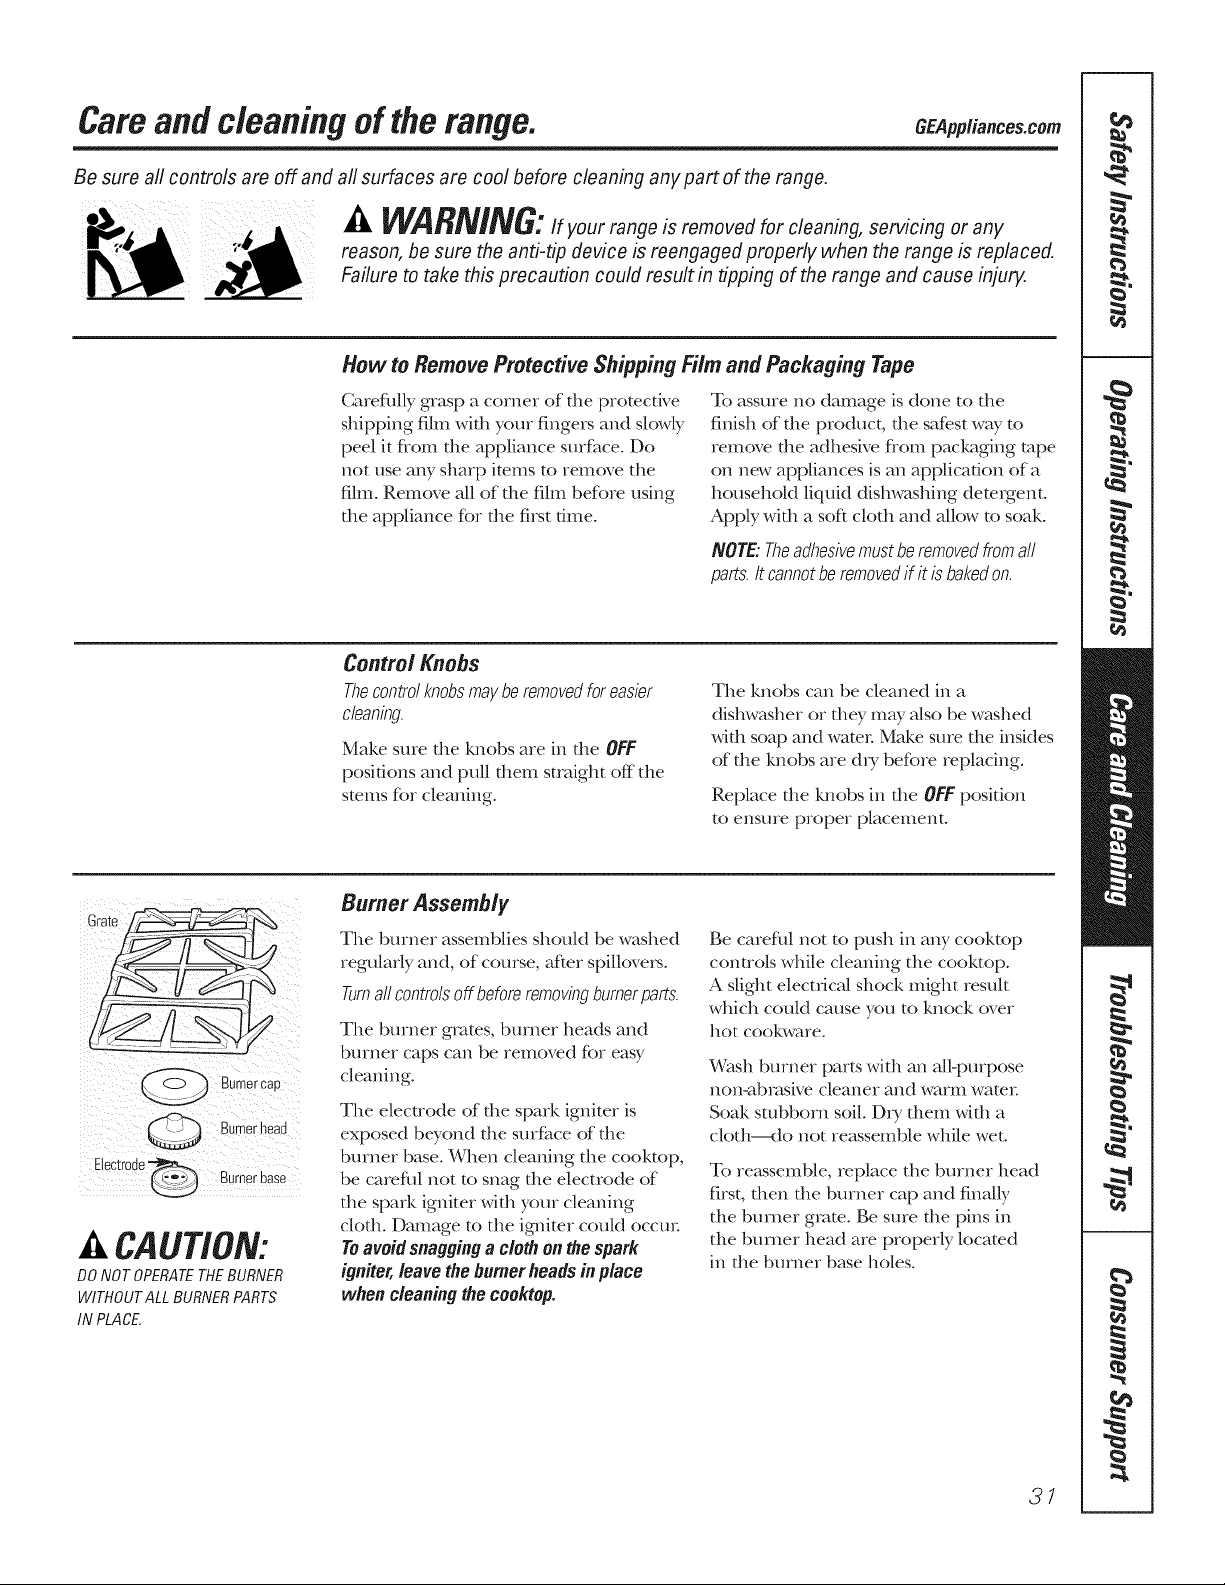
Careandcleaningoftherange. C Appliances.com
Be sure aft controls are off and all surfaces are cool before cleaning anypart of therange,
" A WARNING:If ourrange is removed for cleaning, servicing or any
reason, be sure theanti-tip device is reengaged properly when therange is replaced,
Failure totake this precaution could result& tipping of therange and cause injury,
How toRemove Protective Shipping Film and Packaging Tape
Careflflly grasp a corner of die protective
shipping film with yore fingers and slowly
peel it flom the appliance suxface. Do
not use any sharp imms to xem(we the
film. Remove Ml of the film before using
the appliance for the first time.
To assure no damage is done to die
finish of die product, rite safest way to
remove the adhesive flom packaging tape
on new appliances is an application of a
household liquid dishwashing demrgent.
Apply with a soft cloth and Nlow to soak.
NOTE:Theadhesivemustberemovedfromall
parts.Itcannotberemovedifitis bakedon.
Control Knobs
Thecontrolknobsmaybe removedforeasier
cleaning.
Make sure die kabobs are in die OFF
positions and pull fllem smdght off the
smms fbr cleaning.
The knobs can be cleaned in a
dishwasher or dley may a/so be washed
with soap and wateI: Make sore the insides
of the knobs are dxT before replacing.
Replace die lu_obs in die OFF posidon
[o ensure proper placement.
r
Burnercae
Burnerhead
Electroue_.
Burnerbase
A CAUTION:
DONOTOPERATETHEBURNER
WITHOUTALLBURNERPARTS
INPLACE
Burner Assembly
The burner assemblies should be washed
regularly and, of course, after spillovex_.
Turnallcontrolsoff beforeremovingburnerparts.
The burner grates, burner heads and
burner caps can be removed for easy
cleaning.
The elecuode of die spark igniter is
exposed beyond die surface of die
burner base. When cleaning tlle cooktop,
be carefifl not to snag file electrode of
the spark igniter with yore cleaning
cloth. Damage to the igmimr could occur
Toavoidsnagging a cloth onthe span
igniter, leave theburner heads in place
when cleaning/the cooktop.
Be careflfl not to push in any cooktop
conuols while cleaning the cool<top.
A slight electrical shock might result
which could cause you to knock over
]lot cookware.
Wash burner parts widl an a/l-purpose
xloxl-abrasive cleaner and _,vilxi?Q_,va[eI:
Soak stubborn soil Dxy them with a
cloth---<to not reassemble while wet.
To xe;ksseInble, replace the burner head
first, then the burner cap and finally
the burner grate. Be sure the pins in
the burner head are properly locamd
in the burner base holes.
31
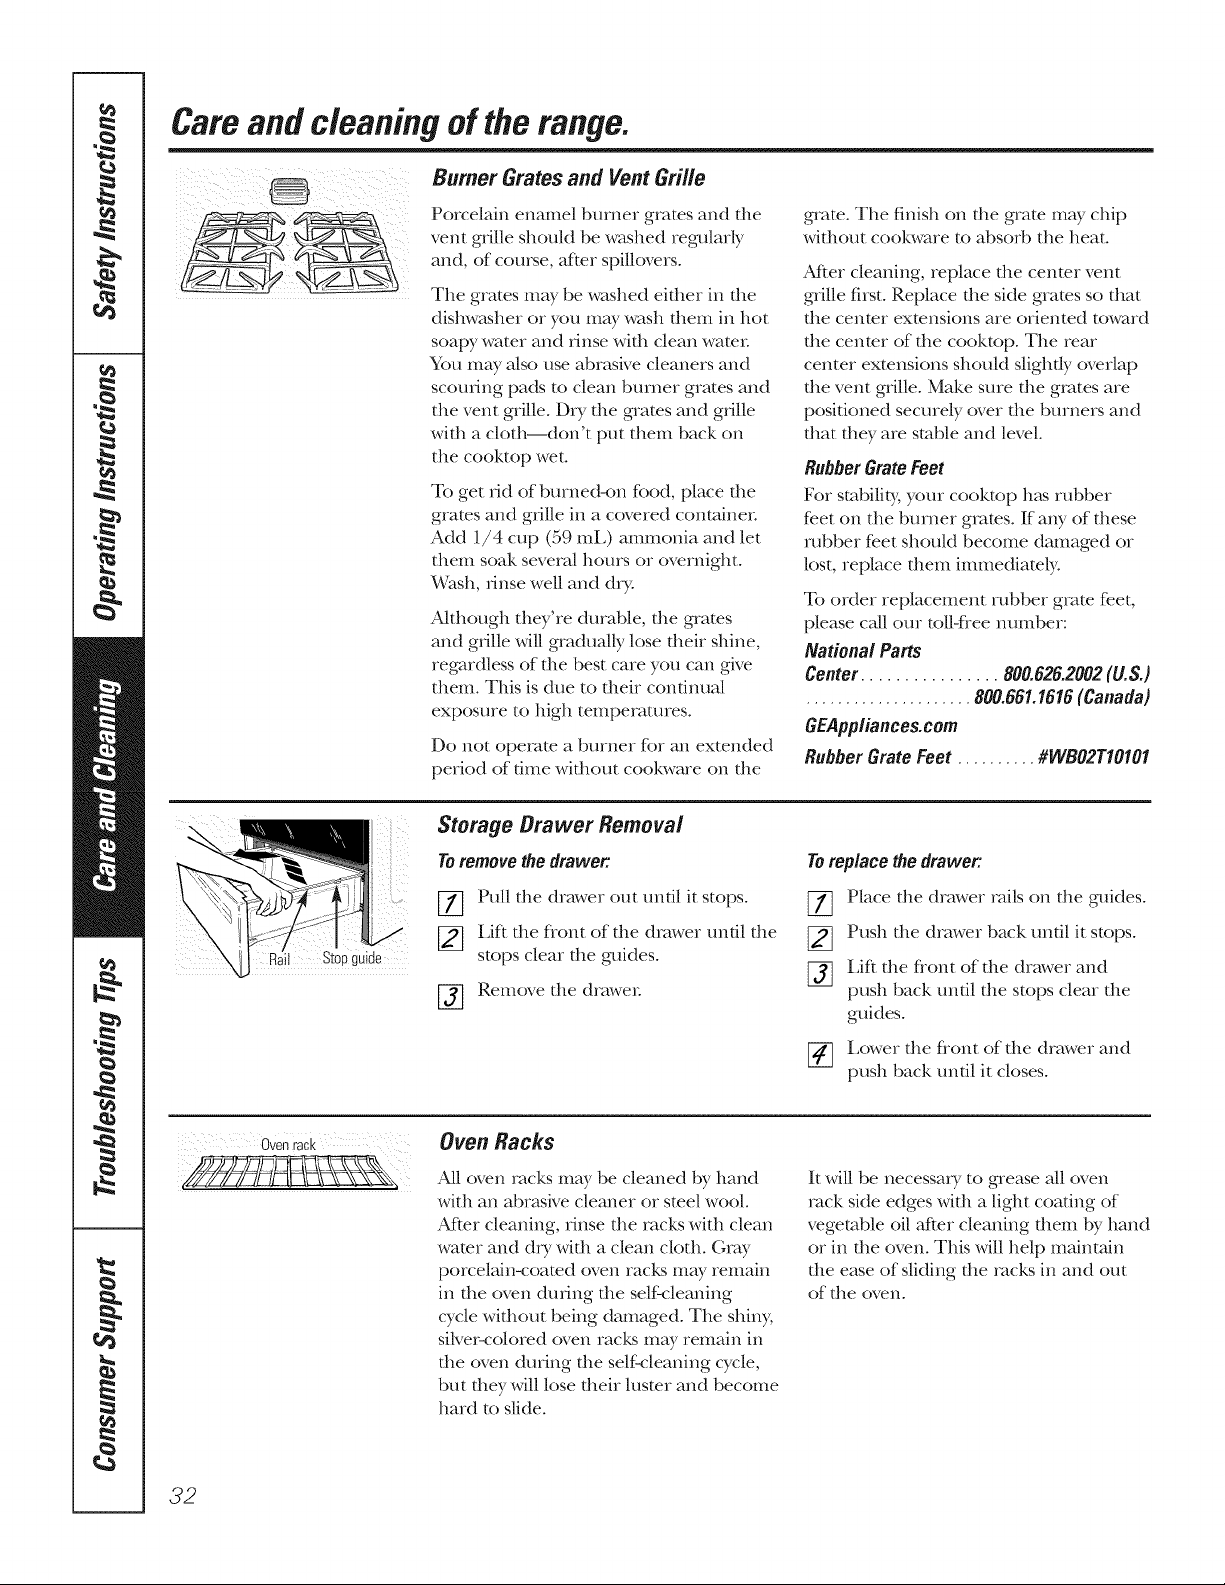
Careandcleaningoftherange.
Burner Gratesand Vent Grille
Porcelain enamel burner grates and tile
vent grille should be washed regularly
and, of coulee, aRer spillovers.
The grates may be washed either ill tile
dishw_ksher or you may wash tbenl ill bet
soapy water and rinse with clean wami:
You may Mso use abrasive cleaners and
scouiJng pads to clean burner grates and
the vent grille. Dry the grams and grille
with a cloth--don't put them back on
tile cooktop wet.
To get ridof burned-on fbod, place die
grams and giille ill a covered conmineL
Add 1/4 cup (59 mL) ammonia and let
thenl soak severn hours or overniglK.
_!asll, IJnse well and dry.
Although they're durable, file gqates
and gIille will graduMly lose their shine,
regardless of the best care you call give
them. This is due to their continual
exposure to high temperatures.
Do not operate a burner for all extended
period of time without cookware on tile
gnate. Tile finish on tile grate may chip
without cookware to absorb tile beat.
M_er cleaning, replace file center vent
g_ille first. Replace file side grates so that
tile cenmr exmnsions are oriented toward
tile cenmr of tile cooktop. Tlle rear
center exmnsions should sligh@ overlap
the vent grille. Make sure tile gIates are
positioned securely over tile burners and
that they are stable and level.
Rubber Grate Feet
For stability, your cooktop h_Ls rubber
feet on the burner glares. If any of these
robber feet should become damaged or
lost, replace them immediamly.
To order replacement rubber glare feet,
please ca/1 our toll-flee number:
National Parts
Center ................ 800.6262002 (U.SJ
..................... 800.66f. 1616 (Canada)
GEPppliances.com
Rubber Grate Feet .......... #WBO2TIOIOf
Ip guide
Storage Orawer Removal
Toremove the drawer:
[_] Pull the drawer out tmdl it stops.
[_] Lift tile front of tlle drawer until tile
stops clear the guides.
[_] Remove tile draweI:
Toreplacethedrawer:
[77 Place tile drawer rails on tile guides.
_] Push tile drawer back tmfil it stops.
[_ Lif_ tile front of the drawer and
push back tmfil tile stops clear tile
guides.
[_ Lower the flont of tile drawer and
push back until it closes.
ovenrack Oven Racks
All oven lacks may be cleaned I)5,band
with all abrasive cleaner or smel wool.
After cleaning, rinse tile racks with clean
wamr and &Y with a clean cloth. Gray
porcelain-coated oven racks mW remain
ill tile oven during tile selffcleaning
cycle without being daumged. The shiny,
silver-colored oven racks may remain ill
the oven during the self:cleaning cycle,
but they will lose their lusmr and become
hard to slide.
It will be necessai y to gqease M1 oven
lack side edges Mill a light coating of
vegetable oil after cleaning them I)5' band
or ill tile oven. Tiffs will help maintain
tile ease of sliding tile lacks ill and out
of tile oven.
32

GEApp/iances.com
Receutade
Socket
/
/
Glasscover
(onsomemodels)
i i i i
_ _,_ _,_ ,i_ iii_iii _i_i
i i i
GlassCover
(onsomemodels)
Oven Light Replacement (onsomemodels)
A WARNING:SHOCKDR
BURN HAZARD. Before replacing oven
light bulb, disconnect the electrical power
to the range at the main fuse or circuit
breaker panel. Failure to do so may result
in electric shock or burn.
A CAUTION:BURNHAZARD
Theglass cover and bulb should be
removed when cool. Touching hot glass
with bare hands or a damp cloth can
cause burns.
Toremove:
[]
Turn tile glass cover
counterclockwise 1/4 turn until
tlle robs of the glass cover clear the
grooves of tile socket. Wearing latex
gloves may ofler a better grip.
[] Using gloves or a (h T cloth, remove
the bulb by pulling it straight out.
Toreplace:
[[_] Use a new 120/130-volt halogen
bulb, not to exceed 50 watts.
Replace the bulb with the same type
of bulb that was removed. Yore
model will have one of the two types
shown on the lefL To demrmine
the correct replacement bulb, check
the bulb mmlina/s. Bulbs with 2
straight pin terminals are G6.35
bulbs. Bulbs with 2 looped mrmina/s
are (7;9 bulbs. (Be not interchange.}
Be sure the replacement bulb is
rated 120 volts or 130 volts (NOT
12 volts).
Usegloves
orcloth
Using gloves or a dry cloth, remove
the bulb flom its packaging. Do not
touch the bulb with bare fingers.
Oil flom skin will damage the bulb
and shorten its life..
Push the bulb straight into the
receptacle all the way.
Place the robs of the glass cover into
the grooves of the socket. Tmn the
gk_ss cover clockwise :l/4 turn.
For improved lighdng inside the
oven, clean die gk_ss cover
flequently using a wet cloth. This
should be done when the oven is
complemly cool.
[_ Reconnect electrical power to
the range.
Wire coverholder
Oven Light Replacement (onsomemodels)
Be sure to let the light cover and bulb
cool completely:
To remove the COVER
%
Hold a hand trader the cover so
• p
it doesn t fall when I eleased. ¼,1th
fingers of the sane hand, firmly
push back the wire cover hokte_:
i JR off the cover
Do not removeanyscrewsto remove thecover
_] Replace bulb with a 404vatt
appliance bulb.
Toreplacethecover:
%
Place it into groove of file light
receptacle. Pull whe forward to
the center of the cover undl it snaps
into place.
[_ Connect electrical power to the
range.
33
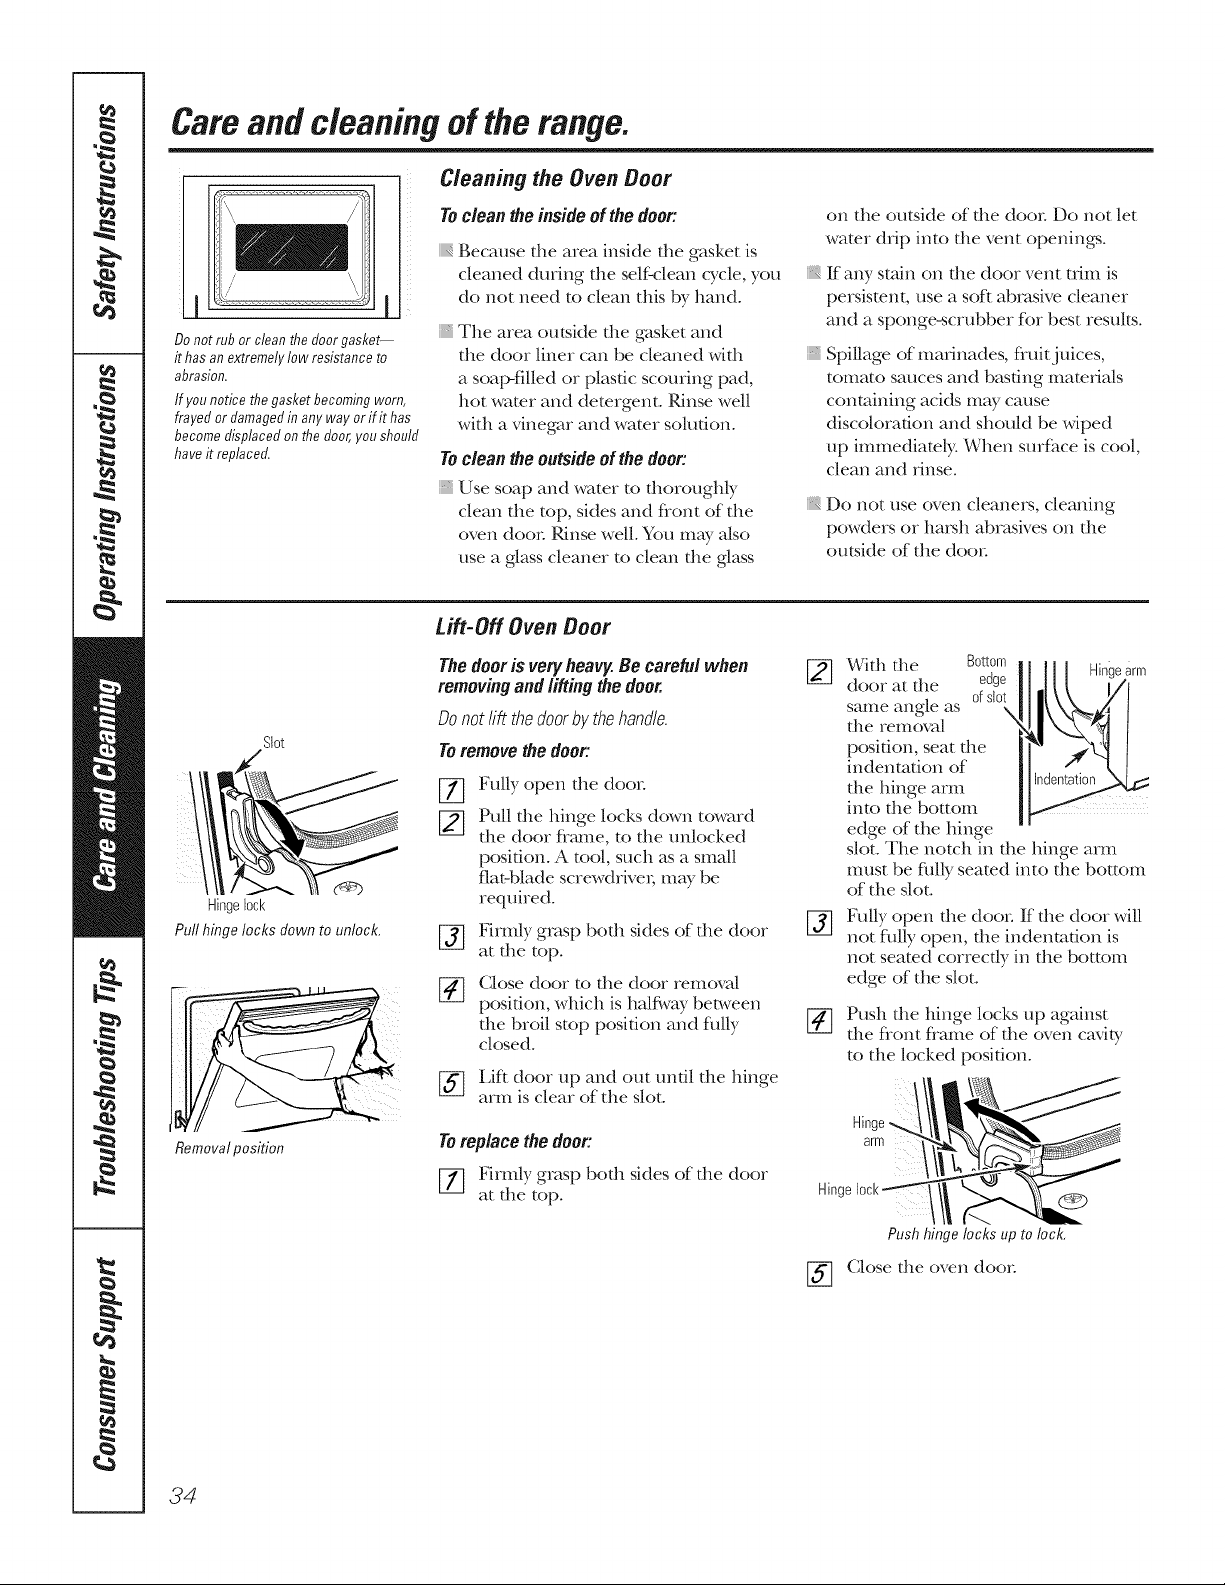
Careandcleaningoftherange.
Do not rub or clean the door gasket--
it has an extremely low resistance to
abrasion.
If younotice thegasket becoming worn,
frayed or damaged in any way or if ithas
become displaced on the door, you should
have it replaced.
C/eening the Oven Door
Todean the inside of the door:
iiiS_
Because tlle area inside tlle gasket is
cleaned during the self'clean cycle, you
do not need to clean this by hand.
The area outside die gasket and
the door liner can be cleaned widl
a seal>filled or plasdc scouring pad,
hot wamr and demrgent. Rinse well
with a vinegar and wamr solution.
To clean the outside of the door:
Use soap and water [o dloroughly
clean the lop, sides and flont of the
oven door Rinse well. You may a/so
use a glass cleaner to clean die glass
iii}i}iiii_
on the outside of die door Do not let
water drip into die vent openings.
If any stain on the door vent tTiIIi is
persistent, use a sol* abrasive cleaner
and a sponge-scrubber fbr best results.
Spillage of marinades, fluitjuices,
tomato sauces and basting materials
containing acids may cause
discoloration and should be wiped
up immediamly. When surface is cool,
clean and rinse.
Do not use oven cleaners, cleaning
powders or ha_h abrasives on die
outside of the door
Slot
Hingeloci<
Pullhingelocksclownto unlock.
Removal position
Lift-Off Oven Door
Thedooris very heavy.Be carefulwhen
removingandliftingthe door.
Donot lift thedoorby thehandle.
Toremovethedoor:
%
%
Fully open die door
Pull die hinge locks down toward
die door flame, to die unlocked
position. A tool, such as a small
flat-blade screwdriver; may be
required°
Firmly grasp both sides of die door
at die top.
Close door to die door removal
position, which is halfi,vaybea,veen
die broil stop position and flflly
closed.
[_ Lif* door up and out undl die hinge
arm is clear of the slot.
Toreplace the door:
[_] Firmly grasp both sides of die door
at die top.
%
Wkh die Bottom earm
door at die edge
same angle as ofslot
X
die removal
position, seat die
indenmtion of
die hinge arIn
into die boKom
edge of die hinge
slot. The notch in the hinge arm
must be flflly seared into the bottom
of the slot.
Fully open die dooI: If die door will
not fhlly open, die indentation is
not seated correcdy in the bottoul
edge of the slot.
Push die hinge locks up against
die flont flame of die oven cavity
to the locked position.
Hinge
arm
Hinge
%
Pushhingelocksup tolock,
Close die oven door
34

GEPpp/iances.com
Stainless Steel Surfaces (onsome models)
Do notuse a steel wool pad;it willscratch
the surface.
To clean die stainless steel surfime,
use warm sudsy water or a stainless steel
cleaner or polish. Ah,vays wipe the surfime
in the direction of the grain. Follow the
cleaner insuucfions for cleaning the
stainless smel surflme.
To inquire about purchasing stainless
smel appliance cleaner or polish, or to
find the location of a dealer or Mabe
Parts Store nearest you, please ca/1 our
toll-flee number:
NationalPartsCenter 1.800.626.2002(U.S.)
1.800.661.1616(Canada)
GEApp/iances.com
Painted Surfaces
Painted surfitces include file top and
sides of file dooh and file drawer flont.
Clean these with soap and wamr or
a vinegar and wamr solution.
Do not use commercial oven cleaners,
cleaning powders, steel wool or harsh
abrasives on any painted surflme.
I
Centervent
Oven Vent
The oven isvented through an opening
in the cooktop under the g_ille.
Never cover the opening with aluminum
foil or any other material. Tiffs would
prevent the oven vent flom working
properly:
Control Panel
If desired,thetouchpadsmaybe turnedoff
beforecleaning.
See the ControlLockout section.
Clean up splatters widl a damp cloflL
You may a/so use a glass cleaner
Remove heavier soil with warm soapy
wamr Do not use abrasives of any kind.
Turnon thetouchpadsaftercleaning.
Ovenfloor
Removable Oven Floor
Toremovethe ovenfloorforeasier cleaning:
-71 Remove the oven door using the
instructions in the Lift-Off OvenDoor
section.
[_ Grasp oven floor at the rear finger
slots on each side, lift it up, push it
back and pull it out.
_]_ Clean the oven floor with warm
soapy water
iMPORTANT:Ah,vays replace the
removable floor before the next use.
35
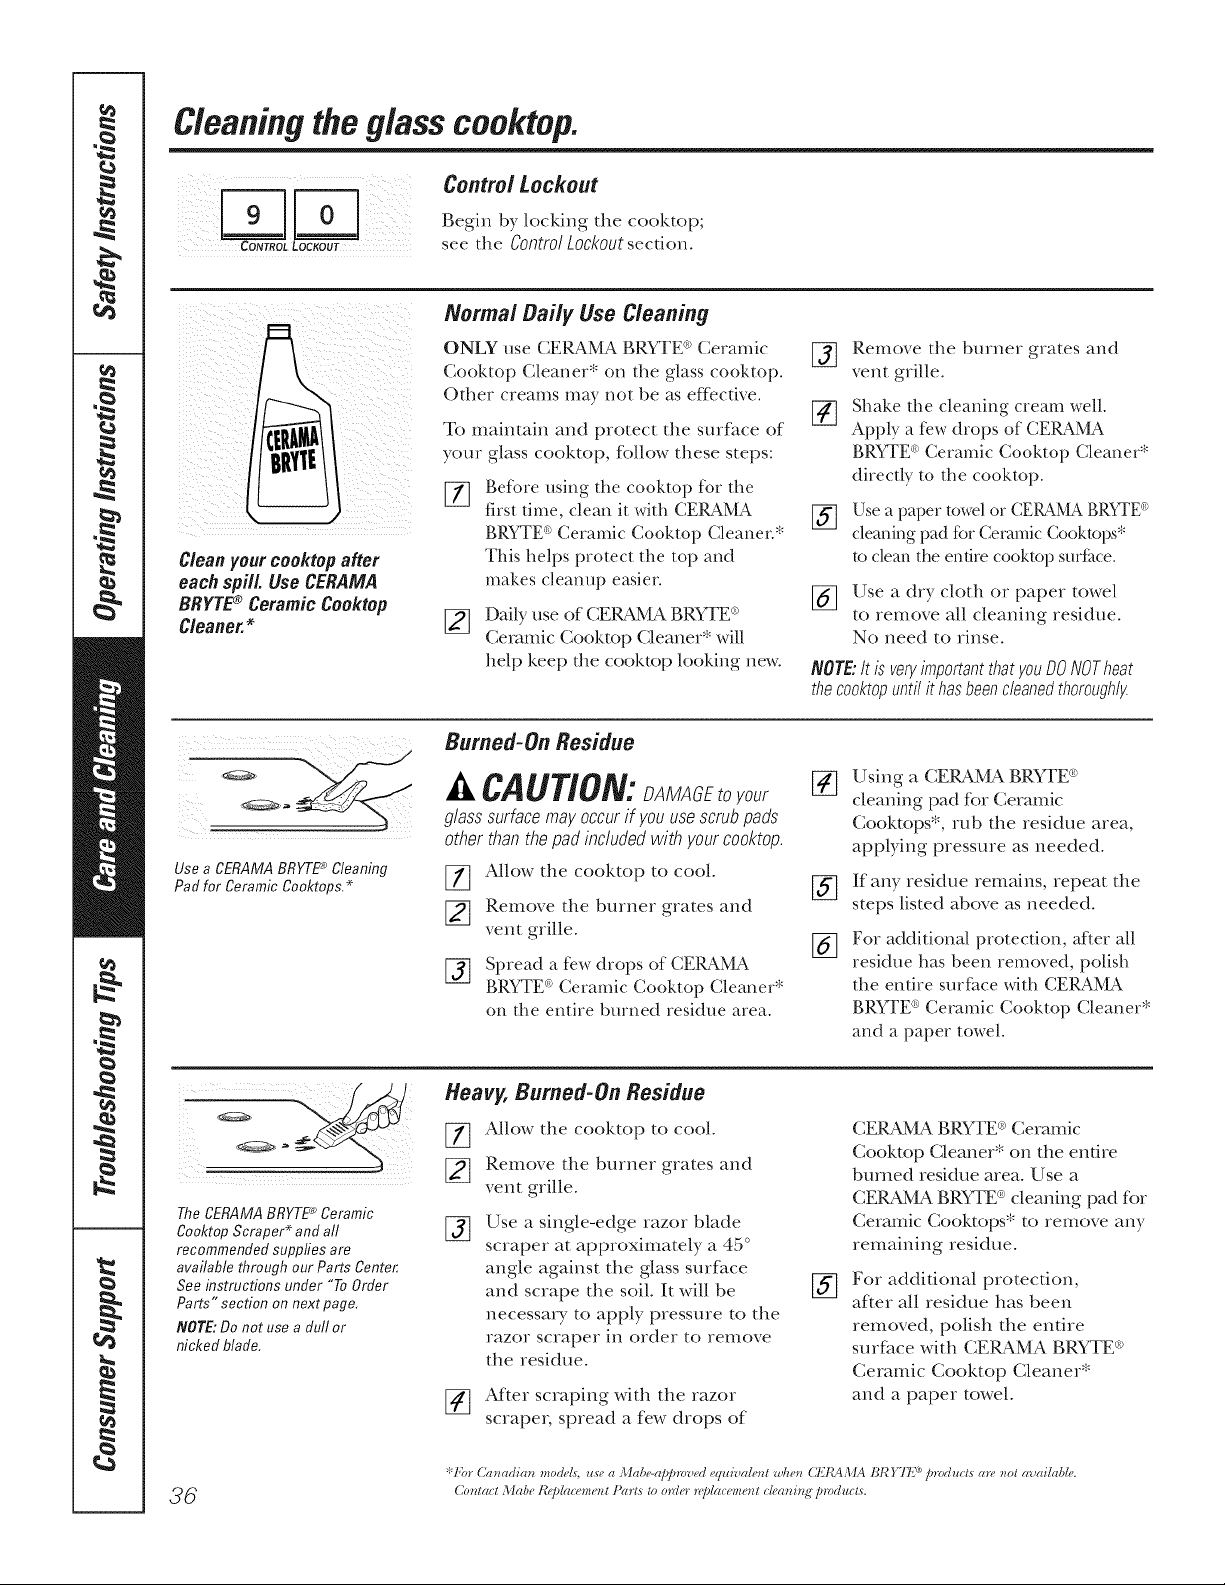
Cleaningthe glass cooktop.
%
Control Lockout
Begin by locking the cooktop;
see the Control Lockout section.
Cleanyour cooktop after
each spill. Use CERAMA
BRYTE® CeramicCooktop
Cleaner.*
Normal Daily Use Cleaning
ONLY use CERAMA BRYTE ®Ceramic
Cooktop Cleaner* on the glass cooktop.
Other creams may not be as effectixe.
To maintain and protect the surface of
your glass cooktop, fbllow these steps:
%
Before using the cooktop for the
first time, clean it with CERAMA
BRYTE° Ceramic Cooktop Cleaner.*
This helps protect the top and
makes cleanup easier.
[_] Daily use of CERAMA BRYTE ®
Ceramic Cooktop Cleaner* will
help keep the cooktop looking new.
[_] Remove the burner grates and
vent grille.
Shake the cleaning cream well.
App b a few drops of CERAMA
BRYTE®Ceramic Cooktop Cleaner*
directl_ to the cooktop.
[_] Usea paper towelor CERAN_ BRSTE®
cleaning pad for Ceramic Cooktops*
to clean the entire cooktop smfime.
[_ Use a dry cloth or paper towel
to remove all cleaning residue.
No need to rinse.
NOTE:It is veryimportantthat_/ouDONOTheat
thecooktopuntilit hasbeencleanedthorough/_
Use a CERAMA BRYTE_*_Cleaning
Pad for Ceramic Cooktops.*
Burned-On Residue
It CAUTION:>MAGftoyour
glasssurface may occur if youusescrubpads
other than thepad included with yourcooktop.
_] Allow the cool<top to cool.
[_ Remove the burner grates and
vent grille. [_]
[_ Spread a few drops of CERAMA
BRYTE ®Ceramic Cooktop Cleaner*
on the entire 1)urned residue area.
Using a CERAMA BRYFE ®
cleaning pad for Ceramic
Cooktops*, rub the residue area,
applying pressme as needed.
If any residue remains, repeat the
steps listed above as needed.
For additional protection, after all
residue has been removed, polish
the entire smfitce with CERAMA
BRYTE ® Ceramic Cooktop Cleaner*
and a paper towel.
TheCERAMABRYTE_ Ceramic
CooktopScraper* and all
recommended suppfiesare
available through our Parts Center,
See instructions under "To Order
Parts" section on nextpage.
NOTE:Do not useadull or
nicked blade.
Heavy,Burned-On Residue
%
Allow the cool<top to cool.
Remove the burner grates and
vent grille.
Use a single-edge razor blade
scraper at approximately a 45 °
angle against the glass surface
and scrape the soil. It will be
necessary to apply pressme to the
razor scraper in order to rexllove
the residue.
[_] After scraping with the razor
scrapex; spread a few drops of
CERAMA BRYTE ®Ceramic
Cooktop Cleaner* on the entire
burned residue area. Use a
CERAMA BRYTE ®cleaning pad for
Ceramic Cool<tops* to remove any
remaining residue.
For additional protection,
after all residue has been
removed, polish the entire
surface with CERAMA BRYTE ®
Ceramic Cooktop Cleaner*
and a paper towel.
"t;br Crmadian modds, *zsea :_labe-appro*ued eq*dvalenl zx,lz_ CI:R_i IA BR} ll_ / _ducls an, _ot available.
3 _ Conlact Mabe R@lacement Paris to o_der _'/daceme_l cleaning" prod_cts.
Glasssurface--potentia/ forpermanentdamage, aappliancescom
Sugaryspillovers(suchas
jellies, fudge,candy,syrups)
ormeltedplasticscancause
pittingof thesurfaceof your
cooktop(notcoveredby the
warranty)unlessthespill is
removedwhile still hot.Special
careshouldbe taken when
removinghotsubstances.
Besuretouse a new,sharp
razorscraper.
Do notuse a dull ornicked
blade.
Damage fromSugary Spills and Melted Plastic
[_] Turn off all surfi_ce units and, with
an oven mitt, remove hot pans and
grams.
[_ Any remaining spillover shoukt be
left until tile smf_me of the cooktop
h_s cooled.
[_] Wearing an oven mitt:
a. Use a single-edge razor blade
scraper (CERAMA BRYTE®
Ceramic Cooktop Scraper*) to
move the spill to a cool area on
tile cooktop.
b. Remove file spillwith
paper towels.
Don't use tile surf_tce units again
undl all of the residue has been
comple[ely removed.
NOTE:ffpitting orindentationin theglass
surfacehasalreadyoccurred,thecooktopglass
will haveto bereplaced.In thiscase,servicewill
benecessar_
To Order Parts
To order CERAMA BRYTE ® Ceramic
Cooktop Cleaner and die cooktop
scraper (or Mabe-approved equivalent
product in Canada), please ca/1 our
toll-flee nmnber:
NationalParts
Center ............... 800.626.2002(U.S.)
800._;f.f6f6 (Canada)
GEPppliances.com
CERAMABRYTE®Ceramic
CooktopCleaner............ //WX 10)(300
CERAMABRYTE® Ceramic
CooktopScraper ........... //WX 10)(0302
Kit.......................... //WB64X5027
(Kitincludescreamandcooktopscraper)
CERAMABRYTE® CleaningPadsfor
CeramicCooktops_ ......... _ WX10X350
';:Pbr Canadia_ mode& us(, a Mab(_-a/q_vv_'d _'r/_iva/e_t when CFJ?AMA BR VFlf _'_p_vducts an_ not available.
Contact Mabe 15,pl<+c_,ment['arts to order r@lac<,m+,_+td+,<+ni_+gpmd_cL_.
37
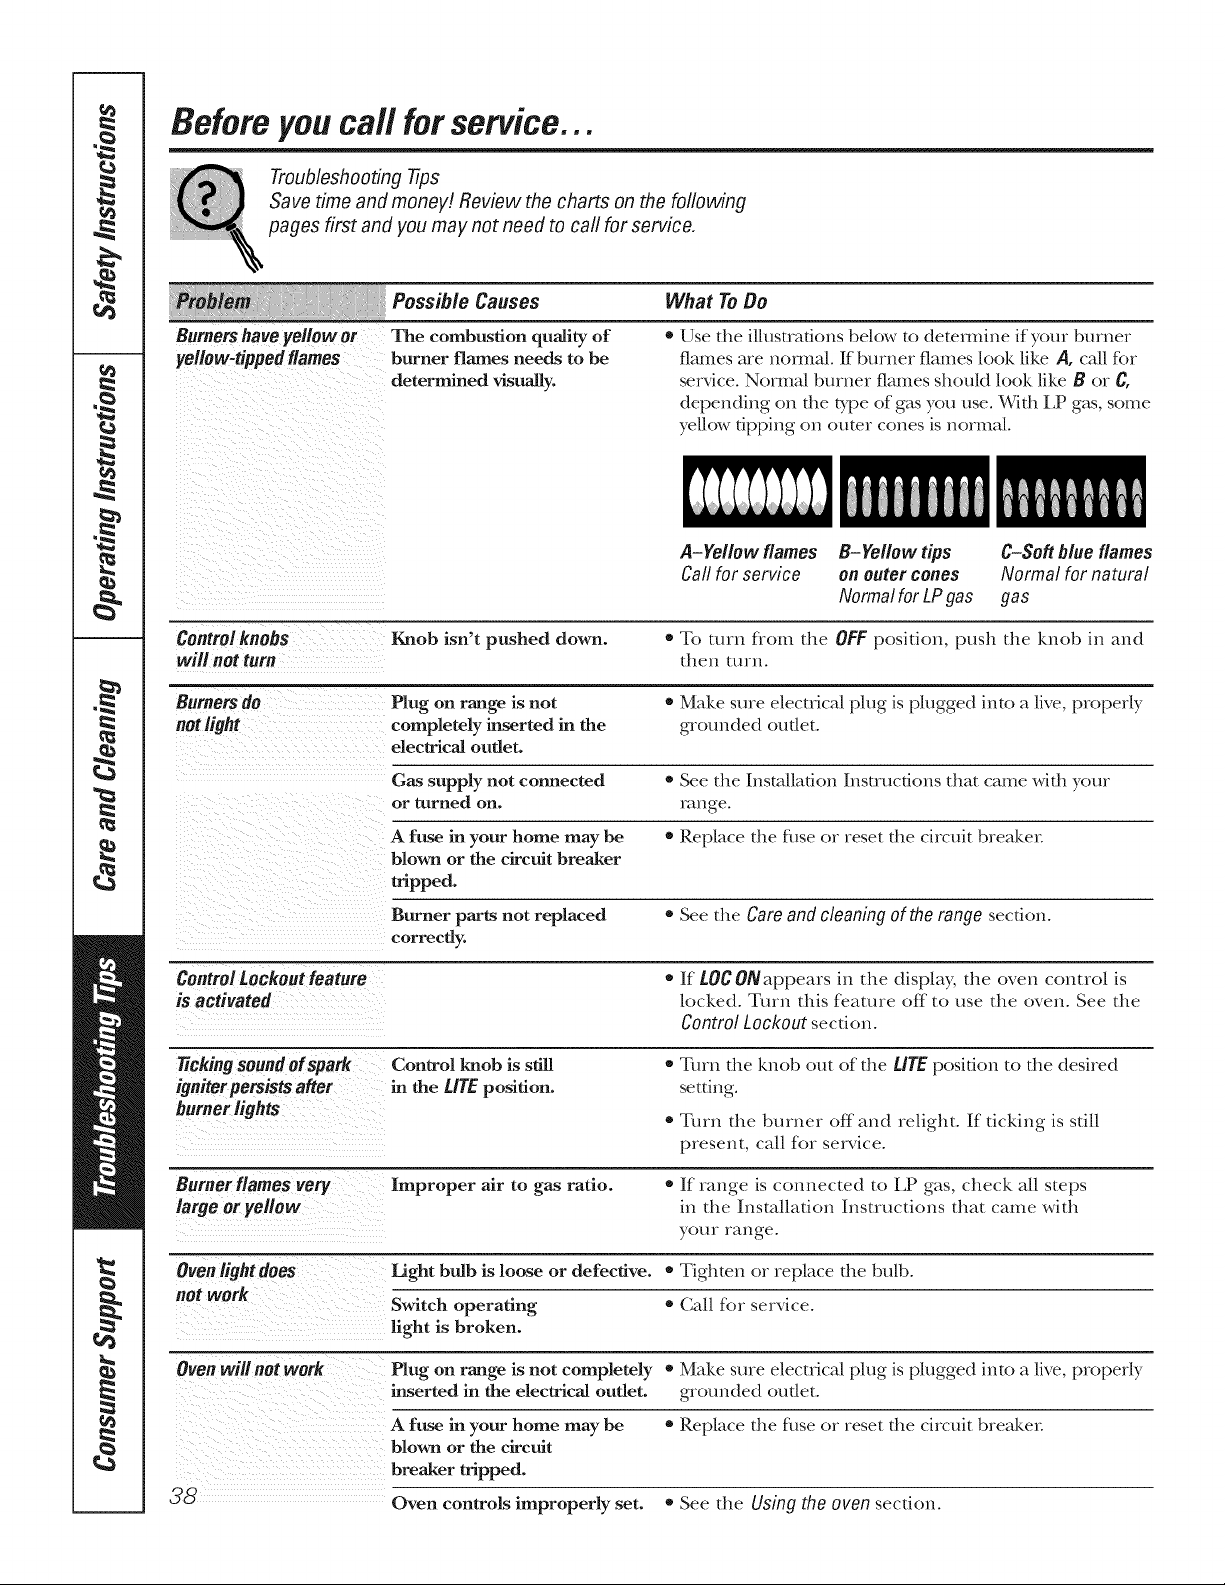
Before you call for service...
Troubleshooting tips
Savetime and money! Review the charts on the following
pages first and youmay not need to carl for service,
Burners haveyellow or
Possible Causes
The combustion quality of
yellow=tippedflames burnerflames needs tobe
determined visually.
What To Be
• Use the illustrations below to dete_nine if your burner
flames are not_nal. If burne_ flames look like A, ca/1for
service. Normal burnex flames shoukt look like B or C,
depending on the type of gas you use. With i,P gas, some
yellow dpping on aurar cones is normal
P-Ye/Icw flames B-Ye//cw tips C-Soft blue flames
Call for service cn cuter cones Normal fornatural
NormalforLPgas gas
Controlknohs Knob isn't pushed down. • To mrn flom the OFF position, push the knob in and
will not turn then turn.
Burnersdo Plug on range is not • Make sure electrical plug is plugged into a live, property
notlight completely inserted in the gqounded outlet.
dectrical outlet.
Gas supply not connected • See the Installation lnst_ucdons that came with your
or turned on. range.
A fuse in your home may be • Replace the fuse or reset the ci_wfit bleaker
blown or the circuit breaker
tripped.
Burner parts not replaced • See the Care and cleaningofthe range secdon.
correctly.
Controitookoutfeature = If LOC0Nappears in the display, the oven cont_ol is
iS activated locked. Turn this feature off to use the oven. See the
Control Lockout secOon.
tickingsound ofspark Control knob is still
igniterpersistsafter in the L/TEposition.
burnerlights
• Turn rite knob out of rite UTEposidon to rite desired
setting.
• Turn the burnm off and relight. If ticking is sdll
present, call for service.
Burner flames very Improper air to gas ratio. • [f range is connected to LP gas, check all steps
large or yellow in the Installation lnst_uctions that came with
your range.
Ovenlightdoes light bulb is loose or defective. *Tighten or replace the bulb.
not work
Switch operating = (;all fbr service.
light is broken.
Ovenwillnot work Plug on range is not completely • Make sure electrical plug is plugged into a live, property
inserted in the electrical outlet, gqounded outlet.
A fuse in your home may be • Replace the fuse or reset the ci_vuit b_eaker
blown or the circuit
breaker tripped.
3c9 Oven controls improperly set. • See the Using theovensection.

GEPpp/iances.com
Possible Causes What To Do
Food does not bake Oven controls improperly set. = See the Using the oven section.
or roast properly
Rack position is incorrect * See tile Using the oven secdon.
or the rack is not level.
Incorrect cook-ware or * See tile Using the oven secdon.
eookware of improper
size being used.
Oven thermostat needs • See tile Adjust the oven thermostat - Do it yourself!
adjustment, section.
Food does not Oven controls improperly set. • Make sure you touch tile BROIL HI/LO pad.
broilproperly Improper rack position • See the Broiling Guide.
being used.
Cookware not suited • For best resu|ts, use a pan designed ffw broiling.
for broiling.
The probe is plugged into the • Unplug and remove tile probe fiom tile oven.
outlet in the oven.
In some areas the power • Preheat file broil element ffw 10 minutes.
(voltage) may be low.
• Broil ff_r tile longest period of time recommended in
the Broiling Guide.
Oven temperature Oven thermostat • See tile Adjust the oven thermostat - Do fl yourself!
tOO hot or too cold needs adjustment, section.
Oven doer is crooked The door is out of position. * Because tile oven door is removable, it sometimes
gets out of position during installation. Remove and
replace the oven door See the Li_-Off Oven Door
section.
Storage drawer Rear drawer support is * Reposifion tile drawer See tile Storage Drawer
is crooked on top of the guide rail. Removal instrucfions in the Care and cleaning of your
range secdon.
Storagedrawer Power cord may be • Reposition tile drawer and power cord. See tile
won'tclose obstructing drawer Storage Drawer Removal insuucfions in the Careand
in the lower back cleaning of your range section.
of the range.
Rear drawer support is
on top of the guide rail.
• Reposidon tile drawer. See tile Storage Drawer
RemovalinsQucfions in the Care and cleaning of
your range secdon.
39
Before you call for service...
Troubleshooting tips
Possible Causes What To Be
Ciockand timerdo Plug on range is not completely * Make sure electfica! plug is plugged into a live, properly
not work inserted in the electrical outlet, g_ounded outer.
A fuse in your home • Replace tile free or reset tile circuit breaker:
may be blown or the
circuit breaker tripped.
Oven controls improperly set. * See the Using the clock and timer section.
Oven will not self-clean The oven temperature is * Allow file range to coo| and reset file contro|s.
too high to set a self-clean
operation.
Oven controls improperly set. * See tile Using the self-cleaning oven section.
The probe is plugged into * Remove the probe flom the oven.
the outlet in the oven.
"Crackling" or This is the sound of the * This is normal.
"popping" sound metal heating and cooling
during both the cooldng and
cleaning functions.
Excessive smoking Excessive soil. * Touch the CLEAR/OFFpad. Open the windows to
during a clean cycle rid the room of smoke. Wait undl the LOCKED light
goes off. Wipe up the excess soil and reset the clean
cycle.
Oven door will not Oven too hot. * Allow the oven to cool below locking temperature.
open after a clean cycle
Oven not clean after a Oven controls not properly set. * See the Using the self-cleaning oven section.
clean cycle
Oven was heavily soiled. * Clean lip heavy spillovers before starting the clean
cycle. Heavily soiled ovens may need to self'clean
again or fin" a longer period of time.
"LOCKED" flashes The self-clean cycle has been * Close the oven door.
in the display selected but the door is not
closed.
"LOCKED"light is The oven door is locked * Touch the CLEAR/OFFpad. Allow the oven to cool.
onwhen you want because the temperature
tOCOOk inside the oven has not
dropped below the
locking temperature.
"F--" anda number
orletterflash
in the display
You have a function error code. * Touch tlle CLEAR/OFFpad. Put rile oven back into
opemfion.
If the function code repeats. * Disconnect all power to the range fin at least 30
seconds and then reconnect power. If tile function
error code repeats, call for service.
40
GEApp/iances.com
Possible Causes What To Do
Controisignals after You forgot to enter a = Touch the BAKE pad and desired temperature or
entering cooking time bake temperature or the SELFCLEAN STD/LOW pad and desired clean time.
or start time cleaning time.
Oisplaygoes blank A fuse in your home may • Replace the fllse or reset the circuit breakel:
be blown or the circuit
breaker tripped.
The clock is in the • See the Special features of your oven control section.
black-out mode.
Display flashes Power failure. • Reset the clock.
Unable to get the Oven control pads were • The BROIL HI/LO and BAKE pads must be touched at
displayto show "SF" not touched properly, the same time and held fbr 3 seconds.
"Probe"appears in This is reminding you to • Enter a probe temperatme.
the display enter a probe temperature
after plugging in the probe.
Power outage, Power outage or surge. • Reset the clock. If the oven was in use, yo/_ must reset
clock flashes it by touching the CLEAR/OFFpad, setting the clock
and resetting any cooldng fimcfion.
Steam from the vent When using the convection • This is normal.
feature, it is normal to see
steam coming out of the oven
vent. As the number of racks
or amount of food being
cooked increases, the amount
of visible steam will increase.
"Burning" or "oily" This is normal in a new oven • To speed the process, set a self'clean cycle for a
odor emitting from and will disappear in time. minimmn of 3 hems. See the Using the self-cleaning
the vent oven section.
Strong odor An odor from the insulation • This is temporary.
around the inside of the oven
is normal for the first few times
the oven is used.
Fannoise A cooling fan or a convection • This is normal. The cooling tim will mrn off and
fan (depending on the on to cool internal parts. [t may run after the oven is
function you are using) may turned OFF The convection fan will cycle on and off
automatically turn on and off. until the fimcfion is over or the door is opened.
4/
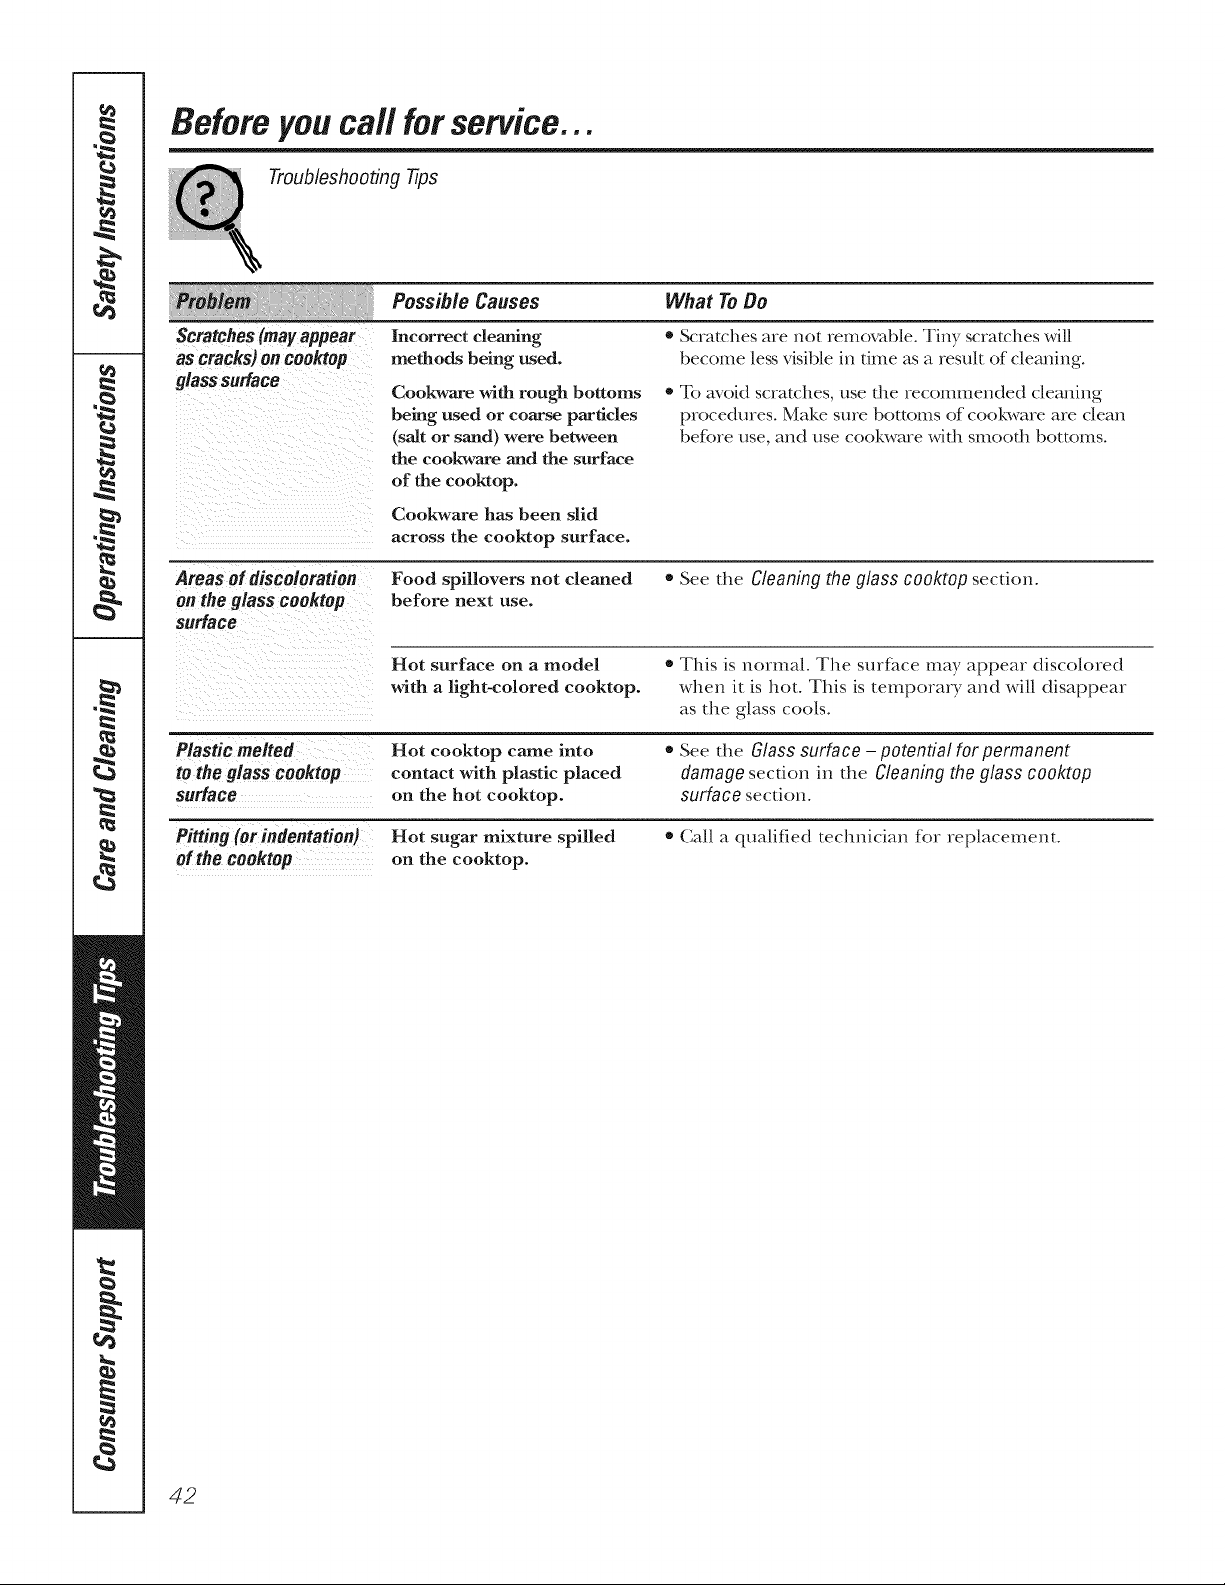
Before you call for service...
Troubleshooting tips
Scratches(mayappear
as cracks)on cooktop
glasssurface
Possible Causes What To Be
Incorrect cleaning
methods being used.
Cookware with rough bottoms
being used or coarse particles
(salt or sand) were between
the cookware and the surface
of the cooktop.
Cookware has been slid
across the cooktop surface.
* Scratches are not removable. Tiny scratches will
become less visible ill time as a result of cleaning.
• To avoid scratches, use die reconunended cleaning
procedures. Make sure bottoms of cool<ware are clean
before use, and use cool<ware with smooth bottoms.
Areas of discoloration
ontheglass cooktop
surface
Food spillovers not cleaned
before next use.
• See the Cleaning theglass cooktopsection.
Hot surface on a model • This is normal. Tile surface may appeal discolored
with a light-colored cooktop, when it is hot. This is temporary and will disappear
as the glass cools.
Plastic melted
totheglass cooktop
surface
Pitting(or indentatiom
of the cooktop
Hot cooktop came into
contact with plastic placed
on the hot cooktop.
Hot sugar mixture spilled
on the cooktop.
See the Glass surface - potential for permanent
damage secdon ill the Cleaning the glass cooktop
surface secdon.
Call a qualified technician for replacement.
42
Please place in envelope and mail to:
Veuillez mettre dans une enveloppe et envoyez _:
OWNERSHIPREGJSTRATJOH
P.O. BOX1780
MISSJSSAUGA,OHTARJO
L4Y 4G1
(FOR CAHADJAHCOHSUMERSOHLY)
43
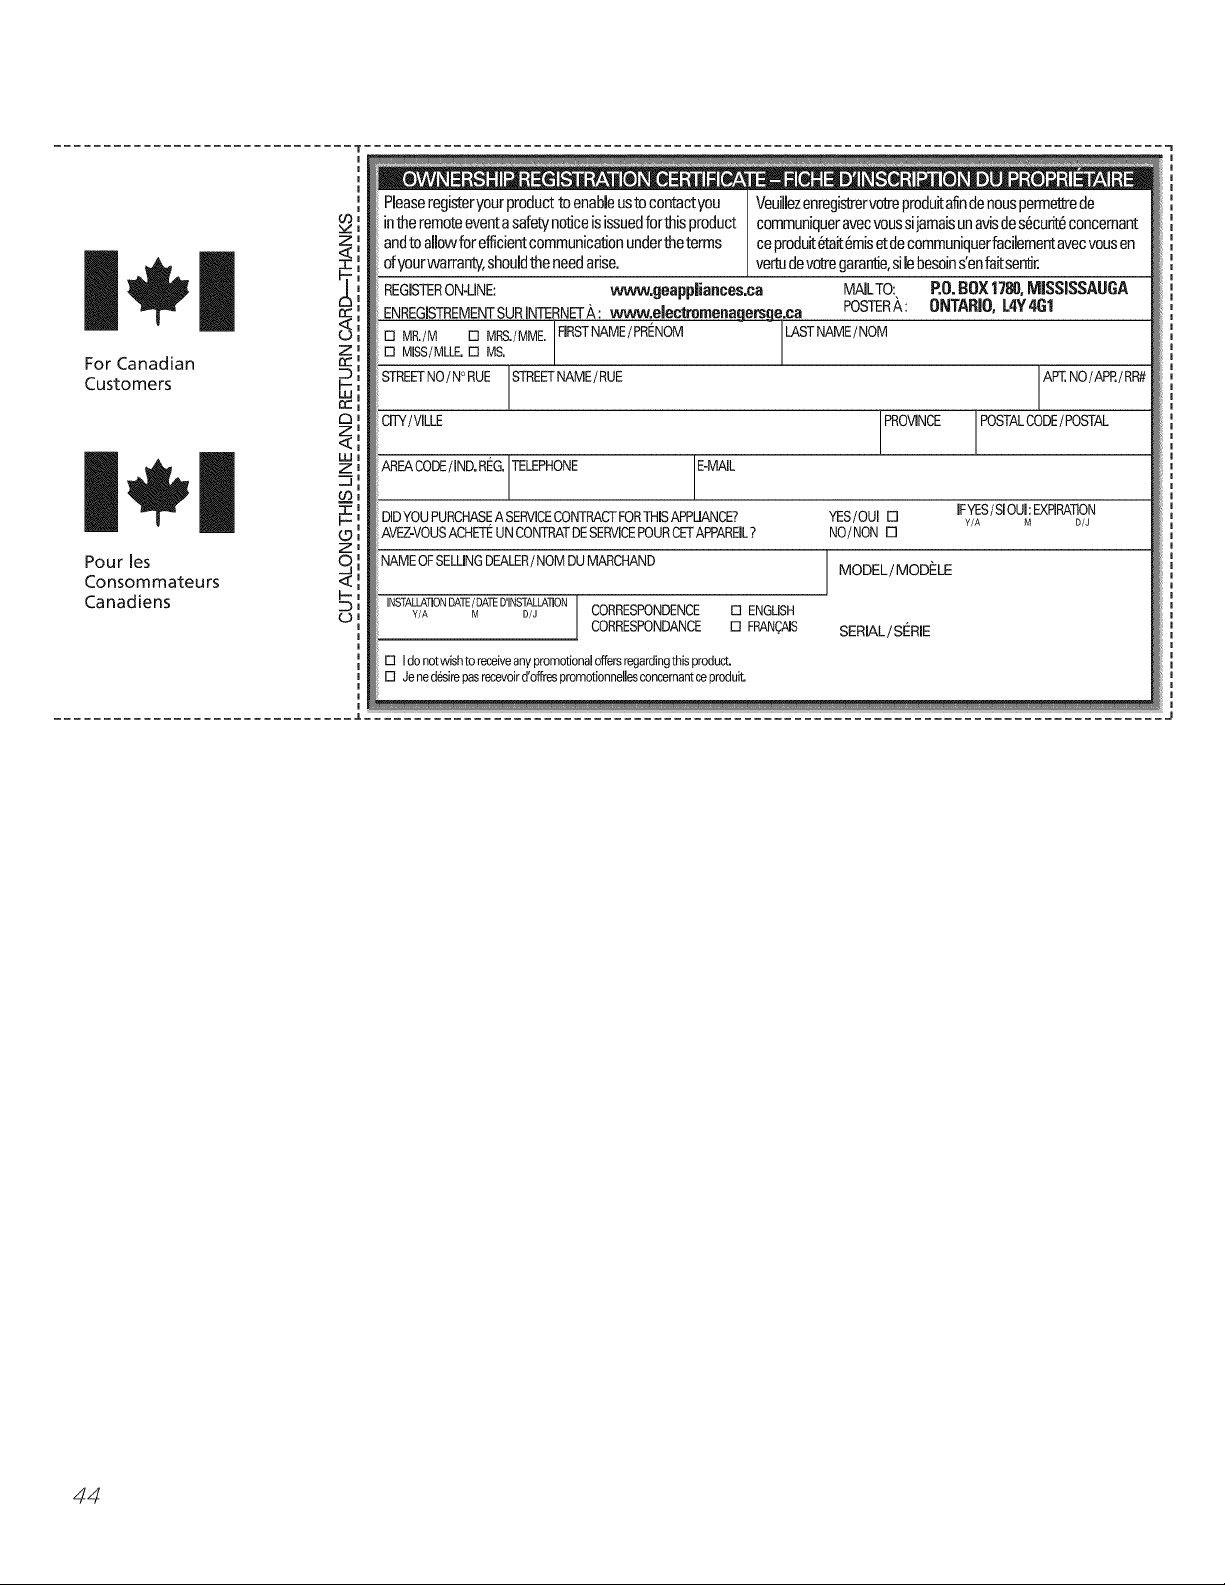
For Canadian
Customers
Pour [es
Consommateurs
Canadiens
Z
rr"
Z
Z
<
I&l
Z
_9
Z
7
C.3
i....
Pleaseregisteryourproductto enableustocontactyou Veuillezenregis_ervo1_produitafindenouspermel_ede
intheremoteeventasafetynolJceisissuedforthisproduct communiqueravecvoussijamaisunavisdes6curit_concemant
andtoallowforefficientcommunica_onundertheterms ceproduit6tait6misetdecommuniquerfacilementavecvousen
ofyourwarranty,shouldtheneedarise, ve_ devotregarartde,silebesoinsenfairsentir.
REGISTERON-LINE: www.geappliances.ca MAILTO: RO.BOX1780,MISSISSAOGA
ENREGISTREMENTSURINTERNETD,: www.electmmenagersge,ea POSTERD,: ONTARIO,14Y461
[][] MISS/MLLE.MR'/M[][] as.MRS'/MME'FIRSTNAME/PRENOM LASTNAME/NOM
STREETNO/N° RUE STREETNAME/RUE
CITY/VILLE
AP%.NO/APP./RR#
PROVINCE POSTALCODE/POSTAL
AREACODE/ IND.RING.[TELEPHONE JE-M_L
DIDYOU PURCHASEASERVICECONTRACTFORTHISAPPUANCE? YES/OUI [] IFYES/ SIOUl:EXPIRATION
Y/A M D/J
AVEZ-VOUSACHETI"UN CONTRATDESERVICEPOURCETAPPAREIL? NO/NON []
NAMEOFSELLINGDEALER/ NOM DU MARCHAND MODEL/MODELE
SERIAL/Sf'RIE
INSTALLA'I]ONDATE/DATED'INSTALLATION
Y/A M D/J CORRESPONDENCE [] ENGLISH
CORRESPONDANCE [3 FRAN?AIS
[] Id° n°twisht° receiveanypr°m°ti°nal °fiefsregardingthispr°duct"
[] Jened_sirepasrecevoird'offrespromotionnellesconcemantceproduit
44
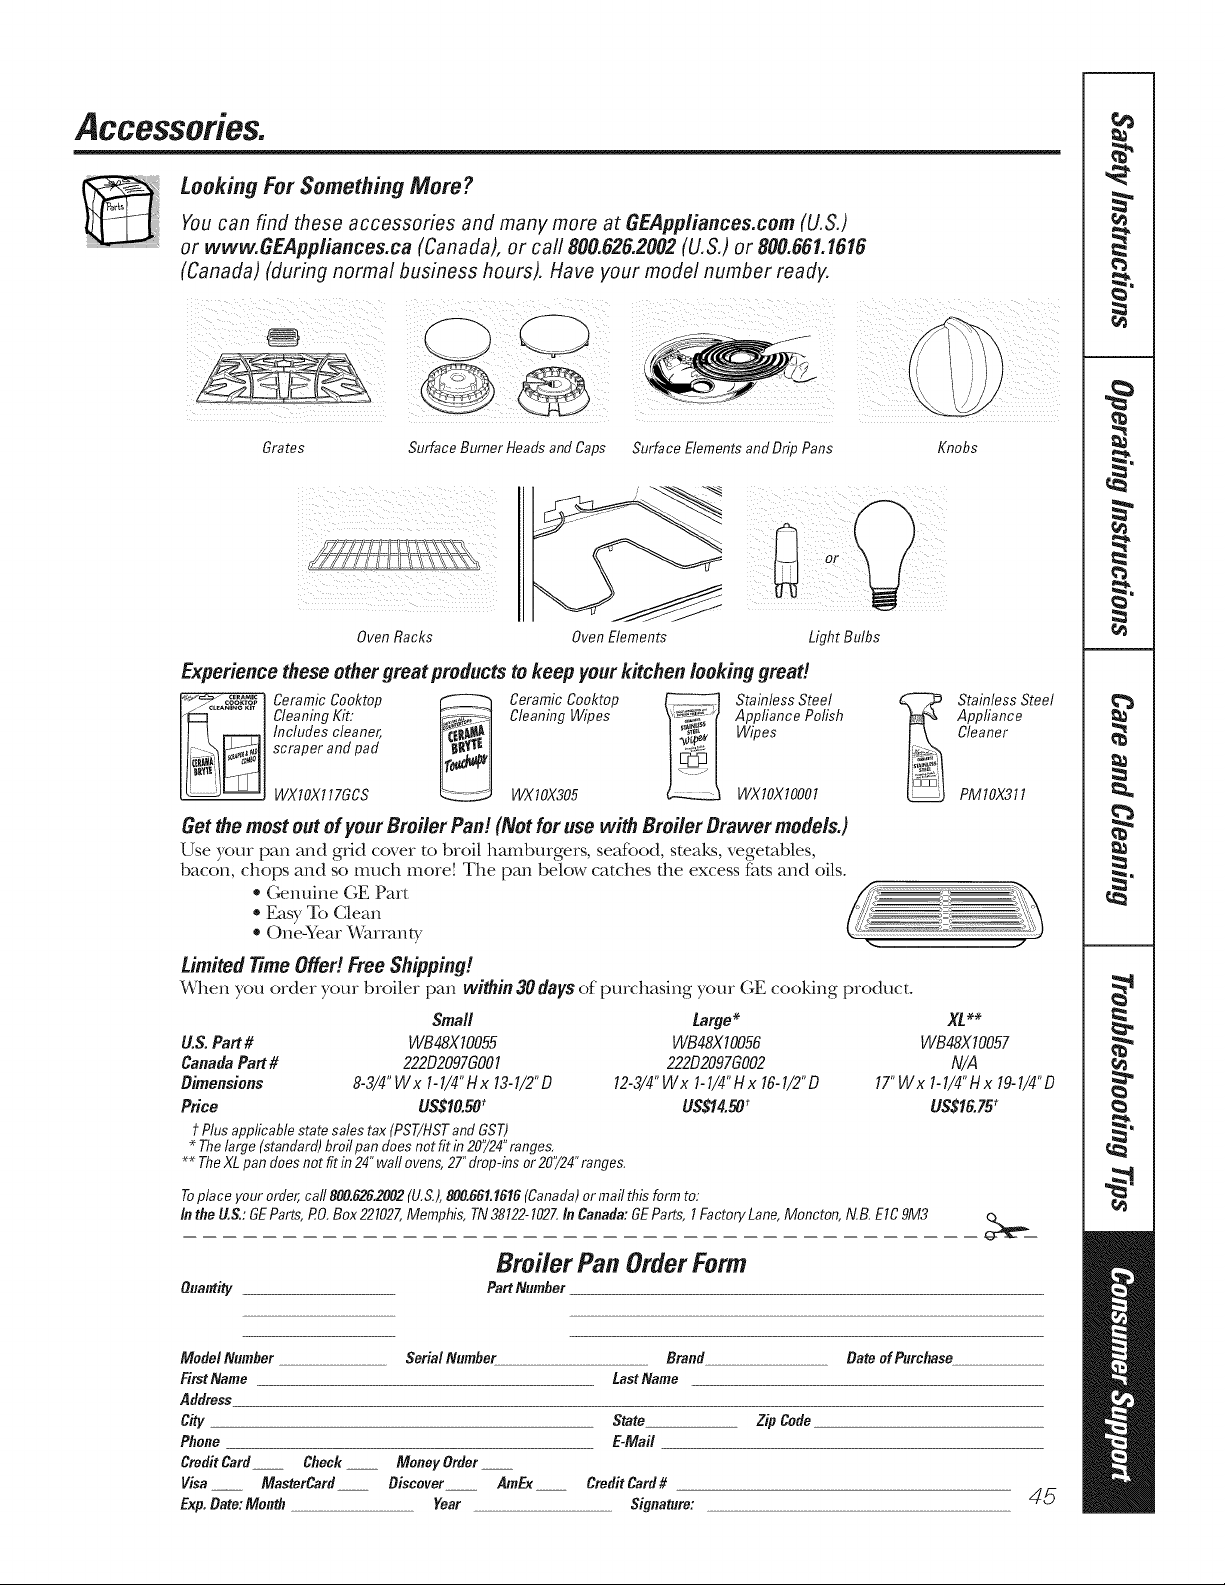
Accessories.
Looking For Something More ?
Youcan find these accessories and many more at GEAppliances.com (U.S.)
or www.GEAppliances.ca (Canada), or carl 890.626.2002 (U.S.) or 800.661.1616
(Canada) (during normal business hours). Have your model number ready.
Grates Surface Burner Heads and Caps Surface Elements and Drip Pans Knobs
Oven Racks Oven Elements
LightBulbs
Experience these other groat products tokeep your kitchen looking groad
[_ Ceramic Cooktop _ Ceramic Cooktop _ Stainless Steel
Cleaning Kit: Cleaning Wipes Appliance Polish
Includes cleaner, Wipes
scraper and pad
WXIOX117GCS WXIOX305 WXlOXIO001
Getthe mostout of your Broiler Pan!(Not for use with Broiler Brawer models.)
Use your pan and gdd cover to broil hamburgers, seafL_od, steaks, vegetables,
bacon, chops and so much more[ The pan below catches the excess f_tts and oilso
• (_nuine (;E Part
• Easy To Clean
• One'Year Warranty
Limited Time Offefi Free Shipping!
When you order your broiler pan within 30daysof purchasing your GE cooking product.
Smafl
U.S.Part # WB48X10055
CanadaPart # 222D2097GO01
Dimensions 8-3/4"W x 1-1/4"Hx 13-1/2"D
Price US$10.50_
?Plusapplicablestatesalestax(PST/HSTandGST)
* Thelarge(standard)broilpandoesnotfit in20"/24"ranges.
Large*
WB48X10056
222D2097GO02
12-3/4"Wx 1-1/4"Hx16-1/2"D
US$14.50'
** TheXL pan does not fit in 24" wall ovens, 27" drop-ins or 20"/24"ranges,
Stainless Steel
Appliance
Cleaner
PM10X311
X_**
WB48X10057
N/A
17"Wx 1-1/4"Hx 19-1/4"D
US$16.75'
Toplaceyour order,call 800.6262002(U,S.),800.661.1616(Canada)or mailthis formto:
In theU.S.:GEParts,PO,Box221027,Memphis,TN38122-102ZInCanada:GEParts, 1FactoryLane,Moncton,N.B, E1C9M3
Broiler Pan Order Form
Ouanti_/ Part Number
ModelNumber
FirstName
Address
City
Phone
CreditCard
Visa
Exp.Date:Month
SerialNumber Brand Bate of Purchase
LastName
State Zip Code
E-Mail
Check__ MoneyOrder__
MasterCard Discover AmEx CreditCard#
Year Signature:
45
GEGasRange Warranty.(For customers in the United States)
Aft warranty service provided by our Factory Service Centers,
or an authorized Customer Care_ technician. To schedule service
visit us on-line at GEAppliances.com, or carl 800.GE,CARES
(800,432,2737). Pleasehave serial number and model number
available when calling for service.
Stapleyourreceipt here.
Proofofthe original
purchase dateisneeded to
obtainservice under the
warranty.
One }'ear
Fromthe date of the
originalpurchase
GEWi// Rep/ace:
Any part of the range which fhils due to a defect in materials or workmanship. During this
limitedone-yearwarranty,GE will a/so provide, free of charge,all labor and in-home service to
replace the defective part.
Service trips to your home to teach you how to use
the product.
Improper installation, delivery or maintenance.
Failure of the product if it is abused, misused,
or used for other than the intended purpose or used
commercially.
Damage to the glass cooktop caused by hardened
spills of sugary materials or melted plastic that
are not cleaned according to the directions
in the Owner's Manual.
Damage to the glass cooktop caused by use of cleaners
other than the recommended cleaning creams.
Replacement of house fuses or resetting of drcuit
breakers.
Damage to the product caused by accident, fire, floods
or acts of God.
Incidental or consequential damage caused by possible
defects with this appliance.
Damage caused after delivery.
Product not accessible to provide required service.
EXCLUSIONOFIMPLIEDWARRANTIES--Yoursole andexclusiveremedyis productrepairas providedinthis Limited
Warranty.Anyimpliedwarranties, includingtheimpliedwarranties of merchantability or fitnessfora particularpurpose,
are limitedto oneyear or theshortestperiedallowedbylaw.
This warranty is extended to the original purchaser and any succeeding owner for products purchased for
home use within the USA. If theproduct islocated in an area where service bya GEAuthorized Servicer is not
available, youmay be responsible for a trip charge or youmay be required tobring theproduct toan Authorized
GEService location forservice. InAlaska, the warranty excludes the cost ofshipping or service calls toyour home.
Some states do not aflow the exclusion or limitation of incidental or consequential damages. This warranty
gives you specific legal rights, and you may also have other rights which vary from state to state. To know what
your legal rights are, consult your local or state consumer affairs office or your state's Attorney General
Warrantor:General Electric Company. Louisville, KY40225
46
GEGas Range Warranty.(For customers in Canada)
All warranty service provided by our Factory Service Centres
or an authorized Customer Care_ technician. To schedule
service, visit us on-line at www.GEAppliances.ca or carl
1.800.561.3344.Please haveserial number and model number
available when calling for service.
Stapleyourreceipt here.
Proofofthe original
purchase dateisneeded to
obtainservice under the
warranty.
One Year
From the date of the
original purchase
Five Years
From the date of the
original purchase
Mabe Will Replace:
Any part of the range which fitils due to a defect in materials or workmanship. During
this limited one-year warranty, Mal)e will also provide, free of charge, all lal)or and in-home
service to replace the defective part.
A replacement glass cooktop if it should crack due to thermal shock, discolor, crack at the
rubber seal betx,veen the gl_s cooktop and the porcelain edge, or if the pattern wears of_
A replacement radiant surface unit if it should burn out.
Dining this limited additional four-yearwarranty, you will be responsible for any lal)or or
related service.
Service trips to your home to teach you how to use
the product.
Improper installation, delivery or maintenance.
Failure of the product if it is abused, misused, or
used for other than the intended purpose or used
commercially.
Damage to the glass cooktop caused by hardened
spills of sugary materials or melted plastic that are not
cleaned according to the directions in the Owner's
Manual.
Damage to the glass cooktop caused by use of cleaners
other than the recommended cleaning creams.
Replacement of house fuses or resetting of circuit
breakers.
Damage to the product caused by accident, fire, floods
or acts of God.
Incidental or consequential damage caused by possible
defects with this appfiance.
Damage caused after delivery.
Product not accessible to provide required service.
L XCLUS/ONOFIMPLIEDWARRANTIES--Yoursoleandexclusiveremedyisproductrepairasprovidedin this Limited
Warranty.Anyimpliedwarranties, includingthe impliedwarranties of merchantability or fitnessfora particularpurpose,
arelimitedto one yearor theshortestperiodallowedby law.
This warranty is extended tothe original purchaser and anysucceeding owner for products purchased in Canada
for home usewithin Canada. In-home warranty service will be provided in areas where # isavailable and deemed
reasonable by Mabe toprovide.
Someprovinces do not allow the exclusion or limitation of incidental or consequential damages, so theabove
exclusion may not apply toyou. This warranty gives youspecific legal rights, and youmay also have other rights
which vary from province toprovince. To know what your legal rights are in your province, consult your local or
provincial consumer affairs office.
Warrantor:Mabe Canada Inc.,
Burlington, Ontario
47
ConsumerSupport.
GEAppliancesWebsite _. theu.s.: GEApp/iances.com
Have a quesdon or need assistance with your appliance? Try the GE Appliances Website 24 hours a day,
any day of the year! For greater convenience and faster service, you can now download Owner's Manuals,
order parts or even schedule service on-line. In Canada: www.GEAppliances.ca
ScheduleService ,. theus: CEaootia.ses.som
Expert GE repair service isonly one step away flom your door Get on-line and schedule your service at your
convenience any day of the year! Or call 800.GE.CARES (800.432.2737) during normal business hours.
In Canada, call 1.800.561.3344
RealLife DesignStudio _. theu.s.: GEApp/iances.com
GE supports the Universal Design concept--products, services and envhonments that can be used by people of
all ages, sizes and capabili0es. Werecognize the need to design for a wide range of phDical and mental abilities
and impaimlents. For details of GE's Universal Design applications, including kitchen desigm ide_s for people with
disabilities, check out our Website today. For the hearing impaired, please ca/1800.TDD.GEAC (800.833.4322).
In Canada, contact: Manage_; Consmner Rela0ons, Mabe Canada Inc.
Suite 310, 1FactoIy Lane
Moncton, N.B. E1C 9M3
ExtendedWarranties
t. theu.s.: GEApp/iances.com
Purchase a GE extended warranty and learn about special discounts that are available while your warranty iss011
in effect. You can purchase it onqine anytime, or call 800.626.2224 during nomml business hotn_. (;E Consumer
Home Services will still be there after your warranty expires. In Canada, call 1.888.261.2133.
PartsandAccessories
t. theu.s.: GEApp/iances.com
Individuah quaUfied to service dleir own appliances can have parts or accesscnies sent directly to their homes
(\qSA, MasterCard and Discover cards are accepted). Order ondine today, 24 hours eve_y day or by phone at
800.626.2002 during n(mna/business hotn._.
Instructionscontainedin thismanualcoverprocedurestobeperformedbyanyuser.Otherservicingoenerallyshould be
referredto qualifiedservice personnelCautionmustbe exercised,since improper servicingmay causeunsafeoperation.
Customers in Canada shoukt consult the yellow pages for the nearest Mabe service cente,, or ca/11.800.661.1616.
ContactUs
t. theu.s.: GEApp/iances.com
Ifyou are not satisfied widl die service you receive flom (;E, contact us on our Websim widl all die details
including your phone numbe_, or w_Jm to: General Manage_, Customer Relations
GE Appliances, Appliance Park
Louisville, 1_ 40225
In Canada: www.GEAppfiances.ca, or w_ite to: Directcn; Consmner Relations, Mabe Canada Inc.
Suite 310, 1Factoiy Lane
Moncton, N.B. E1C 9M3
48
RegisterYourAppliance
t. theu.s.: GEApp/iances.com
Register your new appliance on-line-at your convenience! Timely product registration will allow fbr enhanced
communication and prompt service under the temls of your warranty; shoukt the need arise. You may also mail
in the pre-printed registraOon card included in the packing material. In Canada: www.GEAppliances.ca
www.electromenagersge.ca
C/3
C/3
°_
f%
0
0
Instruct/ore" de s#curi_ ........ 2-7
Mode d'emploi
Auto-nettoyage .............. 25, 26
Batterie de cuisine ............... 9
Brfileurs de surface ........... 8, 9
Convexion .................. 18-22
Cuisiner et r6tir
avecla minuterie ............... 16
Cuisiner ou r6tir ................ 11
Fermentation .................. 23
Fonction du Sabbath ......... 30, 31
Fonctions sp_ciales ........... 27-29
Four ....................... 10-31
Grille_; guide pour griller ........ 14
Horloge et minuterie ........... 15
i,ockout (verrouillage)
des contr61es ................... 15
Rdchauftbr ..................... 2'.4
Sonde ......................... 17
Thermostat .................... 24
Entretien et nettoyage
Ampoules ...................... 34
Assemblage du brfileur .......... 32
Boutons ....................... 32
I_vent ......................... 36
Grilles ........................ 33
, %
,I(;s96s
PGS968
Grilles du bnSleur
et grille centrale ................ 33
Panneau de contr61e ............ 36
Plancher de four ............... 36
Porte ......................... 35
Porte du four retirable .......... 35
Ruban d'emballage ............. 32
Surface de cuisson de verre ... 37, 38
Surfaces d'acier inoxydable ...... 36
Surfaces peintes ................ 36
Tiroir de rangement ............ 33
Conseils de d#pannage ...... 39-43
Accessoires. ................... 44
Soutien au consommateur
Garantie ...................... 47
Soutien au consommateur ....... 48
Imprim# auxE-tats-Unis
Ecrivez ici les numeros
demodele et deserie •
N°demodele
N°deserie
Ces num_ros se trouvent
sur l%fiquette derriere la porte
d'ouvermre du four darts
le coin inf_rieur gauche
edu chfissis de cuisini_re.
49-80542-3 07-09 JR
iNFORMATIONDESECURITE/MPORTANTE
USEZTOUTESLESiNSTRUCTiONSAVANT EUT/USATION.
AAVERTISSEMENT: si l'informationcontenue
darts ces instructions n'est pas suivie exactement, il pourrait
y avoir un incendie ou une explosion causant des dommages
la proprietY, des blessures personnelles ou la mort.
-- Ne rangez pas et n'utilisez pas d'essence ou d'autres vapeurs
et liquides inflammables pros de cet appareil _lectrom_nager
ou autre.
- CEQU'//.FAUTFAIRES/VOUSD_'TECTEZ
UNE ODEURDEGAZ
N'essayez pas d'allumer un quelconque appareil
_lectrom_nager.
Ne touchez aucun commutateur _lectrique; n'utilisez pas
le t_l_phone de votre bfitiment.
Appelez imm_diatement votre fournisseur de gaz
du t_l_phone d'un voisin. Suivez les instructions
du fournisseur de gaz.
Si vous ne pouvez pas rejoindre votre fournisseur de gaz,
appelez le service d'incendie.
-- L'installation et l'entretien doivent _tre effectu6s par un
installateur qualifi_, une agence de service ou le fournisseur
de gaz.
GAS-FiBED
C
LISTED
US
2
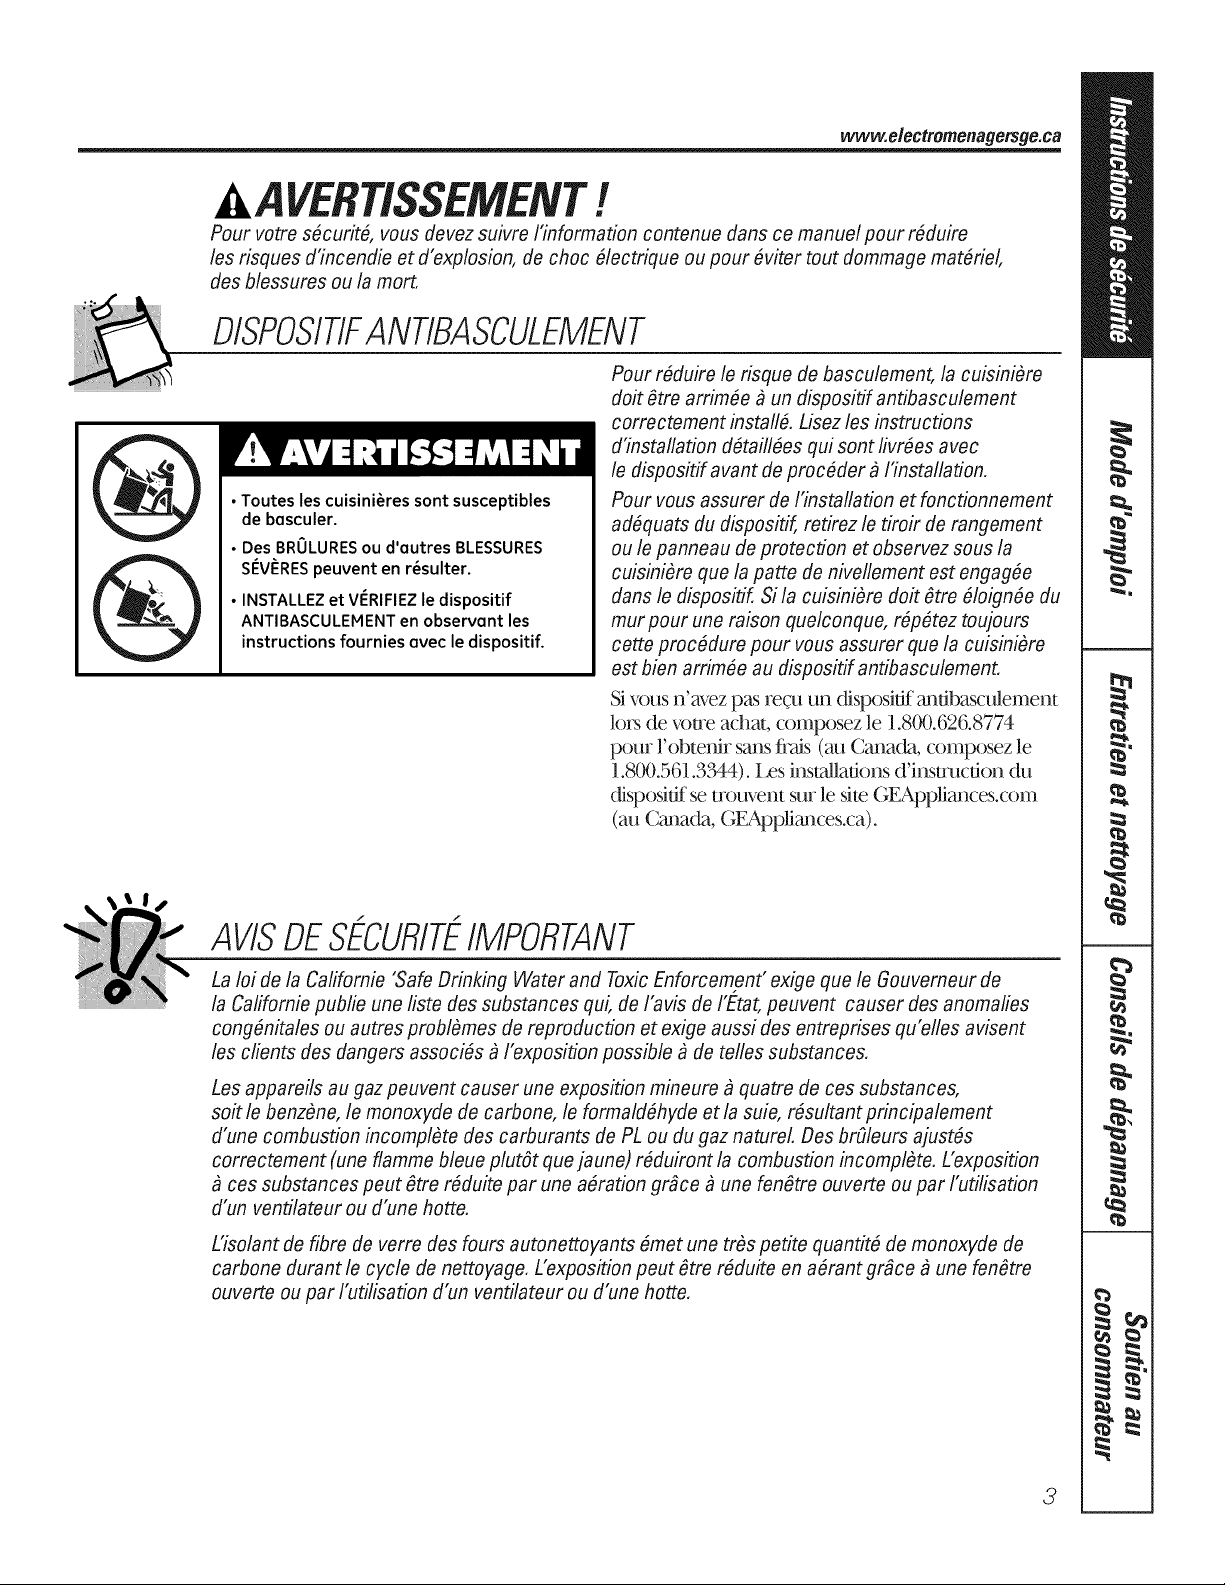
www.electromenagersgo.ca
!
m
Pour votre sficuritfi, vous devez suiwe I'information contenue dans cemanuel pour rfiduire
losrisques d'incendie et d'explosion, de choc filectrique ou pour fiviter tout dommage matfiriel,
desblessures ou la mort.
DISPOSITIFANTIBASCULEMENT
• Toutes les cuisini_res sont susceptibles
de basculer.
• Des BROLURES ou d'autres BLESSURES
SI_Vt_RESpeuvent en r_sulter.
• INSTALLEZ et VI_RIFIEZ le dispositif
ANTIBASCULEMENT en observant les
instructions fournies evec le dispositif.
Pour r#duire le risque de basculement, la cuisinifire
doit #tre arrim#e _ un dispositif antibasculement
correctement installfi. Lisez lesinstructions
d'installation dfitaillfies qui sont fivrfies avec
le dispositif avant de proc#der _ I'installation.
Pour vous assurer de I'installation etfonctionnement
adfiquats du dispositif, retirez le tiroir de rangement
ou le panneau de protection etobservez sous la
cuisinibre que la patte de nivellement est engag#e
clans le dispositif, Si la cuisinibre dolt #tre #loign#e du
murpour une raison quelconque, r@#tez toujours
cette proc#dure pour vous assurer que la cuisini#re
est bien arrim#e au dispositif antibasculement.
Si vous n'a_fez pas re_u un (fisposidf anfibasctflement
lors de voue achat, composez le 1.800.626.8774
p(,lr l'obtenir sans finis (au Canada, composez le
1.800.561.3344). ies installations d'insuuction du
(fisposidf se trouvent sur le site, GEAppliances.com
(au Cana( 'la, GEAppliances.ca).
AVISDESdLCURIT{IMPORTANT
La Ioi de la Californie "Safe Drinking Water and Toxic Enforcement" exigeque le Gouverneur de
la Californie publie une liste dessubstances qui,de I'avis de I'Etat,peuvent causer des anomalies
cong#nitales ou autres probl#mes de reproduction etexige aussi des entreprises qu'elles avisent
los clients des dangers associ#s _ I'exposition possible _ de telles substances,
Lesappareils au gazpeuvent causer une exposition mineure _ quatre de ces substances,
so#le benz#ne, le monoxyde de carbone, le formald#hyde etla suie, r#sultant principalement
d'une combustion incompl#te des carburants de PL ou du gaz natureL Des brOleursajust#s
correctement (une flamme bleue plut#t que jaune) r#duiront la combustion incompl#te. L'exposition
ces substances peut #tre r#duite par une a#ration grace _ une fen#tre ouverte ou par I'utilisation
d'un ventilateur ou d'une hotte.
L'isolant de fibre de verre desfours autonettoyants #met une tr#s petite quanfit# de monoxyde de
carbone durant le cycle de nettoyage. L'expositionpeut #tre r#duite en a#rant gr_ce _ une fen#tre
ouverte ou par I'utilisation d'un ventilateur ou d'une hotte.
3
INFORMATIONBESECURITE/MPORTANTE
USEZTOUTESLESiNSTRUCTiONSA VANTEUT/USATION.
4
!
m
PIlE-CAUTIONSDESE-CUfllTE
Lorsque vous utilisez un apparei161ectrique, vous devez toujours suiwe despr6cautions de base,
ycompris ce qui suit:
} Udlisez cet appareil seulement pour
l'usage auquel iXest destina- selon
ce mamml du propria-taire.
}} Assurez-vous que votre appareil soit bien
installa- et mis fi la terre par un technicien
qualifia-, corfforma-ment aux instructions
d'installadon foumies.
}}Avant d'effectuer tout ser_,ice, coupez
le courant fi la cuisinibre dans le tableau
de (fistribudon ra-sidendel en redrant
le fusible ou en coupant le disjoncteur.
}} Demandez fi l'installateur de vous montrer
l'emplacement du (fisjoncteur ou
du filsible. Marquez-le pour m,'oir
une ra-t_rence facile.
}}Ne laissez pas les enthnts seuls--les enfhnts
ne doivent pas a-tre laiss6.s seuls et sans
surveillance dans un endroit o6 un
appareil a-lectroma-nager est udlis6.. On
ne doitjamais leur permeme de s'asseoir
ou de se tenir debout sur quelque parde
que ce soit de l'appareil.
}}Demandez fi l'installateur de vous montrer
l'emplacement du robinet d'arra-t du gaz
de la cuisiniS.re et comment le fermer
au besoin.
}} Faites installer voue cuisiniS.re et faites-la
mettre fila terre correctement par un
installateur qualifia-,corfforma-ment aux
instructions d'installation. Tout ajustement
et entretien doivent a-tre eftb.ctua-s
seulement par des installateurs de
cuisiniares au gaz ou des techniciens
de ser_ice qualifia-s.
}} Placez la cuisini_re dans un endroit
a l'a-cart de la circulation dans la cuisine
et fi l'a-cart des courants d'air pour &,iter
d'm,'oir une mauvaise circulation d'air.
}}Assurez-vous que tout le mata-riel
d'emballage soit retira-de la cuisiniare
infant de l'utiliser pour a-viter tout incendie
ou dommage causa- par la fuma-e si
le mata-riel d'emballage s'erfflamme.
}} Ne laissez pas les enfhnts seuls ou sans
super_ision lorsqu'une cuisiniS.re est
chaude ou alluma-e, lls pourraient
a-tre grm,'ement brOla-s.
_:_N'essayez pas de ra-parer ou de remplacer
une quelconque piF.ce de votre cuisiniF.re
fi moins que cela ne soit recommanda-
spa-cifiquement dans ce manuel. Tout
auue enuetien dolt a-tre effecma- par
un mchnicien qualifia-.
_:_Assurez-vous que votre cuisiniS.re soit
ajusta-e correcmment par un technicien
de serx,ice qualifia- ou par un installamur
pour le type de gaz (namrel ou PL) utilis&
Votre cuisini&re peut a-tre convertie pour
l'un ou l'autre type de gaz. Repormz-vous
aux instructions d'installation emballa-es
avec la cuisiniS.re.
[[[_:_Branchez votre cuisiniSre seulement
dans une prise murale de 120 volts avec
mise fila terre. Ne retirez pas la broche
de mise fila terre ronde de la fiche. Si vous
n'a-ms pas certain de la mise fi laterre du
systSme a-lectrique ra-sidentiel, vous a.ms
responsable et dans l'obligation de fhire
remplacer la prise qui n'est pas mise
fila terre par une prise fi uois broches mise
fila terre corffom_a-ment au Code nadonal
de l'a-lecu%it& N'utilisez pas de rallonge
avec cet appareiL
AVERTISSEMENT:
ces ajustementsdoivent _tre effectu6s
parun techniciende service qualififi,
conformfimentauxinstructions du
fabricant et_ tousles codes etexigences
de I'autorit6responsable.Le non respect
de ces instructions peut mener_ de graves
blessuresou _ des dommagesmat6riels.
L'agencequalififie effectuant ce travail
assumela responsabifitfide la conversion.
Gardez les filtres de graisse et la hotte
propres pour maintenir une bonne
ventilation et &,iter les feux de graisse.
}} Ensei_ez aux enthnts fine pas.jouer avec
les commandes ou mrecroute auue place
de la cuisini8re.
}} Gardez toqjours les ser_dettes, les linges
fivaisselle, les poi_a-es et autre linge de
maison fidistance de voue cuisini_re.
www.e/ectromenagersge.ca
PflECAUTIONSDESECUfllTE
: Oardez toujours les ustensiles de bois et
de plastique et les aliments en boite fi distance
de votre cuisiniOre.
: (;ardez toujours les rev_tements muraux
combustibles, les rideaux ou les tenulres
fi distance de votre cuisini_re.
: Ne nettoyez pas la ctfisiniSre avec des liquides
de nettoyage inflammables ou volatiles.
: Aprbs une utilisation prolongde de la cuisini_re,
le plancher petit devenir tr_s chmid et de
nombreux rev_tements de plancher pourmient
ne pat rdsister fi ce type d'utilisation. N'installez
jamais de cuisini_re sur des carreaux de _.{nyle
ou du linoldum qui pourmit ne pas rdsister
fi ce b?e d'utilisation. Ne l'installezjamais
directement stir le tapis de cuisine.
t_vitez d'dgratigner la surfi_ce de cuisson vitrde
avec des instruments tmnchants ou avec des
bagues et mitres bijoux.
: Ne laissez personne grimper, se tenir debout
ou se suspendre stir la porte du fbm; le tiroir
de rangement ou la surface de cuisson. Cela
pourmit endommager la cuisiniare et m_me la
finitebascule_; provoquant de graves blessures.
A MISEENGARDE:/ qui
pourraientattirer/esenfantsnedoiventpasgtreranges
danslesarmoiresau-dessusdeb cuisinbreousur
ledosseretd'unecuisinbre--lesenfantsquigrimpent
surb cuisinierepouratteindrelesarticlespourraient
gtregravementblesses.
AVERT/SSEMENT:
n'utilisez JAMA/S cet appareil pour
rdchauffer ou chmlffer la place. Ceci
pourrait mener fi un empoisonnement ml
monoxyde de carbone et une surchm_ftb_
de la surfhce de cuisson ou du fi)ur.
: Pour votre s_curit_, n'utilisezjamais votre
appareil dlectromdnager pour r_chmiftbr
et chmzffbr la piece.
: De larges dgratignures ou chocs sur les portes
de verre peuvent casser ou faire ddater la vitre.
: Ne nettoyezpatla cuisini_re pendant qu'elle
fbnctionne.
: Ne portezjamais de %tements amples
ou tombants lorsque vous utilisez l'appareil.
Attention en vous dtirant pour atteindre
les articles mngds clans les armoires mMessus
de la cuisini5re. Un tissu inflammable p(nirrait
s'enflammer mi contact des flammes ou des
surfi_ces chaudes du fbur et pourmit provoquer
de graves blessures.
: Ne mngez pas de matdrimtx inflammables dans
le fbm; le tiroir de mngement de la cuisini_re
ou pros d'une surface de cuisson.
: Ne mngez pas et n'utilisez pas de mat4riaux
combustibles, d'essence ou d'mitres vapeurs
et liquides inflammables pros de cet appareil
41ectrom4nager ni d'micun autre.
: Ne laissez pas la gmisse de cuisson ou autres
mati_res inflammables s'accumuler stir ou pros
de la cuisiniOre.
: N'utilisez pas d'eau sur les feux de graisse.
Ne saisissezjamais une casserole en flamme.
Eteignez les commandes. Eteignez un feu stir
tin bl_leur en surface en couvmnt enti_rement
la casserole avec un couverde bien ajustd, une
plaque fi biscuit ou un plateau plat. Utilisez un
extincteur d'incendie fi mousse ou une poudre
chimique tout usage.
ia graisse en flammes fi l'extdrieur d'une
casserole s'dteint en la couvrant de bicarbonate
de sodium, ou, si possible en utilisant un
extincteur d'incendie fi mousse ou fi poudre
chimique tout usage.
Les flammes _'tans le fbur peuvent _tre
dteintes entiOrement en fbm_ant la porte du
fbur et en fbrmant la commande ou en utilisant
tin extincteur d'incendie fi mousse ou fi poudre
chimique tout usage.
: i,aissez les grilles de M_leur et autres surfi_ces
refloidir avant de les toucher ou de les laisser fi
tin endroit oL'lles enfimts peuvent les atteindre.
: Ne bloquezjamais les dvents (ouvertures d'air)
de la cuisini_re. Ils ofi_ientune entrde et une
sortie d'air ndcessaires pour que la cuisiniSre
fbnctionne correctement avecla bonne
combustion. Les ouvertures d'air se trouvent
fi l'arri_re de la surfi_ce de cuisson, ('tans
le haut et le bas de la porte du fbur et mi bas
de la cuisiniSre sous le tiroir de mngement
ou le pannemi coup de pied.
: Ne soulevez pas la surface de cuisson.
Soulever la surface de cuisson peut
endommager la cuisiniOre ou causer
tin mmivais fbnctionnement.
5
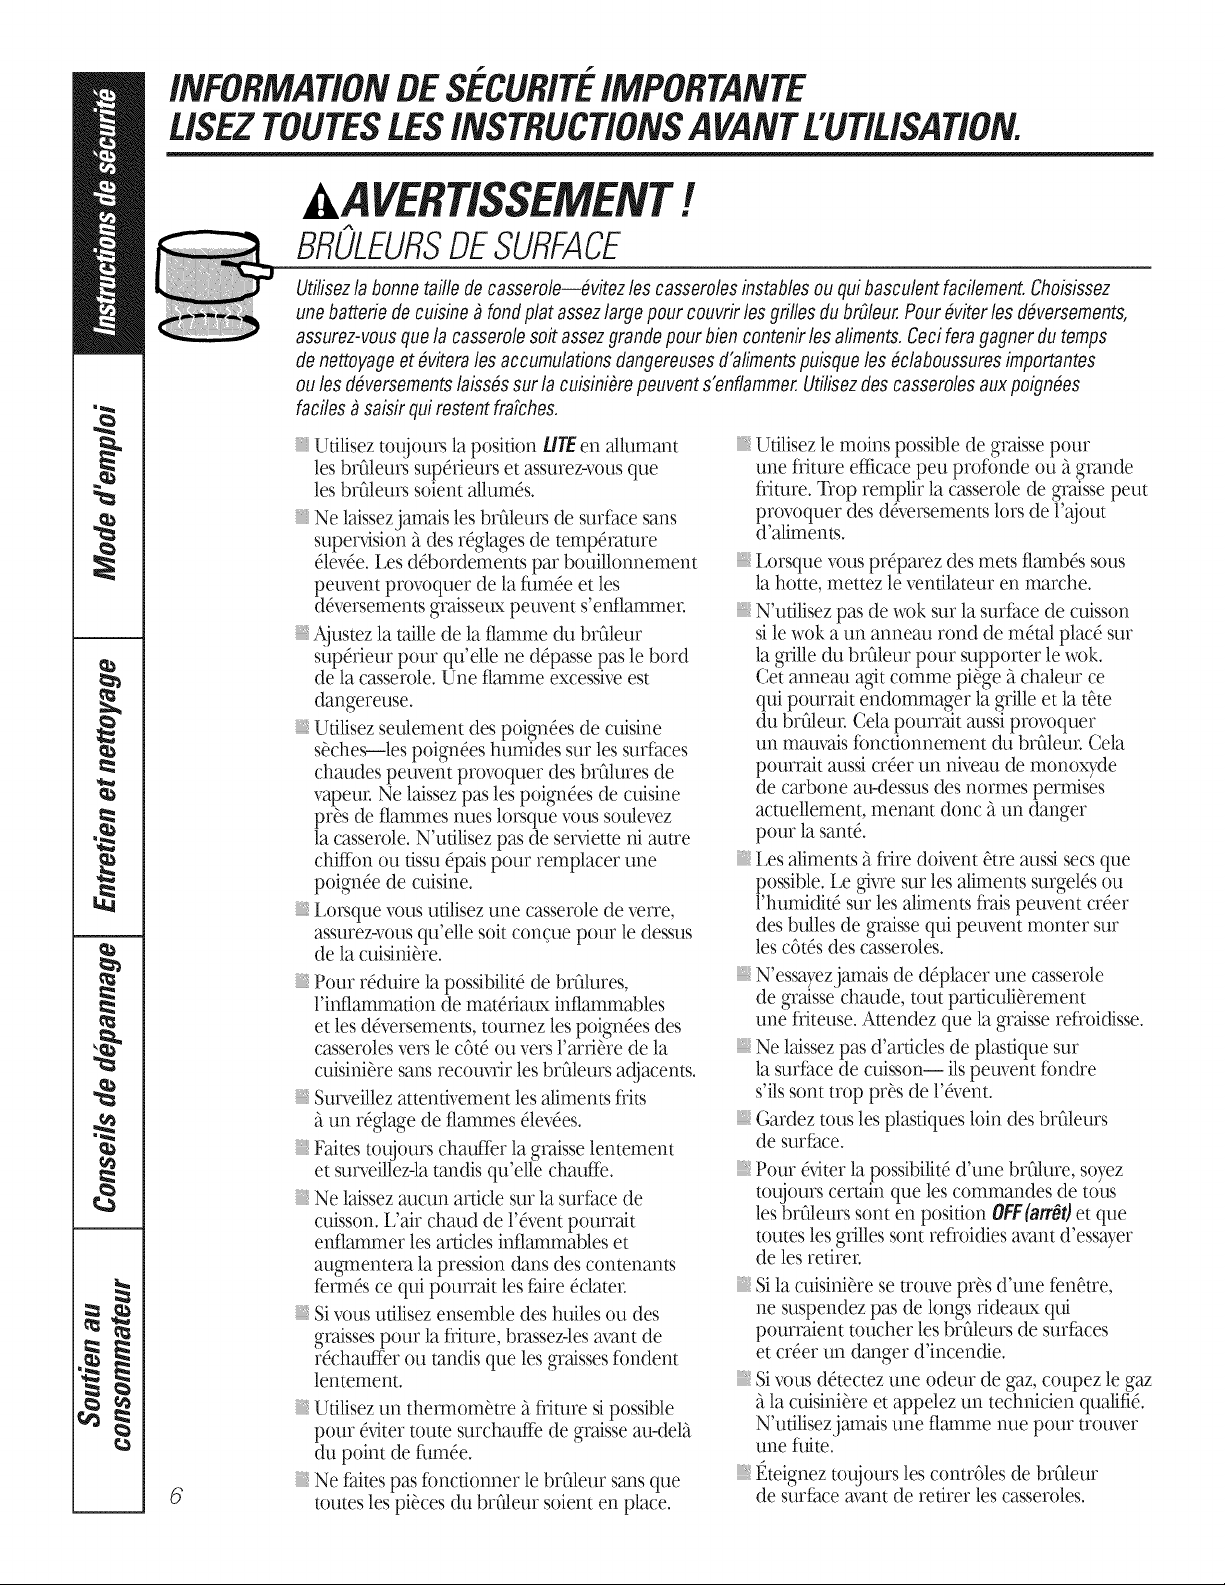
iNFORMATiONBESECURITE/MPORTANTE
USEZTOUTESLESiNSTRUCTiONSA VANTEUT/USATION.
6
BRULEURSDESURFACE
!
m
Utilisezla bonnetailledecasserole--6vitez les casserolesinstablesou qui basculentfacilement.Choisissez
unebatteriede cuisine _ fond plat assezlarge pour couvrirles grilles du brOleur.Pour &iter les d#versements,
assurez-vousque la casseroleso# assezgrandepour bien contenirles aliments.Cecifera gagner du temps
denettoyageetfiviteralesaccumulationsdangereusesd'alimentspuisquelesficlaboussuresimportantes
oules dfiversementslaiss#ssur la cuisinifire peuvent s'enflammer.Utilisezdes casserolesauxpoign#es
faciles _ saisir quirestent fraPches.
Udlisez toujours la position tile en allumant
les blaSleurs supdrieurs et assurezwous que
les brOleurs soient allumds.
Ne laissezjamais les brOleurs de surface sans
superxdsion "_des rdglages de tempdramre
dle%e. Les ddbordements par bouilkmnement
pem.'ent provoquer de la fire, de et les
ddversements graisseux peuvent s'enflammer.
Ajustez la mille de la flamme du brOleur
sup&ieur pour qu'elle ne d@asse pas le bord
de la casserole. Une flamme excessive est
dangereuse.
Utilisez seulement des poigndes de cuisine
sOche_les poignOes humides sur les surfaces
chaudes peuvent provoquer des bffdures de
vapeur. Ne laissez pas les poignOes de cuisine
pros de flammes hues lorsque vous soulevez
la casserole. N'ufilisez pas de ser_dette ni autre
chiffbn ou fissu @ais pour remplacer une
poignde de cuisine.
Lorsque vous udlisez une casserole de verre,
assurez-vous qu'elle soit concue pour le dessus
de la cuisini_re.
: Pour rdduire la pos0bilitd de b,fdures,
l'inflammadon de matdriaux inflammables
et les ddversemems, tournez les poigndes des
casseroles vers le c6td ou vers l'arri_re de la
cuisiniare sans recouvnr les brffleurs a_!jacents.
: Surveillez attendvement les aliments flits
fi tin rdglage de flammes dlevdes.
: Fakes toujours chauffer la gmisse lentement
et surveillez-la tandis qu'elle chmlffe.
: Ne laissez aucun article sur la surface de
cuisson, l.'air chaud de l'&ent pourrait
enflammer les arddes inflammables et
au_entem la pression _'tans des contenants
let-rods ce qui pourrait les faire dclater.
: Si vous utilisez ensemble des huiles ou des
gmisses pour la flimre, brassez-les avant de
rdchauffer ou mndis que les graisses fbndent
lentement.
: Udlisez un them_om_tre "_fiiture sipossible
pour &4ter route surchauffe de gmisse au-del'_
du point de fire,de.
: Ne faites pas foncdonner le brOleur sans que
routes les places du br01eur soient en place.
: Udlisez le moins possible de gmisse pour
une flimre efficace peu profonde ou "5grande
ffimre. Trop remplir la casserole de gmisse petit
provoquer des d&ersements lots de l'ajout
d'aliments.
: Lorsque vous pr@arez des mets flambds sous
la hotte, mettez le venfilateur en marche.
: N'ufilisez pas de wok stir lasurface de cuisson
si le wok a tin annemi rond de rndml placd stir
la grille du bffdeur pour supporter le wok.
Cet anneau a_t comme pi_ge "_chaleur ce
qui pourmit endommager la grille et la t_te
du br01eur. Cela pourrait aussi provoquer
tin mauvais foncdonnement du b_fdeur. Cela
pourmit aussi c%er un niveau de monoxTde
de carbone au-dessus des normes permises
acmellement, menant donc "_tin danger
pour la santd.
: Les aliments "_flire doivent _tre aussi secs que
possible. Le Dvre sur les aliments surgelds ou
l'humiditd stir les alimems flais peuvent crder
des btflles de gmisse qui peuvent monter stir
les c6tds des casseroles.
: N'essayezjamais de d@lacer une casserole
de graisse chmlde, tout pardculi_rement
une fliteuse. Attendez que la graisse refloktisse.
: Ne laissez pas d'ardcles de plasdque sur
la surface de cuisson-- ilspeuvent fondre
s'ils sont trop pros de l'&ent.
: Gardez tous les plastiques loin des brflleurs
de surface.
: Pour dx4terla possibilitd d'une br01ure, soyez
toujours certain que les commandes de tous
les brfileurs sont en position OFF(arrOflet que
routes les grilles sont refloidies avant d'essayer
de les redrer.
: Sila cuisini_re se trouve pros d'une fen_tre,
ne suspendez pas de kings rideaux qui
pourmient toucher les brfileurs de surfaces
et crder tin danger d'incendie.
: Sivous ddtectez une odeur de gaz, coupez le gaz
"_la cuisini_re et appelez tin technicien qualifid.
N'udlisezjamais une flamme nue pour trouver
une fuite.
: t_teignez toujours les contr61es de brOleur
de surface avant de retirer les casseroles.
www.electromenagersge.ca
FA/TESBIENCUIRELA VIANDEETLA VOLAILLE...
Faitesbbncuirela viandeetlavolaille--laviandedoltavoirunetemperatureINTERNEde71°C(160°F),etla volailleunetempgature
INTERNEde82°C(180°F).Preparerlanourriturebcestempgaturesprotegenormalementcentrelesmaladiesalimentaires.
|A !
FOUR
Lorsquevousouvrezlaportedu four,restez_ I'Ocartdela cuisini_re.De Fairchaud ou de la vapeurs_chappant
peut provoquerdes brOluresaux mains,auvisageet/ouaux yeux.
: Ne chauffez pas les contenants d'aliments
qui ne sont pas ouverts. La pression pourrait
s'accumuler et le contenant pourrait _clatel;
provoquant une blessure.
: Gardez l'dvent du f()ur exempt de route
obstruction.
: Gardez le fbur libre de toute accumulation
de graisse.
: Placez la grille du fbur "alaposidon voulue
lorsque que le fbur est floid. Si les grilles
doivent _tre manipul_es lorsqu'elles sont
chmldes, ne laissez pas les poigndes de cuisine
entrer en contact avec les _l_rnents chmgfhnts.
: En ufilisant les sacs de cuisson ou de r6fissage
dans le fbm; suivez les directives du fhbricant.
: Sordr la grille jusqu'ml verrou de butde est
pmdque pour soulever les aliments lourds.
C'est aussi une prdcaution contre les brtSlures
pouvant 4tre provoqudes en touchant les
surfaces chmides de la porte ou les patois
du fbur.
: N'ufilisez pas le four pour sdcher lesjournmtx.
S'ils surchmgfent, ilspeuvent s'enflammel:
: N'ufilisez pas le four comme espace de
mngement. Les ardcles rangds darts tin fbur
peuvent s'enflammer.
FOURAUTONETTOYANT
: Ne laissez pas de produits en papie_, ustensiles
de cuisson ou aliments darts le %ur lorsqu'il
n'est pas udlis_.
AVERT/SSEMENT:couvrez
JAMAISaucune fente, trou ou passage dans le
bas du four et ne rec()uvrez pas complOtement
la grille d'un matOriau comme le papier
aluminium. Ceci bloquerak le debit d'air dans
le fbur et pourrait causer un empoisonnement
mi monoxyde de carbone. Les doublures
de papier aluminium pourmiem mlssi
empfisonner la chalem; menant "atin
danger d'incendie.
: N'udlisez pas de papier aluminium pour
couvrir le if)rid du ff)ur.Une mmivaise
installation de papier aluminium pourrak
provoquer un risque de choc dlectrique ou
d'incendie.
: Assurezwous que une l_cheflite suit
correctement en place pour rdduire
la possibilkd d'incendies de gmisse.
: Sivous avez un feu de gmisse darts une
l_cheflite, appuyez sur la touche CLEAR/OFF
(annulation/arrOt)et gardez la porte du fbur
fel-mde pour contenir l'incendie jusqu"a ce
qu'il s'dteigne.
N'utilisezpasdenettoyantdefour.fl nofautjamaisutiliserdenettoyantdefourcommercialni derevOtementprotecteur
dedoubluredefourdequelquetypequecesoitautourd'unequelconquesectiondufour.Lesr#sidusdenettoyantsdefour
endommagerontl'int#rieurdufour/orsd'uncycled'autonettoyage.
: Ne nettoyez pas lejoint de porte. Lejoint de
porte est essendel au mainden de l'dtanch_it_.
IIne faut pas flotter, ni endommagel;
ni d@lacer lejoint.
: Avant l'autonettoyage, redrez les grilles du fbur
brillantes de couleur argentde (stir certains
modules) et tousles ustensiles.
: Assurezwous d'essuyer tout d&ersement
excessif avant de lancer l'mitonettoyage.
: S'ilv,a ddhillance en mode d'autonettoyage,
dteignez le four et coupez le courant. Faites-le
r@arer par tin technicien qualifid.
: Nettoyez seulement les pibces indiqudes darts
ce manuel du propridtaire.
LISEZATTENTIVEMENTETCONFORMEZ-VOUSACESINFORMATIONSDESECURITE
CONSERVEZCESINSTRUCTIONS 7
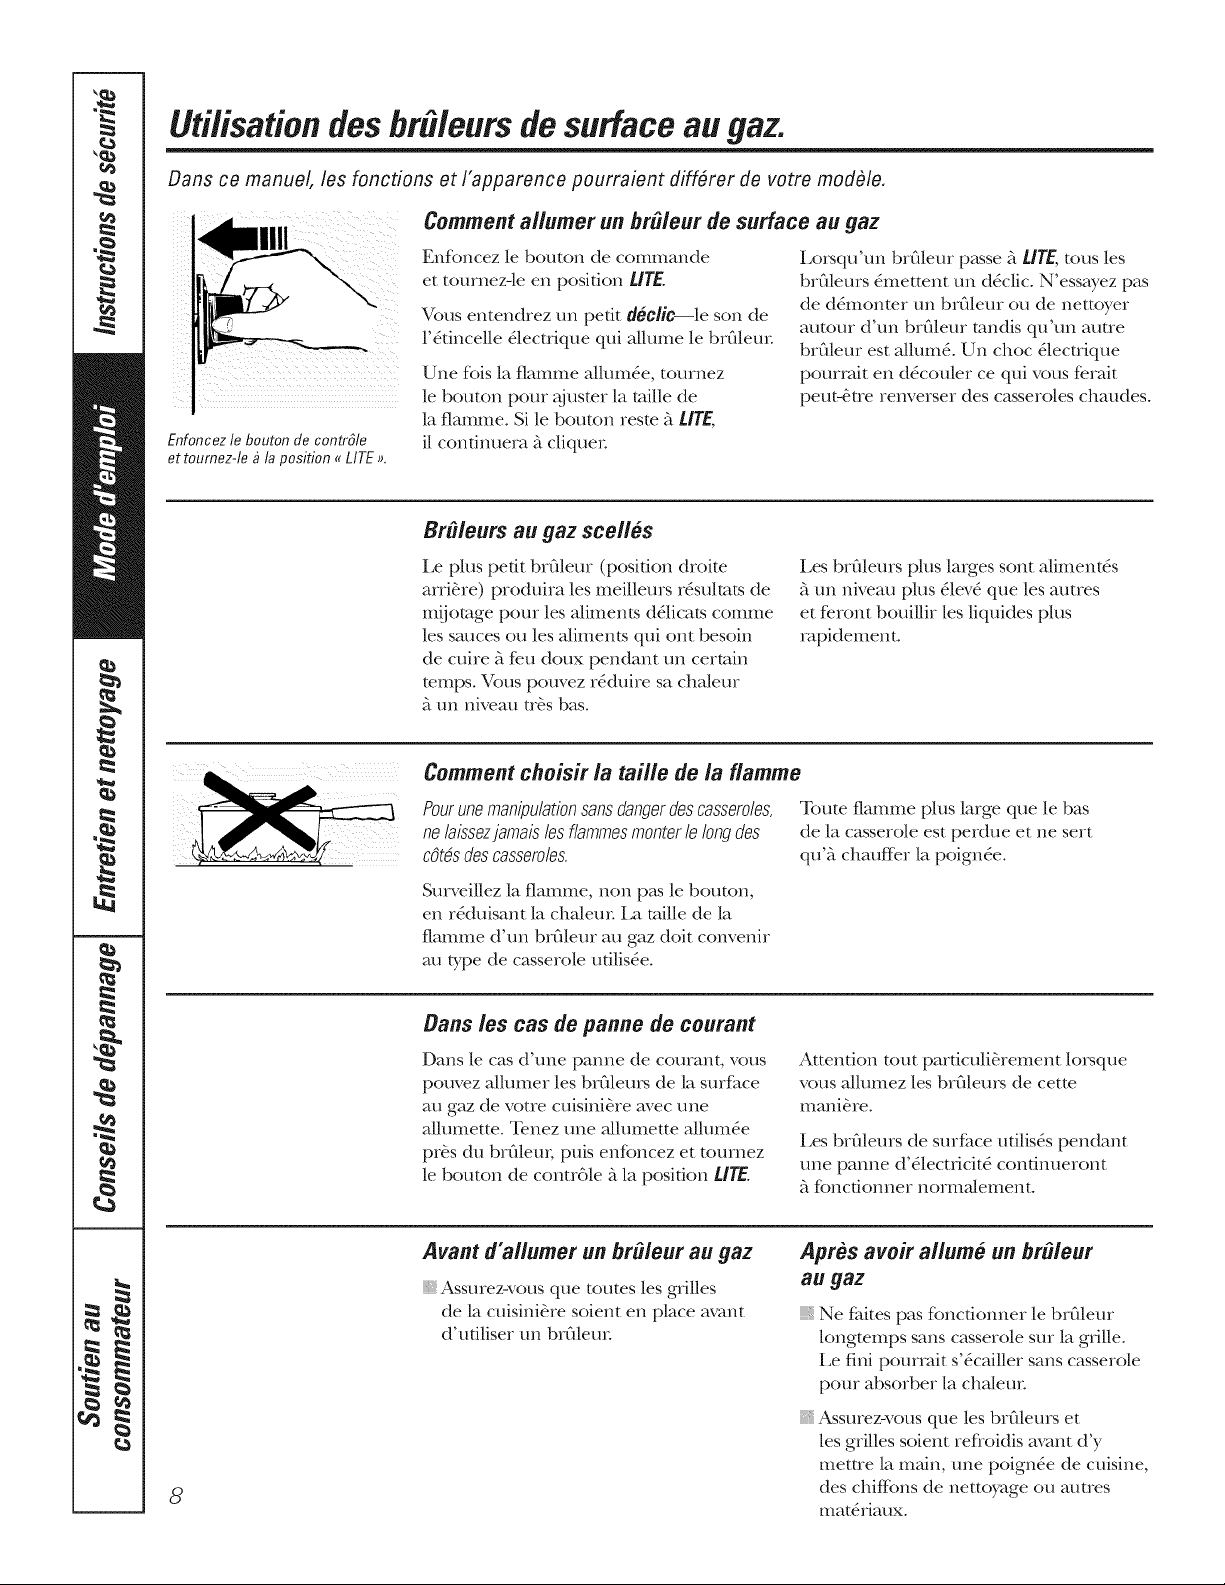
Uti/isation des br#/eursde surface au glaz.
Dans ce manuel, les foncfions et I'apparence pourraient diff#rer de votre modfile.
Enfoncez le bouton de contrSle
et toumez-le _ la position uLITE _.
Comment allumer un br#ieur de surface au gaz
Enfbncez le bouton de commande
et tournezqe en posidon UTE.
Vous entendrez un pedt dec/ic--le son de
l'4fincelle 4lectrique qui a/lume le br_dem:
Une fbis la flamme a/lum_e, tournez
le bouton pore _juster la mille de
la flamme. Sile bouton reste _ UTE,
il confinuera Ftcliquer
i,o,sqt£un brC,leur p_sse _ rITE,a_us les
brfileurs &nettent tm dSclic. N'essayez pas
de d&nonter tm brFfleur ou de nettoyer
aurora d'un brfileur mndis qu'tm autre
brfileur est a/lumP. Un choc 51ecuique
pourrait en d_couler ce qui vous re.fair
peut-&re renverser des casseroles chaudes.
Br#ieurs au gaz scell#.s
Le plus pedt brCdeur (position droim
arri&re) produira les meilleurs r6sulmts de
mijotage pour les aliments d_licats comme
les sauces ou les aliments qui ont besoin
de cuire _ fe.u doux pendant un certain
romps. Vous pouvez r_duire sa chaleur
_ un niveau tr_.s bas.
Les brFfleurs plus laiges sont a/iment6s
_tun niveau plus 51ev5que les autres
et feront bouillir les liquides plus
rapidement.
Comment chois# la taille de la flamme
Pourune manipulation sansdanger descasseroles,
nelaissezjamais les flammesmonterle long des
cOtdsdescasseroles.
Surveillez la flamme, non p_ksle bouton,
en r_duisant la cha/eur La mille de la
flamme d' un brCdem au gaz dolt convenir
au type de casserole ufilis_e.
Toute flamme plus large que le bas
de la casserole est perdue et ne sert
quT_chauffer la poign_e.
Bans les cas de panne de courant
Dans le cas d'une panne de couran[, VOLIS
pouvez a/lumer les brCflem_ de la surfi_ce
au gaz de votre cuisini_re avec tree
a/lumette. Tenez une allumette a/lum_e
pros du brfilem; puis enfoncez et tomnez
le bouton de contr61e _ la posidon UTE.
Attention tout parficuli&rement lo_que
vous a/lumez les brfilem_ de cetm
mani&re.
Les brFdeurs de surfime udlis& pendant
une panne d'51ectficit_ condnueront
;7_fonctionner norInalement.
8
Avant d'a//umer unbrOleur augaz
Assurez-vous que tomes les grilles
de la cuisini&re soient en place avant
d'ufiliser un br_deur
Apres avoir ailume un brOieur
au gaz
Ne fidtes pas fbncdonner le brCfleur
longmmps sans casserole sur la grille.
Le fini pourrait s'Scailler sans casserole
pour absorber la cha[eur
Assurez-vous que les brFdeurs et
les grilles soient refloidis avant d'y
meme la main, une poignSe de cuisine,
des chif_bns de nettoyage ou autres
mat6riaux.

www.electromenagersge.ca
Batterie de cuisine sur la cuisini#m
Aluminium: une batterie de cuisine de
poids moyen est recommandSe car elle
chaufl-_e rapidement et unifbrm&nent.
La plupart des aUments brunissent
uniK)rm&nent dans une po61e fiflire
d'a/uminium. Utilisez des po_lons fi
couvercles herm_tiques en cuisinant
avec de petites quantit6s d'eau.
Fonto: si elles chaufIent lentement,
la plupart des po_les fiffire pr&entent
des r&ulmts satisfhisants.
For6mail16: sous cermines
conditions, l'&nail de cermines batteries
de cuisine pourrak fondre. Stfivez
les recommandations du fhbricant
de batterie de cuisine pour les re&bodes
de cuisson°
Vorre: il ya deux types de batteries
de cuisine de verre--celles pore le four
settlement et celles pour la cuisson sin
la cuisini_re (poSlons, caf_ et thS).
Le verre conduit la chaleur tr_s
lentement.
Coramiquede verre resistantegtla chaleur :
sert fila cuisson de surface ou au fbm-
Elle conduit la chaleur tr_s lentement
et se refioidit tr&s lentement. V_iJfiez
les directives du fhbtJcant de la batterie
de cuisine pour &re certain qu'elle puisse
&re utilis_e avec les cuisini_res au gaz.
Acier inoxydable: ce m6ml seul a de
mauvaises propd&& pour la cha/eur et
est normalement combin5 avec le cuixTe,
l'ahmlinium ou d'autres m_taux pour
mn61iorer la r_partition de cha/eur
Les po&les fi fiire fi combinmson de
m6mux fbnctionnent normNement de
mani_re satisfhisante si elles sont utilis_es
fifeu moyen selon les recommandations
du fabricant.
Grille de dessusde cuisiniem
N'utilisez p_s de gqilles de dessus de
cuisini&re sur vos brfileurs au gaz scell_s.
Si vous utilisez la grille de dessus de
cuisini_re sur le brfileur au gaz scellS, cela
provoquera une combustion incomplete
et doric pourrait mener fi une exposition
fides niveaux de monoxyde de carbone
d_passant les normes admissibles
acmelles.
Cecipeutgtre dangereuxpour votre sant_.
Utilisez un wok _fond plat,
Utilisation duwok
Nousrecommandonsd'utiliserunwokde
35,56cm(14po)oumoinsa fondplatAssurez-
vousquelefonddu woksoita plat surlagrille.
flssontdisponibleschezvotrequincaiflierlocal
Seul un wok fi fond plat doit &re utilis£
N' utilisez p_ksde wok fifired plat sur
un anneau de support. Placer l'anneau
sur le brOleur ou la grille pomTait
provoquer un mauvais fbnctionnement
du brfilem; menant fides niveaux de
monoxyde de carbone au-dessus des
ncmnes permises. Ceci pourrait &ne
dangereux pour voue sant6.
9
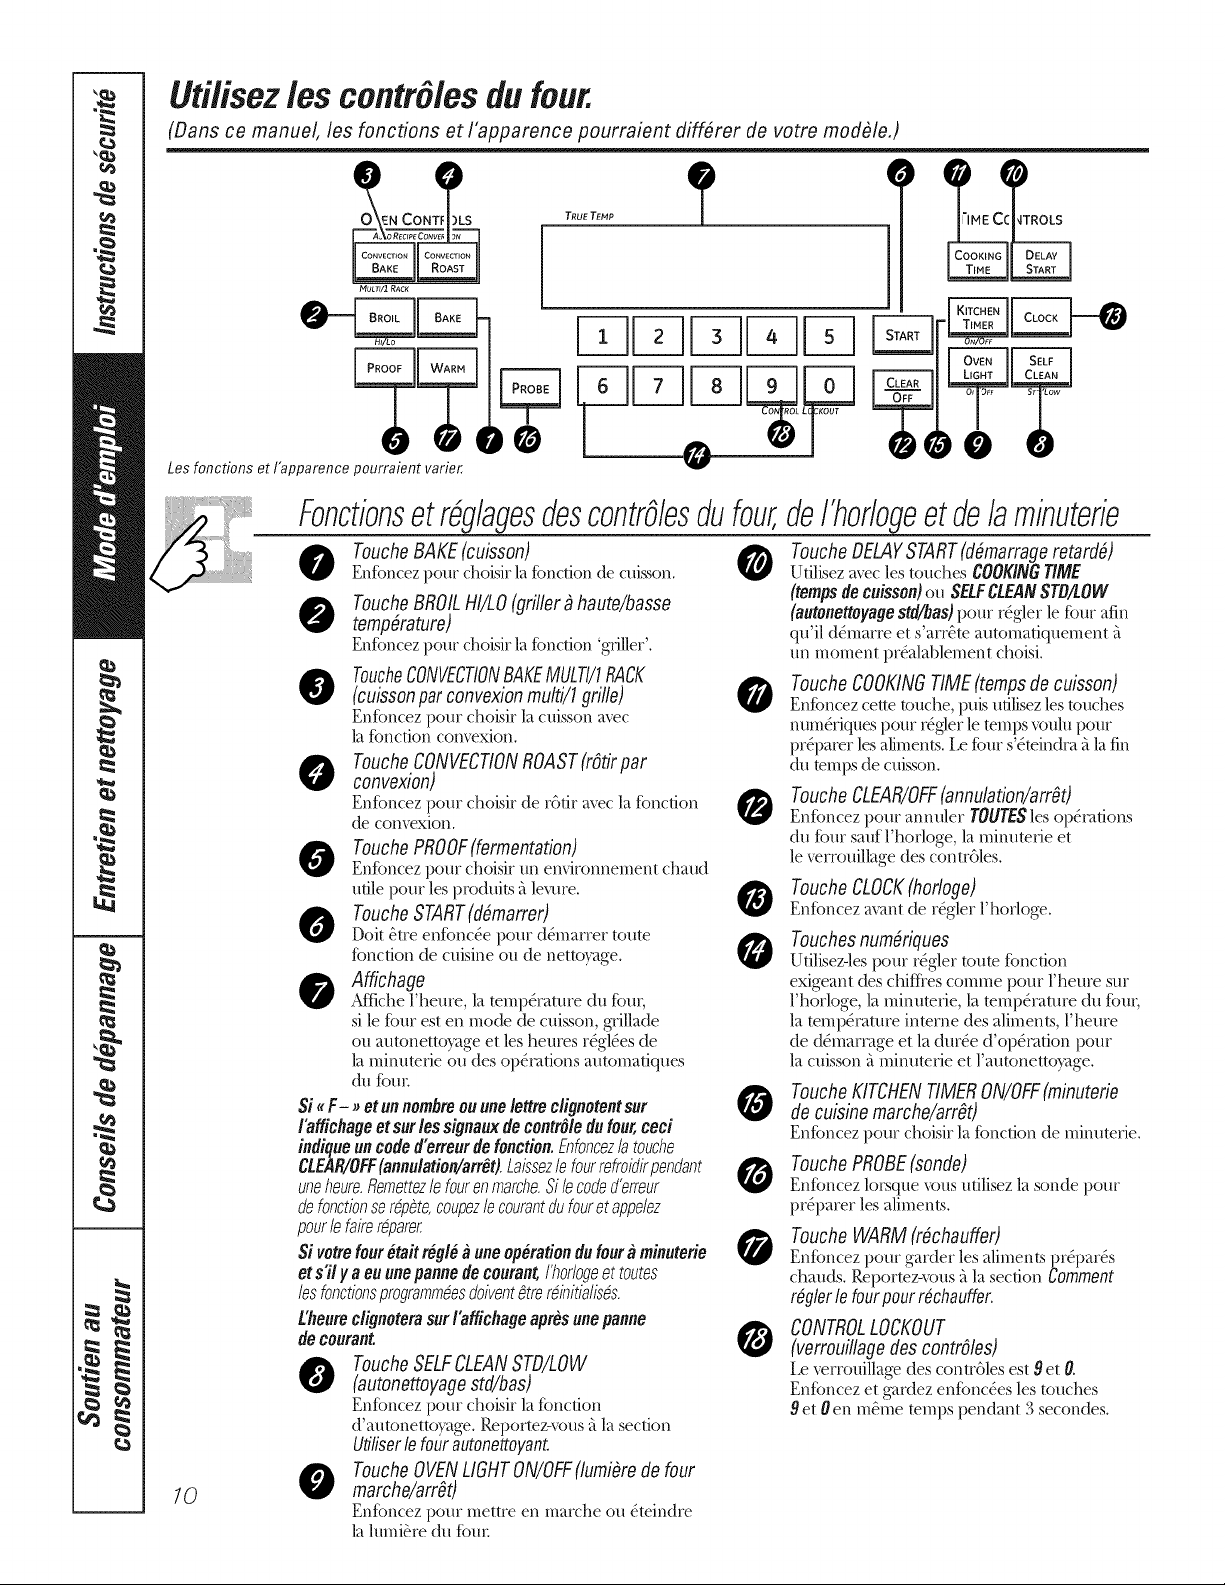
Utilisez les contr61esdu four.
(Dans ce manuel, les fonctions et I'apparence pourraient diff6rer de votre mod61e,)
O_EN CONT?LS
Mutn/1 RACK
Lesfonctions etIbpparence pourraientvarier,
TRUETENP
(,)
JTROLS
FrlFSF FS
.0
/0
Fonctionsetr#g/agesdescontrO/esdufour,
ToucheBAKE(cuisson)
Enfoncez pour choisir la fonction de cuisson. 0
ToucheBROILHI/LO(Triller _haute/basse
temp#rature)
Enfoncez pour choisir la fbnction 'gfiller'.
ToucheCONVECTIONBAKEMULTI/1RACK
(cuissonparconvexionmulti/1grille) 0
Enfoncez pour choisir la cuisson avec
la fonction convexion.
ToucheCONVECTIONROAST(rOt#par
convexion)
Enfoncez pour choisir de r6tir avec la fbnction O
de convexion.
TouchePROOF(fermentation)
Enfoncez pour choisir un environnement chaud
utile pour les produits _tlevure. O
ToucheSTARr(dOmarrer)
Dolt _tre enfbnc_.e pour (t_marrer toute O
fonction de cuisine ou de nettoyage.
Affichage
Aftiche I hetue, la teln[)e.Fature du f()uI;
si le four est en mode de cuisson, gfillade
ou autonettoyage et les heures r_.gl_.esde
la minumfie on des opt.rations automatiques
du fi.m_:
Si _F- _ et un hombreou unelettre clignotent sur
I'affichageet sur /essignaux decontr6/edu four,ceci
indiqueun coded'erreurdefonction.Enfoncez/a touche
CLEAR/OFF(annulation/arr6t).La/ssez/e fourrefro/d/rpendant l_
uneheure.Remettezle fourenmarche.Silecoded'erreur
defonctionser#pete,coupez/e courantdufouret appe/ez
pour/e fairer#parer
$i votre fouretait r6g16a une op6ration dufoura minuterie
et s'il y a eu unepanne de courant,/'hor/ogeet routes
/esfoncfionsprogramm_esdoiventgtre rdnifia//s_s.
L'heureclignotera sur I'affichageapresunepanne
decourant. @
ToucheSELFCLEANSTD/LOW
(autonettoyage std/bas)
Enfoncez ix)ur choisir la foncfion
d'autonettoyage. Reportez-\t)ns _tla section
Utiliser lefourautonettoyant.
ToucheOVENLIGHTON/OFF(lumiOrede four
marche/arrOt)
Enfoncez pour mettre en marche on _.teindre
la lumib.re du fbu_:
deI'horlogeetdelaminuterie
ToucheDELAYSTART(dfimarrageretard#)
Utilisez ax_c les touches COOKINGTIME
(tempsde cuisson) ou SELFCLEANSTO/LOW
(autone#oyagestd/bas) pour r_gler le fbur afin
qu'il (t_marre et s'arr_'te automafiquement _t
un moment pr#alablement choisi.
ToucheCOOKINGTIME(tempsde cuisson)
Enfoncez cette R)uche, puis udlisez les touches
num_.fiques pour r_'gler le romps xt)ulu pour
pr6pamr les aliments. Le fOnTs'_.min(h'a _tlafin
du mmps de cuisson.
ToucheCLEAR/OFF(annulation/arr6t)
Enfoncez pour annuler TOIJTESles op&'adons
du fbur saul l'horloge, la minuterie et
le _errouillage des contr61es.
ToucheCLOCK(horloge)
Enfoncez avant de r#gler l'horloge.
Touches num6riques
Utilisez-les pour r_'gler route foncfion
exigeant des chiffies comme pour l'heure sur
l'horloge, la minumfie, la mmi)_.mmre du fbu_;
la mmi)_.mmre inmrne des aliments, l'heure
de d&narmge et la dur#e d'op&ation ix)ur
la cuisson _tminutefie et l'autonettoyage.
ToucheKITCHENTIMERON/OFF(minuterie
de cuisine marche/arrOt)
Enfoncez pour choisir la foncfion de minutefie.
TouchePROBE(sonde)
Enfoncez loI3que xtms ufilisez la sonde ponI
pr@arer les aliments.
ToucheWARM(rOchauffer)
Enfoncez pour carder les aliments _r@ar&
chauds. Reportez-x<ms _tla section t,omment
rOglerle four pourr#chauffer.
CONTROLLOCKOUT
(verrouillagedes contrOles)
Le _wrouillage des contr61esest 9 et 0.
Enfoncez et g'ardez enfbnc_.esles touches
9et Oen m_.meromps pendant 3 secondes.
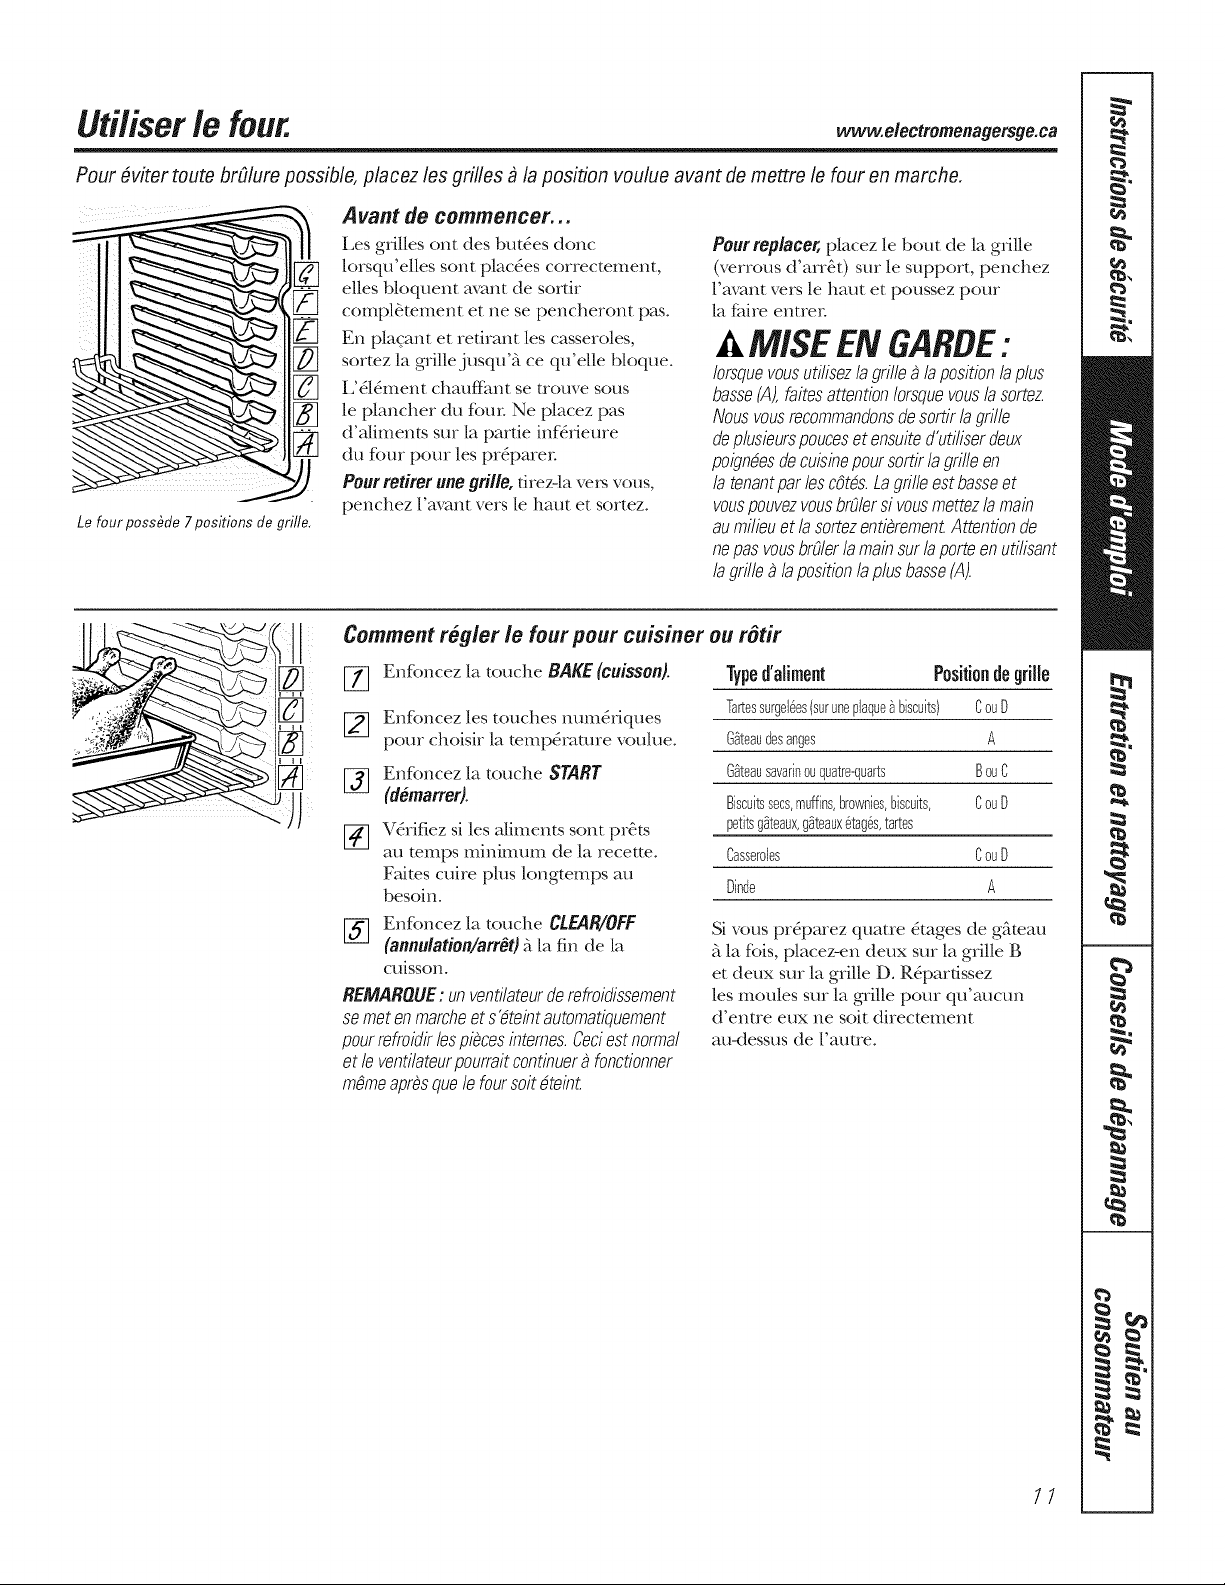
Uti/iser /efour. .elec,rome,age ge.ca
Pour fiviter toute brdlure possible, placez lesgrilles _ la position voulue avant de mettre le four en marche.
[]
Le fourposs#fle 7 positions de grille,
Avant de commencer.,,
[.es g,illes ont des buttes doric
loIsqt£elles sont plac_es coI,ecmment,
dies bloquent avant de soIfi_
compl#.mment et ne se penche_ont pas.
En placant et Iefi_ant les casse_oles,
so_tez la grille.j usqt£k ce qt£elle bloque.
L'_l_ment chauf)c_mt se t_ouve sous
le planche_ du fk>tH-Ne placez pas
d'a/iments suI la paxfie inf_ieu_e
du fk>u_pou_ les p__pare_-
Pourretirerune grille,dIez-la ve_ vous,
penchez l'avant vets le haut et so_tez.
Pour replacer, placez le bout de la giille
(ve_,ous d'ai,&t) su, le suppo_t, penchez
l'avant vets le haut et poussez pou_
la f_d,e entxe_-
A MISE EN GARBE:
Iorsquevousutilisezla grilleala positionlaplus
basse(A),bites attentionIorsquevousla sortez
Nousvousrecommandonsdesortirla grille
deplusieurspouceset ensuited'utiliserdeux
poigndesdecuisinepoursortirla grilleen
la tenantparlescOt_s.Lagrilleest basseet
vouspouvezvousbrOlersivousmettezla main
aumilieuetlacortezentibremen£Attentionde
nepasvousbrOlerla mainsurla porteenutilisant
lagrillea la positionlaplusbasse(A).
Comment r#gler le four pour cuisiner ou r_tir
[_ EnfLmcez la touche BAKE (cuisson).
[_ Enfkmcez les touches num_,iques
pou_" choisi_" la temp_atu_e voulue.
Typed'aliment Positiondegrille
Tartessurgel6es(suruneplaque9biscuits) CouD
Ggteaudesanges A
EnRmcez la touche START
(demarrer).
V#_ifiez si les aliments sont pI&ts
au wraps minimum de la Iecette.
Faims cui_e plus longtemps au
besoin.
Ggteausavarinouquatre-quarts BouC
Biscuitssecs,muffins,brownies,biscuits, CouD
petitsggteaux,ggteauxdtag@s,tartes
Casseroles CouU
Uinde A
F-_ Enfkmcez la touche CLEAR/OFF
(annulation/arrOt)_ ]a fin de la
c uisson.
REMARQUE:unventilateurderefroidissement
semetenmarcheet s_teintautomatiquement
pourrefroidirlespiecesinternes.Ceciestnorrnal
et le ventilateurpourraitcontinuera fonctionner
mOmeaprbsquelefoursoit4tein£
Sivous p__pa_ez quaQe _mges de gt'_mau
;_]a fk>is,placez-en deux su_la g_ille B
et deux suz la g,ille D. R_pa,dssez
les moules su_ la gqillepoui qu'aucun
d'enQe eux ne soit di_ecmment
au-dessus de l'auue.
11

Uti/iser lefour.
Ne placez pus d'aliments
flirectement flans le fond flu four,
Pr#.chauffageet placement desmoules
Pr&:hauffez le fbur si la recette l'indique. Les r_sultats seront meilleurs si
I1 est n6cessaire de pr_chaufi:er pour de
meilleurs r&ulmts lots de la pr6parafion
de gClteaux, de biscuits secs, de p;kisseHes
et de pain°
Pourpr_chauffer,r@lez le foura la bonne
tempdrature.Le contrde feraentendre unbid
Iorsquele four estprdchauffd etI'affichage
indiquerala tempdraturechoisie.Le temps
deprdchauffage variera selonle r@lage
detempdrature.
les moules sont entrSs darts le fbur aumnt
que possible. Si vous prSparez plus d' un
moule, placez-les pour qu'ils aient au
moins 2,5 cm _ 3,8 cm (1 po _ 1½ po)
d'air ;-tutour d'eux.
Papier aluminium
N'ufilisez pasdepapieraluminium aufond
du four
Ne couwezjmnais end_rement une grille
de papier ahmlinium. Ceci afIecmm
la citvulafion de chaleur et m&neIa
{tune IIlauvaise cuisson.
Vous pom_ez udliser une plus pedte feuille
de papier pour saisir les d&_e_sements
en la placant {tquelques pouces sous
les aliments sin une grille inf_Heure.
Humidit#. dufour
Tandis que votre four se r&hauffe.,
le changement de temp&amre de l'air
du four peut fbmler des gouttelettes
d'eau sur le verre de la porto. Ces
gouttelettes ne sont pas dangereuses
et s'&_aporent mndis que le four
continue _tse r_chauffe_:
12
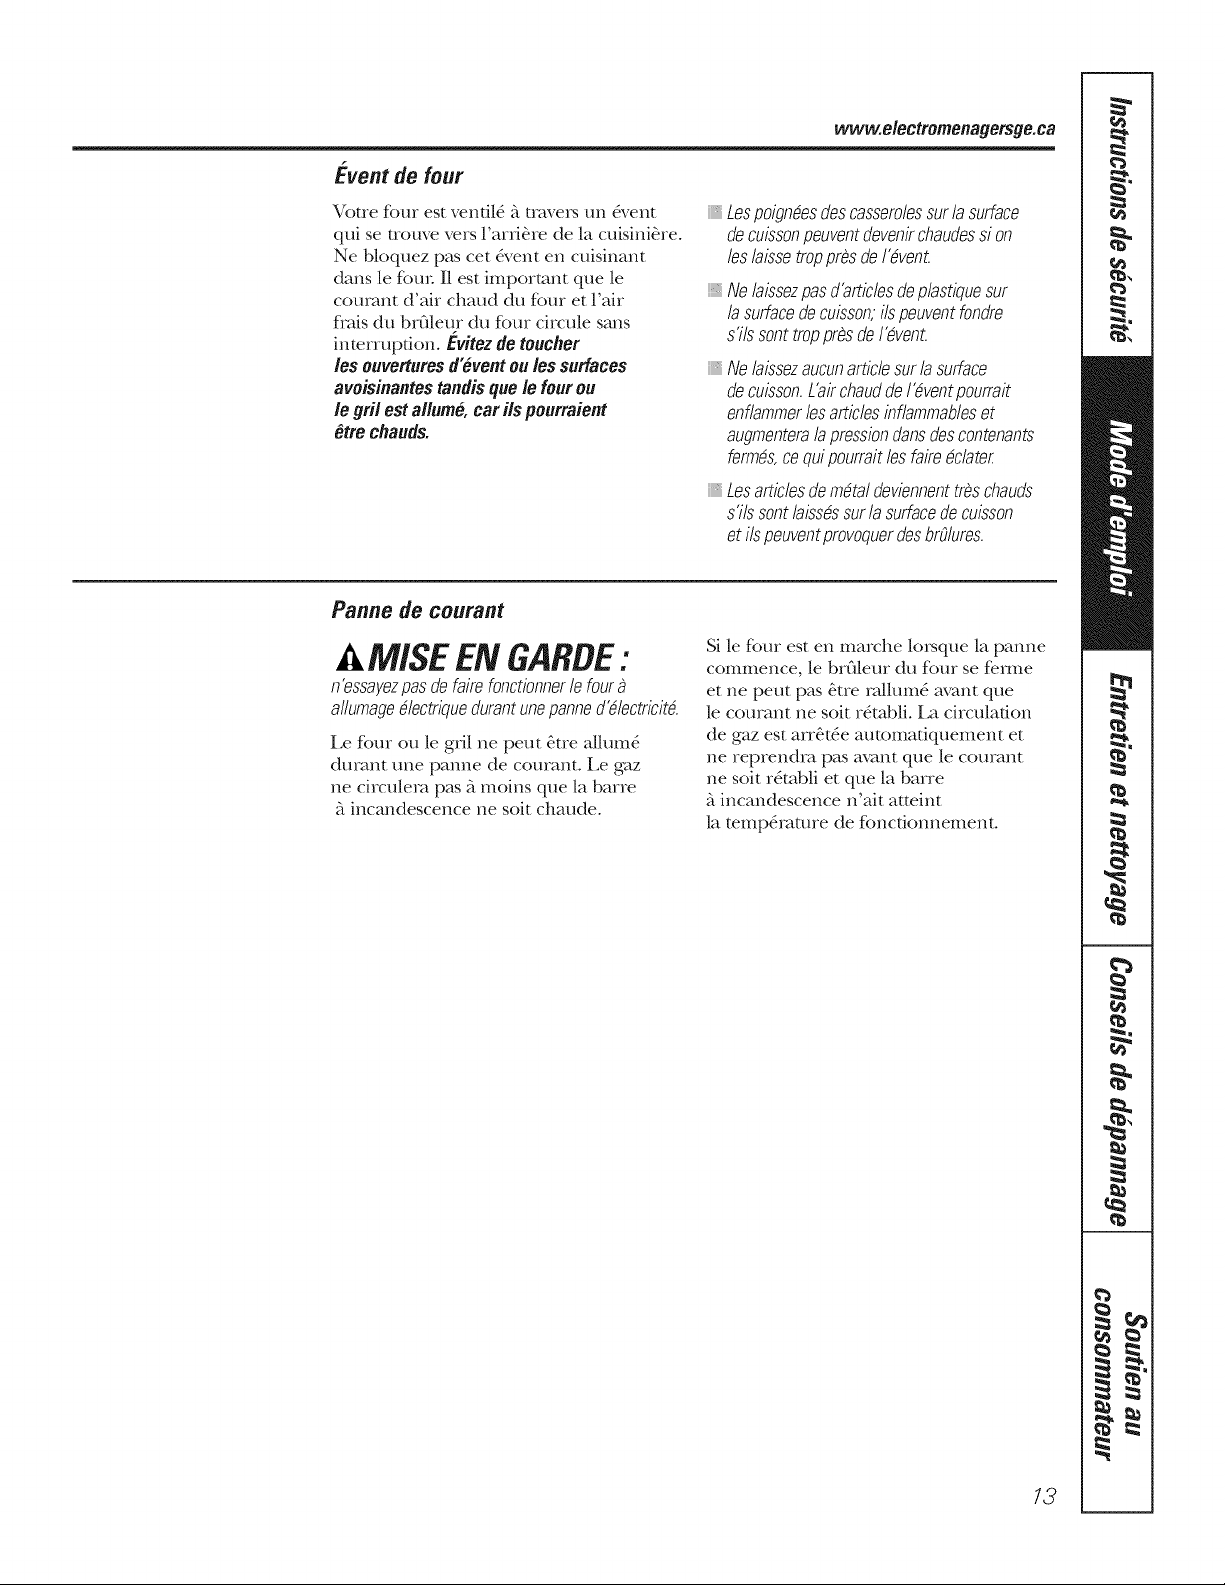
www.electromenagersge.ca
E-ventdefour
Votre fore est ventil_ _ltrave_ un 5vent
qui se trouve vers l'arfi_re de la cuisini_re.
Ne bloquez pascet event ell cuisinant
darts le fore- I1est important que le
comant d'ah chaud du fore et Fair
flais du brgdem du fbm ci,vule sans
intenupfion. Evitezde toucher
les ouverturesd_ventou lessurfaces
avoisinantestandisque/efourou
le gril esta/lume,oar ilspourraient
Otreohauds.
Lespoigndesdescasserolessurla surface
decuissonpeuventdevenirchaudessi on
leslaissetroppresdeI_vent
Alelaissezpasd'articlesdeplastiquesur
lasurfacedecuisson,ils peuventfondre
s'ilssonttroppresde I_vent.
Ne laissezaucun article sur la surface
decuisson.L'air chauddeI_ventpourrait
enflammer les articles inflammables et
augmenterala pressiondans descontenants
fermds, ce qui pourrait les faire dclater
Lesarticlesdemdtaldeviennenttreschauds
sTIssontlaissdssurlasurfacedecuisson
et ilspeuventprovoquerdesbrOlures.
Panne de courant
AM/SE EN GARDE:
n'essayezpasdefairefonctionnerle four
aflumagedectriquedurantunepannedVlectricitd.
Le fbm ou le gill ne peut &re aUum£
dinant tree panne de comant. Le gaz
ne ci_culera pas _ moins que la bane
k incandescence ne soit chmlde.
Si le fbm est en marche lo_que la panne
commence, le brfllem du fore se ferule
et ne peut pas &tre rallum_ avant que
le comant ne soit r_tabli. La circulation
de gaz est arr_t_e automafiquement et
ne reprendra pas avant que le comant
ne soit r_tabli et que la bane
{_incandescence n'ait atteint
la mmp&amre de foncfionnement.
13
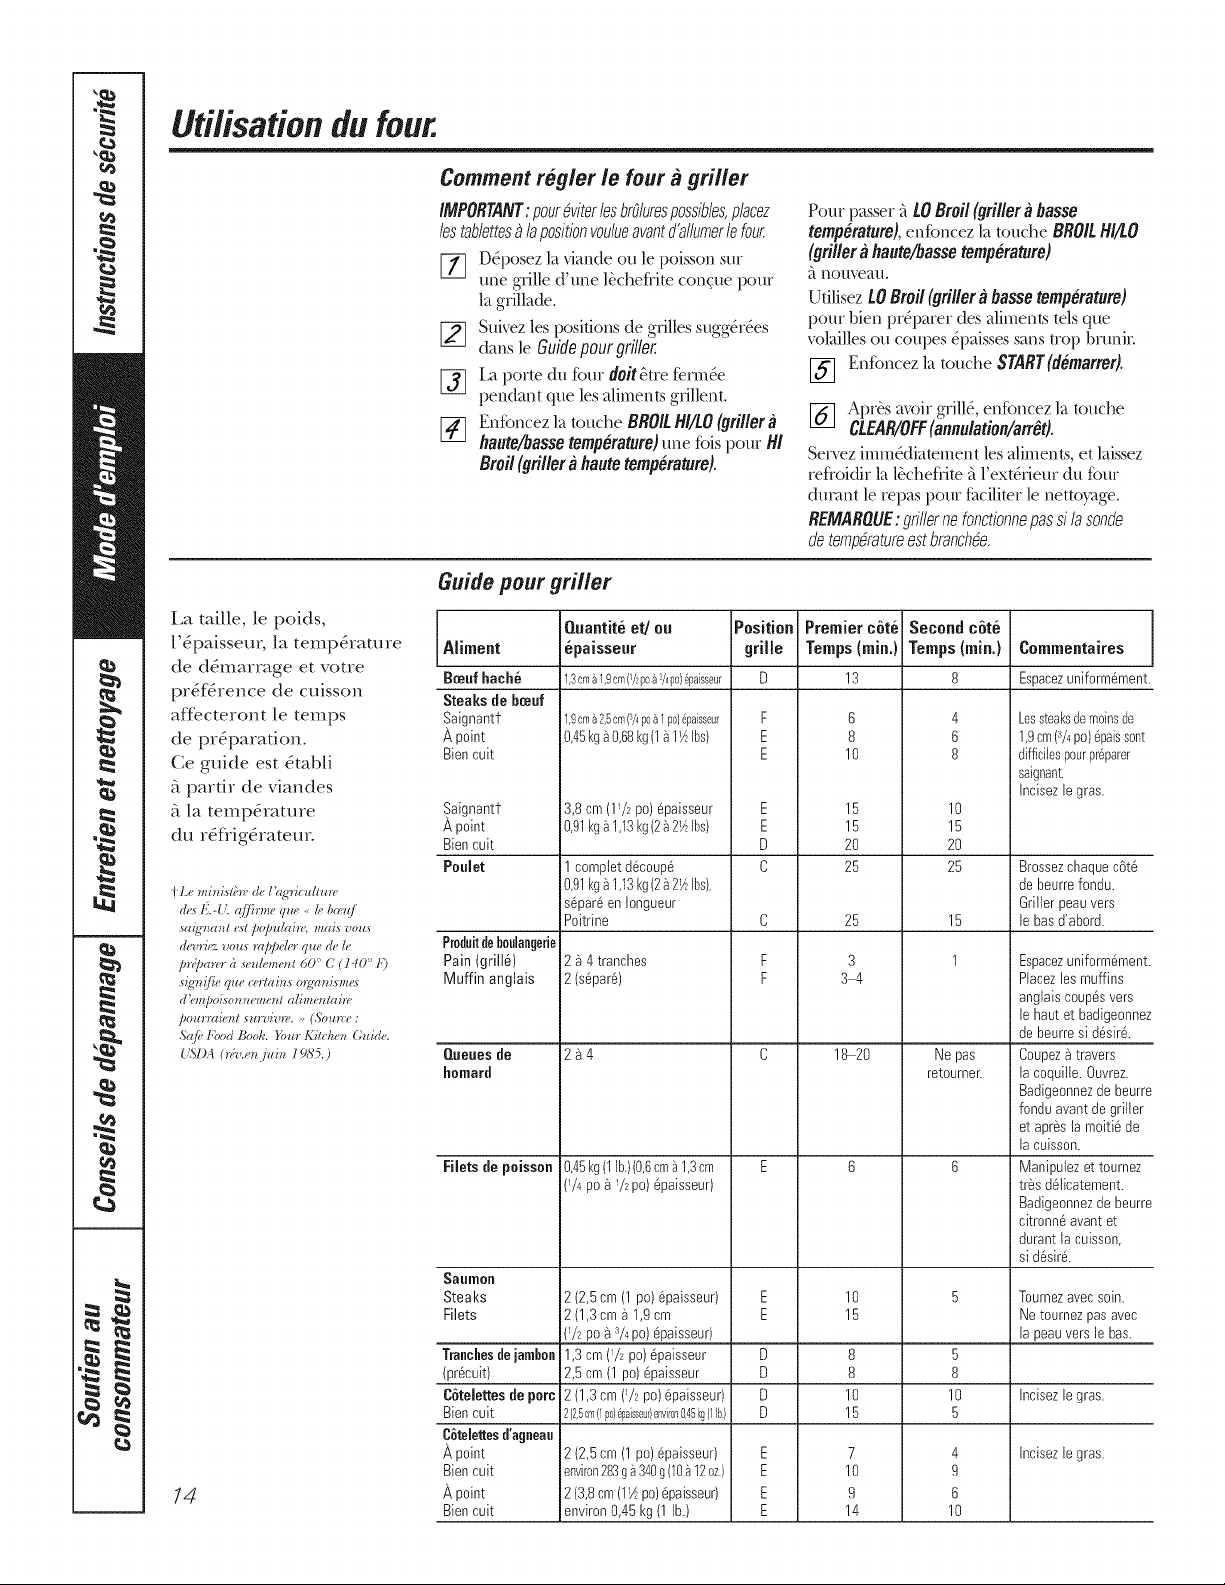
Uti/isationdu four.
Comment r#gler le four a griller
IMPORTANT:pour&iterlosbrdurespossibles,placez
lostablettes_ lapositionvoulueeventd'allumerlefour
[77 D_posez la viande ou le poisson sur
une grille d'une l_cheflite concne pour
la gcillade.
[] Suivez les positions de grilles sugg&_es
dans le Guide pour grifler
[_ La porte du fbur doit_tre f(rm_e
pendant que les aliments gcillent.
[_] Enfoncez la touche BROILHI/LO(griller
hauto/bassotemperature)une fbis pour 14/
Broil(grillerahautetemperature).
Pour passer {tLOBroil (oriller a basse
temperature),enfoncez la touche BROIL N//LO
(grillera haute/bassetemperature)
_t notl\_atI.
Ufilisez tO Broil(grillera bassetemperature)
pour bien pr(3)arer desaliments tels que
_olaillesou coupes _paisses sanstrop bruniL
[_] Enfoncez la touche SraRr(demarreO.
[-_ Apt& a,<)ir gcill_,enfoncez la touche
CLEaR/OFF(annulation/arr_O.
Ser_z imm&tiaten_ent lesaliments, et laissez
refloidir la l_cheflim _tl'ex/&ieur du four
(hwant le repas pour fhcilimr le nettoyage.
REMAROUE:grillernofonctionnepassilasonde
detemp&atureestbranchde.
La mille, le poids,
l'Spaissem; la temp&amre
de d&narrage et voue
prSf>rence de cuisson
affecteront le temps
de preparation.
Ce guide est _mbli
{_pardr de viandes
5 la temp&amre
du r_flig_rateur.
Lemini,_tblvdeIbg'riculture
de_1['.4'.({D'h',wque_,l_,b_*'+q
saigv*ant_,stpopulai_v,maia vous
d_vri_¢vous rappderquede le
/)r,;/)a_oa seulement 60_'C (140' I9
sg'n{fieque _,rlains o_g_mi_mea
d'_m_poiaonm'meutalimentahe
pomraientsu_wivr_,.* (Sou_we:
&(/bt;bod Book._bur Kitchen (bride.
{_I)A (r;v.e_ /ui_ 1985.)
14
Guidepour wilier
Aliment
Breuf haeh_
Steaks de b_euf
Saignantf
_, point
Biencuit
,Saignantf
A point
Biencult
Poulet
Prodeitdebodangerie
Pain(grill_)
Muffin anglais
Queues de
homard
Filetsde poisson
Saumon
Steaks
Filets
"[ranchesdejambon
(pr_cuit)
C6teJettesde porc
Biencuit
CGteJeltesd'agneau
_, point
Biencult
_, point
Biencuit
Onantite et/on Position Premier cGte
epaissenr grille Temps {rain.)
1,3cma1,9cm(7_poa_/4po}Oaisseur D 13
1,9cma2,5crn(a/_poa1po)6paisseur
0,45kg9 0,68kg(19 l_AIbs)
3,8cm (1!/2 po) @aisseur
0,91kg9 1,13kg(29 2_½Ibs)
1templet d_coupO
0,91kg_ 1,13kg(2_ 2_½Ibs),
s@ar_enIongueur
Poitrine
2_ 4 tranches
2(s@ar_)
2_4
0,45kg(1Ib,)(0,6cm9 1,3cm
(!/4 poa !/2 po) @aisseur)
F 6
E 8
E 10
E 15
E 15
D 20
C 25
C 25
F 3
F 34
C 18-20
F 6
2(2,5 cm (1 po) @aisseur) E 10
2(1,3 cm _ 1,9cm E 15
(_/_po_ _/4po) @aisseur)
1,3cm (_/_po) @aisseur D 8
2,5cm (1 po) @aisseur D 8
2(1,3 cm (72 po) @aisseur) D 10
2(2,5cm{/po}_paisseul)envilon0,45kg(/Ib) D 15
2(2,5 cm(1po)@aisseur) E 7
environ283g_340g(10912oz.) E 10
2(3,8cm(11Apo)@aisseur) E 9
environ0,45I<g(1lb.) E 14
Second cGte
Temps (rain.)
8
4
6
8
10
15
20
25
15
I
Nepas
retourner.
5
8
10
5
4
9
6
10
Commentakes
Espacezuniform_ment.
Lossteaksdemoinsde
1,9cm(s/4po)6paissent
difficflespourpr6parer
saignant.
Incisezlegras.
Brossezchaquec6t_
de beurrefondu.
Griller peauvers
lebas d'abord.
Espacezuniform6ment
Ptacezlesmuffins
anglaiscoup6svers
le haut etbadigeonnez
de beurresid6sir&
Coupez_travers
la coquille. Ouvrez.
Badigeonnezde beurre
fonduavantde griller
et apr6s la moiti6 de
la cuisson.
Manipulezet tournez
tr6s d61icatement.
Badigeonnezde beurre
citronn6avantet
durantla cuisson,
sid6sir&
Tournez 8vec soin.
Netournezpasavec
la peauversle has.
Incisez le gras.
Incisez le gras.
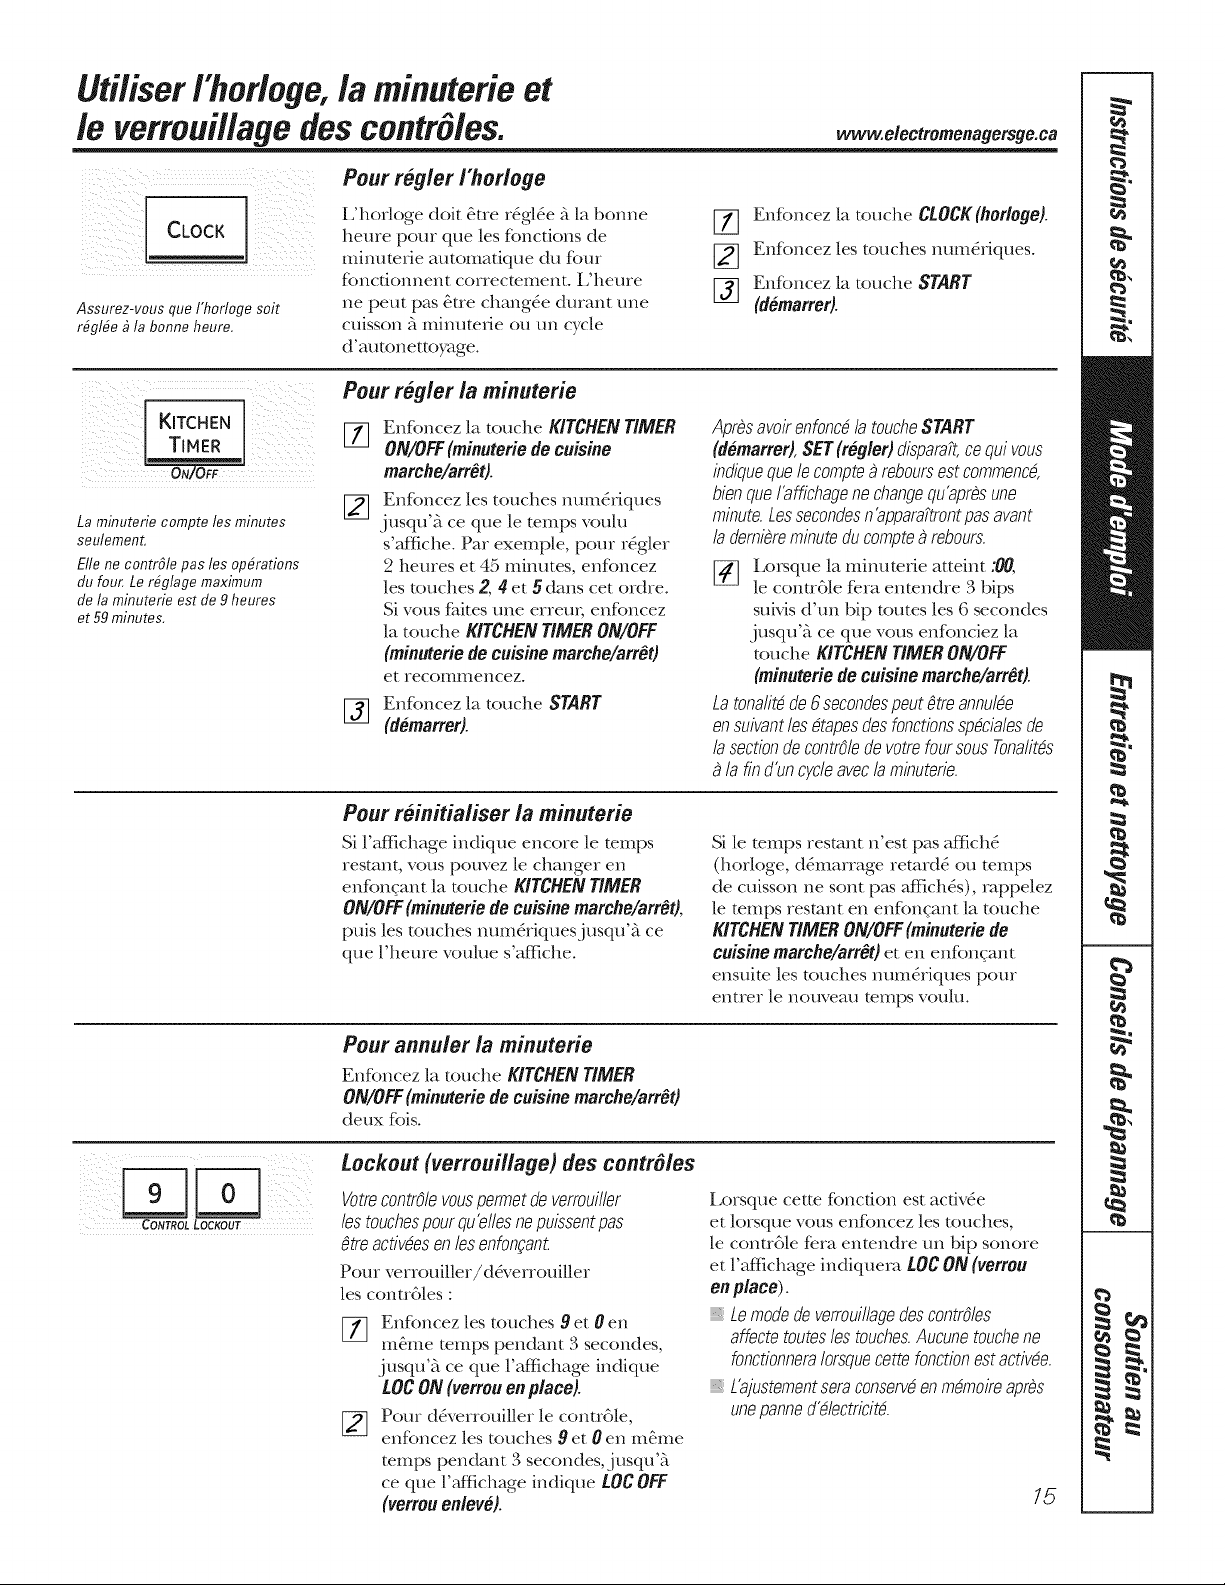
Uti/iser i'horloge,la minuterie et
le verroui/lage des contr /es.
Pour r#g/er /;_or/oge
I CLOCKJ
Assurez-vous que I'horlogesoit
r#gl#e _ la bonne heure.
I/horloge doit _tre r_gl_e _ la bonne
heme pour que les fonctions de
mimKefie automatique du four
fbncfionnent correcmment. L'heme
ne peut pas _ue chang_e durant une
cuisson _ minumfie ou un cycle
d'autonettoyage.
ww_electromenagecsge.ca
[77 Enfoncez la touche CLOCK(horloge).
Enfoncez les touches num&Jques.
[_ Enfoncez ]a touche START
(demarreO.
iiii iii i_
KITCHENTIMER
ON_FF
La m/nutene compte les minutes
seulement.
Erie ne contrSle pas les operations
flu four, Le r@lage maximum
de la m/nuterie est de 9heures
et 59 minutes,
Pour regler la minuterie
[_ Enfoncez ]a touche KITCHENTIMER
ON/OFF(minuteriede cuisine
marche/arr6t).
[_] Enfoncez les touches num&iques
jusqt£k ce que le temps voulu
s'affiche. Par exemple, pour r_gler
2 hemes et 45 minutes, enfoncez
les touches 2,41et 5 darts cet ordre.
Sivous faites une errem; enfoncez
la touche KITCHENTIMERON/OFF
(minuteriede cuisinemarche/arr_t)
et recommencez.
[_] Enfoncez la touche START
(domarrer).
Apresavoirenfoncd/a toucheSTART
(demarrer),SET (reg/er)dispara_t,cequivous
indiquequelecomptea reboursest commenc4
bienqueI'affichagene changequ'apresune
minute.Lessecondesn'appara?trontpasavant
lademiereminuteducomptea rebours.
l£_que la minutefie atteint :00,
[_ le contr61e fera entendre 3 bias
suivis d'un bip routes les 6secondes
jusqt£_ ce que vous enfonciez la
touche KITCHENTIMERON/OFF
(minuteriede cuisinemarche/arrOt).
Latonalit_de6 secondespeutgtreannul_e
ensuivantlesdtapesdesfonctionsspdcialesde
lasectionde contrdlede votrefoursousTonalitds
la find'uncycleaveclaminuterie.
Pour r6initia/iser la minuterie
Si l'affichage indique encore le teIIlps
resmnt, vous pouvez le changer en
enfbncant la touche KITCHENTIMER
ON/OFF(minuteriede cuisinemarche/arr_t),
puis les touches num&iquesjusqu'_ ce
que l'heure voulue s'affiche.
Si le wraps resmnt n'est pas affich_
(horloge, d&narrage retard5 ou teIllps
de cuisson ne sent p_LsafIichSs), rappelez
le romps resmnt en enfoncant la touche
KITCHENTIMERON/OFF(minuterie de
cuisinemarche/arrOt)et en enfbnqam
ensuite les touches num&iques pour
entrer le nouveau temps vouhL
Pour annulet la minuterie
Enfoncez la touche KITCHENTIMER
ON/OFF(minuteriede cuisinemarche/arrOt)
deux fbis.
Lockout (verrouillago) descontrOles
VotrecontrOlevouspermetde verrouiller
lestouchespourqu'dlesnepuissentpas
gtreactivdesen lesenfongan£
Pour verrouiller/d&_errouiller
les contr61es :
Enfoncez les touches 9 et 0 en
IkZ_J
re&me temps pendant 3 secondes,
j usqu'Z_ ce que l'afi_ichage indique
LOCON(verrouonplace).
Pour d&_errouiiler le conu61e,
enfbncez lestouches9 et0 en m&ne
temps pendant 3 secondes,j usqu';_
ce que l'affichage indique LOCOFF
(verrouOhiO@).
Lorsque cette foncfion est acfiv5e
et lorsque vous enfoncez les touches,
le contr61e fera enmndre un bip sonore
et l'affichage indiquem LOC ON (verrou
on place).
Lemode deverrouillagedescontrOles
affectetoutesles touches.Aucune touchene
foncfionneraIorsquecette fonctionest acfivde.
L'ajustementsera conservdenmdmoireapres
unepanne d_lectricitd.
15
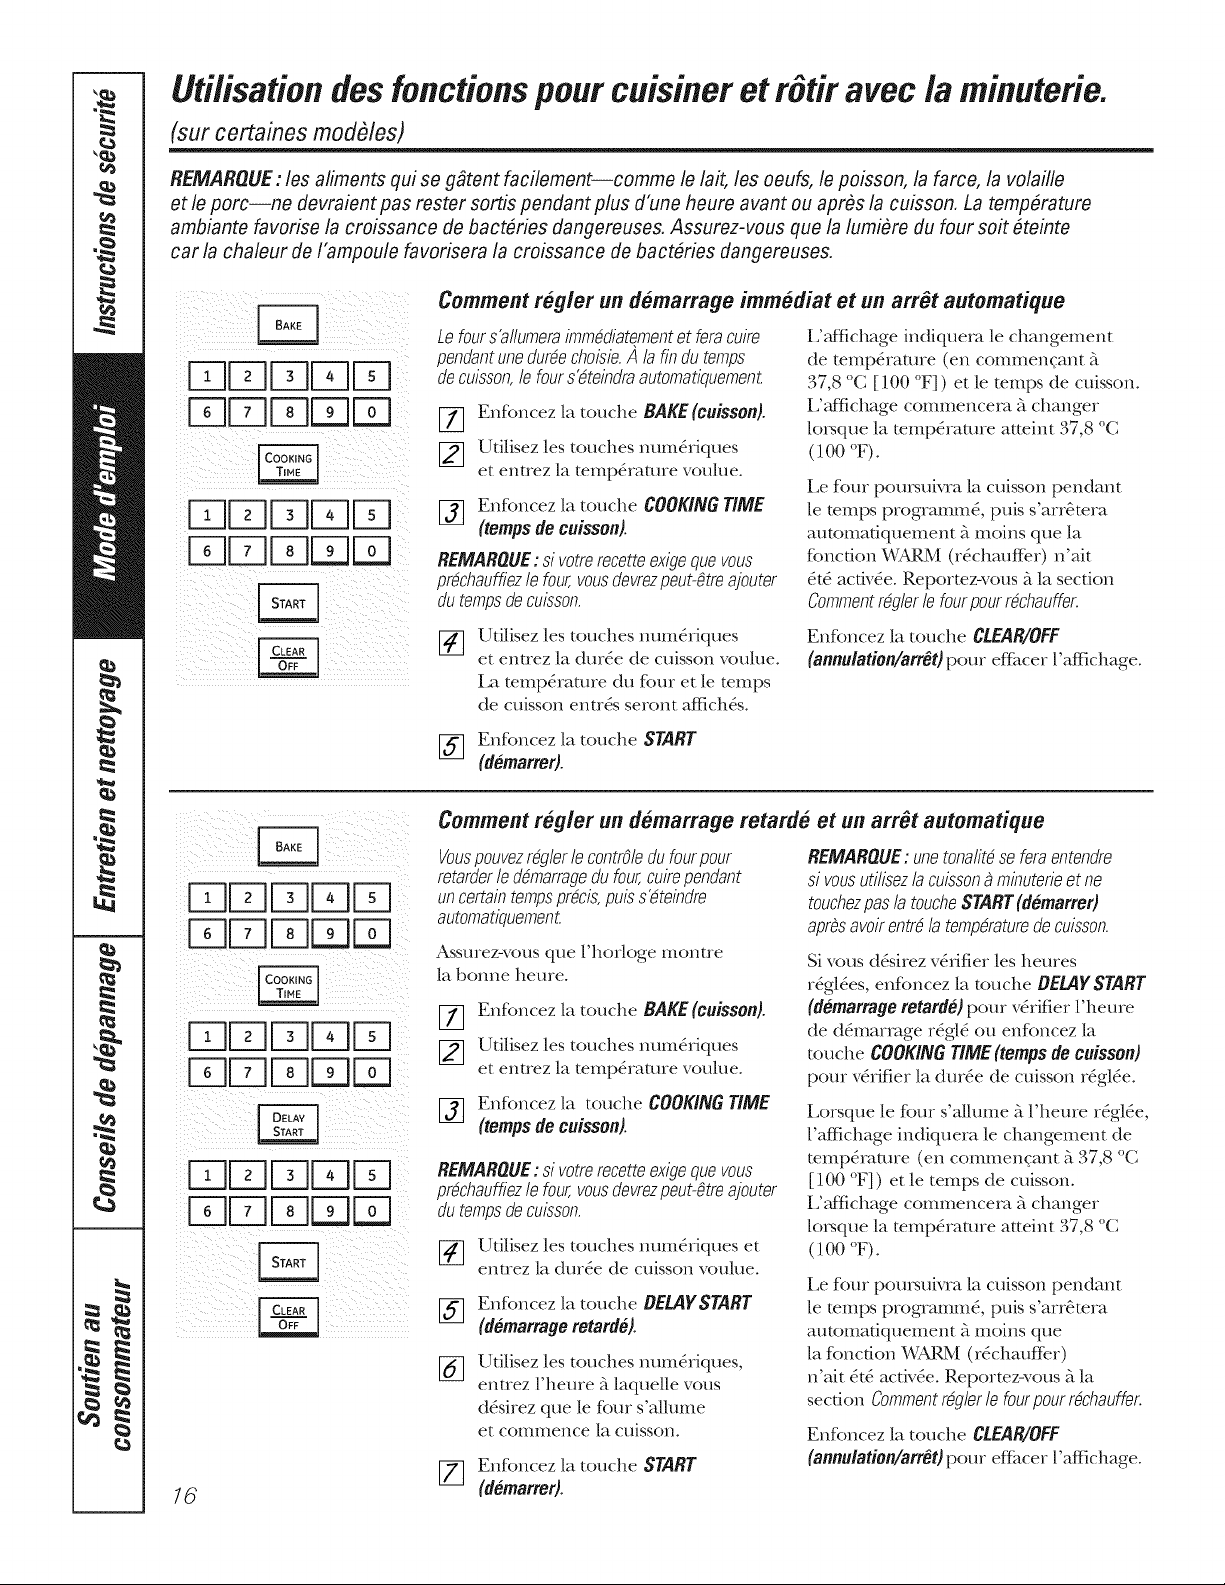
Uti/isationdes fonctionspour cuisiner et r tir avecla minuterie.
(sur certaines mod_les)
REMAROUE : les aliments qui seg#tent facilement--comme le lait, les oeufs, le poisson, la farce, la volaille
etle porc--ne de vraient pas rester sortis pendant plus d'une heure arant ou aprils la cuisson. La tempfirature
ambiante favorise la croissance de bactfiries dangereuses. Assurez-vous que la lumifire du four soit fiteinte
car la chaleur de I'ampoule favorisera la croissance de bactfiries dangereuses.
Comment r#gler un demarrage imm#diat et un arr#t automatique
Lefours'allumeraimmMiatement etferacuire
pendantune dur#e choisie.A la fin dutemps
decuisson,le four s_teindraautomatiquement
[_ Enfoncez la touche BAKE (euisson).
[] Utilisez les touches nmn_riques
et entrez la temperature voulue.
[_] EnfLmcez la touche COOKINGTIME
(tempsde euisson).
REMAROUE:si votrerecetteexigequevous
pr#chauffiezle four,vousdevrezpeut-gtreajouter
dutempsde cuisson.
i,';gfichage indiquem le changement
de mmp&ature (en commencant _t
37,8 °C [100 °F]) et ]e temps de cuisson.
L'_dfichage commencera 5_changer
loI_que la mmp&amre atteint 37,8 °C
(100 °F).
Le ff_urpomsuivra lacuisson pendant
le wraps programme, puis s'arr_mm
automafiquement _ moins que la
fbncfion WARM (r_chaufi:e.r) n'ait
_t_ activ_e. Reportez-vous k la section
Commentr@lerlefourpourr_chauffer.
Udlisez les touches num&iques
et enuez la dm_e de cuisson voulue.
La mmp&ature du four et le temps
de cuisson entr& seront affich_s.
EnRmcez la touche CLEAR/OFF
(annuiation/arrOt) pour e£fimer l'affichage.
[_ Enfoncez la touche START
(demarrer).
16
Comment r#.gler un demarrage retarde et un arr#t automatique
Vouspouvezrdglerlecontrgledu fourpour
retarderle ddmarragedu four,cuirependant
uncertaintempsprdcis,puiss_teindre
automatiquement
Assurez-vous que l'horloge montre
la bonne ]leure.
[77 Enfoncez la touche BAKE(euissen).
_] Utilisez les touches nmn_riques
et entrez la temp&ature voulue.
_] Enfoncez la touche COOKINGTIME
(tempsde cuissen).
REMAROUE:si votrerecetteexigequevous
prdchauffiezle four,vousdevrezpeut-gtreajouter
dutempsde cuisson.
[_ Utilisez les touches nmn_riques et
entrez la dur_e de cuisson voulue.
%
%
Enfoncez la touche BELAYSTART
(demarra#eretarde).
Udlisez les touches num&iques,
enuez l'heure _ laquelle vous
d_sirez que le fbm s'allume
et comInence la cuisson.
_] Enfoncez la touche START
(demarrer).
REMAROUE:unetonafitdseferaentendre
sivousuti/isez/acuisson9 rninuterieet ne
touchezpas/a toucheSTART(demarrer)
apresavoirentr_la temperaturedecuisson.
Sivous d&irez vSHfier les heures
rSglSes, enfoncez la touche BELAYSTART
(demarrageretarde)pour %rifler l'heure
de d&narrage r_gl_ ou enfoncez la
touche COOKINGTIME(tempsde cuisson)
pour %.rifler ladur_.e de cuissonr_gKe.
Lorsque le fbur s'a/lume _ll'heure rSgl_e,
l'affichage indiquera le changement de
mmp&amre (en commencant _ 37,8 °C
[100 °F]) et le temps de cuisson.
L'_dfichage commencera 5_changer
lo_que la mmp&amre atteint 37,8 °C
(100 °F).
Le fbur pom_uivra la cuisson pendant
le wraps programlIl_, puis s'arr6mm
automafiquelnent _moins que
la fbncdon WARM (r#.chmfffer)
n'ait &6 activ6e. Reportez-vous 5.la
secdon Commentr@lerle four pourr_chauffer.
EnRmcez la touche CLEAR/OFF
(annulation/arrOt) pour e£fimer l'affichage.
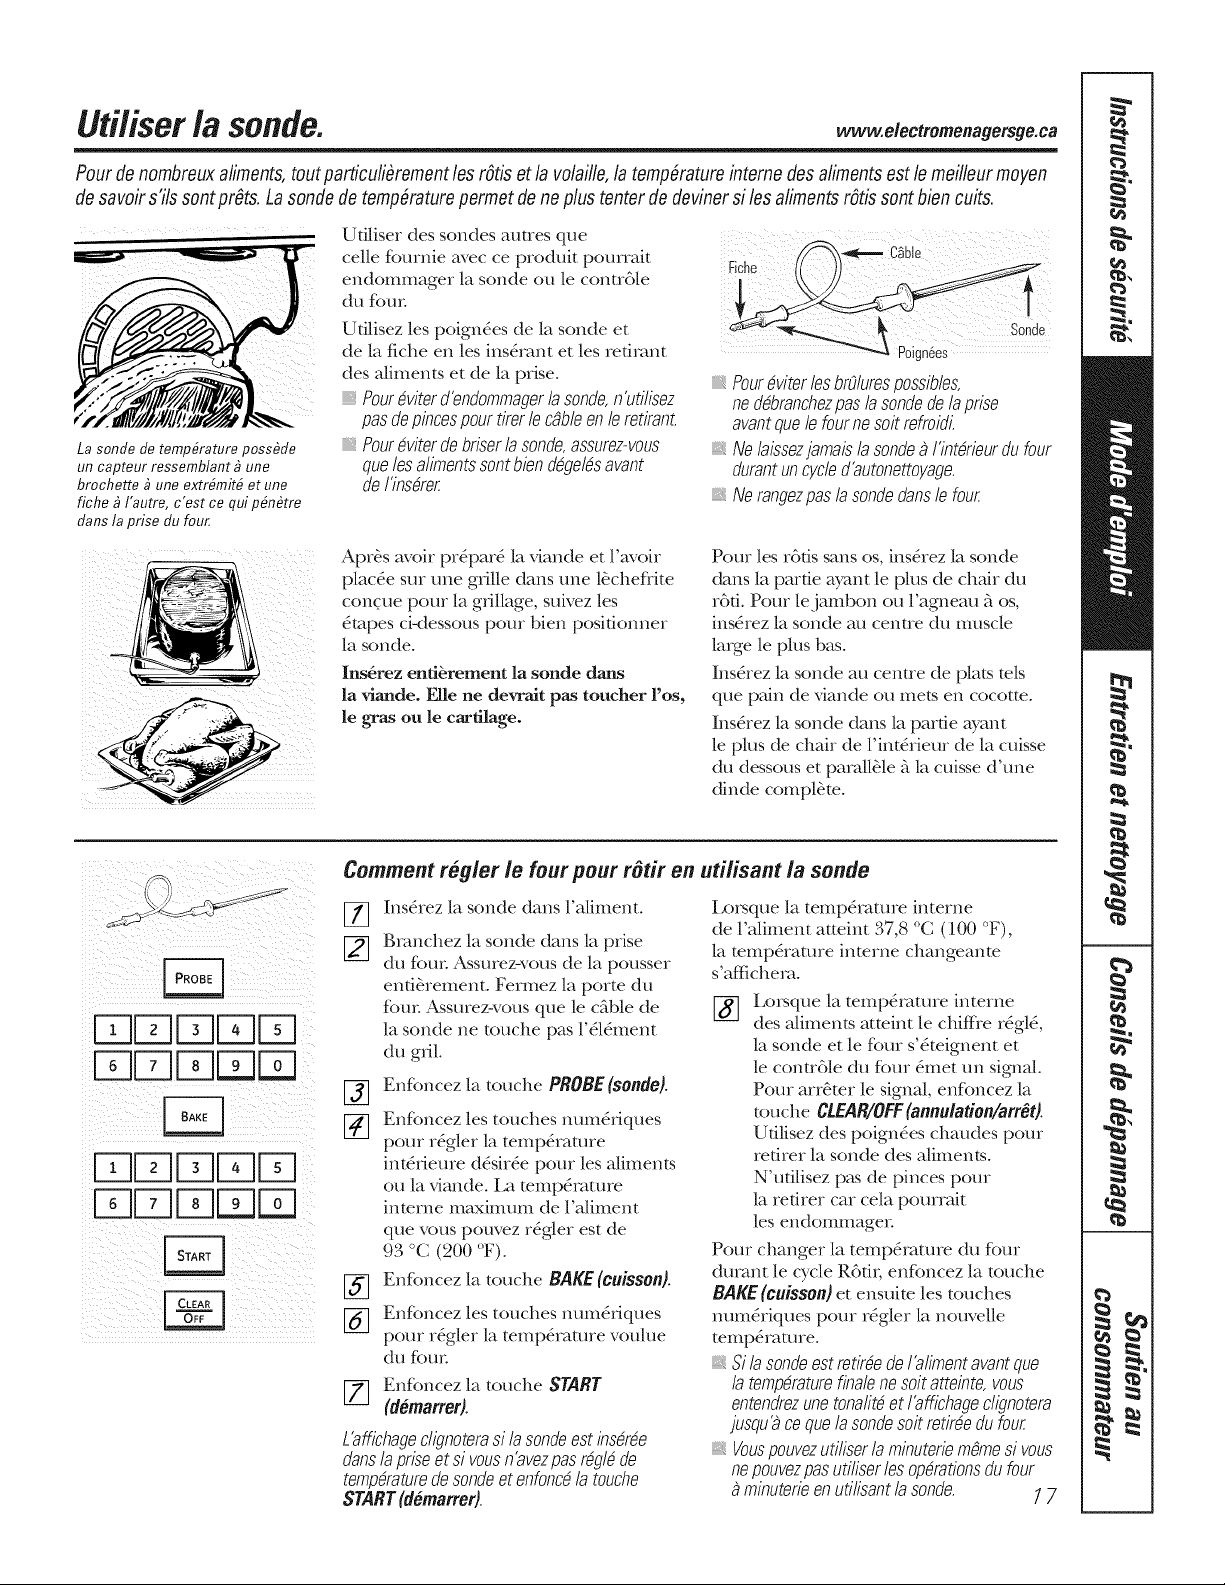
Uti/iser /a sonde. e eo,romen,ge geoa
Pour de nombreuxaliments,toutparticufiOrementles r6tis et la volaille,la temperatureinterne des alimentsestle meilleurmeyen
de savoir s'ils sontprOts.Lasonde detemperaturepermetde neplus tenter de devinersi les alimentsr6tis sontbien cults.
La sonde de temperature poss#cle
un capteur ressemblant _ une
brochette _ une extr#mit# et une
fiche _ I'autre, c'est ce qui p#n#tre
clans la prise clu four.
Udliser des sondes autres que
celle ff_urnie avec ce produit pourrait
endommager la sonde ou le conu61e
du fbuI:
Ufilisez les poign6es de la sonde et
de la fiche en les ins&ant et les refimnt
des Niments el de la prise.
N Pour&iter d'endon)magerla sonde,n'utilisez
pasdepincespour tirerle cgble en le retirant
Pour4viter debriserla sonde,assurez-vous
que les aliments sont bien d@elds event
deI'insdrer
Pour4viterlesbrOlurespossibles,
neddbranchezpaslasondedelaprise
eventquelefournesoit refroidi.
Alelaissezjamaislasondea I'intMeurdufour
durantuncycled'autonettoyage.
Alerangezpaslasondeclansle four
Apr&s avoir pr_par6 la viande et l'avoir
placSe sur une grille darts une l&chei:}ite
conc ue pour la g,illage, suivez les
_mpes ci-dessous pour bien posifionner
la sonde.
Ins6rez enti_rement la sonde dans
la viande. ERe ne devrait pas toucher l'os,
le gras ou le cartilage.
Pour les r6ds sans os, ins&ez la sonde
dans la pattie ayant le plus de chair du
r6fi. Pour lejambon ou l'agneau _ os,
ins&ez la sonde au cenue du muscle
lmge le plus bas.
Ins&ez la sonde au centre de plats mls
que pmn de viande ou mets en cocotte.
Ins&ez la sonde dans la parfie ayant
le plus de chair de l'int_rieur de la cuisse
du dessous et paraU&le A la cuisse d'une
dinde complain.
Comment regler le four pour r6tir en utilisant la sonde
%
D DEBD
DDD E
F FNDDD
F MDEBE
%
%
Ins&ez la sonde darts l'aliment.
Branchez la sonde dans la prise
du fbm- Assurezwous de la pousser
enfi&rement. Fermez la porto du
four Assurez-vous que le c_ible de
la sonde ne touche pas l'_l&nent
du gill.
Enfoncez la touche PROBE(sonde).
EnRmcez les touches num_tJques
pour rSgler la mmp&amre
int&Jeure dSsirSe pour les aliments
ou la viande. La mmp&amre
inmrne tnaxilnutn de l'aliment
que vous pouvez r_gler est de
93 °C (200 °F).
Enfoncez la touche BAKE (cuisson).
Enfoncez les touches num&Jques
pour r_gler la temp&ature voulue
du fbm:
Enfoncez la touche START
(demarrer).
L'affichageclignoterasi la sondeest insdrde
clanslapriseet si vousn'avezpasr@ldde
tempdraturede sondeet enfoncdla touche
START(demarrer).
Loi_que la temp&amre interne
de l'aliment atteint 37,8 °C (100 °F),
la mmp&amre inmrne changeanm
s'affichera.
Lo_sque la temp&amre interne
des aliments atteint le chi_Iie r_gl_,
la sonde et le fbur s'_mignent et
le contr6le du fk__ur&net un signal.
Pour arr&ter le signal, enRmcez la
touche CtEAg/OFF (anmdation/arrOt).
Utilisez des poign_es chaudes pour
refirer la sonde des aUments.
N' ufilisez p_ksde pinces pour
la refirer car cela pourrait
les endomlnager
Pour changer la telnp_mu_re du four
dumnt le cycle R6d_; enfoncez la touche
BAKE(cuisson)et ensuim les touches
num&iques pour r6gler la nouvelle
temp&amre.
Si la sonde estretir4e deI'alimentevent qua
la tempdraturefinalenesoit atteinte, vous
entendrezune tonafitd etI'affichage clignotera
jusqu_ ce que la sondesoit retirdedufour
_,Vouspouvez utiliser la minuterie m&7)esivous
nepouvezpasutiliser les opdrationsdufour
minuterieenutilisant la sonde. 17
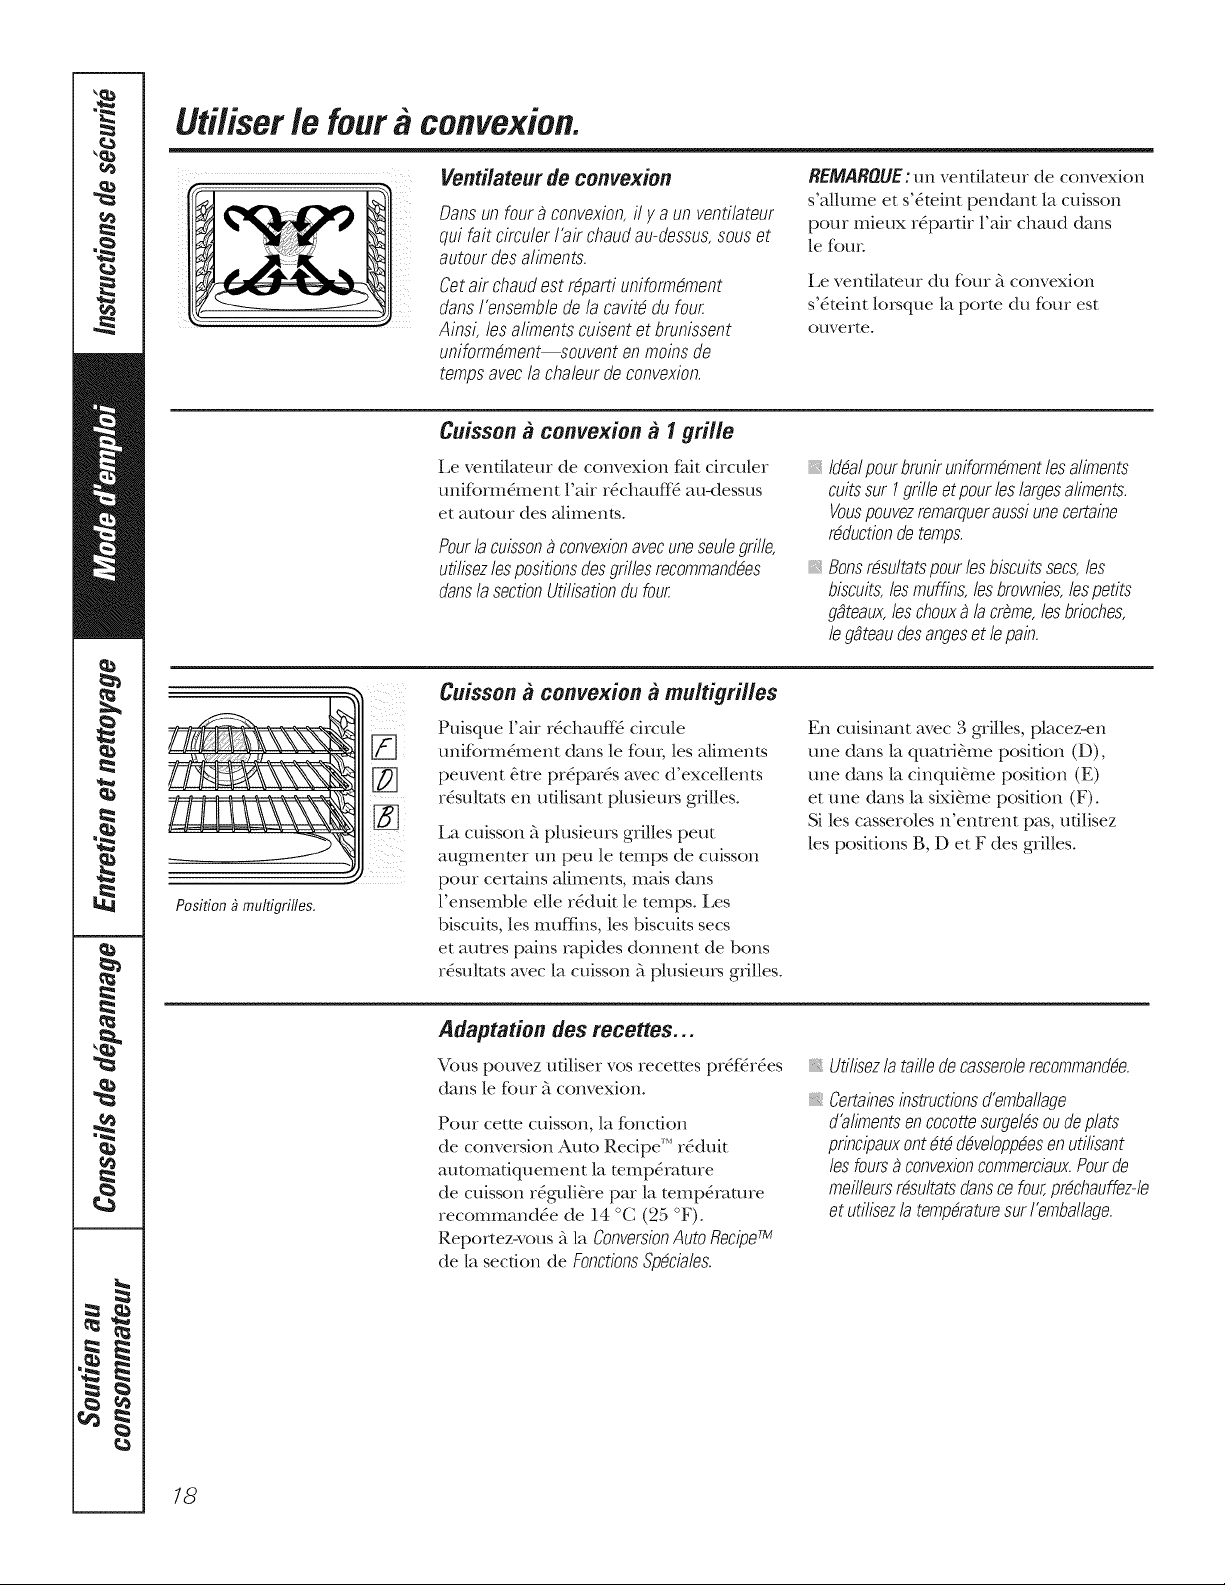
tlti/iser lefoura convexion.
Ventilateur de convexion
Dansun foura convexion, il # a un ventilateur
qui fair circuler Fairchaudau-dessus, souset
autour desaliments.
Cet air chaudestr@arti uniform_ment
clans I'ensemble dela cavit_ du four
Ainsi, les aliments cuisent et brunissent
uniform_ment souvent enmoins de
tempsavecla chaleur deconvexion.
REMARQUE: un vendlateur de convexion
s'a[lume et s'Steim pendant la cuisson
pour mieux r_parfir Fair chaud darts
le &_ur
Le vendlateur du &)ur 5.convexion
s'&eint lo_que la porte du four est
ouverte.
Cuisson a convexion a I grille
Le ventilateur de convexion fait circuler
unifbrm&nent Fair r_chauff_ au-dessus
et autour des aliments.
Pourlacuissona convexionavecuneseule grille,
utilisez lespositions desgrillesrecommand_es
clansla section Utilisation dufour
iiiiiiiiii:_
Iddalpourbruniruniformdmentlesaliments
cuitssur Igrilleet pourleslargesaliments.
Vouspouvezremarqueraussiunecertaine
rMuctiondetemps.
Bonsrdsultatspourlesbiscuitssecs,les
biscuits,lesmuffins,lesbrownies,lespetits
ggteaux,leschouxa la creme,lesbrioches,
leggteaudesangeset lepain.
Position _multigrilles.
Cuisson a convexion a multigri/les
Puisque l'air r6chauff> circule
uniff_rm&nent darts le ff_ui;les aliments
peuvent &re pr6par& avec d'excellents
r6sulmts en udlisant plusiems grilles.
La cuisson Aplusieurs grilles peut
augmenter un peu le temps de cuisson
pour cermins aliments, mais darts
l'ensemble elle rSduit le temps. Les
biscuits, les mu£fins, les biscuits secs
et autres pains rapides donnent de boris
r&ulmts avec la cuisson _ plusiem_ grilles.
En cuisinant avec 3 grilles, placez-en
une darts la quatfi_me posidon (D),
une darts la cinqui0me position (E)
et une darts la sixi0me position (F).
Si les casseroles n'entrent pas, ufilisez
les positions B, D et F des grilles.
Adaptation des recettes...
Vous pouvez utiliser vos recettes pr_f_r_es
darts le four _ convexion.
Pour cette cuisson, la fbncfion
de conversion Auto Recipe'" r_duit
automatiquelnent la mmp_mmre
de cuisson r_guli_re par la temp&amre
recommand_e de 14 °C (25 °F).
Reportez-vous _ la Conversion Auto Recipe wv
de la section de FonctionsSpdcia/es.
Utilisezla tailledecasserolerecommandde.
Certainesinstructionsd'emballage
d'alimentsencocottesurgeldsoudeplats
principauxontdtdddveloppdesen utilisant
lesfoursa convexioncommerciaux.Pourde
meilleursrdsultatsclanscefour,prdchauffez@
et utilisezla tempdraturesurI'emballage.
18
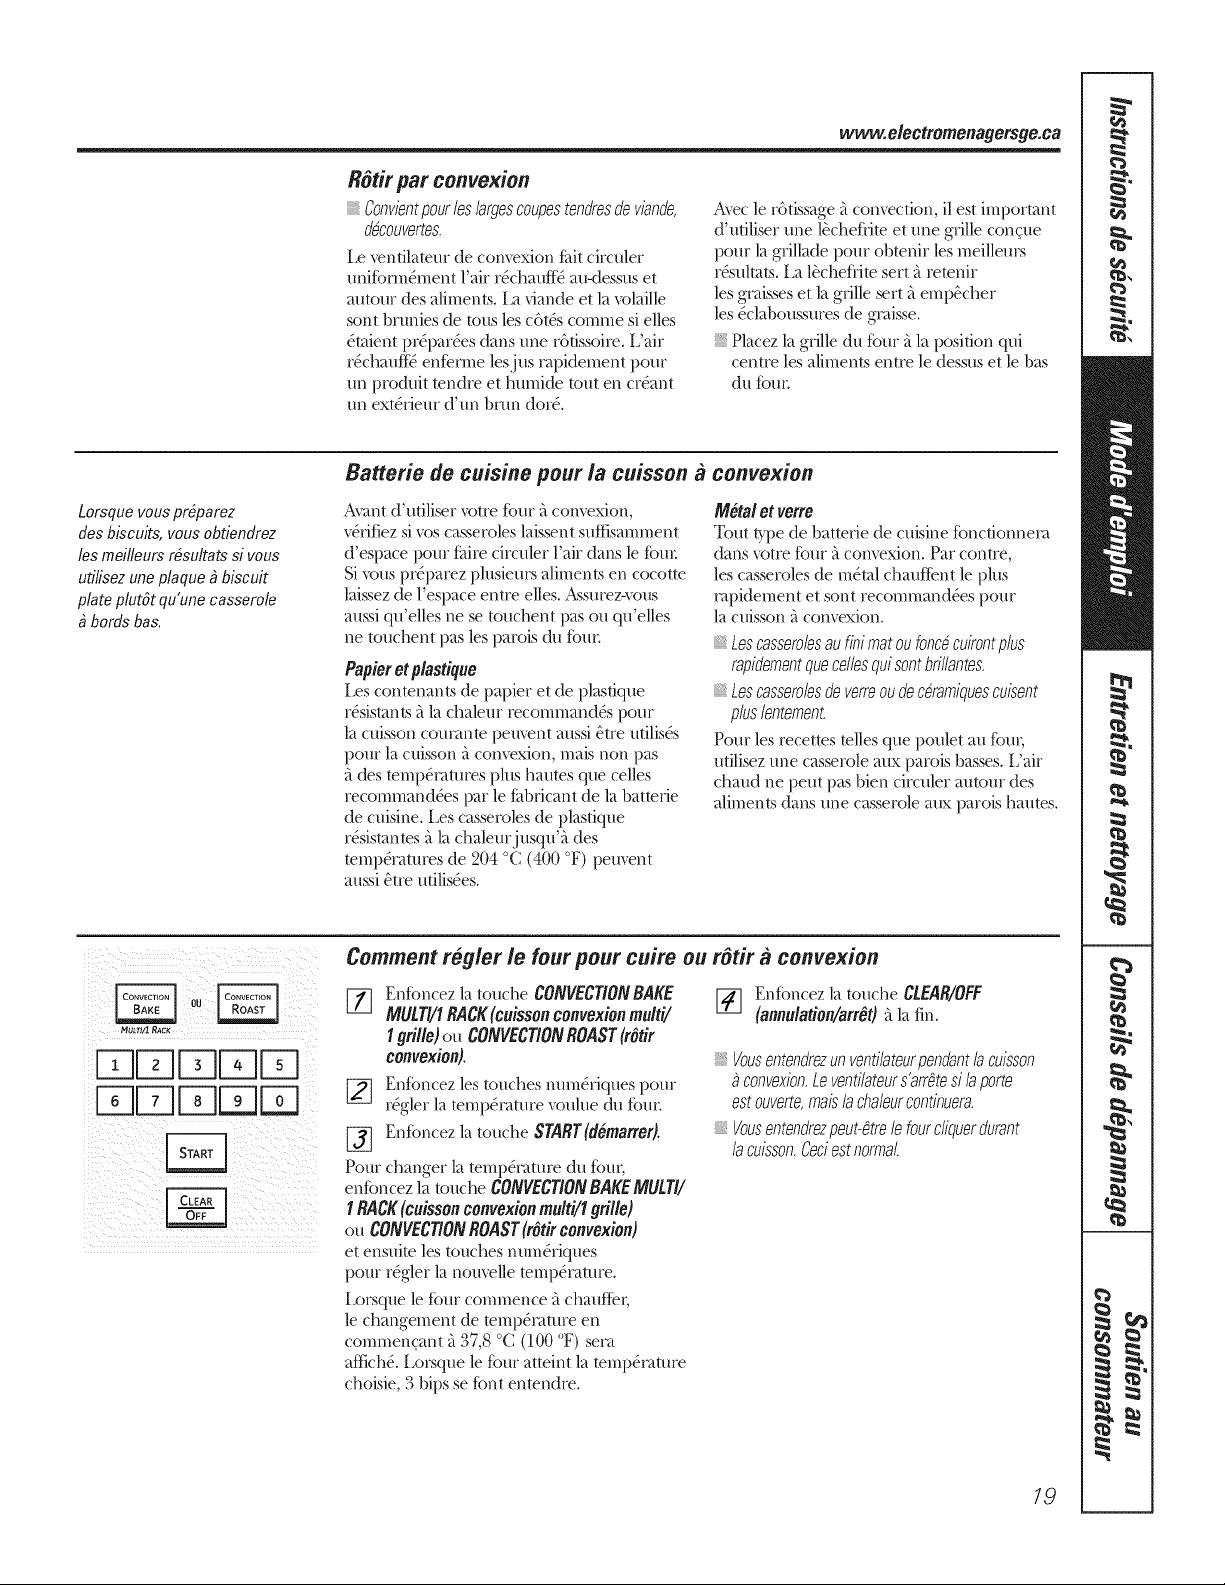
www.electromenagersge.ca
RStirparconvexion
Convientpourleslargescoupestendresdeviande,
d_couvertes.
Le _enfilatem de com_xion f_dtcirculer
unif_)m_&nentl'air r4chauft_ auKtessuset
autour des aliments. [;t dande et la xt_laille
sont brunies de tousles c6t(_scomme si elles
_mient pr_par_es dans une r6fissoim. L'air
r&haufi_ enfem_e lesjus ,>tpidement pour
un produit tendm et bumide tout en cr_ant
un ex/(_fiemd'un brun (tor_.
Avecle r6fissage it comecfion, ilest important
d'ufiliser une l_cheflJm et une grille concue
pour la gfillade pour obmnir lesmeillems
r&ulmts, i_al_chefl-imsert itremnir
lesgcaissesetla grillesert {temp_cher
les_claboussmes de gcaisse.
Placez la grilledu fk.)ur{tlaposition qui
centre lesaliments entre le dessus et le bas
(it/f()//I:
Lorsquevouspr#parez
desbiscuits,vous obtiendrez
lesmeilleurs r#sultatssivous
utilisezune plaque_ biscuit
plate plutSt qu'une casserole
bordsbas.
Batterie de cuisine pourla cuisson
Avantd'ufiliser votre fi)m _tcomexkm,
v&Jfiezsivos casseroles laissent suftisamment
d'espace pour fLtirecirculer l'air dans le fLmr
Sivous pr_parez plusiems aliments en cocotm
laissezde l'espace entre elles. ,Msmez-vous
aussiqu'elles ne se touchent pas ou qu'elles
ne touchent pas lespatoisdu fL)m.
Papieretplastique
Lescontenants depapier et de plastique
r&ismnts gtla chaleur recommand& i)our
la cuisson comvmmpement aussi&treufilis&
pour la cuisson_tcom>xkm, mais non pas
_tdes mmp&'autresplus haums que celles
recommand_es par le fLtbficantde la batmfie
de cuisine. Les casserolesde plasfique
r&ismnms alachalem'jusqu'a des
mmp&'amresde 204°C (400 °F) pement
aussi&treufilis_es.
convexion
Mete/etverre
Tout b.'pe de battefie de cuisine fkmcfionneca
dans votre fLmr_tcom_xion. Par contre,
lescasseroles de m_mlchauffent le plus
capidement et sont recommand_es pour
la cuisson_tcom>xion.
Lescassero/esau finimatou fonc#cuirontp/us
rapidementquece//esqui sontbfi//antes.
Lescasserolesdeverreou dec&amiquescuisent
p/us/entement.
Pour les recettes telles que poulet aufLm_,
utilisez une casserole aux patois basses. L'air
chaud ne peut pas bien circuler aurora des
aliments dans une casserole aux patois haums.
MULTI/I Radg
F DE U3D
EBDU3DE
Comment r#.gler le fourpourcuire ou rStir a convexion
[_ EnfLmcezla touche CONVECT/ONBAKE _] EnfLmcezla touche CLEAR/OFF
MULT/flRACK(cuissonconvexionmulti/ (annu/ation/arrOt)gtlafin.
Igrille)ou CONVECtiONROAST(rOtir
convexion).
EnfLmcezlestoud_es num4fiques pour
r4gler la temp&vtturevoulue du f()m:
EnfLmcezla touche SrARrgdemarrer).
Pourchangerla/emp&'amre du f_m_,
enfLmcezla touche CONVECTIONBAKEMULTI/
1RACK(cuissonconvexionmulti/lgrille)
ou CONVECTIONROAST(rOtirconvexion)
et ensui/e lestouches num&_iques
l)our r_gler la nomelle mmp&'amre.
[x_rsque le f_mrcommence a chaufie_,
le changement detemp&vmue en
commencant a 37,8°C (100 °F) seca
affich&Lorsque lefL)mattaint lammp&'atme
choisie,3 bipsseflintenmndre.
Vousentendrezunventi/ateurpendant/acuisson
convexion.Leventi/ateurs'arr#tesi /aporte
est ouverte,mais/a cha/eurcontinuera.
Vousentendrezpeut-#trele fourcliquer&rant
/a cuisson.Ceciestnormal
19

Uti/iser les fonctionsa minuteriepourla cuissonaconvexion.
Vousentendrez un ventilateur en cuisinant avec ces fonctions. Le ventilateur s'arr#te si la porte est ouverte,
mais la chaleur continuera.
REMAROUE:les aliments qui se g#tent facilement--comme le lait, les oeufs,le poisson, la farce, la volaille
etle porc--ne de vraient pas rester sortis pendant plus d'une heure a rant ou aprils la cuisson. La tempfirature
ambiante favorise la croissance de bact&ies dangereuses. Assurez-vous que la lumifire du four so# fiteinte
car la chaleur de I'ampoule favorisera la croissance de bact&ies dangereuses.
I_ULTI/I RACg
Fqr-qDDFq
FqF-qDD
F-qDDFq
FqFqDD
Comment r#gler un demarrage imm#diat et un arr#t automatique
Lefours'allumeraimm#diatementet feracuire
pendantunedur#echoisie.A la findutemps
decuisson,lefoursYteindraautomatiquement.
Assmez-vousque l'horloge montre
la bonne he/Nre.
Enfoncez la touche CONVECTION
BAKEMULT//I RACK(cuisson
convexionmulti/1grille) ou
CONVECTIONROAST(rOtirconvexion).
Enfoncez les touches num&iques
pore rSgler la temp@amre voulue
du four
[-_ Enfoncez la touche COOKINGTIME
(temps de cuisson).
REMARQUE:si votremcetteexigequevous
pr#chauffiezlefour,vousdevrezpeut@treajouter
dutempsdecuisson.
[_ Enfoncez les touches num&iques
pour choisir la dut6e de cuisson
voulue. Le temps de c//isson mininnml
que vous pouvez rdgler estde
1 minute. La temp&ature du
four que vous r_gtez et le romps
de cuisson entrSs s'afficheront.
_-] En%ncez la totmhe START(d#marrer).
L'aftidmge indiquera le changement
de temp&ature (en commencant _'t
37,8 °C [100 °F]) et le temps de cuisson.
lSaftidmge commencera _'tchanger lorsque
la temp&auue atteint 37,8 °C (100 °F).
Le four poursuMa la cuisson pendant
le romps programme, puis s'mr6tera
automatiquement _tmoins que la foncdon
WARM (r&hm/ffbr) ne soit r_gl_e.
Reportez-vous _'tla section C0mment r#g/er
le four pourr_chauffer.
[_ En%ncez la touche CLEAR/OIF
(annulation/arr_t)pour eff_mer
Faffidmge au besoin. Retirez
les aliments du fbm: Rappelez-vous
que bien que le fbur s'_teigne
m/tomatiquement, les aliments qui
restent darts le four continueront
_'tcuire apr&s que le fbm soit 5teint.
2O
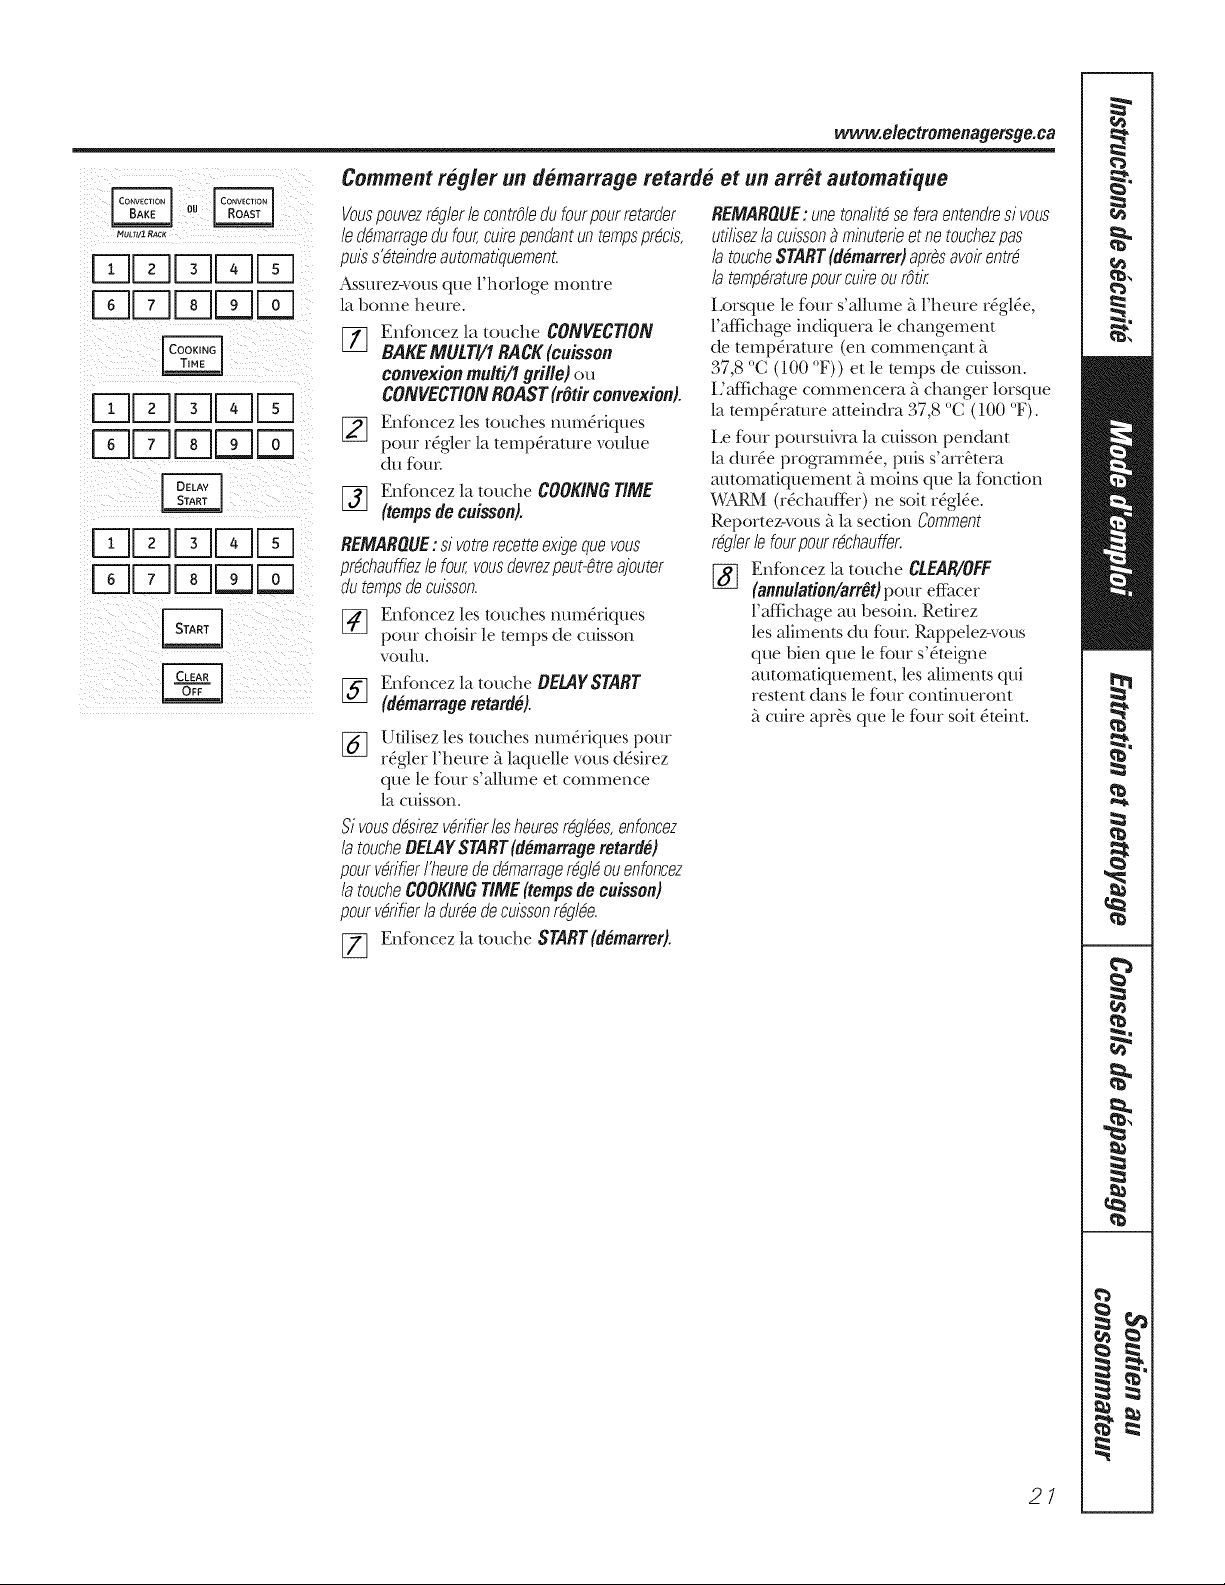
www.e/ectromenagersge.ca
_4ufr_/2Rac_
Fq[Z]DUU
DFqDLd 0L_d
DDDUU
DFqDDD
FqFquL U
FqFqDWLd
Comment r#.glerun demarrage retarde et unarr#t automatique
Vouspouvezr_glerlecontrOledufourpourretarder
led_marragedufour,cuirependantun tempsprecis,
puiss_teindreautomatiquement.
Assmez-vous que l'horloge montre
la b(mne heme.
EnfLmcez la touche CONVECTION
BAKEMULT//I RACK(cuisson
convexionmulti/1 grille)ou
CONVECTIONROAST(rOtirconvexion).
[_ Enfoncez les touches num&iques
pore r_gler la temp&amre voulue
du fom:
1_] Enfoncez latouche COOKINGTIME
(tempsdecuisson).
REMARQUE:;i votremcetteexigequevous
pr_chauffiezlefour,vousdevrezpeut-_treajouter
dutempsdecuisson.
[_ Enfoncez les touches m_m&iques
pore choisir le temps de cuisson
V()/11/1.
[_] Enfoncez ]a touche BELAYSTART
(demarrageretarde).
[_ Utilisez les touches num&iques pore.
r_gler l'heme _t]aquelle vous d&irez
que le fern s'allume et commence
la cuisson.
Sivousd_sirezv_rifierlesheuresr_gl_es,enfoncez
latoucheDELAYSTART(demarrageretarde)
pourv4rifierI'heureded4marrager4g14ouenfoncez
latoucheCOOKINGTIME(tempsdecuissen)
pourvMfierladur_edecuissonr_gl_e.
[_ Enfoncez la touche START(d#marrer).
REMARQUE: unetonalit#seferaentendresi vous
utilisezlacuisson_ minuterieet netouchezpas
la toucheSTART(demarrer)apresavoirentr#
la temperaturepourcuireourOtir.
Lorsque le fern s'allume CtFheure r_gl_e,
Faf{ichage indiquera ]e changement
de temp&ature (en commencant _'t
37,8 °C (100 °F)) et le temps de cuisson.
[/af{ichage commencera _tchanger ]orsque
la temp&amre atteindra 37,8 °C (100 °F).
Le four pomsuMa ]a cuisson pendant
la dur_e programm_e, puis s'arr_tera
m_tomatiquement _tmoins que la foncdon
WARM(r&hm_f*br) ne soit r_gl_e.
Reportez-vous _tla section Comment
r4glerlefourpourr4chauffer.
[}_] Enf_mcez ]a totmhe CLEAR/OFF
(annulation/arrOt)pour eff_tce_
Faf_ichage au besoin. Retirez
les aliments du fLm_:Rappelez-vous
que bien que le fLmrs'_teigne
m/tomatiquement, les aliments qui
restent dans le fern contimmront
;'tcuire aprb.s que le fLmr soit _teint.
21
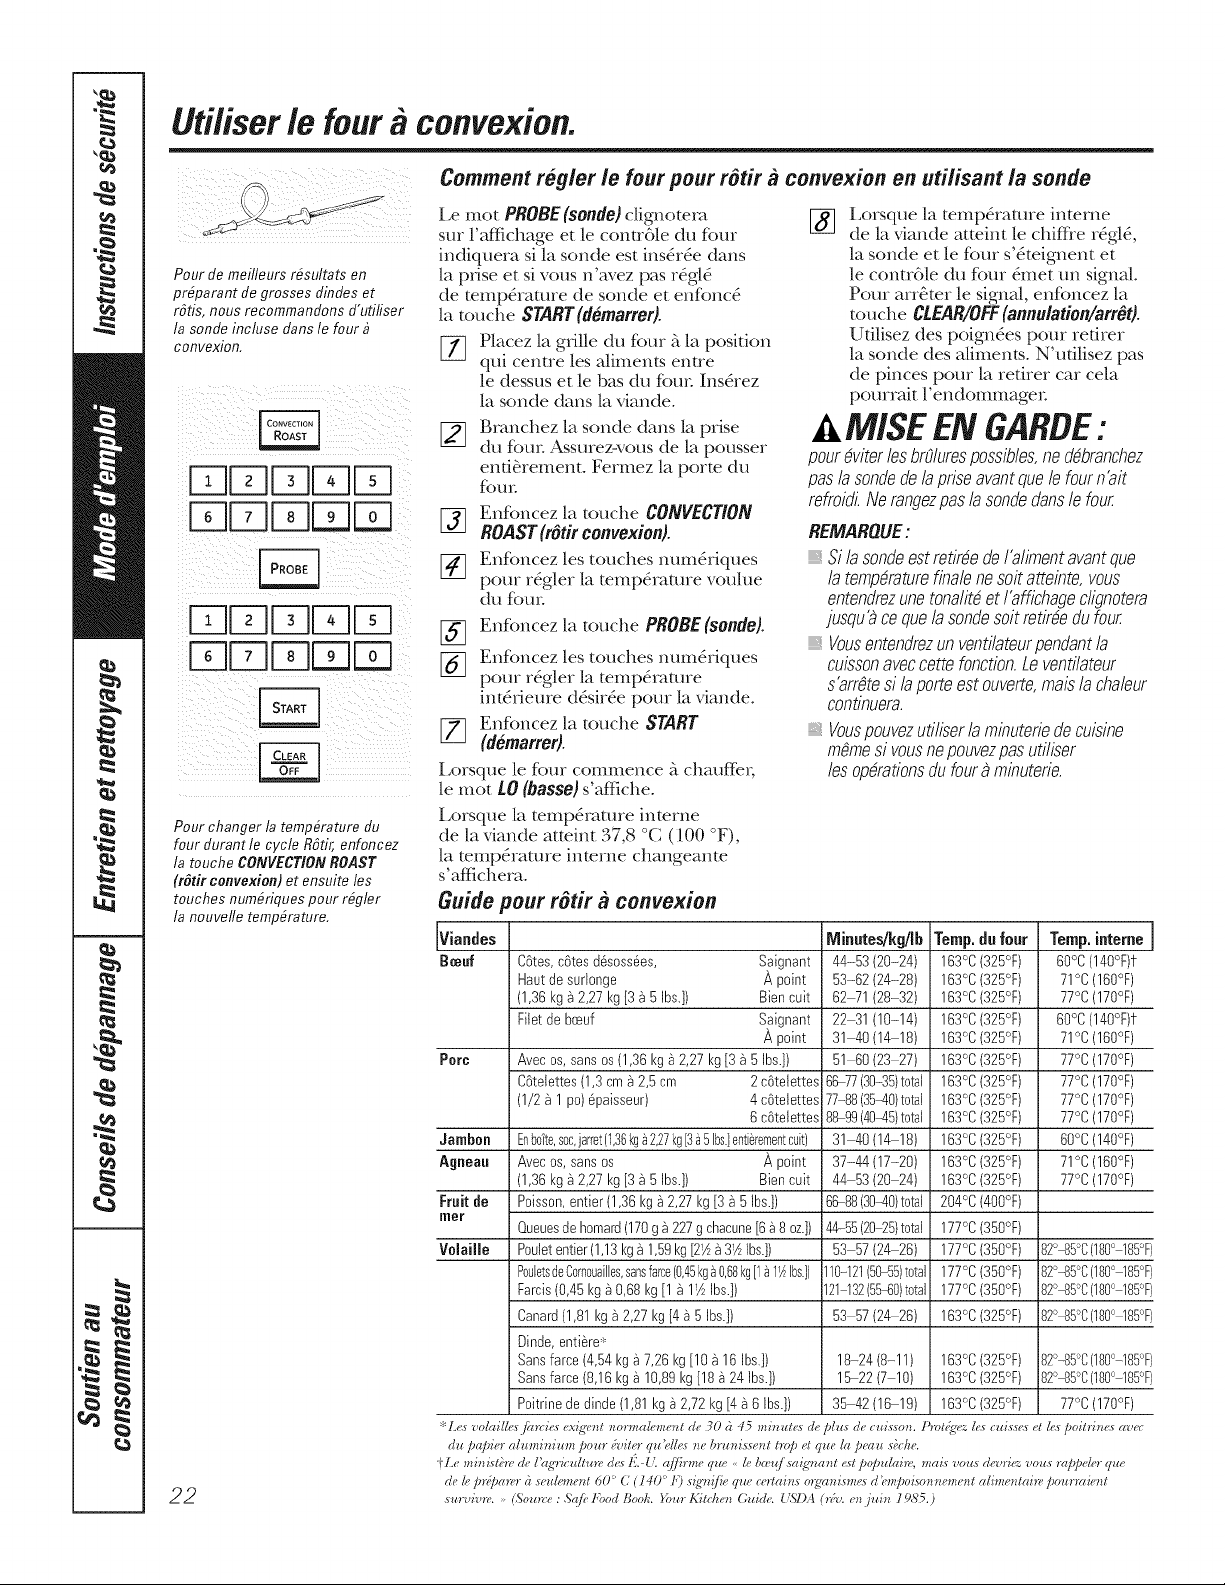
Uti/iser le foura convexion.
Pour de meilleurs rbsultats en
prbparant de grosses clincles et
rStis, nous recommanclons cl'utifiser
la sonde incluse clans le four
convexion.
FqFqFqDD
E][]FqDD
FqFqFqDD
B-7[]FqE][Z]
Pour changer la temp#rature clu
four clurantle cycle RStir, enfoncez
latouche CONVECTIONROAST
(r_tirconvexion) et ensuite los
touches num#riques pour r#gler
la nouvefle temp#rature.
22
Commentr#gler le fourpourr_tir a convexion en utilisant la sonde
i,e mot PROBE(sonde)clignotera [] [,orsflue la temp&a[ure interne
sur l'affichage e[ le contrTle du fbur de la viande atteint le chiff}e r6g16.,
indiquera sila sonde est ins&6e duns
]a pdse et sivous n'avez pus r6gl_
de temp&amre de sonde et enfbnc6
la touche START(demarrer).
[_ Placez lagrille du fbur _ la position
qui centre les aliments entre
le dessus et/e bus du R)m:[ns_rez
la sonde duns la viande.
[_ granchez la sonde darts/a prise
du fbur Assurez-vous de |a pousser
end6rement. Fermez la porte du
f()/l/:
r_ Enfoncez la touche CONVECTION
I,J
ROAST(rOtiroonvexion).
[_ Enfoncez ]es touches num&iques
pour r6gler la tempTratme voulue
du fbun
%
Enfbncez la touche PROBE (sonde).
Enff)ncez les touches num&iques
pour r_gler la temp6.ramre
int&Jeure d&ir6.e pour la viande.
Enfoncez la touche START
(demarrer).
Lorsque le fbur commence _ chauffe_;
le mot LO (basso)s'affiche.
Lorsque/a mmp&amre inmrne
de/a viande atteint 37,8 °C (100 °F),
la temp&amre inmrne changeanm
s'affichera.
Guide pourr tir aconvexion
la sonde et le fbur s'&eignent et
le contr61e du four &net un signal
Pour arr6ter le signal, enfbncez la
touche CtEAR/OFF (annulation/arrOt).
Udlisez des poign_es pour retirer
la sonde des aliments. N'udlisez pus
de pinces pour la redrer car cola
pourrait l'endommager
A MISE EN GARBE:
pour&iter losbrOlurespossibles,ned_branchez
paslasondedela priseavantquele fourn'ait
refroidi.Alerangezpaslasondeclansle four
REMAROUE:
Sila sondeest retireedeI'alimentavantque
la temp&aturefinalenesoitatteinte,vous
entendrezunetonalitdet I'affichageclignotera
jusqu_ cequela sondesoit retirdedufour
_,Vousentendrezun ventilateurpendantla
cuissonaveccettefonction.Leventilateur
s'arr#tesilaporteestouverte,maislachaleur
continuera.
Vouspouvezuti/iserla minuteriedecuisine
mOmesi vousne pouvezpas utiliser
los opdrafionsdu foura minuterie.
Viandes Minutes/kg/Ib Temp. dufour Temp. interne
Bceuf C6tes,c6tes d6soss6es, Saignant 44-53 (20-24) 163°C(325°F) 60°C(140°F)f
Haut desurlonge _,point 53-62(24-28) 163°C(325°F) 71°C (160°F)
(1,36I<g_ 2,27 I<g[3 95 Ibs.]) Biencuit 62 71 (28-32) 163°C(325°F) 77°C (170°F)
Filetdebceuf Saignant 22 31 (10-14) 163°C(325°F) 60°C(140°F)f
_, point 31 40 (14 18) 163°C(325°F) 71°C (160°F)
Pore Avec os,sansos(1,36I<g_2,27 I<g[3 _5Ibs.]) 51 60 (23 27) 163°C(325°F) 77°C (170°F)
C6telettes(1,3cm9 2,5 cm 2 c6telettes66-77(30-35)total 163°C(325°F) 77°C (170°F)
(1/2_1 po)@aisseur) 4c6telettes77-88(35q0)total 163°C(325°F) 77°C (170°F)
6c6telettes 88-99(40qS)total 163°C(325°F) 77°C (170°F)
Jambon Enbdte,soc,jarret(1,30kg_227kg[3_51bs.lenti_rementcuit)31 40(14 18) 163°C(325°F) 60°C(140°F)
Agneau Avecos, sanses _, point 37-44 (17-20) 163°C(325°F) 71°C(160°F)
(1,36I(g_ 2,27 I(g[3 _ 5Ibs.]) Bien cuit 44 53 (20 24) 163°C(325°F) 77°C (170°F)
Fruit de Peisson,entier (1,36I(g_ 2,27 I(g[3_5 Ibs.]) 66-88(30q0)total 204°C(400°F)
mer
Queuesdehomard(170g 9227g chacune[6 _8 oz.]) 44-55(20_5)total 177°C(350°F)
Volaille Peuletentier(1,13I(g_1,59I(g[2_A_ 3_AIbs.]) 53 57 (24 26) 177°C(350°F) 82°_85°C(180° 185°F)
PouletsdeCornouailles,sansfarce(0,45kg_0,68kg[1911_lbs.])110-121(50-55)total 177°C(350°F) 82°-85°C(180°-185°F)
Farcis(0,45I<g_0,68 I<g[1_ I_AIbs.]) 121132(5540)totai 177°C(350°F) 82°45°C(180° 185°F)
Canard(1,81I(g_2,27I(g[49 5Ibs.]) 53 57 (24 26) 163°C(325°F) 82°_85°C(180°-185°F)
Bind< enti_re_
Sansfarce (4,54I(g_ 7,26 I<g[10 _ 16 Ibs.]) 18-24(8-11) 163°C(325°F) 82°-85°C(180°-185°F)
Sansfarce (8,16I<g_10,89I<g[18 _24 Ibs.]) 15-22(7 10) 163°C(325°F) 82°45°C(180°-185°F)
Poitrinededinde(1,81 I<g92,72I<g[4 _ 6Ibs.]) 35 42 (16 19) 163°C(325°F) 77°C (170°F)
* L(,s volaill,,_ flnvi(,s (,xig__t normal*,ment de 30 d 45 minut_,s de 91us de c_ds:_o_. Pmt_{q_<I_,scuis:_,_ et I*,_/)oiu'in(,s av_'c
du papi<,r alu_ni_+iu_n pour Adt<,r qu Tlt<,sne bru_+i,_*e_t hop et que 1<+p_'au s<;che.
tLe ministi, red+,I'ag+w,ultun, des 1_'.-{'. q//bme <lUg,<<I<,t,<*'+¢sa@'_mnt +,st/_<,tmlai,v mais vou,_ &,z,ri+<vous ,<qq_,> <lUg,
de 1_,pr@a_,r d seu&ment 60' (7 (140 _'11) Sg'/t{/_( _qt_ecolains otg_mism(,:_ d'_'_npoisonnement alimentai_, pou_ raient
S*_1-_¢i*_t1_!.* (,SOZt!_re: Sg{fi! II))od [_oo1;.}_)*_rKitchen Guide. {'SI)A (r&_.en fl_in 19,5'5.)
Uti/iser ies fonctionsdefermentation
etderechauffement
www.electromenagersge.ca
La fonction de fermentation conserve un environnement chaud utilepour que les produits _ levure Ibvent,
Commentr_.gler le fourpouria fermentation
[77 Placez la pfite comerte darts un plat _] A lafin de lafermentation,
darts le fern sur la tablette B on C. enfoncez la touche CLEAR/OFF
(annutation/arr_t).
Pour&iter der_duire/atemperaturedufour
etprolongerletempsdefermentation,n'ouvrez
pasinutilementla portedufour
, V_rifiezlespainstotpour&iter toute
surfermentation.
REMARQUE: pourdemeilleursr_sultats,couvrez
lap_ted'unt/ssuoud'unepell/culedeplast/que
_ gra/ss_e(leplast/quedevrapeut-_tre_treancr_
sous/econtenantpourque/eventi/ateurdufour
neleret/?epas).
[_] Enfoncez la ,ouche PROOF
(fermentation)puisla touche
START(demarrer).
L'affichage indiquer PrF (proof on
fermentation).
I,a lumi_re du fbm s'allume et reste
allum_e durant la fermentation.
La fbnction de fe_nentation forenit
m/tomafiquement la temp&ature optimale
pour la fermentation et n'a doric m/curt
ajustement de temp&amre.
1_ R_glez KITCHENTIMERON/OFF
(minuteriedecuisinemarche/arr_t)pour
le temps de fermentation minimum.
REMARQUE:
, N'uti/isezpaslemodedefermentationpour
r_chaufferlesalimentsoulesgarderchauds.
Latemperaturedufourpourla fermentationn'est
pasassezchaudepourconserverlesaliments
destemperaturessansdangerUtilisezla fonction
WARM(recflauffer)pourgarderlesaliments
chauds.
LafermentatbnnefonctbnnerapasIorsque
lefourd_passe51,6°C(125°F)._HOT,(chaud)
s'affbhera.
i _i i ii
I i)i[iiilli i
Comment rO.gler ie four pour r_.chauffer
I,a fbnction WARM(rechauffer)garde
les aliments cults chauds.
Cette fonction n'est pas concue pour
r&hauffer les aliments fiokts.
Pour utiliser la foncfion WARM(rechauffeO
enfbncez la touche WARM(rechauffer)
et ensuite la touche START(demarrer).
Pour utiliser la fbncfion WARM(rechauffer)
apt& avoir cult ou roti avecla minuterie,
suivez ces &apes :
[_ Enfoncez le mode de cuisson xoulu
(BAKE[cuisson], CONVECTION BAKE
MULTI/1 RACK[cuisson convexion
multi/1 grille] on CONVECTION ROAST
[r_tir convexion]).
[_ Enfoncez les touches num&klues
pour r_gler la temp&ature du fbur.
[_ Enfoncez la touche COOKINGTIME
(temps de cuisson).
%
%
EnRmcez les touches num&iques
pour choisir la durde de cuisson
vo/flue,
Enfoncez la touche WARM(rechauffer).
En%ncez la touche START(demarrer).
Pour rendrelesarticles rassis cmustillants
Placez les aliments darts des casseroles
ou plats _'_c6t& bas.
Pour de meilleurs r&ultats, placez
les aliments en un seul niveau.
N'empilez pas.
I_aissez-lesdScouverts.
V&ifiez apt& 20 _'_30 minutes s'ilssent
croustillants. Ajoutez du temps au besoin.
NOTES/MPORTANTES:
Lesalimentsdoiventresterchaudsdansleur
contenantdecuissonoutransforms_unplat
deserviceconvenantauxalimentschauds.
, Pourlesalimentstendres,couvrez-lesd'un
couvercleallantaufouroud'unpap/eraluminium.
, Lesalimentsfritsoucroustillantsn'ontpasbesoin
d_trecouverts,maispeuvents'ass_chers'ilssont
r_chauff_stropIongtemps.
, Ouvrirlaporte_r_p_titionpermet_Fairchaud
des'_chapperet auxalimentsdesemfroidir
, Pr&oyezdutempssuppl_mentairepourque
latemperature_ I'int_rieurdufoursestabilise
apresavoirajoutddesarticles.
Avecdegrossescharges,il faudrapeut-_tre
couvrircertainsdesalimentscults.
Retirezlescuifleresde service,etc.avant
deplacerlescontenantsclansle four
N'utilisezpasdecontenants,couvercles
deplastiqueoudepelliculedeplastique.
A MISE EN GARBE:
lescontenants,couverclesdeplastiqueou
lapelliculedeplastiquefonderonts'ilssontdans
le fourLeplastiquefondupourraitne paspouvoir
_treretirdet n'estpascouvertsousvotre
garantie.
23
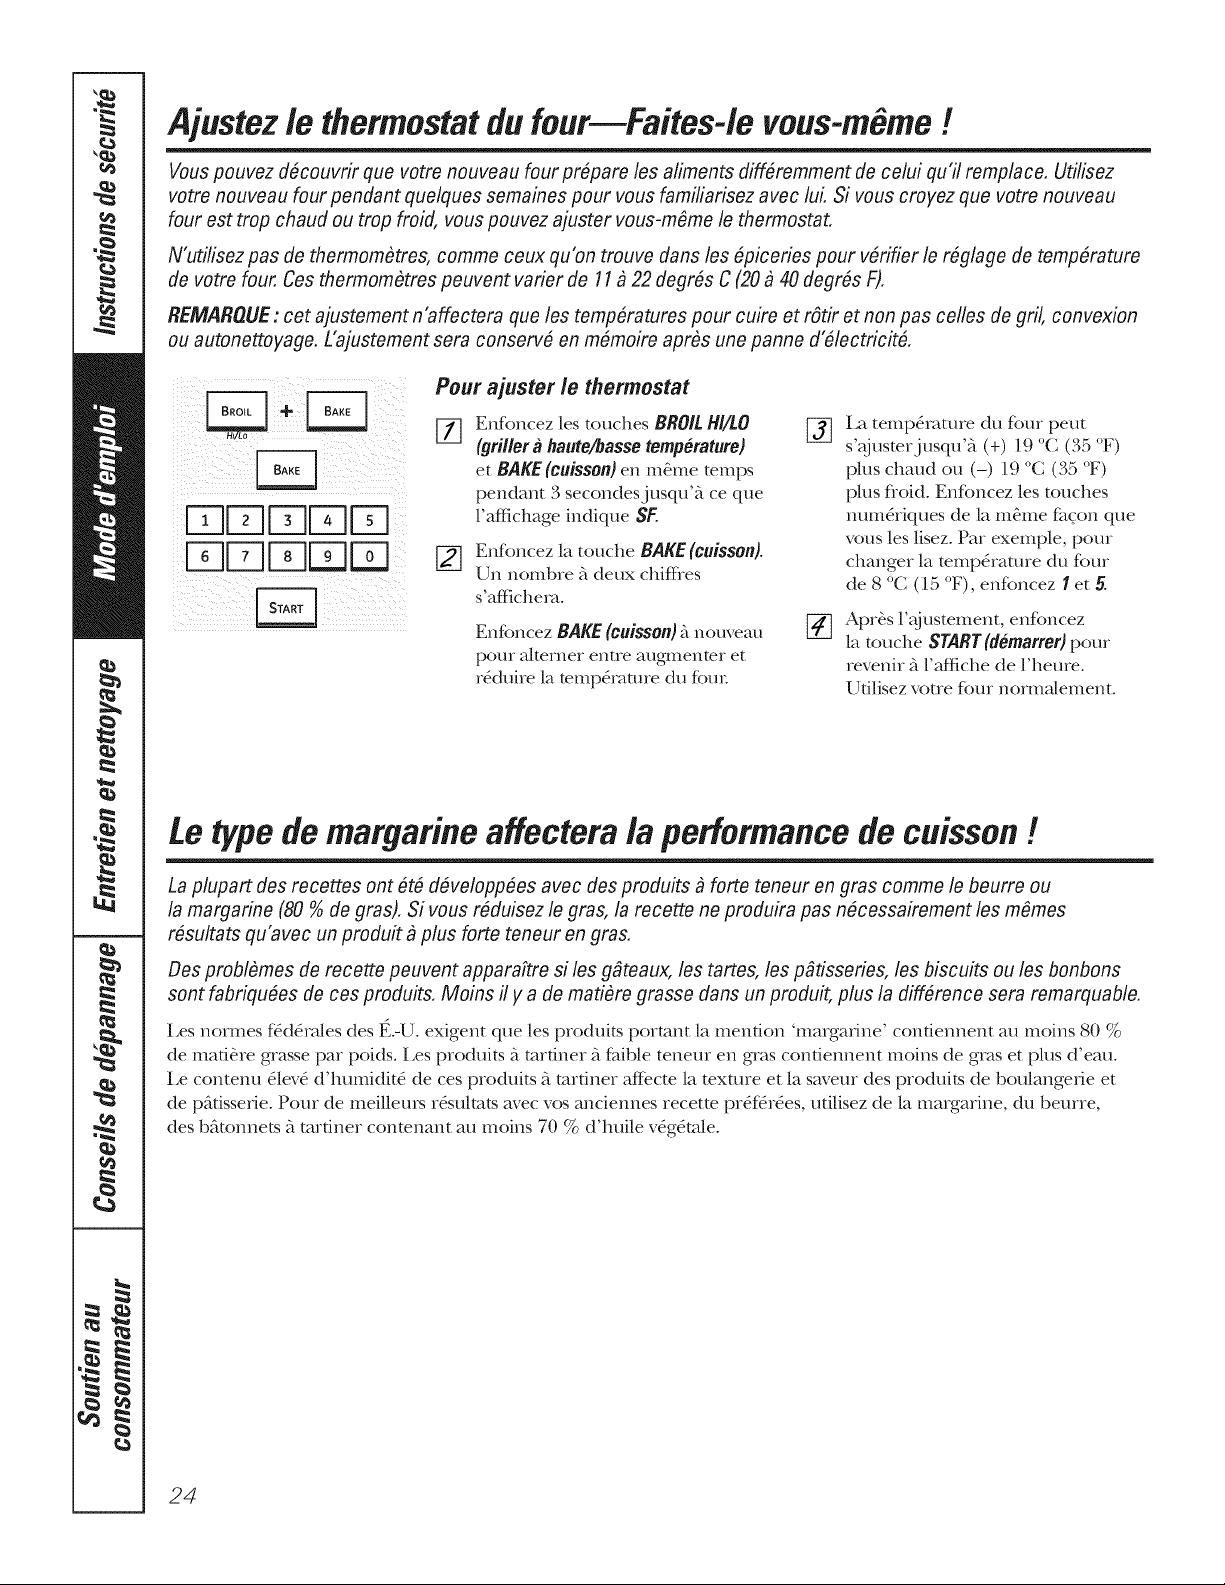
Ajustez le thermostatdu four--Faites-le vous-m me !
Vous pouvez dficouvrir que votre nouveau fourpr@are les aliments diff#remment de celui qu'il remplace. Utilisez
votre nouveau four pendant quelques semaines pour vous familiarisez avec lui. Si vous croyez que votre nouveau
four est trop chaud ou trop froid, vous pouvez ajuster vous-mfime le thermostat.
N'utilisez pas de thermomfitres, comme ceux qu'on trouve dans les#piceries pour vfirifier le r@lage de tempfirature
de votre four. Ces thermomfitres peuvent varier de 11 _ 22 degrfis C (20 _ 40 degrfis F).
REMABQUE : cet ajustement n'affectera que les tempfiratures pour cuire etrOtiretnon pas celles de gril, con vexion
ou autonettoyage. L'ajustement sera conserv# en mfimoire aprils une panne d'#lectricit&
÷
5]DFqFqFq
E E DF-q
Pour ajuster le thermostat
Enfoncez les touches BROILH//LO
(grillera haute/bassetemperature)
et BAKE(cuisson)en m&ne temps
pendant 3 secondesj usqu'_ ce flue
l'affichage indique SF.
Enfoncez la touche BAKE (cuisson).
Un hombre _ deux chiff_es
s'affichera.
Enfoncez BAKE(cuisson)"_nouveau
pore alterner entre augmenter et
rSduire la mmp&ature du four
%
La temp&amre du four peut
s'_justerjusqu'_ (+) 119°C (35 °F)
pins chaud ou (-) 19°C (35 °F)
plus floid. Enfoncez ]es touches
num&iques de la m&ne fhgon que
vous les lisez. Par exemple, pour
changer la temp&amre du fore
de 8 °C (15 °F), enfoncez Iet 5
Apr6.s l'_j ustement, enfoncez
la touche START(demarrer)pour
revenir _ l'affiche de Fheure.
Udlisez votre four normaiement.
Le type de margarine affectera la performancedecuisson!
Laplupart desrecettes ont#tfi dfiveloppfies avec desproduits _ forte teneur en gras comme lebeurre ou
la margarine (80 % de gras). Si vous r#duisez le gras, la recette ne produira pas n#cessairement les mfimes
r#sultats qu'avec un produit _ plus forte teneur en gras.
Des problfimes de recette peuvent apparaTtresiles g#teaux, les tartes, lesp#tisseries, les biscuits ou lesbonbons
sont fabriqufies de ces produits. Moins il ya de matifire grasse clans un produit, plus la difffirence sera remarquable.
[,es normes f>d&a/es des E.-U. exigent que les produits portant la mendon 'margarine' condennent au moins 80 %
de mad6re grasse par poids. Les produits _t mrdner _tfaible teneur en gTas confiennent moins de gras et plus d'eau.
Le contenu _lev_ d'humidit_ de ces produits _tmrfiner affecte lamxture et lasaveur des prodtfits de boulangerie et
de p_'_tisserie. Pour de meillem_ r_sulmts avec vos anciennes recetm pr_f_r_.es, udlisez de la margarine, du beurre,
des b_'_tonnets _t tarfiner conmnant au moins 70 % d'huile v_g_ta/e.
24

tlti/iser lefourautonettoyant.
La porte flu four dolt #tre ferm#e et tous les contrdles r#gl#s correctement pour que les cycles fonctionnent
correctement.
Essuyez toute accumulation
de salet# sur le fond du four,
Avant un cycle de nettoyage
NOL]S iecolillnandons d'aerer votre
cuisine avec une fbnSUe ouverw ou en
ufilisant un venfilateur ou la hotw durant
le premier cycle d'autonettoyage.
Refirez les gqilles, lOcheflite, sonde,
K)u[es casseroles et K_ut papier
a[uminium du four
Les grilles brillanms de couleur argent_e
(sur cermins modules) peuvent &ue
nettoy_es pendant Fautonetmyage,
mais leur couleur foncera, elles
perdront leur b_illant et deviendront
dures 5 faire glisser
Les sa/et6s sur le cadre avant de
la cuisini&re et l'ext&iem dujoint de
la porte doivent _tre nettoy_es _ la main.
Nett+gez ces endroits 5 Feau chaude,
avec un tampon 5r_curer de plasfique
ou rempli de savon ou des nettoyants
tels que Sol* Scrub®.Pdncez bien 5 Feau
propre et assSchez.
Ne nettoyez pas lejoint. Le mat&Jau
de fibres de verre dujoint de la porte
du four ne r£sism pas F_l'abrasion.
I1 est essendel que lejoint reste intact.
Sivous remarquez qt£il devient us6
ou s'effiloche, remplacez-le.
Essuyez tout d&'ersement lourd au fond
du four
Assurez-vous que le couvercle de
l'ampoule du fore est en place et que
la lumi&re est &einte.
iMPORTANT:la sant_ de certains oiseaux
est exu&mement sensible aux fmnSes
dSgagSes dinant le cycle d'autonettoyage
de route cuisini&re. D_placez les oiseaux
et mettezqes darts une pi&cebien a&_.e.
i[-qu-lmDr ;
Comment r#.gler le four pour le nettoyage
K_ Enfoncez la touche SELFCLEAN
/LZ_J
STB/LOW(autonettoyagestd/bas) une
lois pour une dur_e de nettoyage
de 4 heuresou deux fbis pour
une dur_.e de 3 heures.
Une dm_e d'autonettoyage
de 3 heures est recommand_e
lo,_que les d&_ersements sont
pedts et contenus. Une dtn_e
d'autonettoyage de 4 heures
ou plus est recommand_e
pour un fbur plus sale.
S'il faut une p&iode autre que
3 heures ou 4 heures, utilisez
les touches num6dques et entrez
la dur_e de herr(gage voulue.
Vous pouvez changer la p&iode 5 tome
autre entre 3 et 5 heures selon la salet_
du four
En%ncez la touche START
(demarmr).
Lorsque le voyant LOCKED(verrouil/e)
s'&eint, vous pourrez omqir la porte.
Le mot LOCKED(verrouille) clignotera
et le contr6le du fbm signa/era si vous
r_glez le cycle de nett(ger et si vous
oubliez de fermer la porte du four
Pore arr&ter un cycle de nettoyage,
enfoncez la touche CLEAR/OFF
(atmulation/arrOt). Lorsque le voyant
LOCKED(verroui//e) s'&eint indiquant
que la temp&amre du four estp_ss_e
sous la temp&amre de verrouillage,
vous pourrez ouvxir la porte.
La porte se verrouille automafiquement.
L'tffIichage indiquera le temps de
nettoyage resmnt. I1ne sera pas possible
d'ouvrir la porte du fbm avant que
la temp&amre ne tombe sous la
mmp_rature de verrouillage et avant que
le voyant LOCKED(verrouilie)nes'&eigne.
25
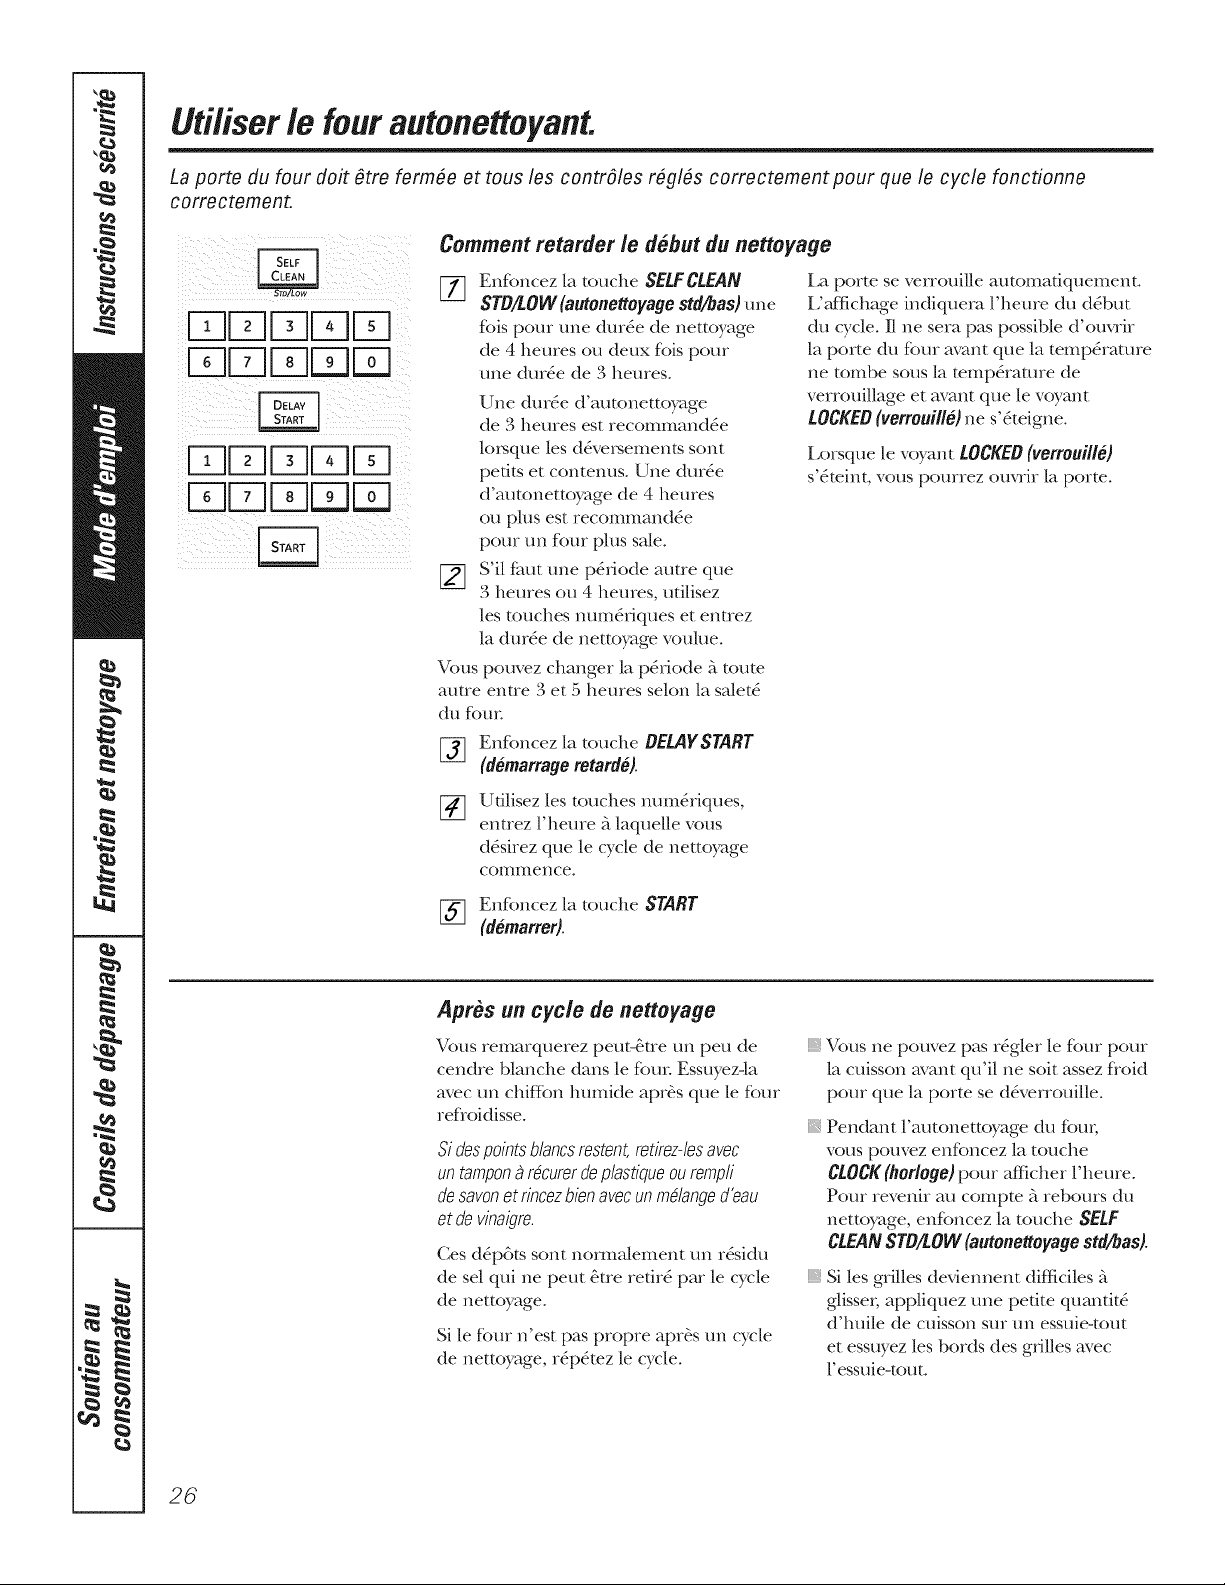
Uti/iser lefour autonettoyant.
La porte du four dolt #tre ferm#e et tous les contrdles r#gl#s correctement pour que le cycle fonctionne
correctement.
Comment retarder le d#.but du nettoyage
[77 Enfoncez la touche SELF CLEAN La porte se verrouille automatiquement.
SYD/LOW(autonettwagestd/bas)une [/_ff_ichage indiquera l'heure du dbbut
Kis pour une dur_e de nettoyage
de 4 heures ou deux fbis pour
une dur_e de 3 heures.
Une durSe d'autonettoyage
de 3 heures est recommandSe
loi_que les d&_ei._ements sont
perils et contenus. Une dm_e
d'autonettoyage de 4 heures
ou plus est recommand_e
pore un fbur plus sale.
[] S'il faut une p&iode autre que
3 heures ou 4 heures, utilisez
les touches nmn_fiques et entrez
la dur_.e de nettoyage voulue.
Vous pouvez changer la p&iode 5_route
autre entre 3 et 5 heures selon la salet_
du fbur
Enfbncez h touche DELAYSTART
_[M_J
(demarrageretarde).
du cycle. 111ne sera pas possible d'om_ir
la porte du four avant que la temp&amre
ne tombe sous la temp&amre de
verrouillage et avant que le voyant
LOCKED(verrouille)ne s'&eigne.
Lorsque le voyant LOCKED(verroMIle)
s'&eint, vous pourrez ouvrir la porte.
Ufilisez les touches num&iques,
entrez l'heure _tlaquelle vous
dSsirez que le cycle de netmyage
commence.
[_ Enfoncez la touche START
(demarmr).
Apres un cycle de nettoyage
Vous remarquerez peut-&tre un pen de
cendre blanche darts le fbur Essuyez-la
avec un chiffbn hmnide apr& que le four
refloidisse.
Sidespointsblancsrestent,retirez-lesavec
untampona rdcurerdeplastiqueourempfl
desavonet rincezbienavecunmganged'eau
et de vinaigre.
Ces dSp6ts sont nornmlenlent un r&idu
de sel qui ne peut &re retir_ pal le cycle
de nettoyage.
Sile fbm nest pas propre apr&s un cycle
de nettoyage, rSp&ez le cycle.
}_Vous ne pouvez pas rSgler le fbur pour
la cuisson avant qt£il ne soit assez flokt
pour que la porte se d&_errouille.
iii}i}iiii_
Pendant l'autonettoyage du fbm;
vous pouvez enfoncez la touche
CLOCK(hor/ogo) pour afficher l'heure.
Pour revenir au compm _ reboms du
nettoyage, enfoncez la touche SELF
CLEANSTD/LOW(autonettoyagestd/bas).
iii}iil;ii;_
Siles grilles deviennent difficiles _t
glissei; appliquez une petite quanfit6
d'huile de ctfisson sur un essuie-tout
et essuyez les bords des grilles avec
l'essuie-tout.
26
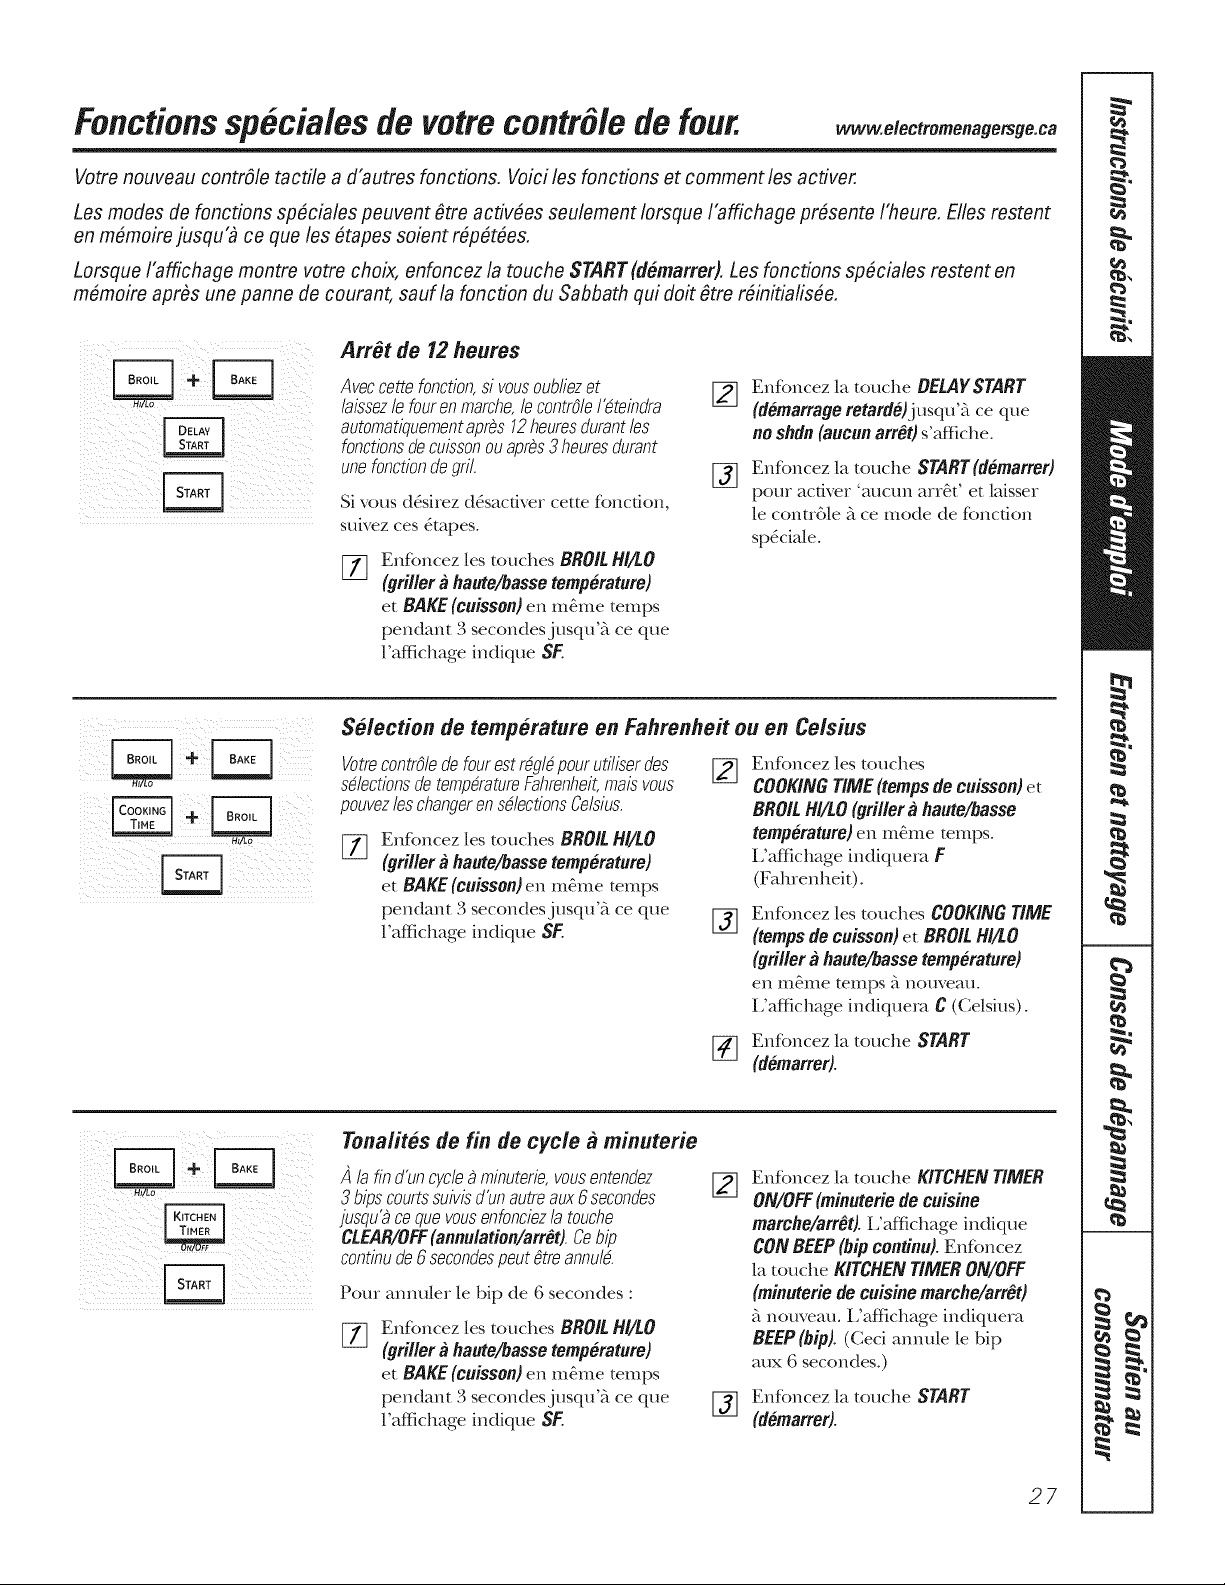
Fonctions sp_.cia/es de votre contr_/e de four. _.elect,omen,ge_ge.ca
Votrenouveau contrOle tactile a d'autres fonctions. Voici les fonctions et comment les activer.
Lesmodes de fonctions sp#ciales peuvent fitre activ#es seulement Iorsque I'affichage pr#sente I'heure. Ellesrestent
en m#moire jusqu_ ce que les #tapes soient r#p#t#es.
Lorsque I'affichage montre votre choix, enfoncez la touche START (demarrer). Lesfoncfions sp#ciales restent en
m#moire apr#s une panne de courant, sauf la foncfion du Sabbath qui dolt Otre r#initiafis#e.
libel_i_!_i:iiii:ii:_:iii!i_ iiiii_ill__i_i;iiiiii_i_iI_
i_ i (_i iii i i
Arr_t de 12 heures
Aveccettefonction,sivousoubliezet
laissezle fourenmarche,lecontrdeI_teindra
automatiquementapres12heures&rantles
fonctionsdecuissonou apres3heures&rant
unefonctiondegril.
Si vous d&sirez d&sacfiver cette fbncfion,
suivez ces 5ropes.
Enfoncez les touches BROILH//LO
(gril/era haute/bassetemperature)
et BAKE(cuisson)en m&ne temps
pendant 3 secondesjusqu'_ ce que
Faffichage indique SF.
%
Enfoncez la touche BELAYSTART
(demarrageretarde)jusqu'Z_ce que
noshdn (aucunarrOt)s'affiche.
Enfoncez la touche START(demarrer)
pour activer 'auctm art&' etlaisser
le contrGle _ ce mode de fonction
spSciale.
/7 il [77-] i iiiiiiiiiill
S_.iectionde temp#.rature en Fahrenheit ouen Celsius
VotrecontrOlede fourestr@ldpourutiliserdes
sdectionsdetempdratureFahrenheit,maisvous
pouvezleschangerensdlecfionsCelsius.
%
En%ncez les touches BROILHI/LO
(grillera haute/bassetemperature)
et BAKE(cuisson)en m&ne temps
pendant 3 secondesjusqu'_ ce que
Faffichage indique SF.
%
Enfoncez les touches
COOKINGTIME(tempsde cuisson)et
BROILH//LO(grillera haute/basse
temperature)en m&ne temps.
i,'affichage indiquem F
(Fahrenheit).
Enfoncez les touches COOKINGT/ME
(tempsde cuissen)et BROILH//LO
(grillera haute/bassetemperature)
en [neIile teIllps _t nouveau°
L'afIichage indiquera C(Celsius).
[_ Enfoncez la touche START
(demarrer).
Tenalites de fin de cycle a minuterie
lafin d'uncyclea minuterie,vousentendez
3bidscourtssuivisd'unautreaux6 secondes
jusqu'acequevousenfonciezla touche
CLEAR/OFF(annulatien/arr_t).Cebid
continude6 secondespeutgtreannulS.
Pour ammler le bip de 6 secondes :
%
Enfoncez les touches BROILH//LO
(grillera haute/bassetemperature)
et BAKE(cuisson)en m&ne temps
pendant 3 secondesjusqu'_t ce que
Faffichage indique SF.
Enfoncez la touche MTCHENTIMER
ON/OFF(minuterie de cuisine
marehe/arrOt).L'affichage indique
CONBEEP(hipcontinu).Enfoncez
]a touche KITCHENTIMERON/OFF
(minuteriede cuisine marche/arr_t)
_tnouveau. L'affichage indiquera
BEEP(hip).(Ceci ammle le bip
aux 6 secondes.)
Enfoncez la touche START
(demarrer).
27
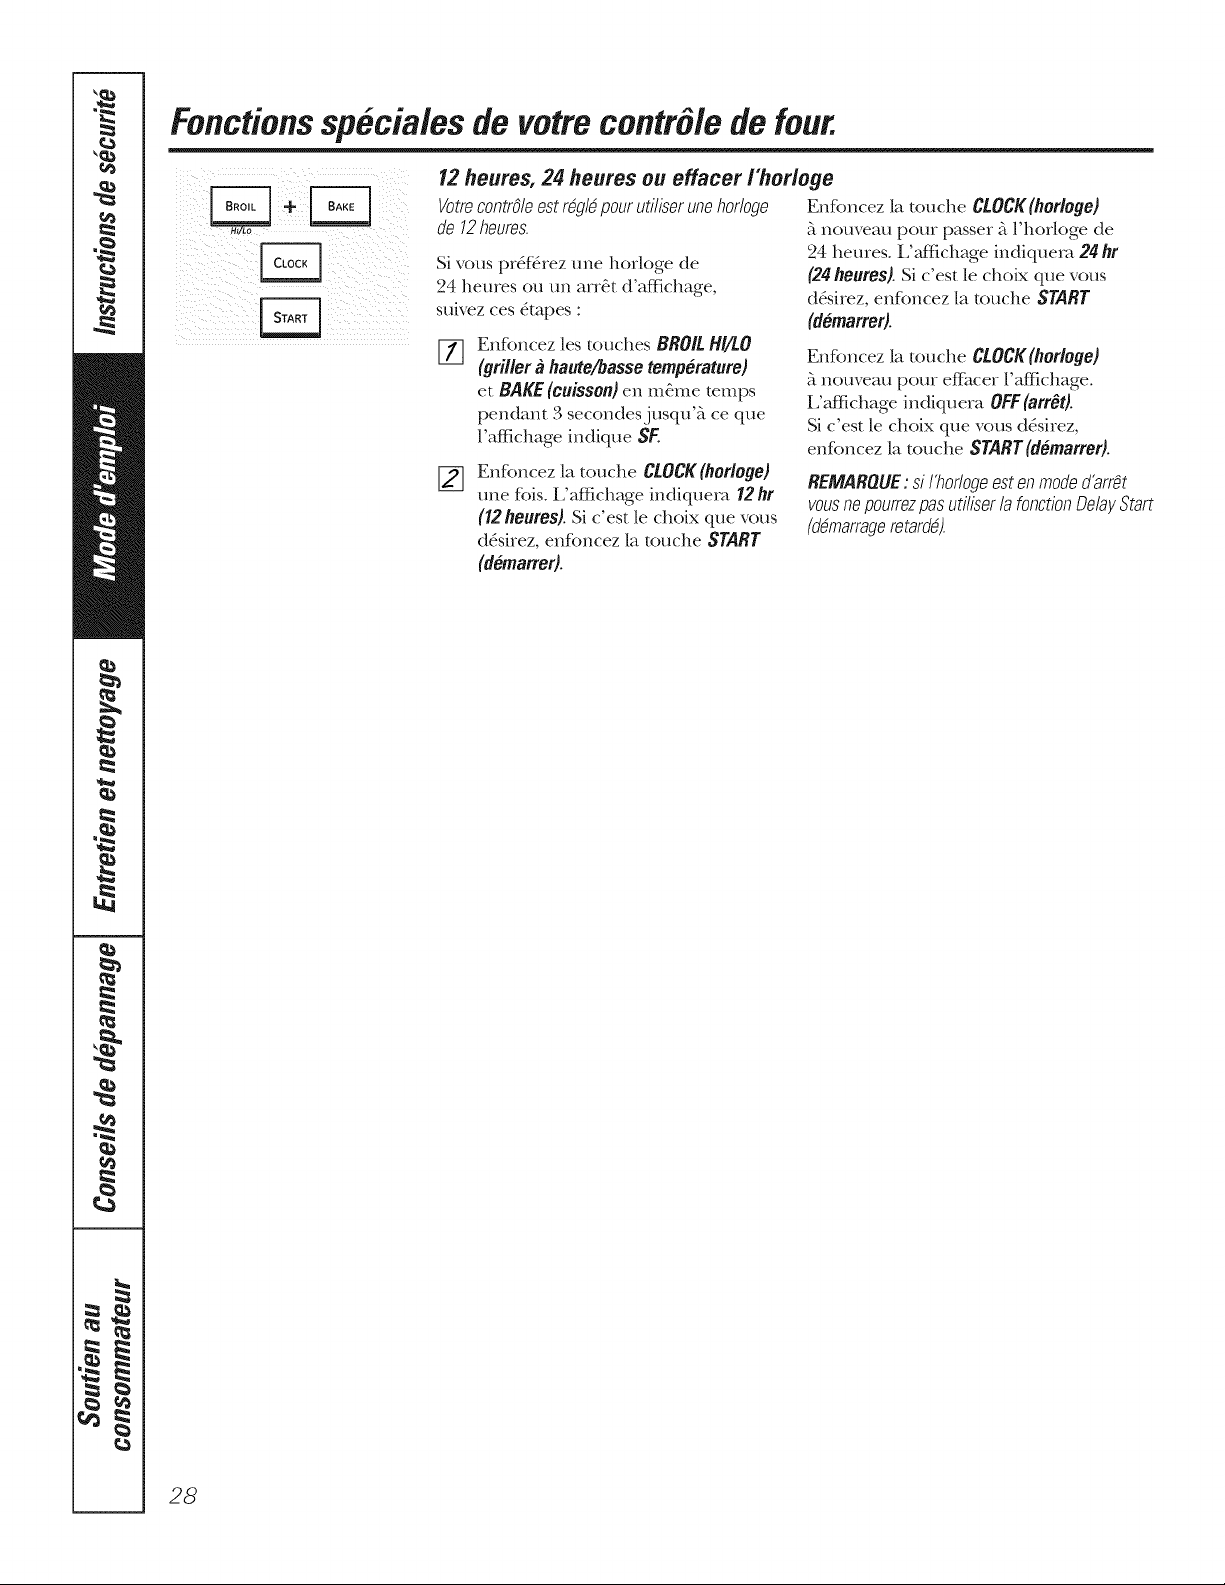
Fonctionssp6ciales devotrecontr6/e de four.
12 heures,24heures ou effacer i'horloge
VotrecontrOleest r@ldpourutiliserunehorloge
de 12heures.
Si vous prSf_rez une hork_ge de
24 heures oa un arrOt d'afl_ichage,
suivez ces 5ropes :
[]
Enfoncez les touches BROIL/'///tO
(gril/er a haate/basse temperature)
et BAKE (cuJsson)en m_me temps
pendant 3 secondesjL_squ'_ ce que
l'afl_ichage indique SK
Enfoncez la toache CLOCK (horloge}
une fbiso L'af_fichage indiquera 12 hr
(12 heures}o Si c'est le choix que vous
dSsirez, enKmcez la touche START
(demarmr)o
Enfoncez la touche CLOCK(hor!oge)
_tnouveau pour passer _ll'hork_ge de
24 heures, i/_gfichage indiquem 24 hr
(24 heuros}o Si c'est le choix que vous
dSsirez, enfoncez la touche START
(demarrer)o
Enfoncez la touche CLOCK(horloge)
_ nouveau pour efIhcer l'afIichageo
i/afIichage indiquera OFF(arrOt)o
Si c'est le choix que vous dSsirez,
enfoncez la touche STARr(demarreflo
REMARQUE :siI'hoflogeest enmode d'arr_t
vousne pourrezpasutiliser lafonctionDelag Start
(ddmarrageretardd).
28
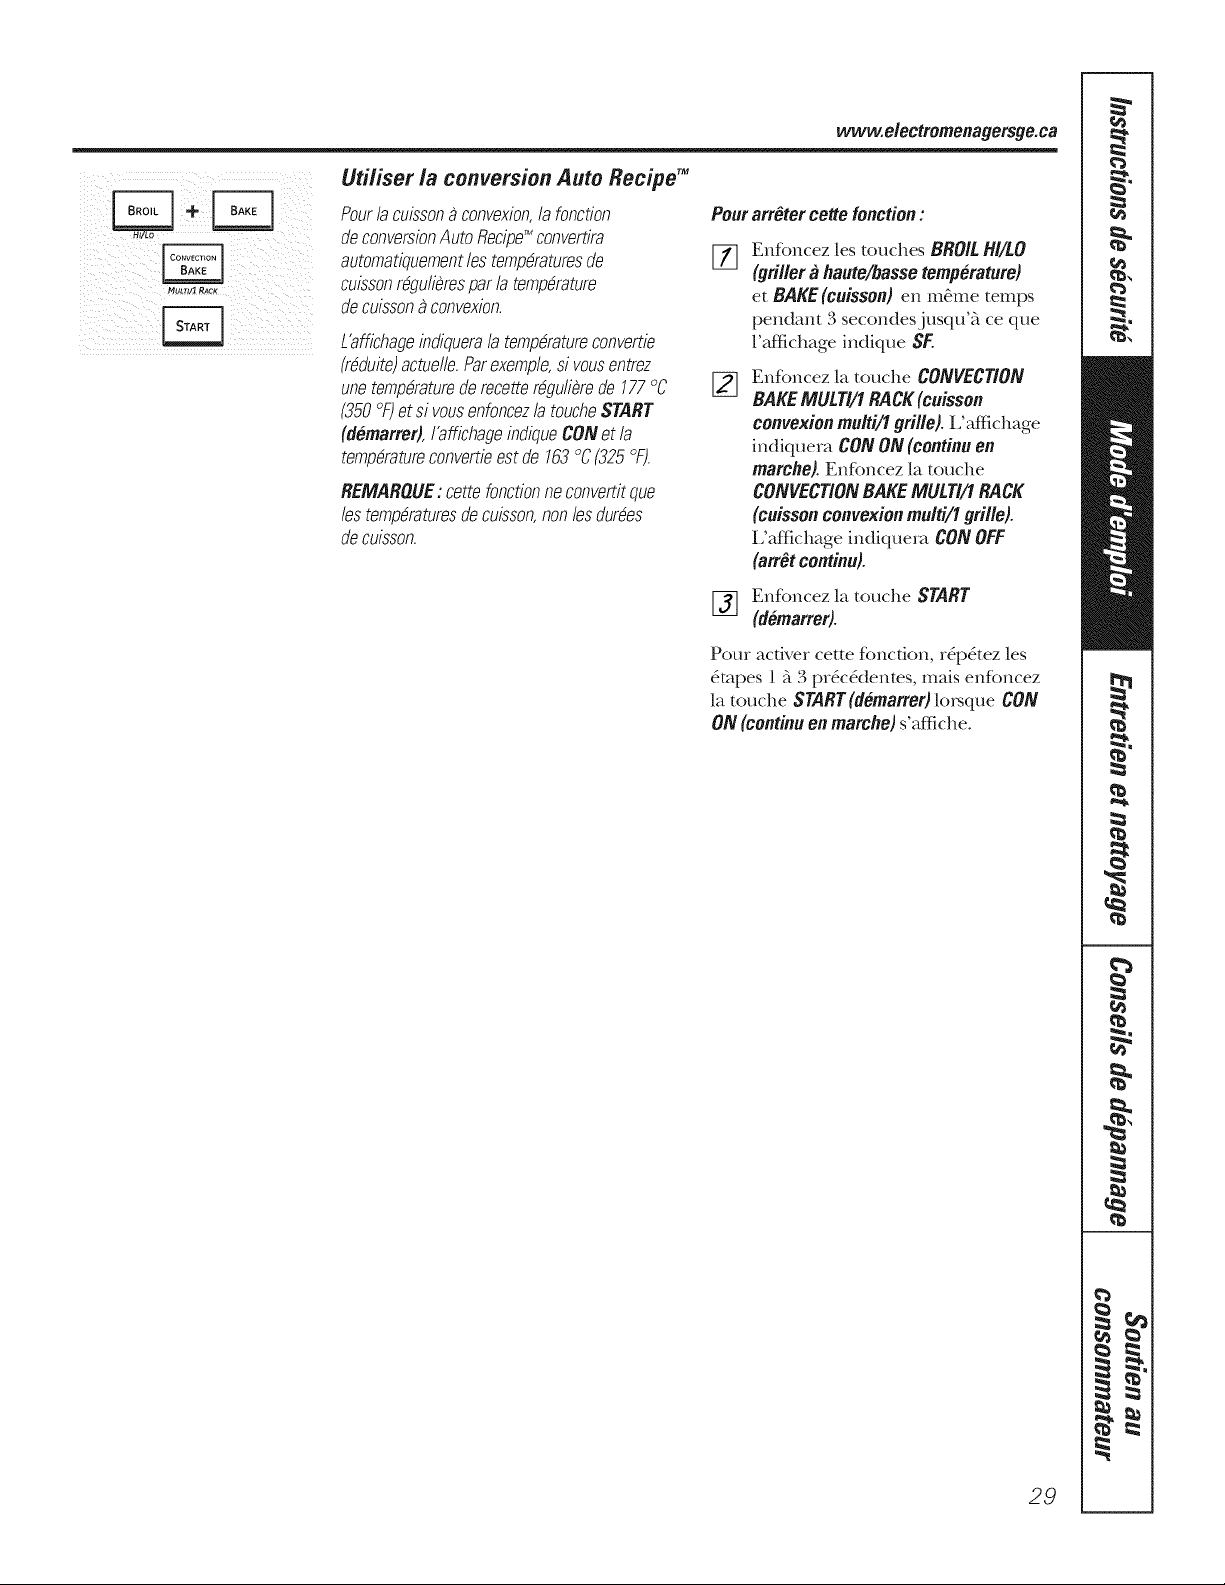
www.electromenagersge.ca
HULTI/2RACK
Utiliser /a conversionAuto Recipe TM
Pourlacuissonaconvexion,lafonction
deconversionAutoRecipe'_convertira
automatiquementlestemp&aturesde
cuissonr@ulieresparla temp&ature
decuissona convexion.
L'affichageindiquerala temp&atureconvertie
(rdduite)actuefle.Parexemple,si vousentrez
unetemp&aturederecetter@ulierede 177°C
(350°F)et sivousenfoncezla toucheSTART
(d6marrer),I'affichageindiqueCONet la
temp&atureconvertieestde 163°C(325°F).
REMAROUE: cettefoncfionneconvertitque
lestemp&aturesdecuisson,nonlesdurdes
decuisson.
Pourarr6teroettefonction:
[]
[]
Enfoncez les touches BROILH//LO
(griller a haute/basse temperature)
et BAKE (cuisson) en m&ne temps
pendant 3 secondesjusqu'_ ce que
l'affichage indique SE
Enfoncez la touche CONVECTION
BAKEMULTI/1RACK(ouisson
oonvexionmulti/1grille), i,'affichage
indiquera CONON (oontinuen
marohe).Enfoncez la touche
CONVECTIONBAKEMULTI/I RACK
(ouissonoonvexionmulti/1grille).
i:affichage indiquera CONOFF
(arr6toontinu).
[_ Enfoncez la touche START
(demarrer).
Pour acfiver cette foncfion, r_p&ez ]es
_tapes 1 _ 3pr_c_dentes, mais enfoncez
]a touche START(demarrer)lo_que CON
ON (continuen marche)s'affiche.
29
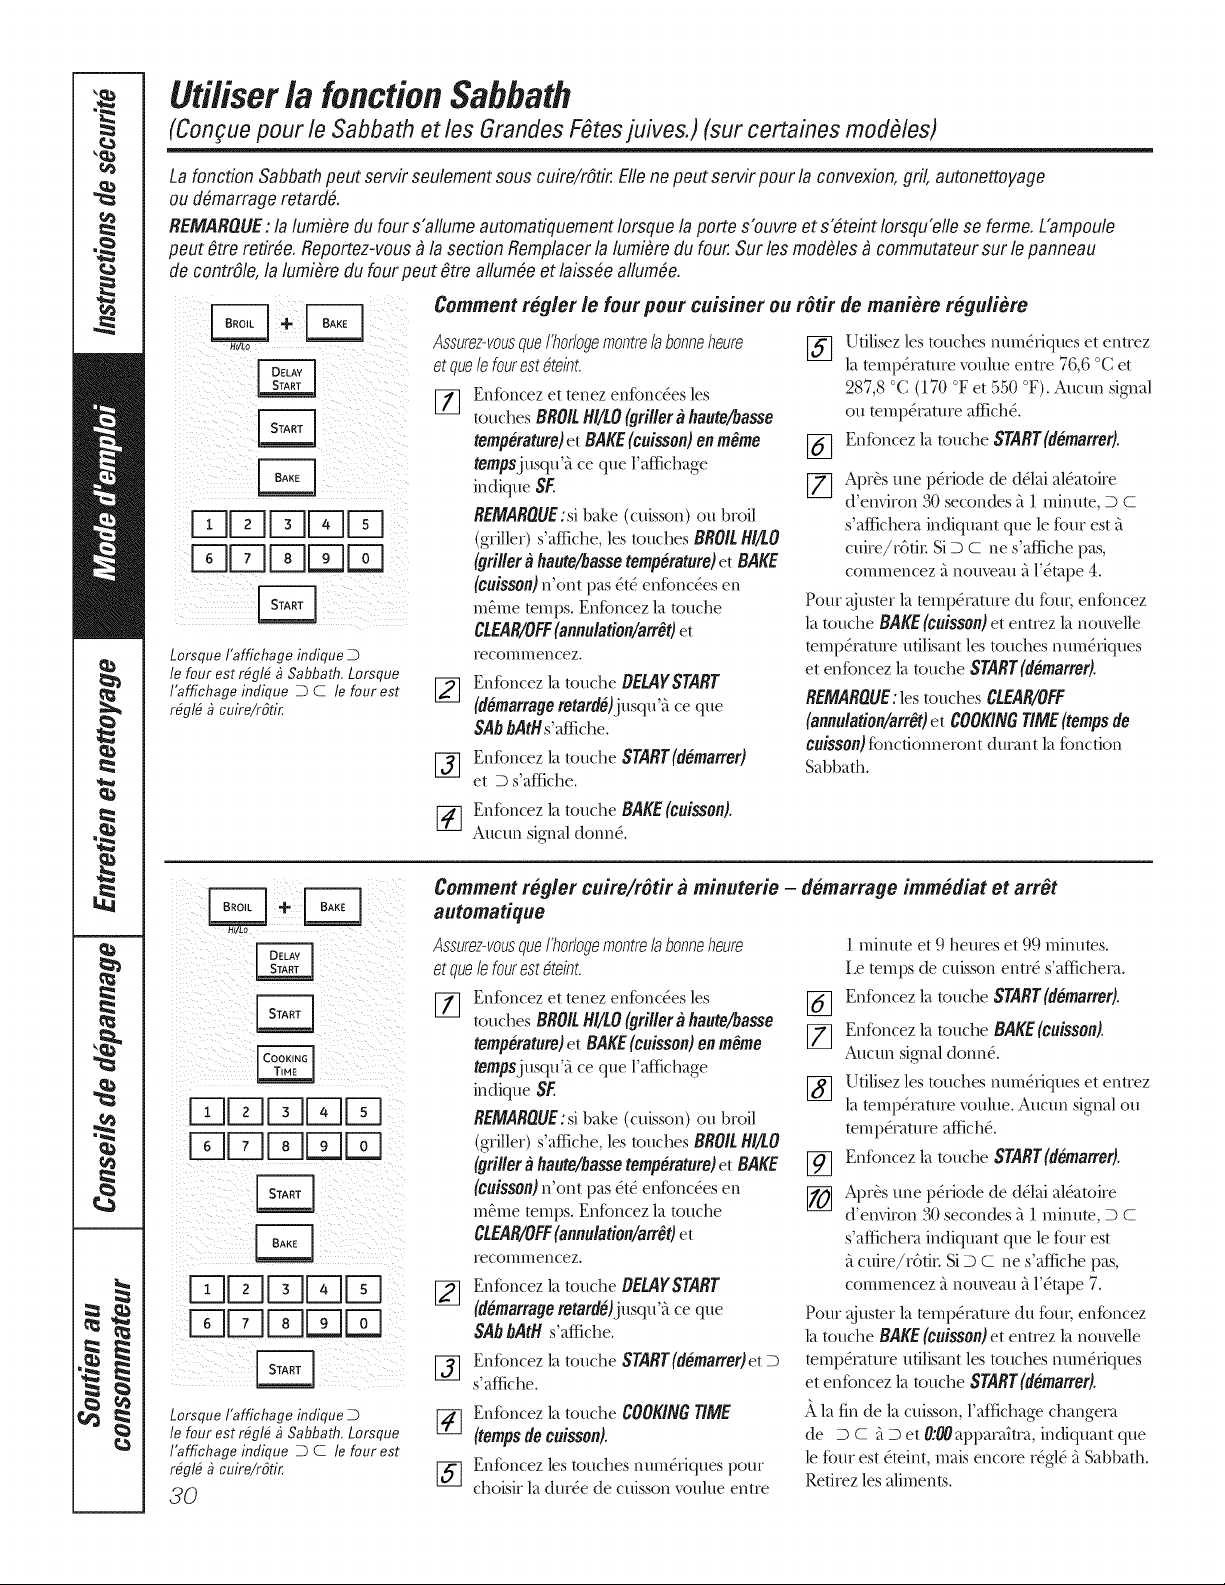
Uti/iser/a fonctionSabbath
(Con;ue pour le Sabbath et les Grandes F_tesjuives.) (sur certaines mod_les)
La fonction Sabbath peut servir seulement sous cuire/r6tir. Elle ne peut servir pour la convexion, gril, autonettoyage
ou dOmarrage retardS.
REMAROUE : lalumi#re du four s'allume automatiquement Iorsque la porte s'ouvre ets_teint Iorsqu'elle se ferme. L'ampoule
peut #tre retiree. Reportez-vous _ la section Remplacer la lumi#re du four. Sur les modOles_ commutateur sur le panneau
de contr#le, la lumi_re dufour peut gtre allum#e etlaiss#e allum#e.
/E]DEQEZ]
Lorsque I'affichage inflique D
le four est r#gl# _ Sabbath, Lorsque
I'affichage inflique D C le four est
r#gl# _ cuire/rSfir,
Comment r#gler le fourpour cuisiner ou r#tir demaniere r#guliere
Utilisezlestouches num&iques et entrez
Assurez-vousetque/efourqUeest_teint./'h°r/°gemontre/abonneheure [_] la temp_._muevoulueentre76,6°Cet
[77 Enfoncez et tenez enfbnc_es les
touches BROILHi/LO(#ri#era haute/basse
temp#rature)et BAKE(euisson)en mime
tempsjusqu"_ ce que l'affichage
indique SE
REMAROUE:si bake (cuisson) ou broil
(griller) s'affiche, les/ouches BROILHi/[O
(#fillera haute/bassetemperature)et BAKE
(cw'ssen)n'ont pas _t(• enfL)nc_es en
m_.me temps. EnfL)ncez la touche
CLEAR/OFF(annulation/arrfOet
Feconlnlencez.
[_ Enfi)ncez la touche OEMYSTART
(demarrage retarde)jnsqu'.:_ ce que
SAbbAtH s'affiche.
[-_ Enfoncez la tcmche SNRT(demarrer)
et D s'affiche.
%
287,8 °C (170 °F et 550 °F). Aucun signal
on temp_.mture affich_..
Enfoncez la t(mche SNRT(demarrer).
Aprb.s une p&iode de (t_.laial_.atoire
d'em'iron 30 secondes ;t 1 minute, D C
s'afficheI>[ indiqu?lnt que le f_.)tlr est _[
cuire/r6ti_: Si D C ne s'attiche pas,
commencez finom_au fil'_.mi)e 4.
Pour @1star la mmp_.mmre du fern; enfoncez
la touche BAKE(cw'sson)et entrez la nom_lle
mmp_.tamre utilisant les routines nmn_fiques
et enfoncez la touche SNRr(demarrer).
REMARQUE: Ies /ouches CLEAR/OFF
(annu/ation/arr_t)et COOKINGTiME(tempsde
cuisson) fonc/ionneront (hmmt la fL)nction
Sabbath.
[-_ Enfoncez la tcmche BAKE(c_isson).
Aucun signal donn_..
FqFqFqEzIFq
FqFqFq Fsq
FqFqFqFqFq
EZ]r-qFq
Lorsque I'affichage inflique D
le four est r#gl# _ Sabbath. Lorsque
I'affichageinflique D C lefourest
rOgl#_ cuire/rSti_
30
Comment rOgler cuire/r#tir g_minuterie - dOmarrage immOdiat et arrOt
automatique
Assurez-vousqueI'horlogemontrelabonneheure
et que/e fourest #teint.
[77 Enfoncez et tenez enf6nc_.es les
touches BROILHI/tO(#rifler# haute/basse
temperature)et BAKE(cuissen)en m_me
tempsjusqu"_ ce que l'affk:hage
indique $F
REMARQUE:sibake (cuisson) ou broil
(griller) s'affiche, les/oud)es BROIL Hi/[O
(#fillera haute/bassetemperat.re)et BAKE
(cuisson)n'ont pas _.t(_enfL)nc_.esen
m_me romps. EnfL)ncez la touche
CLEAR/OFF(annulatien/arr_Oet
Feconlnlencez.
_] Enfoncez la touche OEMYSTART
(dOmarra#eretardOljusqu'.:_ce que
SAbbAtH s'affiche.
[_ Enfoncez la tonche SNRT(demarrer)et D
s'affiche.
[_ Enfoncez la touche COOKINGTIME
(tempsdeeuisson).
[_ Enfoncez les touches num&iques pour
choisir la dur_.e de cuisson voulue entre
%
%
%
1minute et 0 heures et 99 minutes.
Le temi)s de cuisson entr4 s'afIichem.
Enfoncez la t(mche SNRT(demarreO.
Enfoncez la tcmche BAKE(cuisso_).
Aucun signal donn4.
Utilisez les tot_ches nmn4fiques et entrez
la temperature voulue. Aucun signal on
mmp4mmre affich4.
Enfoncez la t(mche SNRT(demarrer).
Aprb.s une p&iode de (t_.lai al_.atoire
d'em'iron 30secondes _t1 minute, D C
s'afficheI>[ indiquant que le four est
ficuire/r6tiL Si D C ne s'affiche pas,
commencez finouveau fi l'_.tape 7.
Pour @_ster la temp_camre du fern; enfoncez
la touche BAKE(cuissofl)et entrez la nom_lle
mmi)_.tature utilisant les touches num_fiques
et enfoncez la touche SrARr(demarrer).
la fin de la cuisson, l'affichage changem
de D C _ D et O:#Oapl)ata_tta, indiquant que
le four est _.mint, mais encore r#gl_,it Sabbath.
Retirez les aliments.
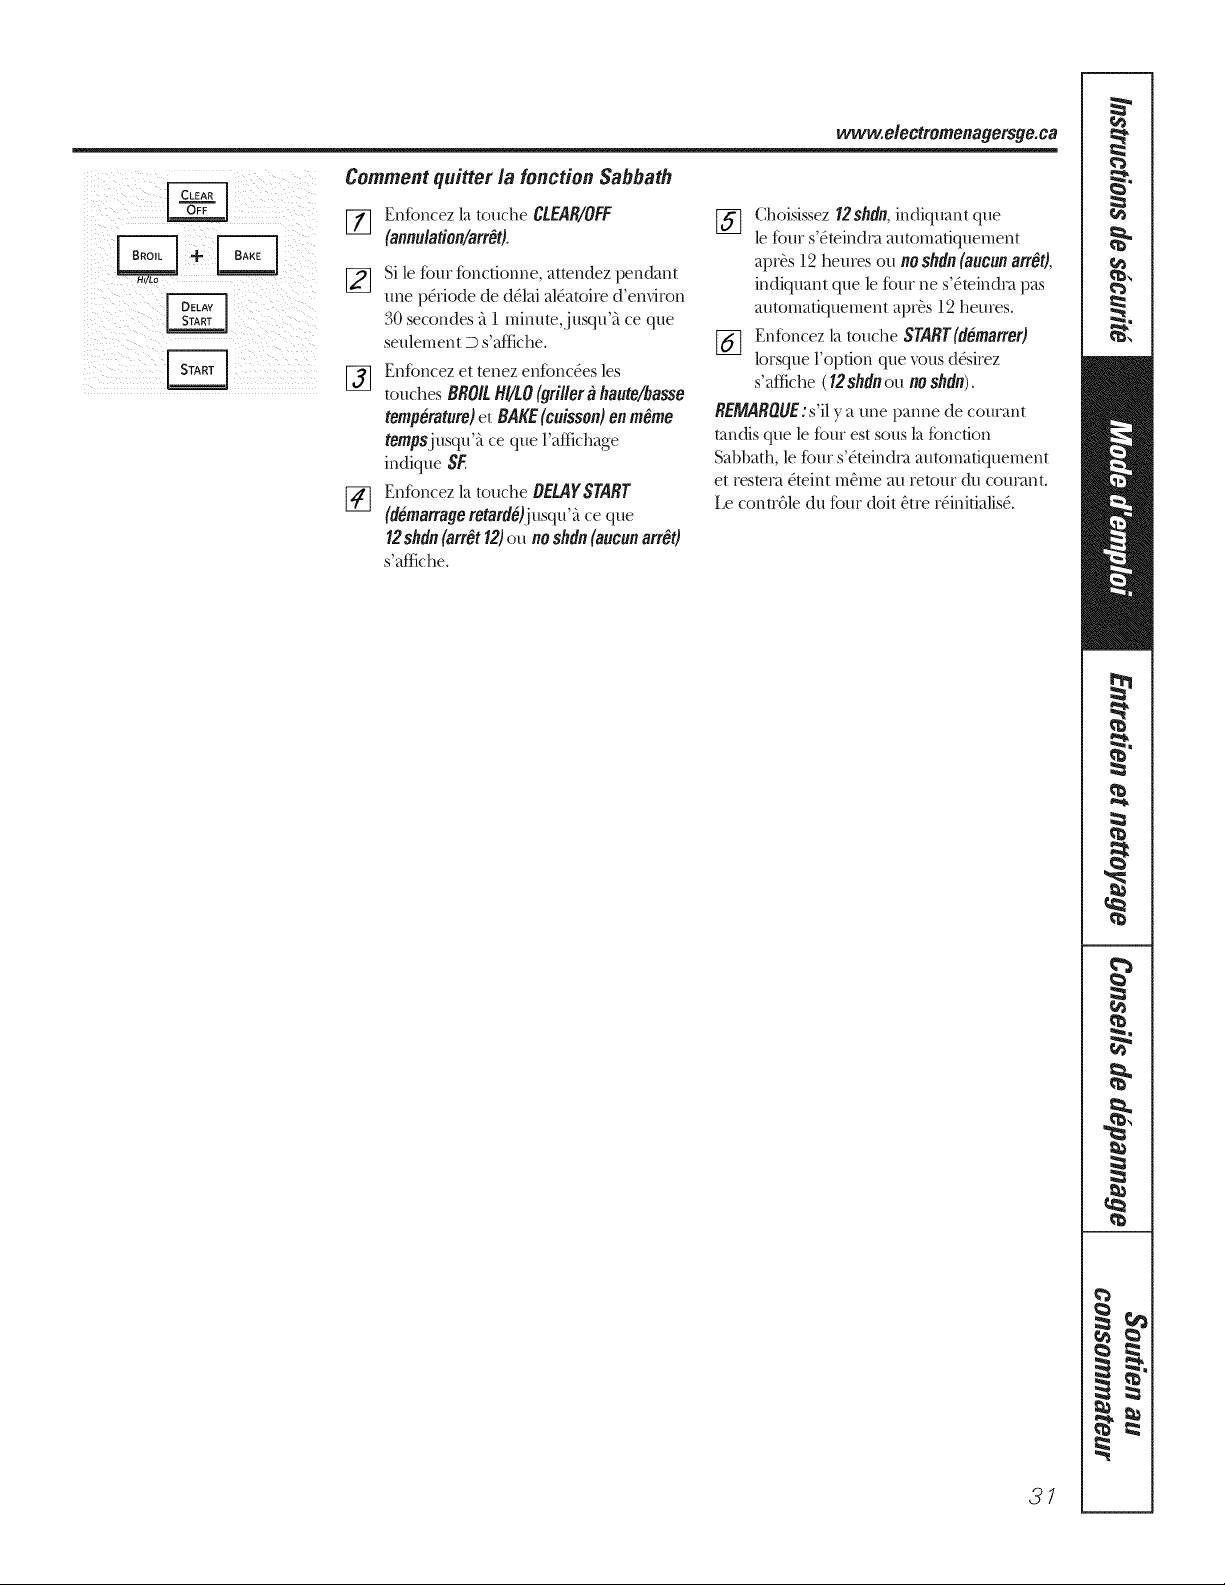
www.electromenagersge.ca
Comment quitter la fonction Sabbath
[] EnfL)ncezla touche CLEAR/OFF
(anmt/ation/arrOt).
[]
Si le four %ncfionne, attendez pendant
une p&Jode de d_lai al_atoire d'en@on
30 secondes _t1 minute,jusqu'_t ce que
seulement D s'affiche.
f_ Enfoncez et tenez enf()nc_es les
touches BROILHI/LO(grillera haute/basse
temperature)et BAKE(cuisson)enm_me
tempsjusqu'fi ce que l'affichage
indique SF
[_] Enfoncez la touche OELAYSTART
(demarraoeretardejjusqu'fi ce que
12shdn (arrOt12)ou no shdn (aucunafrO0
s'affiche.
Choisissez 12shdn, indiquant que
[_] le four s'6teindm automatiquement
apt& 12 heures ou no shdn (aucun arrOO,
indiquant que le four ne s'6mindm pas
automatiquement aprbs 12 heures.
[_] En%ncez la touche START(dO,matter)
lotsque 1 option que vous d&irez
s'aftiche (12 shdn ou no shdn).
REMAROUE:s'il ya une panne de courant
mndis que le four est sous la fbnction
Sabbath, le four s'6mindm automatiquement
et restem _teint m&ne au retour (fit coumnt.
Le contr61e du fk)ur(bit _tre r(qnitialis_.
3/
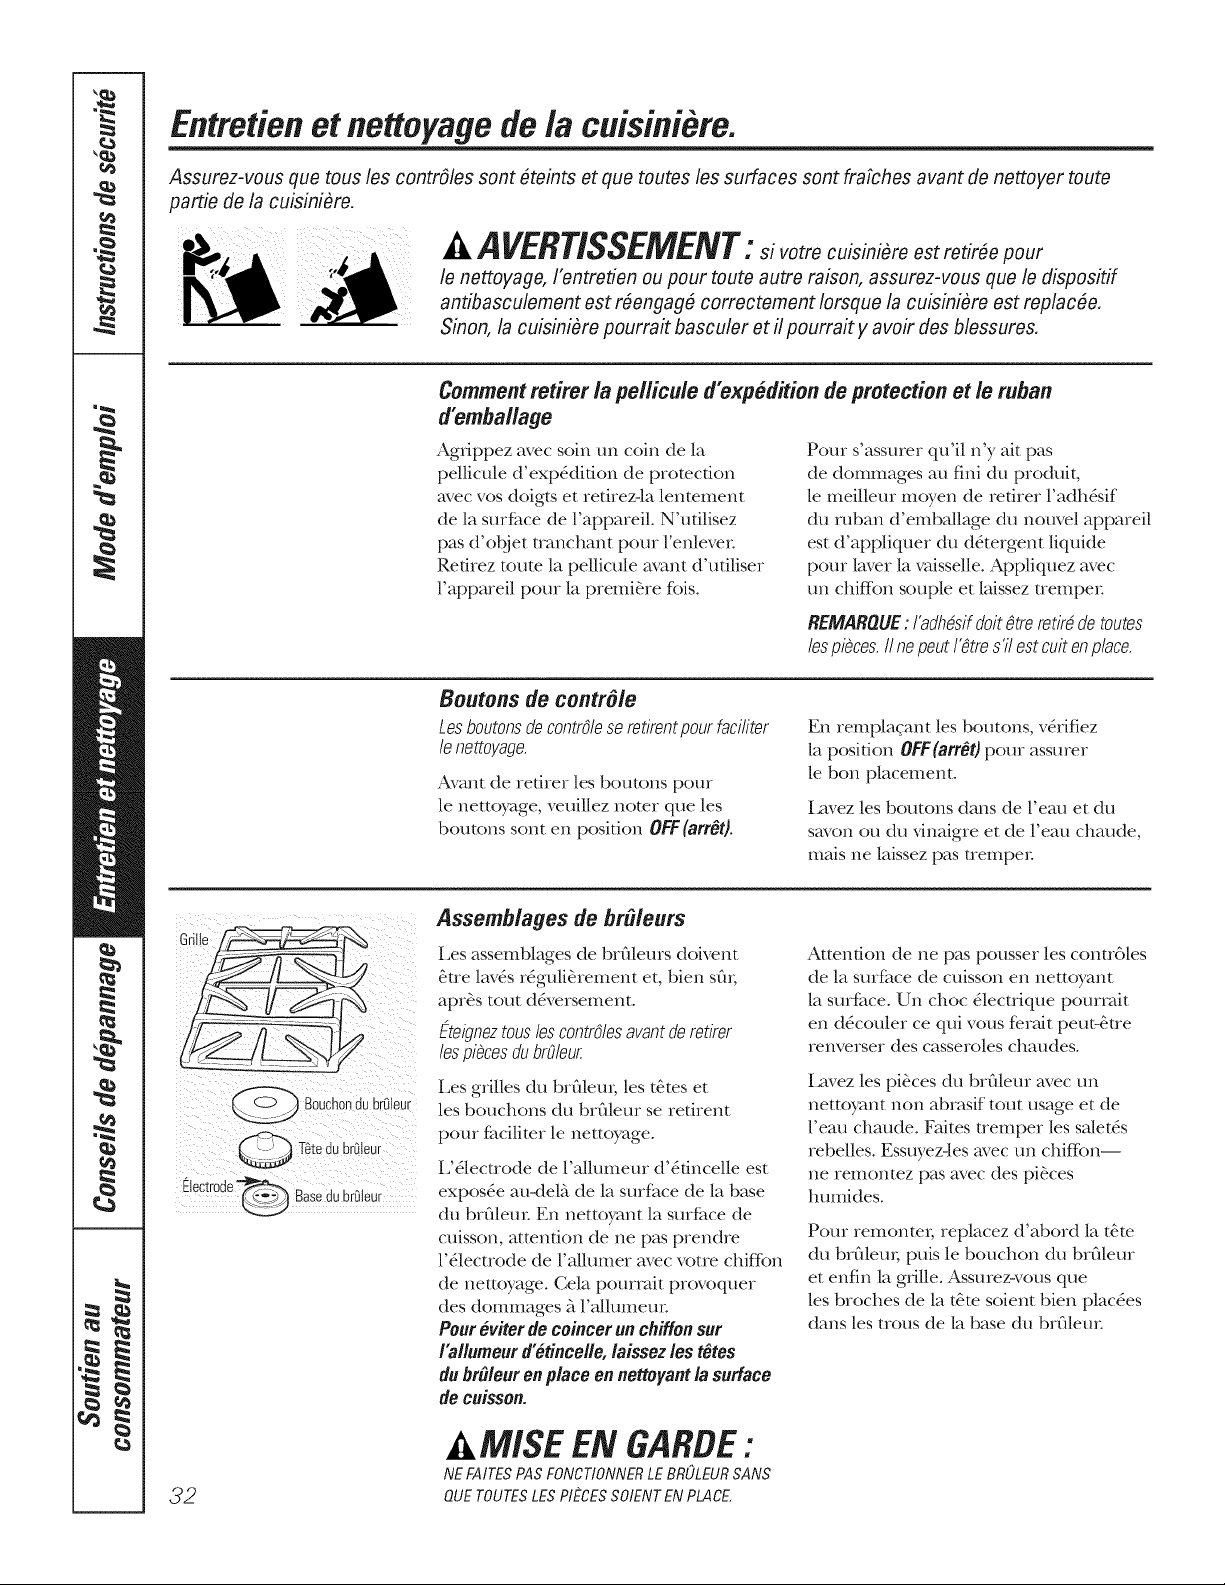
Entretien et ne#oFage de la cuisim'#re.
Assurez-vous que tous les contrdles sont #teints etque toutes lossurfaces sont frMches avant de nettoyer toute
partie de la cuisinifire.
A PVERTISSEMENT:sivotrocuisiniOr pour
le nettoyage, I'entretien ou pour toute autre raison, assurez-vous que le dispositif
antibasculement est r#engagfi correctement Iorsque la cuisinifire est replac#e.
Sinon,la cuisiniOre pourrait basculer etil pourrait ya voir desblessures.
Commentrotifer lapellicule d'exp#dition de protection et leruban
d'embailage
Agfippez avec soin tm coin de la
pellicule d'exp_difion de protection
avec vos doigts et refirez-la lentement
de la surfitce de l'appareil. N'ufilisez
pas d'objet tranchant pore l'enleven
Refirez route la pellicule avant d'ufiliser
l'appareil pour la premib_re fbis.
Pour s'assurer qu'il n'y ait pas
de dommages au fini du prodtfit,
le meilleur moyen de refirer l'adh_sif
du ruban d'emba/lage du nouvel appareil
est d'appliquer du d&ergent liquide
pour laver la vaisselle. Appliquez avec
un chiffbn souple et laissez trempe,:
REMAROUE:I'adMsifdoitgtreretir#de toutes
lospieces.II nepeutI_tre sTIest cuitenplace.
Boutons de eontr#le
LesboutonsdecontrOlese retirentpour faciliter
le nettoyage.
Avant de retirer les boutons pour
le nettoyage, veuillez rioter que los
boutons sont en position OFF(arrOt}.
En remplacant les boutons, v&ifiez
la position OFF(arr_Opour assurer
le bon placement.
im_ez les bout(ms darts de l'eau et du
savon ou du vinaigre et de l'eau chaude,
mais ne laissez pas trempe,:
..............
V
@ Bouchondu brOleur
O TOteJubrOleur
Electrode_ _ ^
_base ouDruleur
32
Assemblages de br#ieurs
Les assemblages de brfllems doivent
&tre lav6s rSguli&rement et, bien stir;
apr_s tout d_versement.
E-teigneztousloscontrdlesavantderotifer
lospiecesdubrOleur
Les grilles du brfllem; les t&tes et
les bouchons du brOleur se retirent
pour faciliter le nettoyage.
L%lecuode de l'a/lumeur d'Sfincelle est
exposSe au<tel_t de la surface de la base
du brfileur En nettoyant la surfime de
cuisson, atmnfion de ne pas prendre
l'_lectrode de l'a/lmner avec votre chiflCbn
de nettoyage. Cela pourrait provoquer
des dommages {_l'allmnem-
Pour eviter de coincer un chiffonsur
I'allumeur d_tincelle, laissez les t_tes
dubr#leur enplace ennettoyantla surface
de cuisson.
AMISE ENGARBE:
NEFAITESPASFONCTIONNERLEBROLEURSANS
OUETOUTESLESPIECESSOIENTENPLACE.
Attention de ne pas pousser les conu61es
de la surface de cuisson en nettoyant
la surface. Un choc _lectrique pourrait
en d_couler ce qui vous re.fair peut-_tre
renverser des casseroles chaudes.
im_ez les pi&ces du brflleur avec tm
nettoyant non abrasif tout usage et de
l'eau chaude. Faites tremper los sa/etds
rebelles. Essuyez-les avec un chiffbn--
ne remontez pas avec des pi_ces
humides.
Pour reIllon[eI; replacez d'abord la t6te
du brfilem; puis le bouchon du brflleur
et enfin la grille. Asstlrez=vous que
les broches de la tbm soient bien placSes
darts les trous de la base du brfilem:
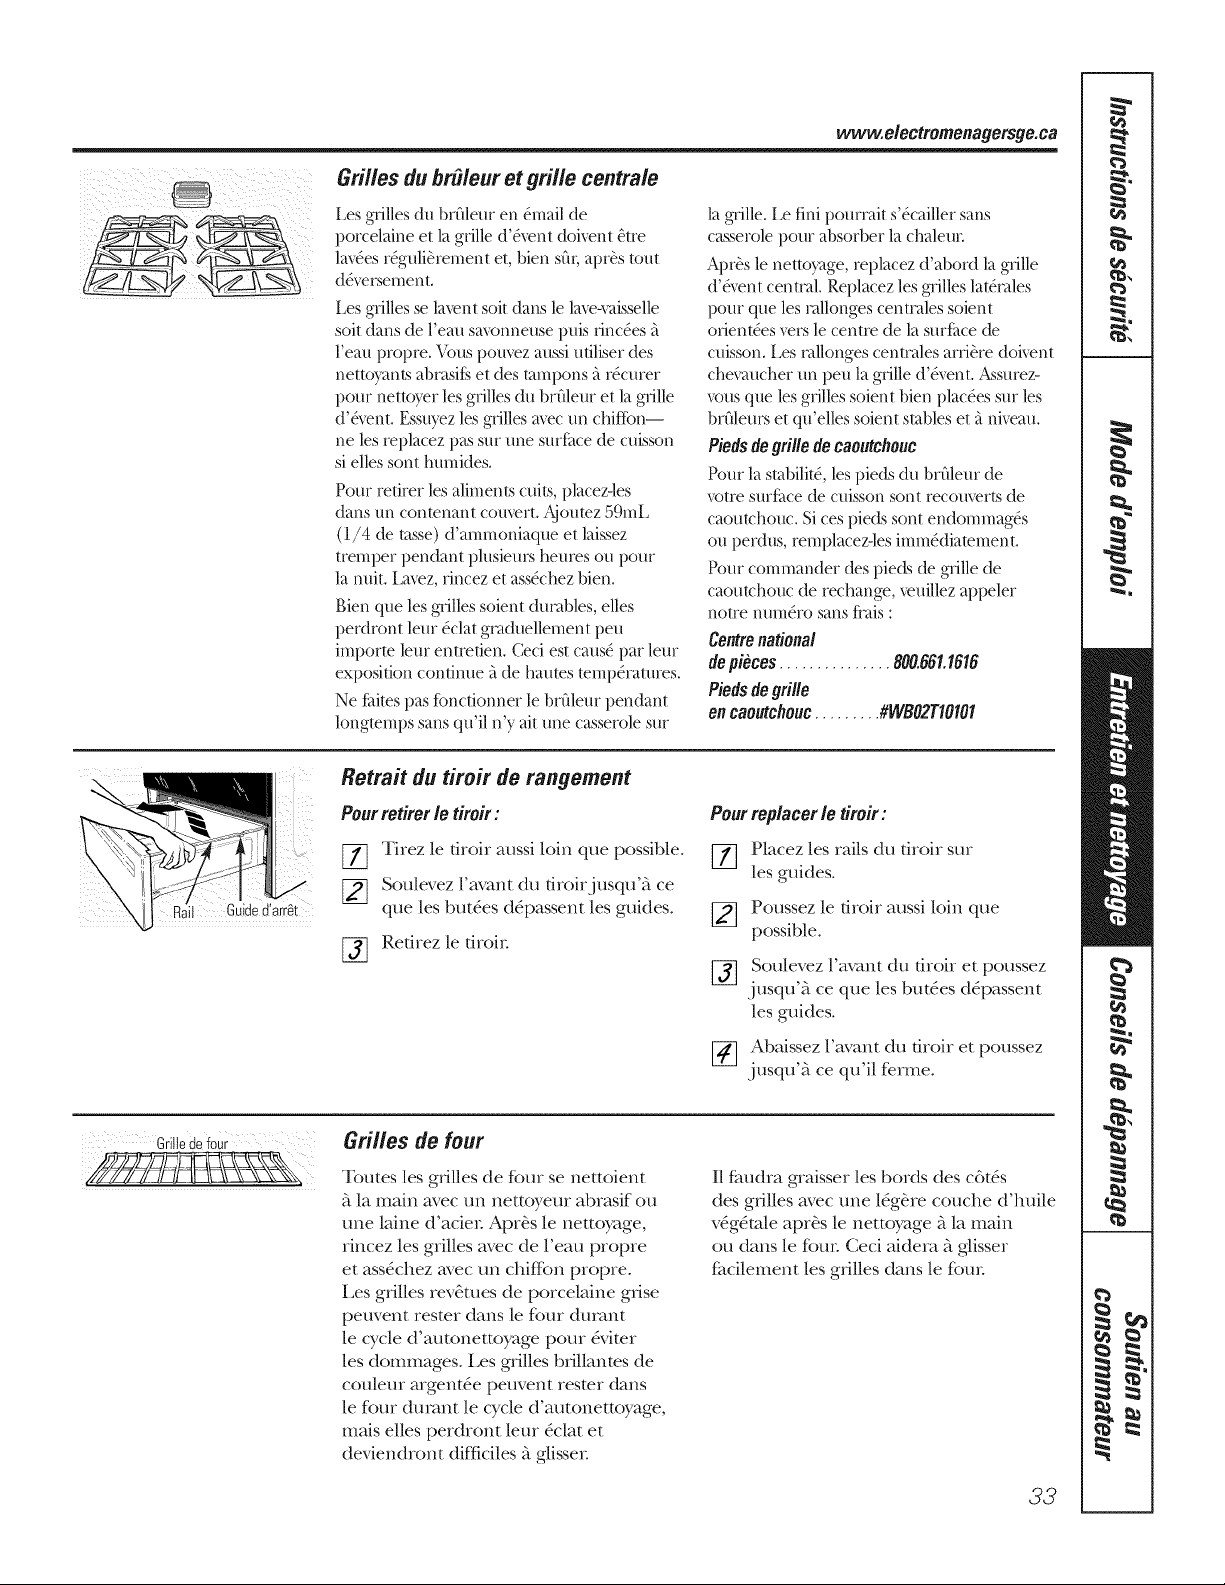
www.electromenagersge.ca
Grilles du br_ieur et grille centrale
Les grilles du brfileur en 4mail de
porcelaine et la grille d'&'ent doivent Otre
la%es r_guli_rement et, bien stir, apt& tom
d_versement.
Les grilles se lax_nt soit dans le lax_-vaisselle
soit dans de l'eau savonneuse puis rincSes _t
l'eau propre. \,%us pom_z aussi ufiliser des
nettoyants abrasifs et des tampons _tr_cmer
pour nettoyer les grilles du brflleur et la grille
d'&'ent. Essuyez les grilles ax>c un chifIbn--
ne les replacez pas sur une surfitce de cuisson
si elles sent hmnides.
Pour refirer les aliments cults, placez-les
dans un conmnant comert. Ajoumz59mL
(1/4 & msse)d'ammoniaque etlaissez
tremper pendant plusiem_ heures ou pore
la refit, imez, rincez et ass_chezbien.
Bien que lesgrilles soient ducables,elles
perdront leur _clat gcaduellement peu
imporm leur entrefien. Ceci estcaus_par leur
exposition c(mfinue _tde haums mmp&'atures.
Ne fLtimspas foncfionner le brfileur pendant
longmmps sans qu'il n'yaitune casserolesur
la grille. ][_efini pourmit s'_cailler sans
casserolepour absorber la chalem:
Apr_slenettoyage, replacez d'abord la grille
d'&ent centcal.Replacezles grilles latScales
pour que lescallonges centcalessoient
orientSes xe_ le centre de la surfime de
cuisson. Les callongescentcales arfib,re doivent
chevaucher un pen la grille(t'&_nt. Assure>
_ous que lesgrilles soient bien plac_essur les
brfllems et qu'elles soient stables etitni_eau.
Piedsdegrilledecaoutchouc
Pour la s/abilitY,les pieds du brfileur de
_otre smfitce de cuisson sent recomerts de
caoutchouc. Sices pieds sent endommag&
ou perdus, remplacez-lesimm&tiamment.
Pour commander des pie(g degrille de
caoumhouc de rechange, _euillez appeler
notre nmn&o sans flais :
Centrenational
depieces............... 800.66I.I616
Piedsdegrille
oncaoutchouc......... #WBO2T10101
Retrait du tiroir de rangement
Pourretirerletiroir:
%
Tirez le firoir aussi loin que possible.
Soulevez l'axant du firoirj usqu'_l ce
que les butSes dSpassent les guides.
Refirez le firoir
Pourreplacerle tiroir:
[_] Placez les rails du tiroir sin
les guides.
[_] Poussez le firoir aussi loin que
possible.
[_ Soulevez l'avant du firoir et poussez
jusqtFS_ce que les buttes d_passent
les guides.
[_ Abaissez l'avant du firoir et poussez
jusqu'5_ ce qu'il ferme.
6rille defoui
Grilles de four
Toutes les grilles de fbur se nettoient
_tla main avec un nettoyeur abrasif ou
une laine d'acier Apr&s le nettoyage,
rincez les grilles avec de l'eau propre
et ass_chez avec tm chifKm propre.
Les grilles rev&mes de porcelaine grise
peuvent rester darts le fbur durant
le cycle d'autonettoyage pore 5viter
les dommages. Les grilles brillantes de
couleur argent6e peuvent rester darts
le four durant le wcle d'autonettoyage,
mais elles perdront leur _clat et
deviendront dif_iciles 5_glisser
I1 faudra graisser les bords des c6t&
des grilles avec une 16g&re couche d'huile
v_.gSta/e apr&s le nettoyage _tla main
ou darts le fbm- Ceci aidem _ glisser
facilement les grilles darts le four
33
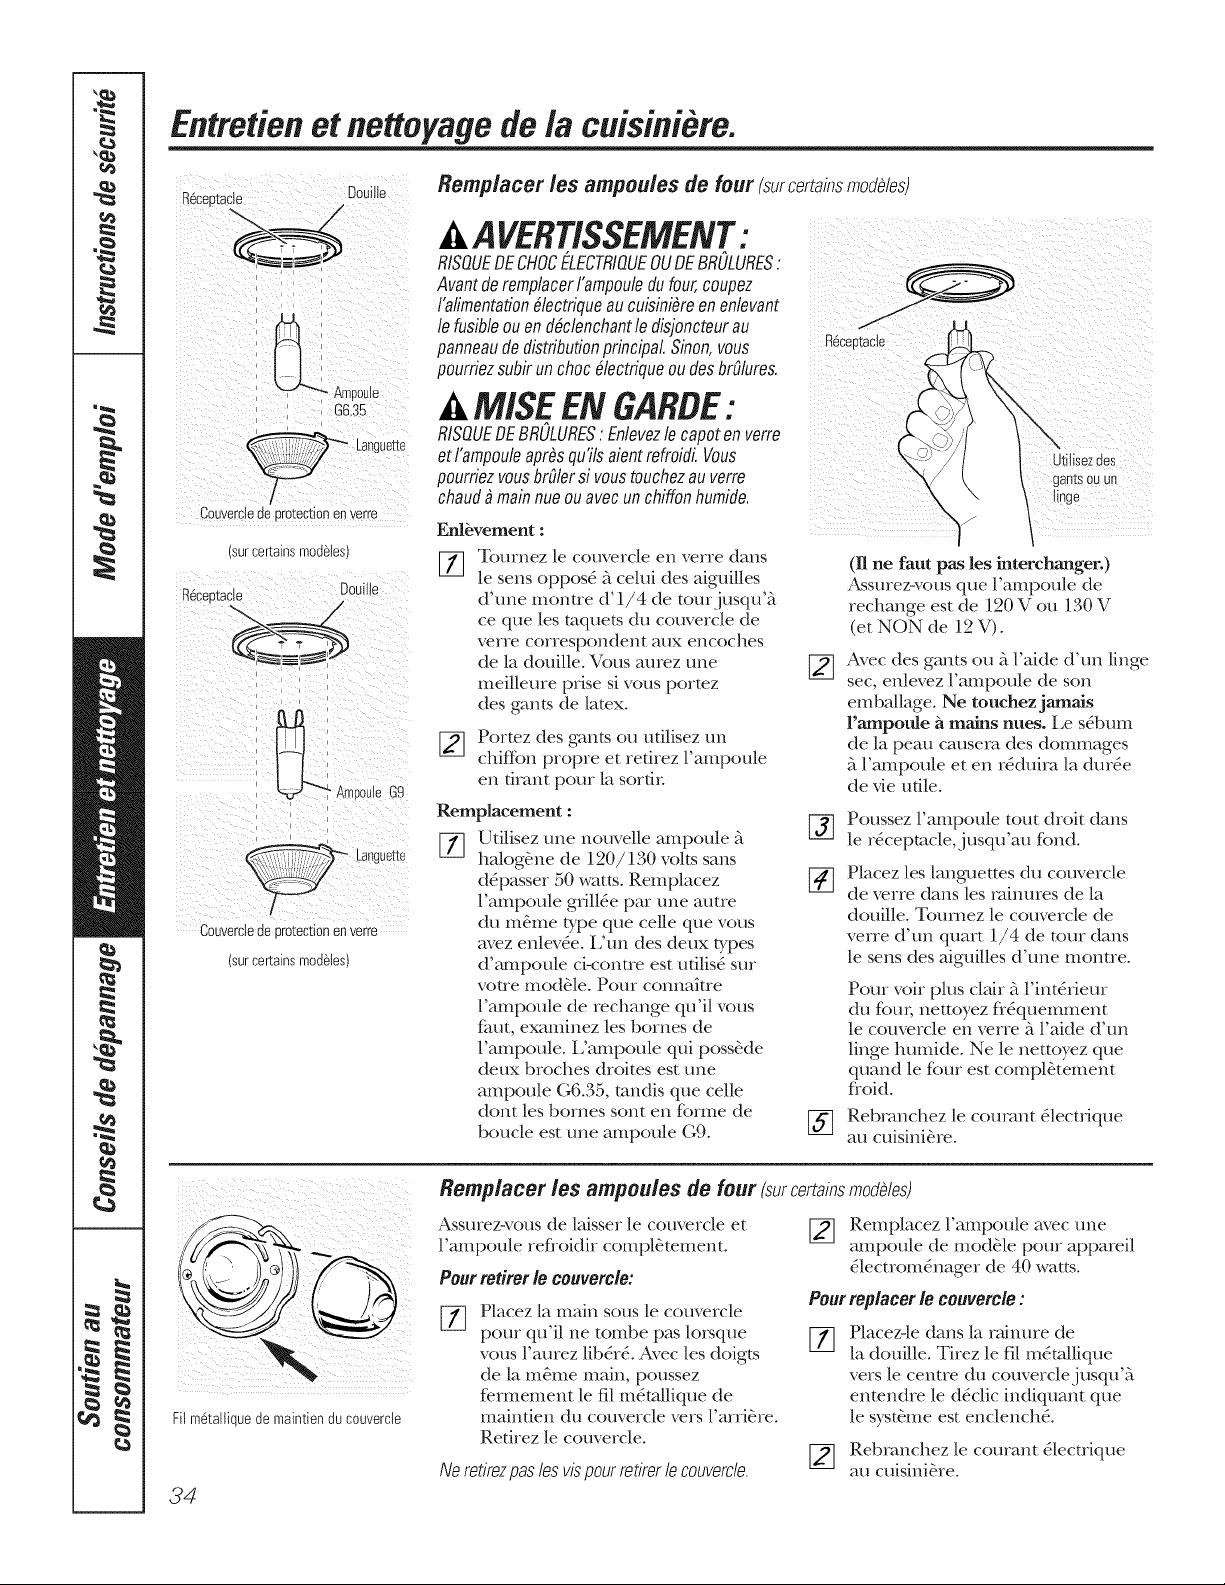
Entretien et nettoyage de la cm'siniere.
R_ceutacle
DouillE
Langue_e
i
Couverciede erotection en verre
Remplacer les ampoules de four (surcertainsmode/us)
AP VERTISSEMENT:
RISOUEDECHOCELECTRIOUEOUDEBROLURES.
Avant deremplacer I'ampouledufour,coupez
I'afimentationOlectriqueau cuisiniOreenenlevant
le fusibleouen dOclenchantle disjoncteurau
panneau de distribution principal. Sinon,vous
pourfiez subir unchoc61ectriqueou desbrOlures.
A MISE EN GARBE:
RISQUEDEBROLURES"Enlevezle capot en verre
etI'ampouleaprOsquTIsaientrefroidL Vous
pourfiez vousbrdler si vous touchezauverre
chaud_ main nue ou avec unchiffon humide.
Enl_vement :
(surcurtains modules) I7]
Couverdede protectionenverre
(surcurtainsmod6tes)
Tournez le couvercle en verre dans
le sens oppos_ _ celui des aiguilles
d'une montre d'1/4 de tourjusqt£_
ceque les mquets du couvercle de
verre correspondenl; _-ttlX encoches
de la douille. Vous aurez une
meilleure prise si vous pormz
des gains de lamx.
_] Portez des gains ou utilisez un
chiffbn propre et retirez Fampoule
en drant pour la sord_:
Remplacement :
[_ Utilisez une nouvelle ampoule _
3
halog&ne de 120/l. 0 volts sans
d6passer 50 watts. Remplacez
l'ampoule g_Jll_e par une autre
du tIle.I_Qe type que celle que vous
avez enlev6e, l/un des deux types
d'ampoule ci-conue est udlis& sur
votre mod&le. Pour connakre
l'ampoule de rechange qt£il vous
faut, examinez les bornes de
l'ampoule. L'ampoule qui poss_de
deux broches droites est une
ampoule G6.35, mndis que celle
dent les bornes sent en forme de
boucle est une ampoule (;9.
R6ceptacle
i
!
!
Utilisezdes
gants OUun
(11ne faut pas les interchanger.)
Assurezwous que l'ampoule de
rechange est de 120V ou 130 V
(et NON de 12V).
Avec des gants ou A l'aide d'un linge
sec, enlevez l'ampoule de son
emballage. Ne touchez jamais
l'ampoule & mains hues. Le s_bum
de la peau causem des dommages
k l'ampoule et en r_duira la dur_e
de vie utile.
Poussez l'ampoule tout droit dans
le rScepmcle, j usqu'au fond.
Placez les languettes du couvercle
de verre dans les rainmes de la
douille. Tournez le couvercle de
verre d'un quart 1/4 de tom dans
le sens des aiguilles d'une montre.
Pour voir plus clair k l'int&ieur
du fern; nettoyez fl_quemment
le couvercle en verre k l'aide d'un
linge humide. Ne le nettoyez que
quand le four est compl_tement
floid.
[_] Rebranchez le courant 51ecuJque
au cuisini&re.
Fil m_tatliquede maintiendu couvercle
34
Remp/acer les ampoules de four(surcertainsmode/us)
Assurezwous de laisser le com_ercle et
l'ampoule refloidir compl_tement.
Pour rotifer le couvercle:
%
Placez la main sous le couvercle
pour qt£il ne tombe pas lo,_que
vous l'aurez lib&£ kvec les doigts
de la t_Qellle IIl{'till, poussez
refinement le fil m_ta/lique de
mainden du couvercle vers l'arri&re.
Redrez le couvercle.
Neretirezpaslesvispourretirerle couvercle.
Remplacez l'ampoule avec une
ampoule de mod&le pour appareil
61ectrom&mger de 40 watts.
Pourreplacer/e couverde :
Placez.le dans la rainure de
la douille. Tirez le fil m_mllique
vers le centre du couverclejusqu'_
emendre le d_clic indiquant que
le syst_me est enclench_.
[_ Rebr_!n.cl}ez le courant _lectrique
all CtllSlnlere.
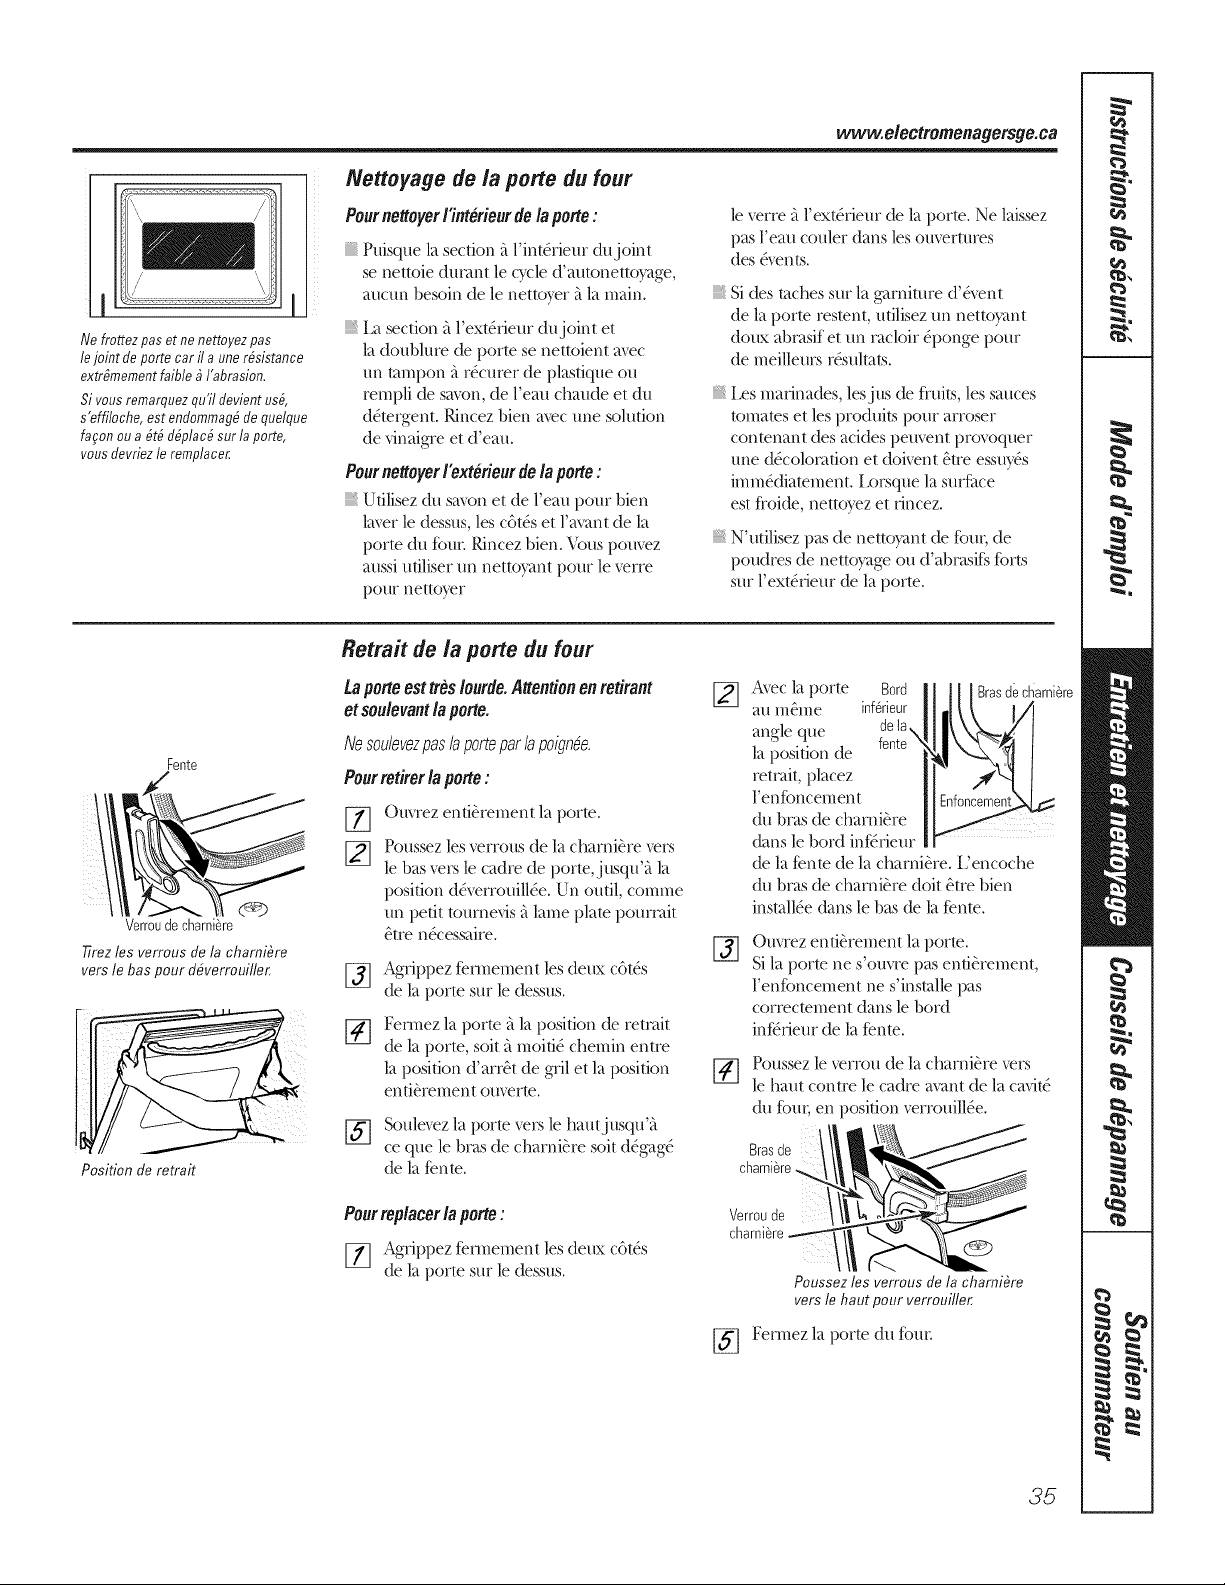
www.e/ectromenagersge.ca
Nefrottezpaset nenettoyezpas
lejoint de portecar ilauner#sistance
extr#mementfame _ I'abrasion,
Sivousremarquezqu'ildevientus#,
s'effiloche,estendommag#de quelque
fagonou a#t# d#plac#sur la porte,
vousdevriezleremplacer,
Nettoyage de la porte dufour
Pourne#oyer/'interieurde/aporte:
Puisque la section {tl'int&ieur dujoint
se nettoie din>rot le cy'cle d'autonettoy'age,
at/ct/n besoin de le nettoyer fila main.
[;t section _l'ex/&ieur dujoint et
ladoublure de porte se nettoient a_c
un tampon _ r(_curerde plasfique ou
rempli de savon, de l'eau chaude et (hi
d4tergent. Rincez bien a_c une solution
de _naigre et d'eau.
Pournettoyer/'exterieurde/aporte:
Ufilisez du savon et de l'eau pour bien
la_r le dessus, les c6t& et l'avant de la
porto du fotlI: Pdncez bien. _,%us pom_z
aussi ufiliser un nettoyant pour le _erre
pour nettoyer
le verre _tl'ext&iem de la porte. Ne laissez
[)asl'eau couler dans les ouvertures
des&ents.
Si des inchessur la garniture d'&ent
de la porteres/ent, ufilisez un nettoyant
doux abcasif etun cacloir @onge pore
de meilleurs r&ulmts.
Les marinades, lesjus de fiuits, les sauces
tomates et les produits pour anoser
contenant des acides pem>nt provoquer
une (t_.colocafion et (loi_ent _tre essuy&
imm&tiamment. Lorsque la surfitce
est fioide, nettoyez et rincez.
N'utilisez [)as de nettoyant de Ibm; de
poudres de nettoy'age ou d abmsi£s fb_ts
sur l'ext&ieur de la porte.
Fente
Verroudecharni_re
77rezles verrous de Is charni#re
versle bas pour d#verrouiller,
Position de retrait
Retra# de la porte dufour
taporteesttresIourde.A#entionenretirant
etsoulevantlaporte.
Nesoulevezpaslaporteparla poignde.
Pourretirerla porte:
[_ Ouvrez enti_rement la porte.
Poussezlesverrous de la charni_re ve_
le basve_slecadre de po_te,jusqu _tla
position d&_rrouill4e. Un oufil, comme
un petit toume_s _tlameplate pourmit
_tre n&essaire.
%
Agrippez fennement lesdeux c6t&
de la porte sur le dessus.
Fennez la porte it la position de retmit
de la porte, soit_tmoiti_chemin entre
la position d'arrSt de gril et la position
enti_rement ouverte.
[_] Soulevezla porte ve_slehautjusqu'_t
ceque le boas decharni_re soit(t_gag_
de la Dnte.
Pourreplacerla porte:
[77 Agfippez fennement lesdeux c6t_s
de la porte sur le dessus.
Avecla porte Bord
au m&ne inf6rieur
angle que dela.
fente
la position de
retcait, placez
l'enfoncement
du binsde chami_re
dans le bord inf_cieur
de la Dnm de lacharni_re. L'encod_e
du bI_tsde charni_re dolt _tre bien
insmll_e dans le bas de la lento.
Brasdecharni_re
%
OHvrezenti_rement la porte.
Silapotte ne s om,e pasenti_rement,
1enfoncement ne s'installe [)as
correctement dans le bord
inf_rieur de laDnte.
FX1
Poussezle verrou de la charni_re ve_s
le haut contre le cadre avant dela cavit_
du [but; en position verrouill_e.
charni_re. _
Verroude
charni_re
Poussez les verrous de la charni_re
vers le haut pour verrouiller,
[_] Fennez la porte du %m.
35
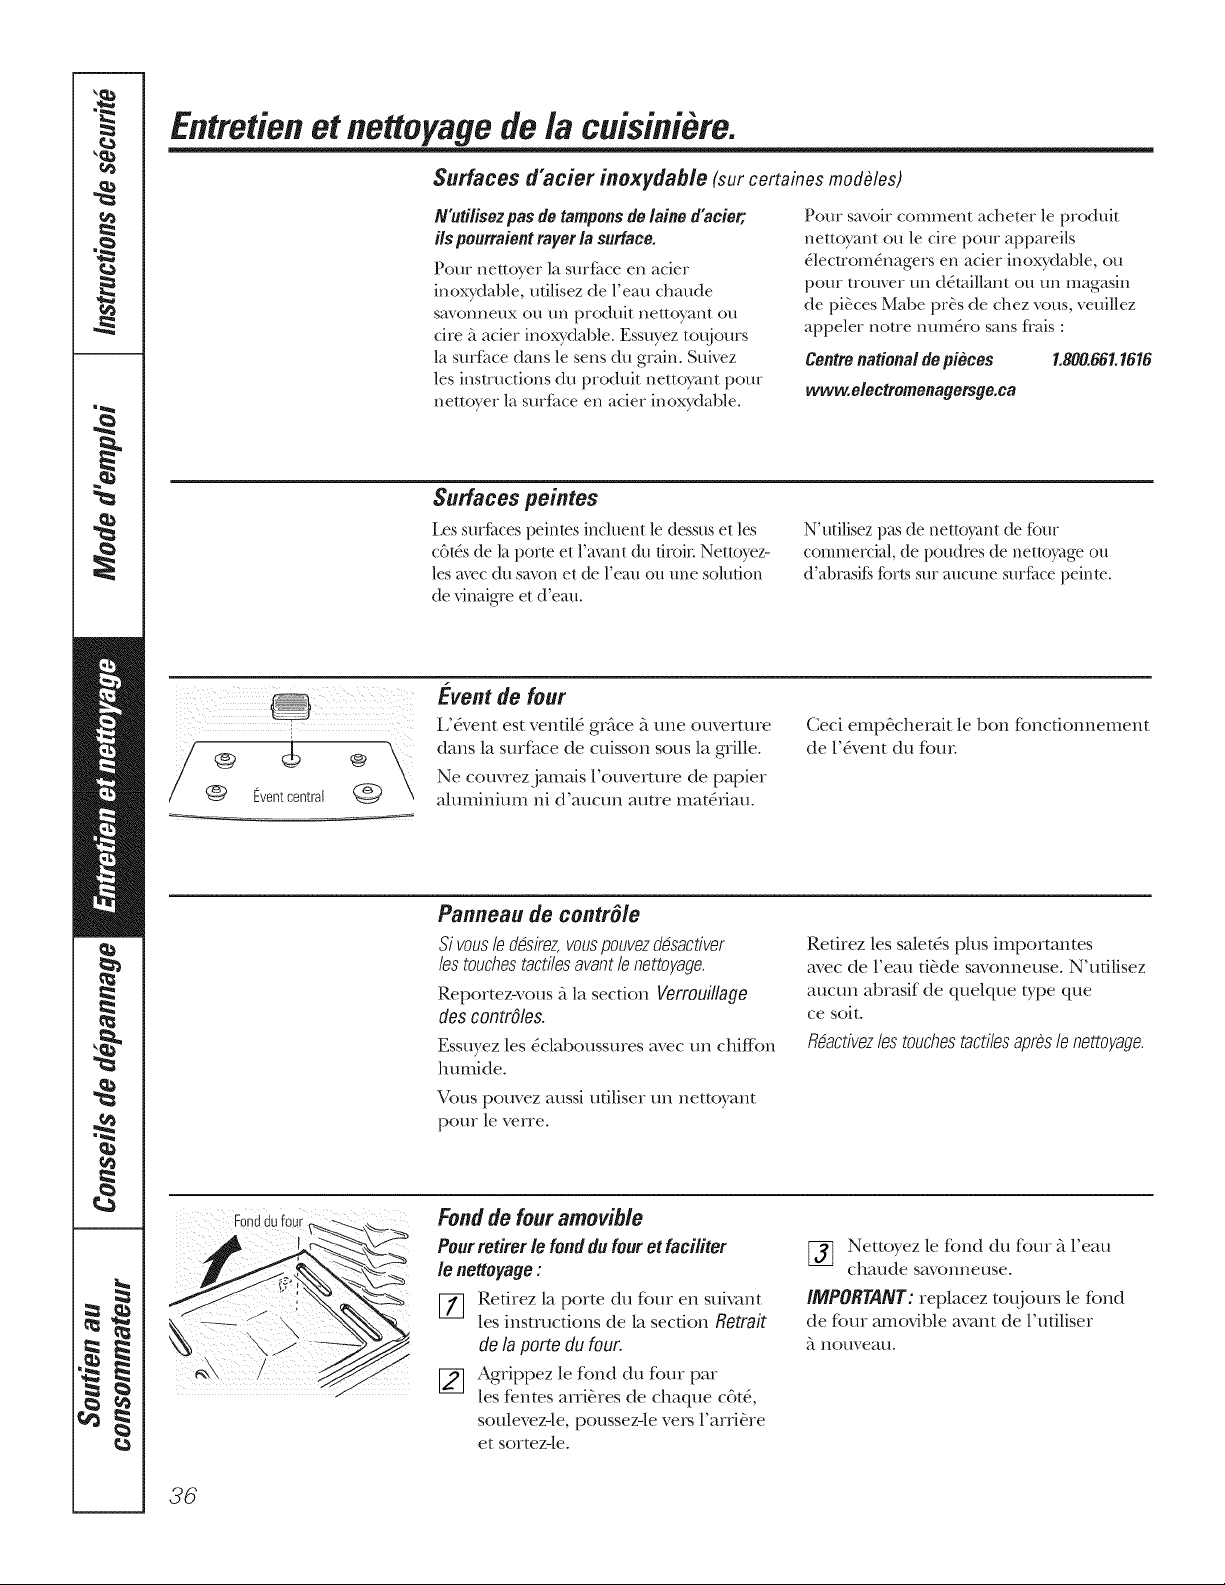
Entretien et nettoyage de la cuisim'ere.
Surfaces d'acier inoxydable (surcertaines modules)
N'utilisez pasde tamponsde laine d'acier;
ilspourraient rayer lasurface.
Pour nettoyer la smf:4ce en acier
inoxydable, milisez de l'eau chaude
savonneux ou un produit nettoyant ou
cite _tacier inoxydable. Essuyez totljours
la smf:4ce darts le sens du grain. Suivez
les ins/ructions du produit nettoyant pour
neuoyer la surf:4ce en acier inoxydable.
Pour savoir comment ache/cr le produit
net/oyant ou le cite pour appareils
dlecuomdnagers en acier inoxydable, ou
pour trouver tm ddmillant ou un magasin
de pikces Mabe prks de chez vous, veuillez
appeler notre numdro sans flais :
Centrenationalde pieces
www.electromenagemge.ea
1.800.661.1616
Surfaces peintes
Les surf_tces peintes incluent le dessus et les
c6t& de la porto et l'a,vmt du tiroi,: Nettoyez-
les a_c du savon et de l'eau ou une solution
de vinaigre et d'eau.
N'utilisez pas de nettoyant de four
commercial, de poudres de nettoTage ou
(t'abI_tsif}sf()rts st/I ?t//ct/ne St/I'[_tCe peinte.
F
/ @ @ @ \
Eventcentrat
Went de four
L'&_ent est ventil_ gri'_ce _ une ouvermre
darts la surfitce de cuisson sous la grille.
Ne couvrezjamais l'ouvermre de papier
Numinimn ni d'aucun auue mat@Jau.
Ceci emp&cherait le bon fbncfionnement
de l'&_ent du four
Panneau de contrSle
Si vous le d_sirez,vouspouvezd_sactiver
les touchestactilesavant le nettoyage.
Reportez-vous _ la section Verrouillage
des contrOles.
Essuyez les 5claboussures avec un chitfbn
humide.
Vous pom_ez aussi ufiliser un nettoyant
pour le verre.
Refirez les sa/et_s plus importantes
avec de l'eau d&de savonneuse. N'udlisez
aucun abrasif de quelque type que
ce soit.
@activezlestouchestactilesaprbsle nettoyage.
Fonddufour Fondde fouramovible
Pour rotifer le fond dufour etfaciliter
le nettoyage:
[77 Retirez la porte du four en suivant
les instructions de la section Retrait
de la porte du four.
[] Agrippez le fond du four par
les fentes arri6res de chaque c6t6,
soulevez-le, poussez-le ve,_ l'arri&re
et sortez-|e.
[_ Nettoyez le fond du four _ l'eau
chaude savonneuse.
iMPORTANT:replacez toqjom_ le fond
de R_uramovible avant de l'utiliser
_t notlveatl.
36
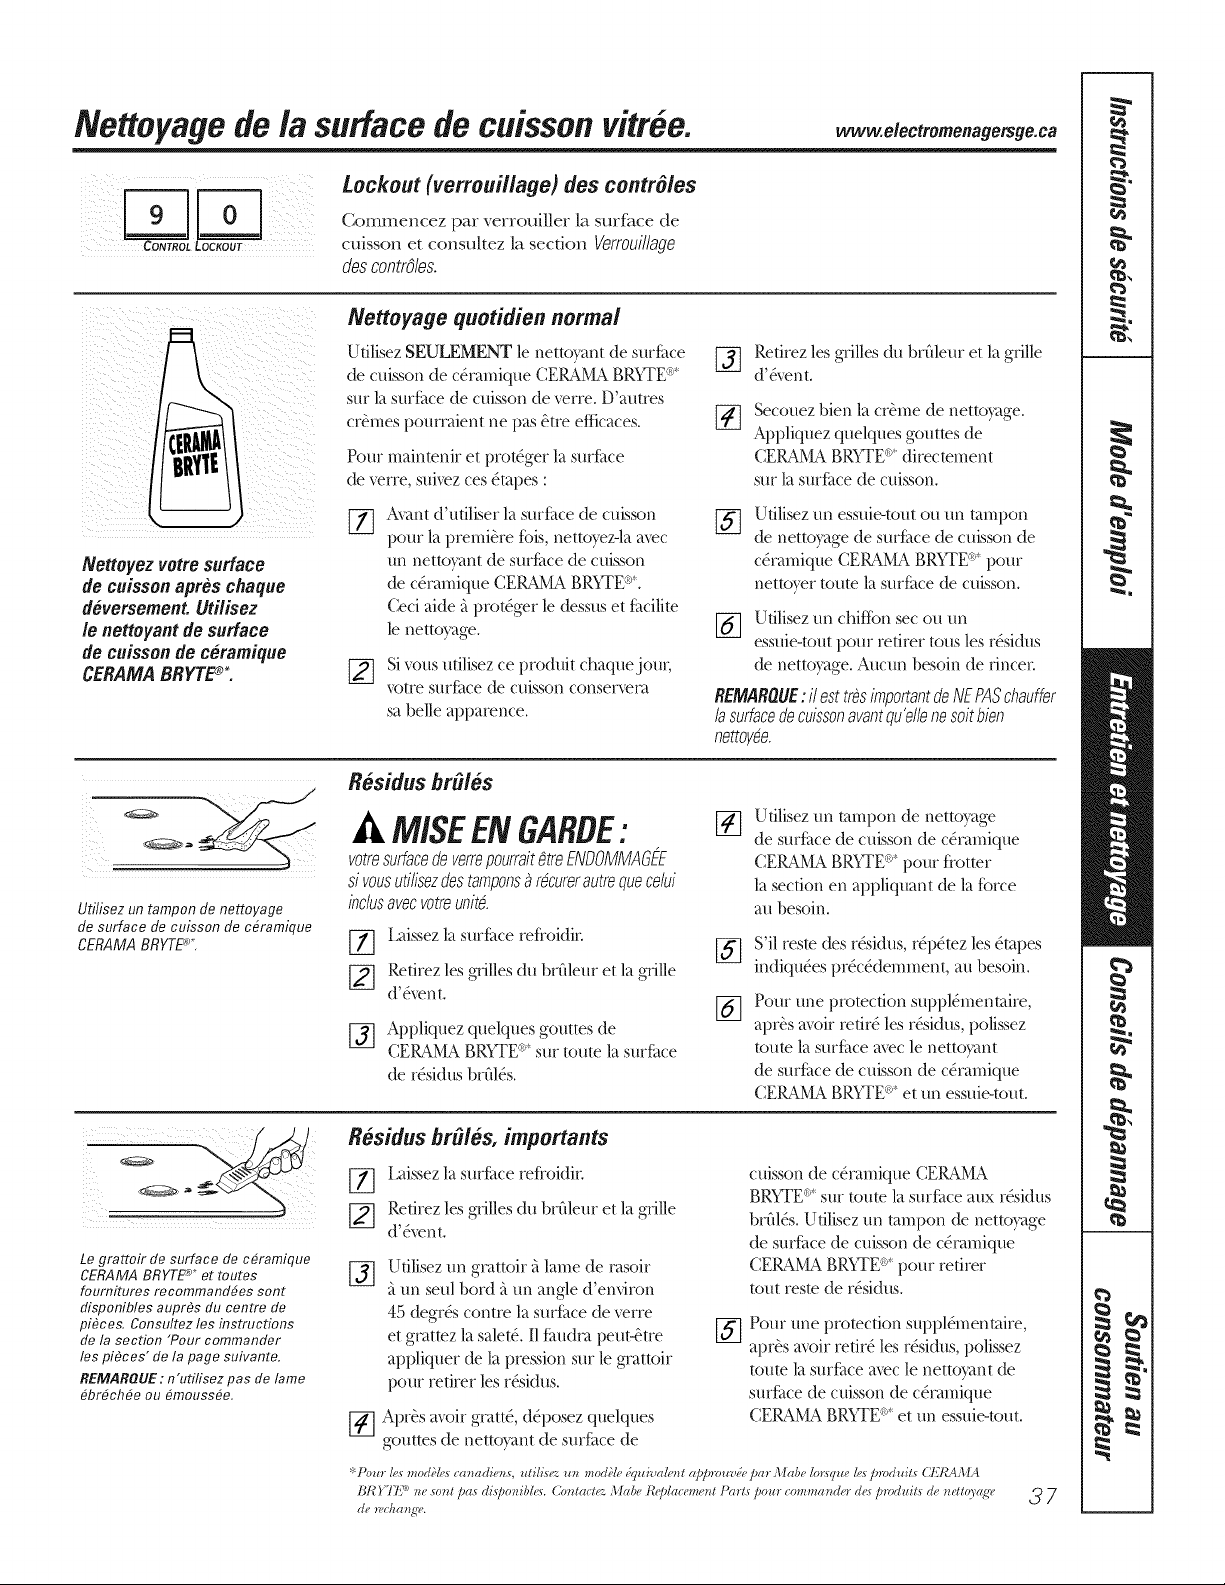
Nettoyage de/a surface decuissonvitree. .e ec,rome,age ge.ca
CONTROL LOCKOUT
Lockout (verrouillage) descontr61es
Commencez par verrouiller la surface de
cuisson et consultez la section Verrouillage
descontrdes.
Nettoyezvetre surface
de cuisson apres chaque
d6versement Utilisez
lenettoyantde surface
de cuisson dec6ramique
CERAMABRYTE®t
Nettoyage quotidien normal
Utilisez SEULEMENT le netto}>mt de surf{me
de cuisson de c_camique CERAN_ BR_TE <_'
sur la surf_ce de cuisson de x_rre. D'autres
cr_mes pourmient ne pas _tre efficaces.
Pour maintenir et protSger la surfLme
de verre, suivez ces 5tapes :
Y]
Axant d utiliset la surfime de cuisson
pour la premiere %is, nettoy'ez-la avec
un nettoyant de surf{me de cuisson
de c&amique CERA_ BRSTE°'.
Ceci aide _tprot_ger le dessus et fLmilim
le nettoyage.
[-2i] Si vous utilisez ce produit chaquejom;
votre surf_me de cuisson conservem
sa belle apparence.
Retirez les grilles du brflleur et lagrille
d' eve IXt.
Secouez bien la crkme de nettoyage.
Appliquez quelques gouttes de
CERAMA BR5%E®'directement
sur la surfLmede cuisson.
%
%
Utilisez un essuie-tout ou un tampon
de nettoyage de surf_tce de cuisson de
c&amique CERAN_ BR}TE ®' pour
nettoy'er toute la surfLmede cuisson.
Utilisez un chiffbn sec ou un
essuie-tout pour retirer tousles r&idus
de nettoy'age. Aucun besoin de fince_:
REMARQUE: il est tresimportantde NEPASchauffar
lasurfacedecuissonavantqu'e/lenesoitbien
netto_/de.
Utilisez un tampon de net?oyage
de surface de cuisson de c6ramique
CERAMA BRYTE%
Residus br#i6s
A MISEENGABDE:
votresurfacedeverrepourraitgtreENDOMMAGEE
si vousutilisezdestamponsa rdcurerautrequecelui
indusavecvotreunitg
[_ iaissez la surf_me refloidiL
Retirez les grilles du br61eur et la grille
d'&'ent.
[_ Appliquez quelques gouttes de
CERAN_ BR5%E®' sur toute lasurf{me
de r&idus br61&.
%
Utilisez un tampon de nettoy'age
de surf_me de cuisson de c&amique
®
CERA_ BRSTE'-' pour flotter
la section en appliquant de la fbrce
au besoin.
S'il reste des r&idus, r@Stez les 5tapes
indiqu_es pr_c&temment, au besoin.
Pour une protection suppl&nentaire,
aprSs avoir retir5 les r&idus, polissez
toute la surfitce avec le nettoyant
de surf_me de cuisson de c&amique
®
CERAN_ BRSTD ' et un essuie-tout.
R6sidus br#i6s, importants
Le grattoir de surface de c6ramique
CERAMA BRYTE _* et routes
fournitures recommand6es sent
disponibles auprbs du centre de
pibces. Consultez les instructions
de la section "Pour commander
les pibces" de la page suivante.
REMAROUE : n'ufifisez pas de lame
6br6ch6e ou 6mouss6e.
%
iaissez la surfkme refloidiL
Retirez les grilles du br61eur et la grille
d'&'ent.
Utilisez un gcattoir {(lame de ms(fir
_un seul bord ;lun angle d en@on
45 degr& contre lasurfLmede _rre
et gmtmz la salet& I1fLm(ha peut-,)tre
appliquer de la pression sur le gmttoir
lxmr retirer les r&idus.
[_] AprOs avoir gcatt_, d@osez quelques
gouttes de nettoy'ant de smf{tce de
%
cuisson de c&amique CERAN_
BR5%E®' sur route la surfitce aux r&idus
brfil&. U/ilisez un tampon de nettoyage
de surfitce de cuisson de c&amique
CEIL_N_ BRSTE°' pour retirer
tout res/e tie r&idus.
Pour une protection suppl&nenmire,
apr& avoir refir_les r_sidus, polissez
route la surf_tceaxec le nettoyant de
surfime de cuisson de c&vtmique
CERAMABRSTE°' et un essuie-tout.
':Pour les modl,h<_#alladie_s, *dilisea u_z modi,le &/uivalelll appmuv;e par Mabe lotiWue h.:_pmduits (,t'.17,4, 14
BR I TI£ '>_u_so_l pas disTpo_ibh_s, t2mtaclez Mabe R_'/daceme_l Parts pour comma_der &_sproduiL_ de _elto)ag'e
(_{? !Nclz(I?I_?.
37
Surfacede verreipossibi/ite de dommagespermanents.
Losdeversementssucres
(te/squege/ees,fudge,
bonbons,sireps)oulos
p/astiquesfonduspeuvent
piquerla surface de cuisson
(noncouvertepas la garantie)
moins que vousnepuissiez
lesre_'rer tandisqu'ilssont
encorechauds.Attention
enretirantlossubstances
chaudes.
Pssurez-vousd'utiliser
ungrattoira lamede rasoir
neufet tranchant.
N'utilisezpasde lame
emousseeou ebrechee.
Dommages de deversements sucres et dep/astique fondu
Eteignez routes les unit_s de surf_ce
et avec des gants de cuisinier, retirez
les casseroles chaudes et les gTilles.
[-_ Portez des gants de cuisinier :
a. Udlisez tm gqattoir A.lame de
rasoir Atm soul bord (grattoir de
smface de cuisson de c_.ramique
CERAMA BRYTE ®_) pour
d_.placer le d_.versement vers
un endroit flais sin le smface.
[_ Vous pouvez laisser le restejusqu't_
ceque la smface refloktisse.
[-_ N'ufilisez pas les unitSs de surfime
A.nouveau avant d'avoir refit5 tous
los r&idus.
REMAROUE:s71g addjadespiq&esouun
enfoncementdela surfacede verre,il faudra
remplacerle verredela surface.Danscecas,
il faudrauner@aration.
b. Redrez le d&'ersement avec
tin essuie-tOtlt.
Pour commander los pieces
Pour commander le nettoyant de smfi_ce
de cuisson de c_.ramique CERAMA
BRYFE®'_et le grattoir de surface de
cuisson, veuillez appeler ncme nmn&o
sans flais :
Centrenationaldepieces .... 800.661.1616
www.electromenagersge.ca
CERAMABRYTE_nettoyant
desurfacede cuisson
de ceramique_ .............. _ WXIOX300
CERAMABRYTE_ grattoir
desurfacede cuisson de
ceramique_ ................ //WX10)(0302
Treusse..................... _ WB64XS027
(latrousseinclutla cr&_eet legra_oirdesurface
decuisson)
CERAMABRYTE®tampons
de nettoyagedesurface
de cuisson de c&amique _ ... _ WX10X350
': ['ore &frood;los ca_zadie_s, utilisez *_ mod;le ;q_dvalerzl alqa_*cv& par MaDe 2o_:fq_eh<fp_d*dtf CEI,'A MA
BR)TI3 __e so_l pas (liSpor_ib&f. Co_lact_z Mat, a Re/alacema_t t_arts pore com_*_a_dardes prod_dls de _etlo),ag*,
de _c/zcmgv,.
?8
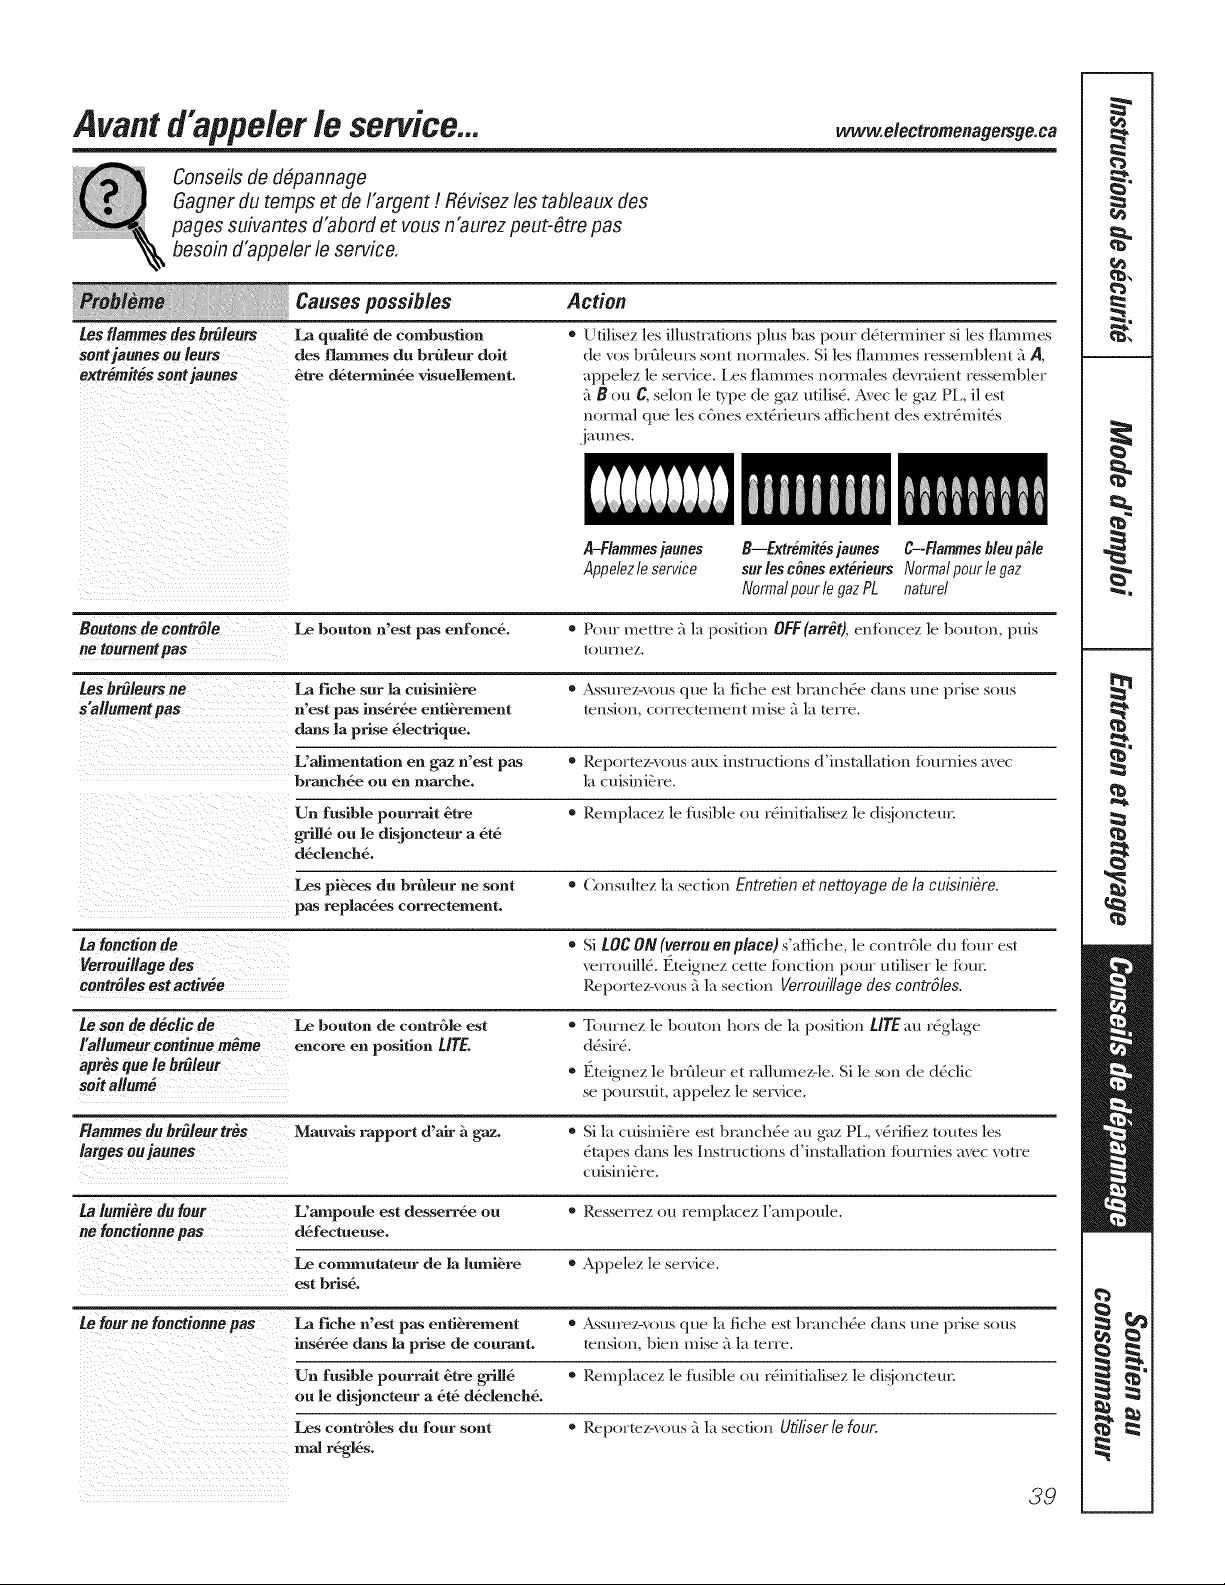
Avantd'appe/er/e service... e e.rome.age geca
Conseilsde d@annage
Gagner du temps etde I'argent !R#visez lestableaux des
pages suivantes d'abord etvous n'aurez peut-#tre pas
besoin d'appeler le service,
tes f/aminesdesbr_leurs
sentjaunesou leurs
extr#mit#ssentjaunts
Causespossibles
La qualit6 de combustion
des flammes du brhleur doit
_tre d6termin_e vitueUement.
Action
• UfiYisez Yes iYYustcafions pYus bas pour d_terminer si Yesflammes
de vos brfiYeurs sont normaYes. Si Yes flammes ressembYent _'_,4,
appeYez Yeservice, l.cs flammes normaYes dcvnfient rcssembYer
fi B on C,seYon Yet)pe de Kaz utiYis_. Avcc YeKaz PI. iYest
normaY que Yesc_)nes ext_rieurs aflichent des extr_mit_s
.j_lnnes.
A-Flammes jaunts
Appe/ez le service
B--Extremit#s jaunts C-Flammes bleupMe
surlesc#nesext&ieursNormalpourlegaz
NormalpourlegazPL nature/
Neurons de contrMe Le bouton n'est pat enfonc& • Pour mem'e 5 Yaposition OFF(arr_t),enl_,ncez Yebenton, puis
ne tournentpas tournez.
Los brOlaurs ne La fiche sur ]a cuisini_re • Assurez-vous que Yafiche est bnmch6e dans une prise sous
s'allumentpas n'est pas ins6r6e enti_rement tension, correctement mist _'_Yatorte.
dmls la prise 61ectrique.
L'alimentation en gaz n'est pat * Reportez-vous aux instructions d'instaYYafion t_)urnies avec
brmlch_e ou en marche. Yacuisini_re.
Un fusible pourrait _tre " RempYacez Yeti_sibYe ou r6inifiaYisez Yedi@)ncteur.
grill6 ou le ditjoncteur a 6t&
d6dench6.
Los pi_ces du brfileur ne sent • ConsuYtez Yasection Entretien etnettoyage dela cuisini_re.
pas replac&es correctement°
ta fonction de * Si tOC OH (verrou en place) s'aifiche, Yecontr6Ye du tk,ur est
Verrouillage des verrouiYY& Eteignez cette tk)nction pour utiYiser Yet_)ur.
centrOles estactiv#e Reportez-vous fiYasection Verrouillage des contrSles.
te son de d#clic de Le benton de contr6Ye est * Tol/rnez Yebat/ton hers de Yaposition tire au rdgYage
I'Mlumeur continue m_me encore en position tirE. d_sir&
apres quele br_lem " Eteignez YebrflYeur et ndYumez-Ye. Si Yeson de d&Yic
saltallure# se poursuit, appeYez Yeservice.
Flammesdu br_leurtrOs Mauvatt rapport d'air h gaz. • Si Yacuisini&re est bmnch4e m_ gaz PL, @rifiez tomes Yes
largos oujaunes _tapes &ms Yes Instructions d'instaYYafion tk)urnies avcc votre
cuisinibre.
ta lumi&e du four Uampoule est desserr&e ou • Resserrez ou rempYacez Y'ampouYe.
no fonctionne pas d6fectueuse.
Le commutateur de la lumi_re • AppeYez Yeservice.
est bris6.
te four ne fonctionne pas La fiche n'est pas entibrement • Assurez-vous q ue Yafiche est branch4e dans une prise sous
hls6r6e dmls la p_te de courmlt, tension, bien raise fiYaterre.
Un fusible pourrait g_tre grill6 • RempYacez YefusibYe ou rdinidaYisez Yedisioncteur.
ou le disjonctenr a _t_ d_clench_.
Los contrhYes du four sent * Rcportez-vons fiYasection Utiliser le four.
real r6gY6s.
39
Avant d'appeler le service...
Conseilsde d@annage
Causes possibles Action
Los aliments ne cMsent Los contr_Jes du four sont ® J_.cportcz-vous_'[1_[section Utiliser le four.
ou ne rttissent pas real r6g]&s.
La position de Ia clayette est * Reportez-vous _'_la section Utiliser le four.
hlcorrecte ou ]a c]ayette n'est pa_
niveau.
On utiIise la mauvaise table * Rep(wtez-vous _'_la section Utiliser le four.
de casserole.
Le thermostat du four * Reportez-vous _'_la section Ajuster/e thermostat du four-
doit _tre ajust& Faites-le vous-m_me !.
Los aliments ne grillent Les contrt]es du four sont * Assurez4"o{is dleulL()ncer la/o//che BROILHI/LO
pus correctement real r6@6s. (wilier _ bouLe/hesse temperature).
La mauvaise position de dayette ® Reporwz-vous au Guide pour griller.
est utiliste.
Batterie de cuksine ne convient pus * Pour ob/enir de b(ms r_suha/s, utilisez un ustensile
pour gt4]ler, de cuisine conqu pour la grill,_de.
La sonde est branch6e darts • D4br, mchez el retirez la sonde du four.
]a pr_se du four.
certains endroit_, le couraslt * Prtch,mflKz l%ltmeut du gril pendant 10 mimncs.
(tension) peut 6tre foible. • Grillez pend,mt plus longtemps qua la p_riode recomm,md_e
d,ms le Guide pour griller.
ta tamp#future du four est Le thermostat du four doit • Reportez4'ous _'_1_ section Ajuster/e thermostat du four-
trapehaude ou trapfroide _e ajust& Faites-le vous-m_me !.
ta porte du four est tordue La porte est huts de position. * Puisq ue la porte de four se retire, ella se dtplacc pariois din, rot
l'installati(m. Retirez ct repl,tcez la porte du four. Reportez-vous
_'_la section Retrait de laporte du four.
Le tire# de rangement Le support du tiroir arribre • Replacez le tiroil: (k)l_sultcz les iustructious (]e Retrait
est tordu repose sur le dessus du rail guide, du tiroir de rangement &ms la section Entretien etnettoyage
de la cuisini_re.
te tiroir de rangement Le cordon peut obstruer le tiroir * Replacez le/iroir et le cordon. (',onsuhez les instructions
neso ferme pus dais Ia pattie inftrieure arribre de Retrait du tiroir de rangement duns la section Entretien et
de la cuL_ini_re, nettoyage de la cuisinibre.
Le support du tiroir arri6re
repose sur le dessus du rail guide.
* Replacez le tiroi_; Consuhez les instructions de Retrait
dutiroir derangementduns ]asection Entretienet nettoyage
dela cuisini_re.
4O
www.electromenagersge.ca
Causes possibles Action
t'horloge etla minuterie La fiche n_est pas hls6r6e = Assurez-vous de Yafiche soil br',mch_e d,ms une prise sous
ne fonctionnentpas enfi6rement dasls la p_se tension, bien raise fi Ya terre.
de courant.
Un fusible pourrait 6tre grill6 * RempYacez Yefl_sibYeou r_initiaYisez Yedisioncwur.
ou le disjoncteur a 6t6 d6dench6.
Les contr6Yes du four sent • Reportez-vous fi Yasection Utilisorrhorloge etla minutorio.
madr6gY6s.
Lefournes'autonettoie pas Latemp6rature du four est trop • I,aissez Yacuisini(re refi'oidir e/r_glez YescontlGYes.
6Yev6epour r6gYer hl'autonettoyage.
Les contr6Yes du four sent • Reportez-vous fi Yasection UtilisorIo four autonottoyaRt.
madr6gY6s.
La sonde est branch6e dasls • Retirez Yasonde du four.
la p_se du four.
Sonde craquement oll Ced est Yeson de m6tad • C'est normaY.
de p_tarade qui chauffe et refroidit duraslt
la cuisson et le nettoyage.
Fum_eexcessive durant Sadet_excessive. • Enioncez Yatouche CLEAR/OFF(annulation/arr_t).()uxyez
uncycle de nettoyage Yesfcn_tres pour 6Yiminer Yafum6e. Attendez que Yevoyant
LOCKED(verrouill_)s'6teigne. Essuyez Yesuq)Yusde saYe/_
el r6initiaYisez Yenell(gage.
ta porte du fourno s'ouvre La temp6rature du four est * I_aissez Yefour refl'oidir sous Yatern p_ntture de verrouiYYage.
pasaprOsuncycle de trop 61ev6e.
nettoyage
Lefourn'estpaspropre Les contr6Yes du four sont ® Reportez-vous fiYasection UtilisorIofour autonot_oyant.
apr_suncycledenettoyage madr6gY_s.
Le four 6tail tr6s sale. * Essuyez tout d6versement important avm_tde Lmcer YecycYe
de nct/oyagc. Los tkmrs/r_s saYesdoivent souvent £ql'e ne//oy_s
i't notlveatI el pendant pYus Yong/emps.
LOCKED(verrouill& Le cycle d'autonettoyage a 6t6 • Fermez Yaporte du fb*m
clignote hI'afficheut chotsi, mats la porte n'est pas
ferm6e.
Le voyant LOCKEDest La porte du four est verrouill6e • Entoncez Yatouche CLEAR/OFF(annulatiou/arr_t}.Laissez Yefour
allum_ Iorsque vous voulez par la temp6rature h l'hlt6rieur veil'(fidin
cuisiner du four n'est pas encore pass6e
sous la temp6rature de verrouillage.
aF--_ etunhombre Vous avez un code d'erreur * Entonce z Yau_uche CLEAR/OFF(annulation/arrOO.Ren_euez
ou lettre clignotent de foncfion. Ye tour en marche.
hI'afticheur
Si le code de foncfion se r6pbte. • Coupez Yecent, rot fi Yacuisini_re pen&rot au moins
30 secondes, puis reme/tez Yecounmt. Si Yecode d'erreur
de toncfion se r6p_/e, appeYez Yeservice.
41
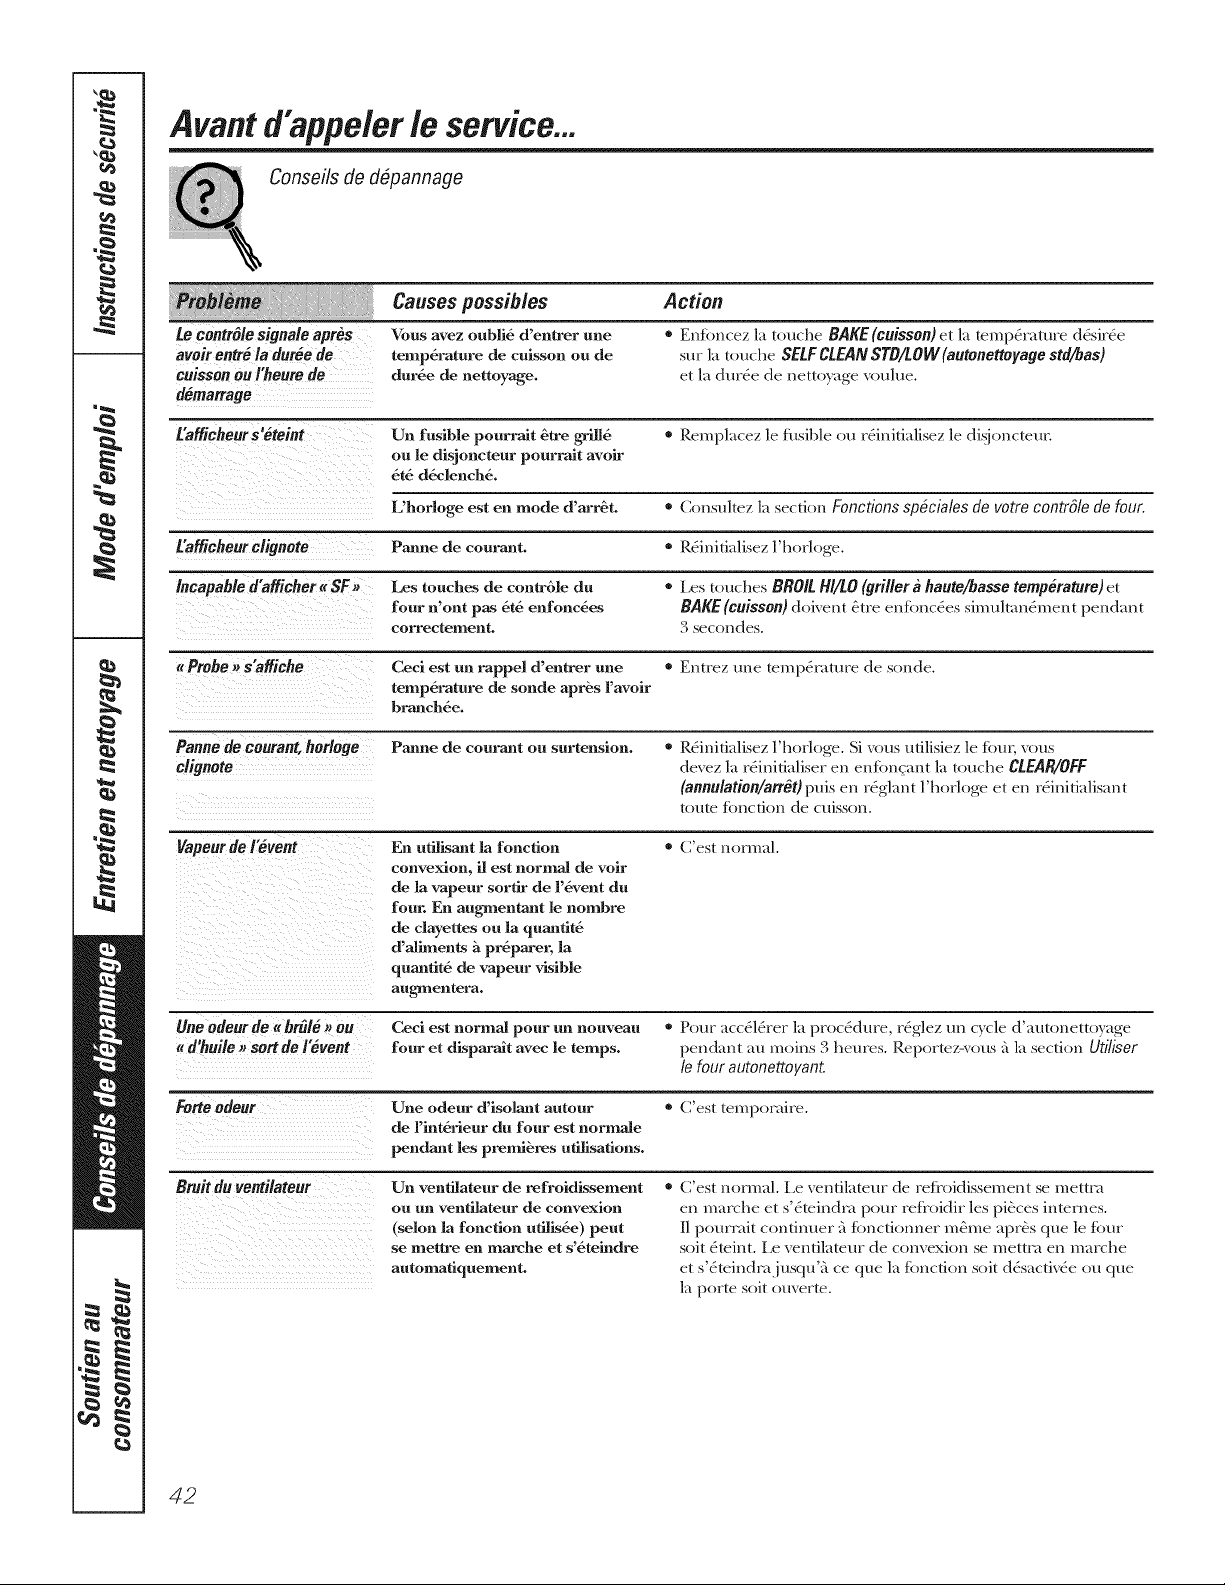
Avant d'appeler le service...
Conseils de d@annage
Causes possibles Action
Le contr61e sionale apres Vous avez oubli6 d'en_er une = Enlonccz l,l t+mche BAKE (cuisson) ct la tcmp6ramre d&ir6c
avoir entr_ la dunOede temp6rature de cuisson ou de stir la u,,chc SELF CLEAN STO/LOW (autone#oyage std_as)
cuisson ou rheum de dur6e de nettoyage, c/la dur6c dc uct/+Lyagc Vot/lt/c.
d#marrage
t'affichenrs'#teint Un fusible pourrait _tre grill6 + Rcmplaccz lc thsil)lc ou r6iuitialisez lc di@mctcur.
ou le disjoncteur pourrait avoir
6t6 d@lench6.
L'horloge est en mode d'arr6t. = C+msuhcz la section Fonctions sp#ciales do votre contrfle do four.
Eafficheurclignote Panne de courant. * Rdiuitialiscz l'horlogc.
Incapable d'MIicher _ SF ,, Los touches de contr6le du * Irs tt,,ches BROIL Hi/tO (wilier a haute/basse temp&ature) et
four n'ont pas 6t6 enfonc6es BAKE (cuisson)doiveut _tre cufbuc6cs simuhan6meut pendant
correctement. 3 secoudcs.
1€Probe _+YMlicbe Ceci est un rappel d'entrer une * Entrcz lille [eu] p6mturc dc sonde.
temp6rature de sonde apr6s Favoir
branch6e.
Pannede caurant barlnge Pmme de courmlt on surtension. + Rdiuiti.disez l'horlogc. Si vans milisiez lc t_mr, vans
clignote dcvcz la rdinitialiscr cn cntbnCant la touche CLEAR/OFF
(annu/ation/arrO# puis cu r6gl,mt l'horlogc ct cu r6iuitialisant
tome tbuctiou de cuiss(m.
Vapeur de I_vent En utilismlt la foncfion " C'cst normal.
convexion, il est normal de voir
de la vapeur sorfir de l'@ent du
four. En augmentant le hombre
de clayettes ou la qumltit6
d'aliments h pr6parer, la
quantit6 de vapeur visible
augmentera.
One odeur de a br#l#, ou Ceci est normal pour un nouveau • Pour acc616rer la proc6durc, r6glcz tin cycle d';m[+mcttoyagc
_ d'huile _>sort deI_vent four et dLsparait avec le temps, pen&mr au mains 3 heurcs. Rcportcz-v(ms 5 la section Utiliser
le four autonettoyant.
Forte odeur Une odeur d'isolant cutout • C'est tcmpomirc.
de Fint6rieur du four est normale
pendant les premi6res utilisations.
Bruit du ven61ateur Un ventilateur de refroidissement • C'cgt IIOVIIIH].[_e vcutilatcur dc rcfi(fidisscment sc mctwa
ou un vent'flateur de convexion cu marchc et s'6tcindra pour rcfl'oidir los pi_ccs internes.
(scion la fonction ufilLs6e) peut I1 pourrait continuer _'ttonctiouucr m_mc apr_s quc Iv Ibm"
se mettre en marche et s'6teindre soil _tciut. Lc vcnfilatcur de convcxion se ntclll_t cn n]iwchc
automatiquement, el s'dtciudmjusqu'5 cc quc la %ucfiou soil d&acfi%c ou quc
la porte soil Burette.
42
Des_gratignures (peuvent
_tre des fissures) sur la
www.e/ectromenagersge.ca
Causes possibles Action
MauvaLses m6tbodes
de nettoyage ufilis6es.
surface de cuisson vitrde Vous ufilL_ez peut-&re une batterie
de cuisine aux fonds rugueux ou
ill y a des parficules rugueuses
(sel ou sable) entre la surface
de cuLssou et la surface de
la casserole.
• Les _gcatignures ne s'_liminent p:_s. Les petites _gmtignures
seront moins visibles avec le temps et suite au nettoyagc.
• Pour _viter ce probl_me, ufilisez les procedures de netto)age
recomm_md_es. Assurez-vous que le dessous des c_sseroles soit
propre av,mt de les ufiliser et ufilisez des casseroles aux dessous
lisses.
On a gliss6 la casserole sur
la surface de cuisson.
OOco/oration sur /a surface
do cuisson vitr6e
Vous n'avez pas nettoy6 les
d6versements avaslt de r6ufiliser
l'appare_.
* Reportez-_ous _'_la section Nettoyer/a surface de cuisson virtue.
Surface chaude d'un modble
fi surface de cuLsson de couleur
p_e.
• C'est normal. La surface peut sembler d6color6e lorsqu'elle
est charade. C'est tempomire et dispara_tca lorsqt/e le verre
refroidit.
Leplastiqne a fondu sur La surface de cuisson chaude est * Consultez la section Surface vitr#e - possibilit# de dommages
la surface de cuisson vitr#e entr6e eu contact avec du plasfique permanents de ]a section Nettoyer la surface de cuisson de verre.
sur la surface de cuissou chaude.
Piqftres (ou renfoncement] I1 y a eu un m61mlge de sucre
de la surface do ¢uisson chaud d6vers6 sur la surface
de cuLsson.
* Appelez tm technicien qualifi_ pour 1:lrempl:_cer.
43
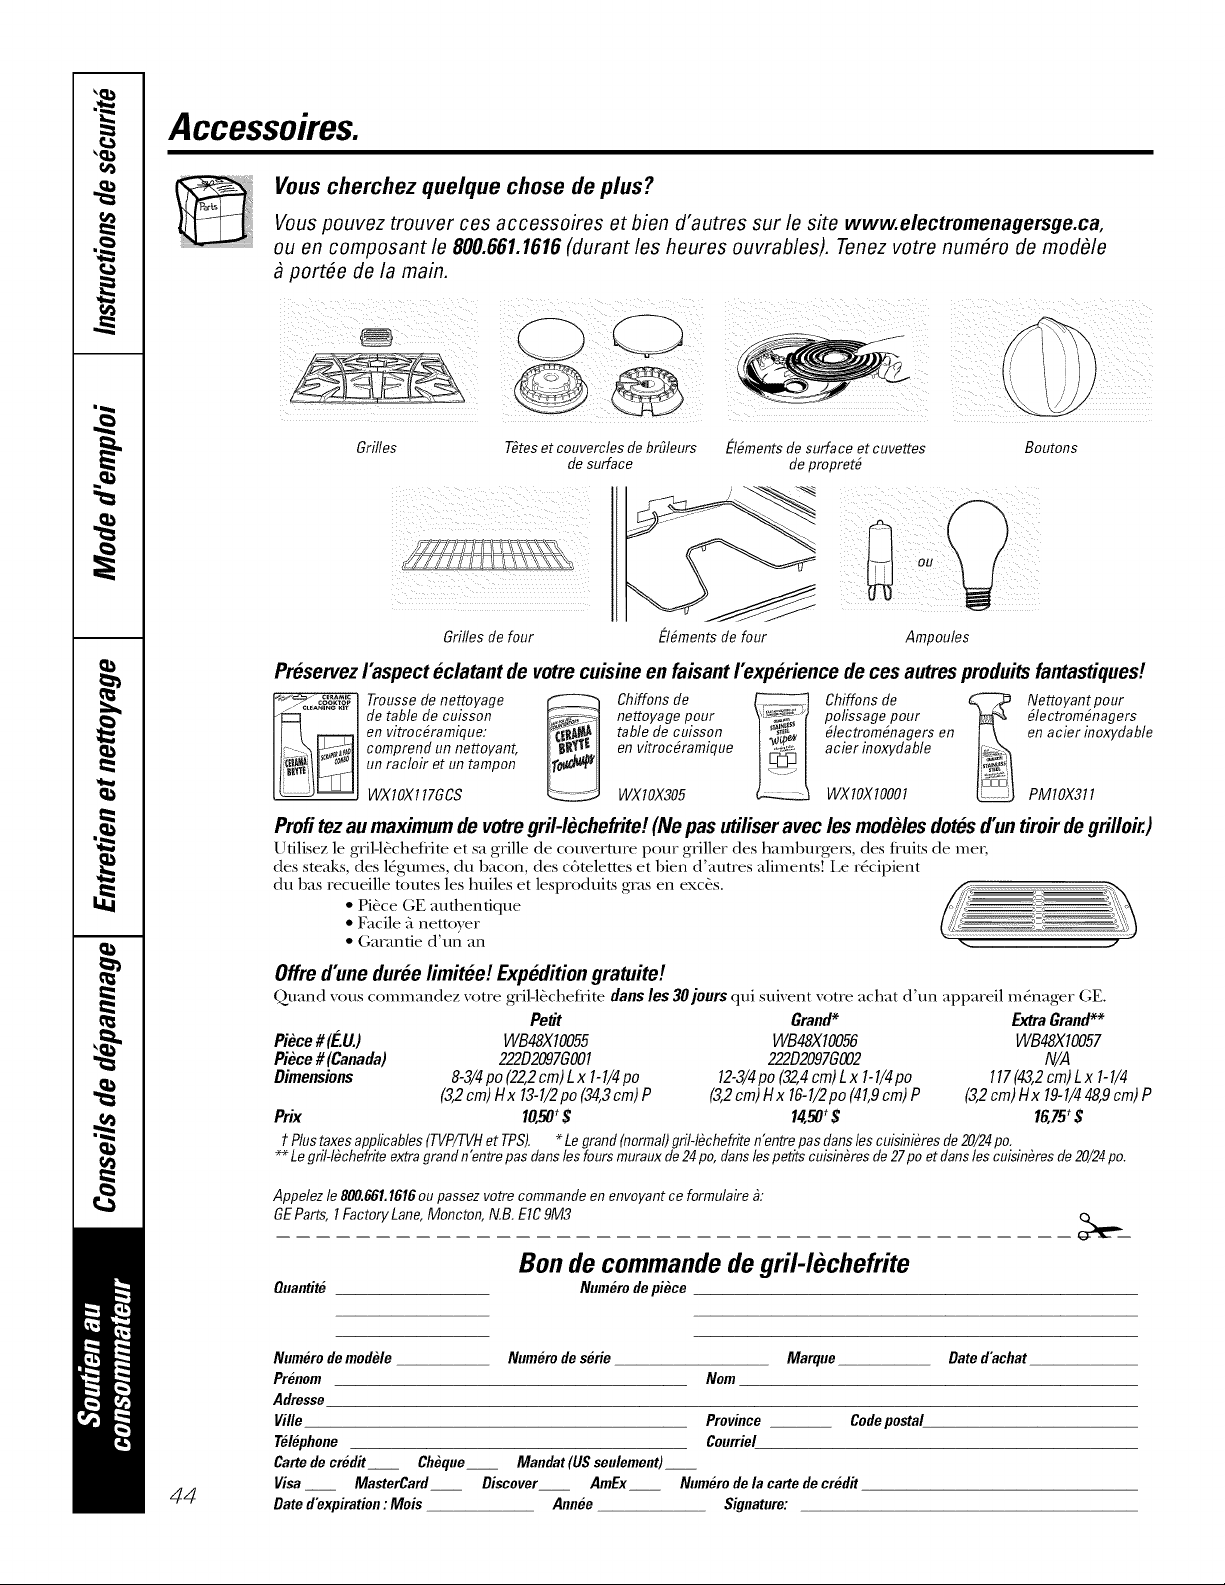
Accessoires.
Vous cherchez quelque chose de plus?
Vouspouvez trouver ces accessoires et bien d'autres sur le site www.electromenagersge.ca,
ou en composant le 800.661.1616 (durant les heures ouvrables). Tenez votre numOro de modOle
port6e de la main.
Grilles TOtesetcouverclesdebr£/leurs
de surface
) ¸¸¸¸¸¸¸¸7¸¸:¸
EIOmentsdesurface et cuvettes Boutons
de propretO
EIOmentsdefour
Grillesde four Ampoules
Pr#servezraspect #clatant devotrecuisine enfaisant I'exp#rience deces autres produitsfantastiques!
.......de table de cuisson nettoyage pour polissage pour OlectromOnagers
en vitrocOramique: table de cuisson OlectromOnagersen en acier inoxydable
comprend un nettoyant, en vitrocOramique acier inoxydable
un racloir etun tampon
WXlOX117GCS WXIOX305 WXIOXlO001 PMlOX311
Profi tezaumaximum devotre gril-I#chefrite! (Nepasutiliseravec lesmodulesdot#sd'un tiroir de grilloir.)
Utilisez le gril-l&hefl'ite et sa grille de couvcrturc pour griller des hamburgers, des fl'uits de me_;
des smaks, des l_gumes, du bacon, des cg_mletms et bien d'autrcs aliments! Le r_cipient
du has rccueille toums les huiles et lesproduits gins en cxc_s.
• Place GE authentique
• Facile fi nettoycr
• Gm_ande d'un an -. .-
Offre d'unedur#e limit#e! Exp#dition gratuite!
Qmmd wins commmMez votrc gril-l&hefl'ite dartsles 30jours qui suivcnt votrc achat d'un apparcil m_nag_r GE.
Petit Grand* Extra Grand**
Piece#(E.I1.) WB48XI 0055 WB48XI0056 WB48X I 0057
Pi#ce #(Canada) 222D2097GO01 222D2097GO02 N/A
Dimensions 8-3/4po (22,2 cm) L x 1-1/4po 12-3/4po (32,4cm) L x 1-1/4po 117(43,2cm) Lx 1-1/4
(3,2cm)Hx13-1/2po(34,3cm)P (3,2cm)Hx16-1/2po(41,gcm)P (3,2cm)Hx19-1/448,gcm)P
Prix 10,50_$ 14,50_$ 16,75_$
t Plustaxes app/icab/es(TVP/TVHet TPS). * Legrand(normal)gril-IOchefriten'entrepasclans/escuisini&es de 20/24po.
•* Legril-IOchefriteextragrand n"entrepasclans/esfours murauxde24 po, clans/espetits cuMn&es de27 poetclanslescuisin&esde 20/24po.
Appelezle 800.661.1616ou passezvotre commande enenvoyantce formulaire_:
GEParts, IFactoryLane,Moncton, N.B,E1C9M3
Quantite
Don de commande degril-lechefrite
Numerodepiece
44
Num&odemodele Numerodes&ie Marque
Prenom Nom
Adresse
Ville Province __ Codepostal
Telephone Courriel
Cartedecredit Cheque__ Mandat(USseulement)__
Visa MasterCard Discover AmEx Num&o dela carte decredit
Dated'expiration:Mois Annee Signature:
Date d'achat
Notes.
www.e/ectromenagersge.ca
_u
w
w
45
-_-- Notes.
_L
_N
46

Garantiede/a cuisiniereau gazGE.
Le service sous garantie est assur# par nos centres de service
de I'usine ou par un technicien agr## Customer Care_.Pour obtenir
le service, visitez notre sue Web _ www.electromenagersge.ca ou
contactez 1.800,561.3344.Veuillez fournir le numfiro de sfirie
etle numfiro de modfile Iorsque vous appelez pour obtenir
le service.
Agrafez votre row icL Lapreuve
de date d'achat original est
n#cessairepour obtenir
I'entretien etlesr@arations
sous la garantie.
an
De la datede
I'achat original
Cinqarts
De la datede
I'achat original
Mabe remp/acera :
Teute piece de la cuisini_re qui connak une dSf_dllance suite _ ml dSf_mt de mat_riau
ou de f_tb,icafion. Dinant cette annee degarantie/imitee, Mabe _mnira aussi, sans #ais,
tous les services _ la maison et tousles flais de main d'oeuvre pour remplacer la piece
dSfe.cmeuse.
ta surface de cuissonsi ere se b,ise _tla suite de choc thermique, se dScolore ou se fend
aujoint d'_mnch_it_ enue la smf_ce de cuisson en vene et les bor(ts en c&amique,
ou sile motif s'use et disparak.
Unelement radiant de surface s'il brOle.
Pendant cette p#riodede garantie limiteesupp/ementairede quatreans,vous serez responsable
des flais de main-d'oeuwe ou de rd.parafion connexe.
Los d6placements du service pour vous enseigner
comment ufiliser le produit.
Mauvaise installation, liwaison ou maintenance.
D6faiRance du produit suite Run abns, mauvaise
utilisation ou ufilisation Rdes fins autres que ceres
pr6vues ou utilisafion commerciale.
Dommages &la surface de cuisson de verre par des
d_versements durcis de produits sucr6s ou du plasfique
fondu non nettoy_s selon le mode d'emploi du manuel
du propri_taire.
Dommages Rla surface de cuisson de verre en utilisant
des nettoyants autres que les _T_mes de nettoyage
recommand_es.
}_Remplacement des fnsibles r6sidenfieRes ou
r&iuifialisafion des disjoncteurs.
Dommages au produit suite atm acddent, incendie,
inondations ou force majeure.
Dommages indirects ou cons6cutifs cans6s par des
d6fauts possibles de l'appareiL
Dommages apr_s la livraison.
Le service s'il est impossible d'avoir acc6s au produit
pour ce faire.
EXCLUS/ON BEGARANTIES /MPL/CITES- Votre seul etunique recours est /a reparation du produit solon
los dispositions decette Garantie limit#e. Touteslos garanties implicites, incluant los garanties de
commercial## et d'ad#quation a un usage sp#cifique, sent limit#es a une ann#e ou a lap#riode
la pluscourte autorisee par la I#gislation.
Cette garantie est offerte _ I'acheteur initial, ainsi qu'O tout propri#taire subs#went d'un produit achet#
en rue d'une utilisation domestique au Canada. Le service _ domicile en vertu de la garantie sera fourni
dans los r@ions oOil est disponible et oOMabe estime raisonnable de le fournir,
Certaines provinces n'autorisent pas I'exclusion ou la limitation des dommages indirect& la limitation ou
I'exc/usion ne vous sont pas appficables. Cette garantie vous conf#re des droits sp#cifiques, et vous disposez
de droits suppl#mentaires qui varient d'une province _ I'autre. Pour en savoir plus sur les droits qui vous
sont conf#r#s pour une province donn#e, consultez le bureau d'informations pour les consommateurs
le plus proche ou le procureur de votre province.
Garant : Mabe Canada Inc.
Burlington, Ontario
47
Soutienau consommateur.
l SiteWebappareilsgectrom_nagersGE www,electromenagersge.ca
Vous avez une question ou vous avez besoin d'aide pour votre appareil 51ectrom&mger? Contactez-nous
24 heure_ parjou_, tous lesjou_ de l'ann_e.par Internet au site www.eleetromenagersge.ca _ s
Servicede rdparations
Service de r_parafions GE est tout pros de vous.
Pour f_drer_parer votre 51ectrom&mger GE, il suffit de nous tS16phoner
1.800.561.3344
Studio de conception rdaliste
Sur demande, (;E peut f_urnir une brochure sur l'am&mgement d'une cuisine pour les pe,_onnes
{_mobilit_ r_duite.
EclJvez: Directetm Relations avec les consomInamuI_, Mabe Canada Inc.
Bureau 310, 1 Facto, y Lane
Moncton, N.B. E1C 9M3
Pro/ongationde garantie www.electromenagersge.ca
Achetez un conm_t d'entretien GE avant que votre garantie n'expire et b&_ficiez (t' un rabais substantiel.
Ainsi le service apr&s-vente GE sera tot{jours 1{_apr&s expiration de la garande.
Visitez notre site Web ou appelez-nous au 1.888.261.2133.
Pi_ceset accessoires
Ceux qui d&irent rSparer eux-m&nes letos _lectrom_nagers peuvent recevoir pi&ces et accessoires
direcmment {_la maison (cartes \qSA, MasterCard et Discover accept_es).
LosdirectivesstipuleesdanslepresentmanuelpeuventOtreefectueesparn'importequelutilisateur.Losautres
reparationsdoiventgeneralement_treeffectueesparun technicienqualifie.Soyezprudent, car unereparation
inadequatepeutaffecterlefonctionnementsecuritairede rappareil.
Vous trouverez dans les pagesjaunes de votre annuahe le num&o du Centre de service Mabe le plus
proche, ktmement, appelez-nous au 1.800.661.1616.
Contactez-nous
Si vous n'&tes pas safisf_fit du service apr&>vente dent vous avez b&_6fici6 :
Premi_rement, communiquez avec les gens qui ont r_par_ votre appareil.
Ensuite, si vous n'_tes toulours pas safisf_dt, envoyez tousles d4tails--num&o de t_14phone comp_is--au
Direcmu_; Relations avec les consommamu_, Mabe Canada Inc.
Bureau 310, 1 Factory Lane
Moncton, N.B. E1C 9M3
Inscrivezvotreappareilgectrom_nager www. electromenaqersge, ca
Inscrivez votre apparei161ectrom6nager en direct, aussitgt que possible. Cela amdliorera nos
communications et notre service apr_s-vente. Vous pouvez _galement nous envoyer par la poste
][efLmmdahe d'inscriptionjoint 5_votre documentation.
48

