Loading ...
Loading ...
Loading ...

• 11 •
CHARGING A BATTERY OUTSIDE OF THE VEHICLE
1. Place battery in a well-ventilated area.
2. Clean the battery terminals.
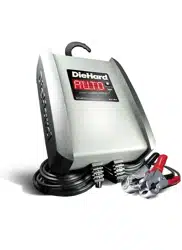
3. Connect a 24-inch long, 6-gauge (AWG) insulated battery cable to the
NEGATIVE (NEG, N, -) battery post (i.e., jumper cable, not provided).
4. Connect the POSITIVE (RED) clamp to the POSITIVE (POS, P, +) battery post.
5. Position yourself and the “negative post extension” cable as far away from
the battery as possible, and connect the NEGATIVE (BLACK) clamp to the
cable’s free end.
6. Connect the charger to the electrical outlet.
7. When the charger starts, the GREEN LED will be solid, and the display will
show ANALYZING BATTERY while the charger determines if the battery is
properly connected, the condition of the battery, and whether the battery is
6V or 12V.
8. Monitor the progress of the charge by pressing the display button on the front of
the unit. When the battery is fully charged, the GREEN LED will pulse.
9. When charging is complete, disconnect the charger from the AC power,
disconnect the negative clamp, and nally the positive clamp.
10. A marine (boat) battery must be removed and charged on shore.
BATTERY CHARGING TIMES
CCA = Cold Cranking Amps RC = Reserve Capacity Ah = Amp Hour
BATTERY SIZE/RATING
CHARGE TIME
(6A)
SMALL BATTERIES
Motorcycle, garden tractor, etc.
6-12 Ah ¾-1¼ h
12-32 Ah 1¼-3½ h
CARS AND
TRUCKS
200-315 CCA 40-60 RC 3¾-4¾ h
315-550 CCA 60-85 RC 4¾-6 h
550-1000 CCA
85-190 RC
6-11½ h
MARINE/DEEP-CYCLE
80 RC 6 h
140 RC 9 h
160 RC 10 h
180 RC 11 h
Times are based on a 50% discharged battery and may change, depending on
age and condition of battery.
Loading ...
Loading ...
Loading ...