Loading ...
Loading ...
Loading ...
5
For some models the auxiliary handle may need to be
attached. If the model needs the auxiliary handle attached,
please refer to theseinstructions.
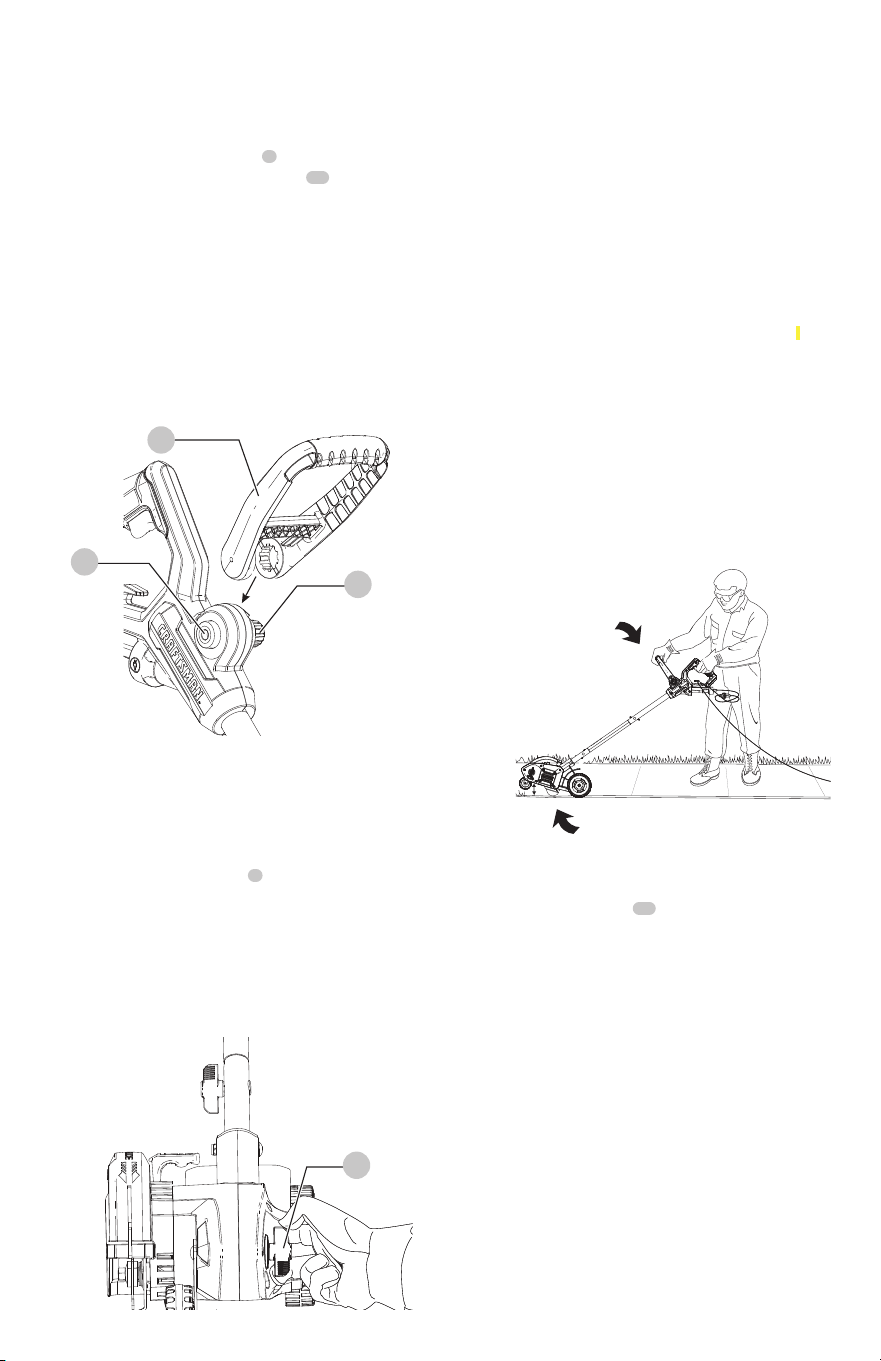
1. To attach the auxiliary handle
, press in on the
auxiliary handle adjustment buttons on both sides
of the upper housing as shown in Figure E
2. Position the auxiliary handle as shown in Figure E .
Partially push the auxiliary handle on so it will hold the
buttons in when you release them with your hand.
3. Push the auxiliary handle completely onto the housing
and position it slightly until it “snaps” intoplace.
To adjust the auxiliary handle up or down, press in on
the buttons and raise or lower the handle.
The handle should be adjusted so that your front arm
is straight when the edger is in the workingposition.
Fig.E
The front wheel can be adjusted to allow a deeper or
shallower cut, and to increase the life of the blade.
1. Wait for blade to come to completestop.
2. Unplugtool.
3. Loosen the cut depthknob
.
4. Adjust wheel depth, using the depth indicator (on the
wheel bracket and the marking on the fronthousing.
Recommend 1 " (2.5 cm) depth foredging.
5. Tighten knobfirmly.
Thick overgrowth may drag on the guard. Reduce
cut depth to minimum to help reduce thiseffect.
Fig. F
The edge guide is useful for cutting a straight path along
sidewalks. For landscaping or trenching in the yard the edge
guide can interfere with moving the edger through hard
soil or sod. The edge guide can be adjusted so that the tool
will also perform TRENCHING and LANDSCAPINGoperations.
Pull edge guide lever sideways to unlock from the guard
tab in direction of small arrow. Lift the lever up until the
lower square notch in the lever lines up with the tab on
the guard. In this position the edge guide is lifted up so the
tool can easily cut along the edges of flower and shrubbery
beds, and around trees in preparation for trenching or
sodremoval.
To return edge guide to lower position, pull lever sideways
and push down until guard tab fits into upper leverhole.
You may need to tilt edger back to allow edge guide
to be moved into trenchingposition.
Fig.G
An extension cord retainer is built into the switch
handle to reduce strain on the power cord. To use this
feature, simply double the extension cord as shown, about
1' (30 cm) from the end, and insert it into the end of the
handle. Hook the loop formed by doubling the cord over
the tab. Gently tug on the cord to ensure that it is firmly
retained in thehandle.
Keep extension cord clear of operator, unit, and any
obstacles at all times. Do not expose the cord to heat, oil,
water, or sharpedges.
Loading ...
Loading ...
Loading ...