Owner’s Manual
Printed in China
Part No. 814-RX6801-101
English
TWO-WAY
RADIO MODEL
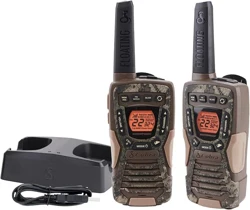
RX680
Nothing Comes Close to a Cobra
®
Nothing Comes Close to a Cobra
®
CS28710
Energy Efciency
Veried
Trademark Acknowledgment
©2022 Cobra Electronics Corporation. Cobra and the snake design are proprietary
trademarks of Cobra Electronics Corporation, USA. Other trademarks and trade names
are those of their respective owners.
Cobra Electronics Corporation™ is a trademark of Cobra Electronics Corporation, USA.
Trademark Acknowledgment
Staying in touch with your family and friends is convenient and easy
when using your microTALK
®
radio. Some of the many uses you will
discover include:
Communicating with others while hiking, biking, and working; keeping track of
family and friends at a crowded public event; checking with travel companions
in another car; talking with neighbors; arranging meeting spots with others
while shopping at the mall.
Secure your microTALK
®
radio while on the go.
Carrying your microTALK
®
radio with you is easy when
using the belt clip or optional wrist strap.
The belt clip easily attaches to your belt, purse, or
backpack.
Introduction
Making Life Easier and Safer
Customer Assistance
Product Service & Support
Belt Clip
A-1 A-2
WARNING: Important Safety Instructions for Battery
Read All Instructions
• Do not incinerate the battery even if it is severely damaged or is completely worn
out.
• Do not discard battery in a fire. The battery pack can explode in a fire.
• Do not replace battery in any area labeled “Hazardous Atmosphere”. Any sparks
created in a potentially explosive atmosphere can cause an explosion or fire.
• Do not disassemble, crush, puncture, shred, or otherwise attempt to change the
form of your battery.
• Do not dry a wet or damp battery with an appliance or heat source, such as a hair
dryer or microwave oven.
• A small leakage of liquid from the battery cells may occur under extreme usage or
temperature conditions. This does not indicate a failure. Do not open, deform or
mutilate the battery as there may be corrosive materials which can cause damage
to eyes or skin and may be toxic if swallowed.
However, if the outer seal is broken and this leakage gets on your skin:
a. Wash quickly with soap and water.
b. Neutralize with a mild acid such as lemon juice or vinegar.
c. If battery liquid gets into your eyes, flush them with clean water for a minimum of
10 minutes and seek immediate medical attention.
This product uses Lithium Polymer Battery. Do not transport package if damaged, a
fire hazard could exist.
Recycle Battery
Local, state or federal laws may prohibit disposal of batteries in ordinary trash.
Consult your local waste authority for information regarding available recycling
and/or disposal options.
1. Only accessories included in this package or specified by the manufacturer
should be used with the radio. The 5V micro-USB charging input is compatible
with most high quality micro-USB chargers that fully conform to the USB
standards.
2. Do not use cleaners or solvents to clean the exterior of the radio. Use only a
damp or dry cloth.
3. Do not expose this product to splashing or dripping water.
4. Do not attempt to service the receiver yourself. Removing the cover will void
the warranty. Changes or modifications not expressly approved by Cobra may
void the user’s authority granted by the FCC to operate this device and should
not be made.
5. Do not plug the wall adaptor into the power outlet if the outlet is wet.
6. Do not use any portable radio that has a damaged antenna. If a damaged
antenna comes into contact with your skin, a minor burn can result.
WARNING: Important Safety Instructions
Before operating the radio, please read all safety and
operating instructions. Save all instructions in a safe place
for future reference.
©2022 Cobra Electronics Corporation
www.cobra.com
In this user’s guide, you should find all the information you need to operate
your microTALK® radio. If you require further assistance after reading this
guide, Cobra offers the following customer assistance services:
For Assistance In The U.S.A.
For any questions about operating or installing this new Cobra product, PLEASE
CONTACT COBRA FIRST… do not return this product to the retail store. The
contact information for Cobra will vary depending on the country in which you
purchased and uses the product. For the latest contact information, please go
to www.cobra.com/support or call 1-800-543-1608.
If your product should require factory service, please go to
www.cobra.com/support and follow the instructions.
A-3 1
1
2
3
4
5
7
11
13
12
14
15
18
19
20
16
10
9
8
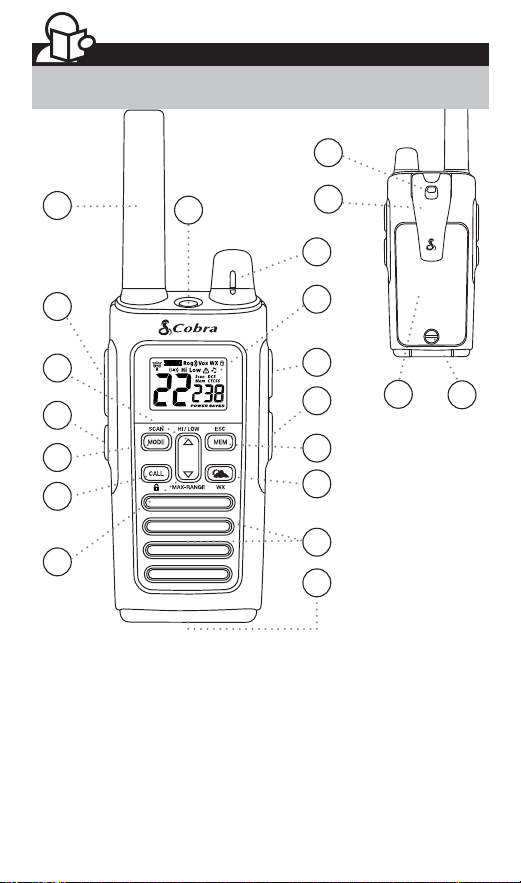
1. Antenna
2. Push-to-Talk Button
3. Up/HI/LOW Button
4. Flashlight Button
5. Mode/Scan Button
6. Call/Lock Button
7. Down/Max-Range Button
8. LED/S.O.S Flashlight
9. Speaker/Microphone
10. Weather Button
11. Memory/Escape Button
12. USB Charge Jack
13. External Speaker/Microphone
Jack
14. Backlit LCD Display
15. ON/OFF/Volume Knob
16. Emergency Alert Button
17. Wrist Strap Connection
18. Belt Clip
19. Battery Compartment Door
20. Battery Door Screw
17
6
Customer Assistance
Operational Cautions
Exposure to high volume sound levels may cause temporary or permanent
damage to your hearing. Although there is no single volume setting that is
appropriate for everyone, you should always use your radio with the volume set
at low level and avoid prolonged exposure to high volume sound levels.
1. Set the volume control in a low position and use as low a volume as
possible.
2. Avoid turning up the volume to block out noisy surroundings. Whenever
possble, use your radio in a quiet environment with low background noise.
3. Limit the amount of time you use headsets or earpiece at high volume
levels.
4. When using the radio without a headset or earpiece, do not place the radio’s
speaker directly against your ear.
5. Observe all signs and instructions that require an electrical device or RF
radio product to be switched off in designated areas, such as gas/refueling
stations, hospitals, blasting areas, potentially explosive atmospheres, or
aircraft.
6. If you experience a skin irritation after using this product, discontinue use
and seek medical attention.
7. If the product or charger: overheats; has a damaged cord or plug; has been
dropped or damaged; has been dropped into water, disconnect any charger
from its power supply, discontinue use of the product.
Electromagnetic Interference
Nearly every electronic device is susceptible to electromagnetic interference
(EMI) if inadequately shielded, designed, or otherwise configured for
electromagnetic compatibility. Turn off your radio in any facility where posted
notices instruct you to do so. These facilities may include hospitals or health
care facilities that may be using equipment that is sensitive to external RF
energy.
• When instructed to do so, turn off your radios when on board an aircraft. Any
use of a RF device must be in accordance with applicable laws, regulations
and airline crew instructions.
• Some radios may interfere with some hearing aids. In the event of such
interference, you may want to consult your hearing aid manufacturer or
physician to discuss alternatives.
• If you use any other personal medical device, consult the manufacturer of
your device to determine if it is adequately shielded from RF energy. Your
doctor or physician may be able to assist you in obtaining this information.
Introduction
Product Features
A-3 1
1
2
3
4
5
7
11
13
12
14
15
18
19
20
16
10
9
8
1. Antenna
2. Push-to-Talk Button
3. Up/HI/LOW Button
4. Flashlight Button
5. Mode/Scan Button
6. Call/Lock Button
7. Down/Max-Range Button
8. LED/S.O.S Flashlight
9. Speaker/Microphone
10. Weather Button
11. Memory/Escape Button
12. USB Charge Jack
13. External Speaker/Microphone
Jack
14. Backlit LCD Display
15. ON/OFF/Volume Knob
16. Emergency Alert Button
17. Wrist Strap Connection
18. Belt Clip
19. Battery Compartment Door
20. Battery Door Screw
17
6
Customer Assistance
Operational Cautions
Exposure to high volume sound levels may cause temporary or permanent
damage to your hearing. Although there is no single volume setting that is
appropriate for everyone, you should always use your radio with the volume set
at low level and avoid prolonged exposure to high volume sound levels.
1. Set the volume control in a low position and use as low a volume as
possible.
2. Avoid turning up the volume to block out noisy surroundings. Whenever
possble, use your radio in a quiet environment with low background noise.
3. Limit the amount of time you use headsets or earpiece at high volume
levels.
4. When using the radio without a headset or earpiece, do not place the radio’s
speaker directly against your ear.
5. Observe all signs and instructions that require an electrical device or RF
radio product to be switched off in designated areas, such as gas/refueling
stations, hospitals, blasting areas, potentially explosive atmospheres, or
aircraft.
6. If you experience a skin irritation after using this product, discontinue use
and seek medical attention.
7. If the product or charger: overheats; has a damaged cord or plug; has been
dropped or damaged; has been dropped into water, disconnect any charger
from its power supply, discontinue use of the product.
Electromagnetic Interference
Nearly every electronic device is susceptible to electromagnetic interference
(EMI) if inadequately shielded, designed, or otherwise configured for
electromagnetic compatibility. Turn off your radio in any facility where posted
notices instruct you to do so. These facilities may include hospitals or health
care facilities that may be using equipment that is sensitive to external RF
energy.
• When instructed to do so, turn off your radios when on board an aircraft. Any
use of a RF device must be in accordance with applicable laws, regulations
and airline crew instructions.
• Some radios may interfere with some hearing aids. In the event of such
interference, you may want to consult your hearing aid manufacturer or
physician to discuss alternatives.
• If you use any other personal medical device, consult the manufacturer of
your device to determine if it is adequately shielded from RF energy. Your
doctor or physician may be able to assist you in obtaining this information.
Introduction
Product Features
Backlit LCD Display
2
Caring for Your microTALK
®
Radio
Your microTALK
®
radio will give you years of trouble-free service if cared for
properly. Handle the radio gently. Keep the radio away from dust. Never put
the radio in water or in a damp place. Avoid exposure to extreme
temperatures.
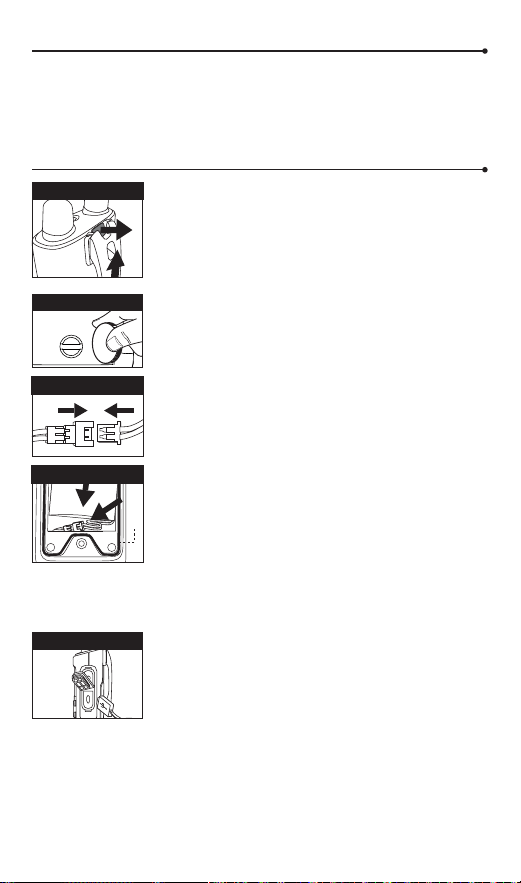
Installing Batteries (Battery already pre-installed)
To install or replace batteries:
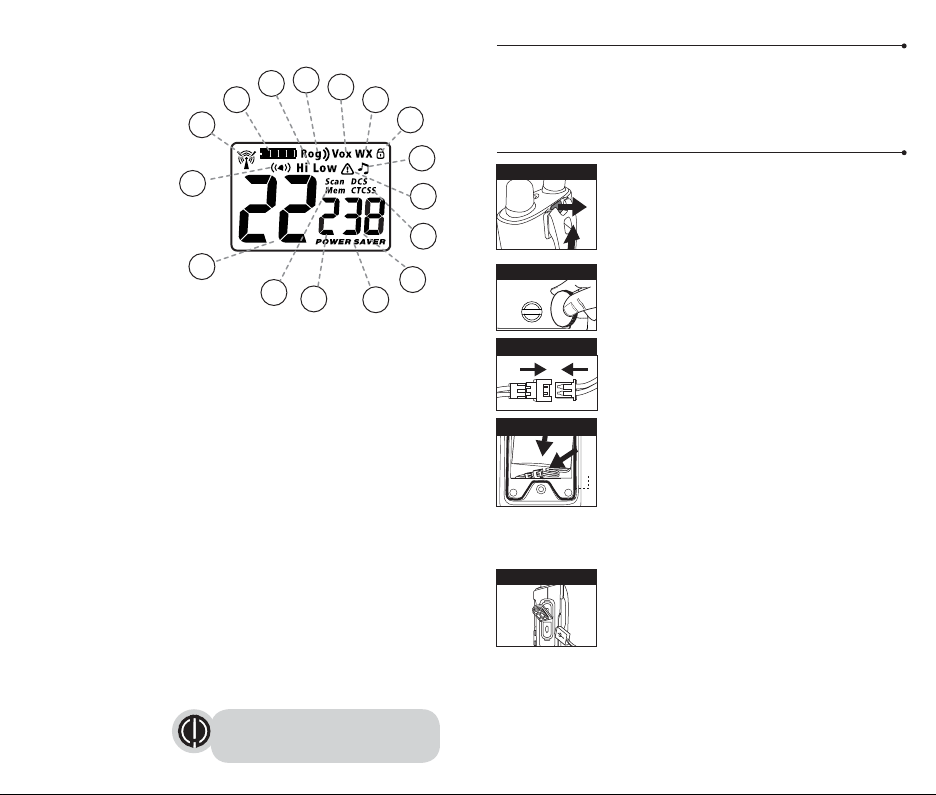
1. Remove belt clip by releasing belt clip latch and
sliding clip up.
2. Using a flat head screw driver or edge of a coin
(a quarter may be used), remove the screw securing
the back battery panel.
3. Open the battery compartment cover, connect the
connector of the battery to the socket of the radio
inside the battery compartment.
4. Place the battery inside battery compartment and
align the wires as shown.
Ensure the battery connector with cables are tucked
into the hole (keeps the connector to the left) located
at bottom as shown.
(Note: Wires are required to be tucked into the battery
compartment completely and carefully. If any object
interferes the O-ring, its sealing perfomence will be
affected.)
5. Place the battery compartment cover, screw down the
screws mildly.
(Screw nuts may be damaged if overtightened)
6. Re-attach the belt clip.
To charge batteries in radio:
1. Check to see that the batteries have been
inserted properly.
2. Insert the cable into the charge jack located at the
right side of the radio.
3. Plug the cable into USB-compatible power port.
Only use the supplied rechargeable batteries and desktop charger for
recharging your Cobra microTALK
®
radio.
Please charge new batteries for 8 hours for first time of use.
Cobra recommends your radio is turned off while being charged.
3
Maximum range may vary and is based on
unobstructed line-of-sight communication
under ideal conditions.
1
2
3
4
5
16
11
13
14
15
10
8
7
6
9
12
Remove Screw
USB Charger Jack
Remove Belt Clip
1
2
Features
• 60 Channels
• 10 Channel
Weather Radio
• Weather Alert
• 121 Privacy Codes
(38 CTCSS codes/
83 DCS codes)
• Hands-Free Operation
(VOX)
• VibrAlert
®
Paging
• Scan
Channels, privacy codes
• Backlit LCD Display
• LED/S.O.S Flashlight
• Call Alert
Ten selectable tones
• Button Lock
• Speaker/Microphone
• Charge Jack
• Roger Beep
Selectable On/Off
• Battery/Power Saver
• Keystroke Tones
Selectable On/Off
• Battery Level Indicator
• Low Battery
Audible Alert
• Auto Squelch
• Maximum Range
Extender
• Belt Clip
• Emergency Call
• IP54 Waterproof and
Dustproof
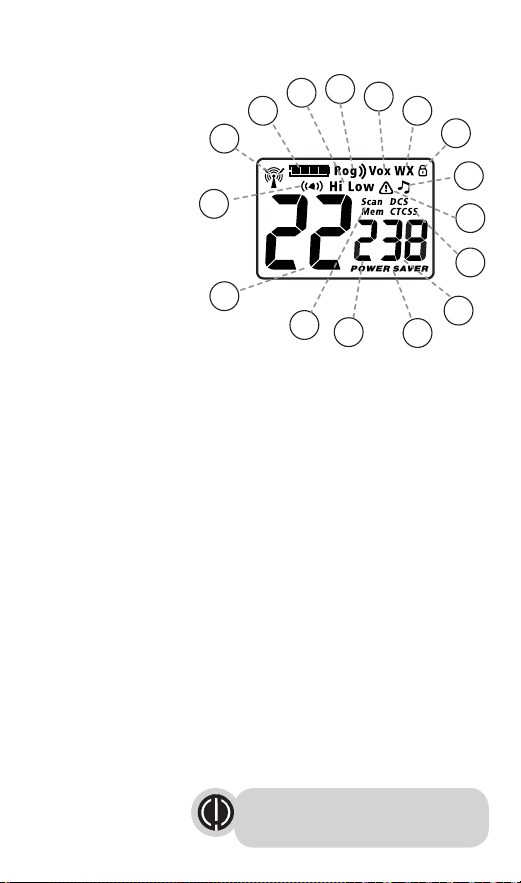
1. Receive/Transmit Icon
2. Battery Level Indicator
3. Hi/Low Power Icon
4. Roger Beep Icon
5. VOX Icon
6. Weather Icon
7. Lock Icon
8. Key Tone Icon
9. Weather Alert Icon
10. DCS/CTCSS Icons
11. DCS/CTCSS Privacy Code
Numbers
12. Power Saver Icon
13. Memory Channel Number
14. Scan/Memory Icon
15. Channel Numbers
16. VibrAlert
®
/ Call Alert Icon
2
O-ring
Wires alignment
1
Battery connector
Backlit LCD Display
2
Caring for Your microTALK
®
Radio
Your microTALK
®
radio will give you years of trouble-free service if cared for
properly. Handle the radio gently. Keep the radio away from dust. Never put
the radio in water or in a damp place. Avoid exposure to extreme
temperatures.
Installing Batteries (Battery already pre-installed)
To install or replace batteries:
1. Remove belt clip by releasing belt clip latch and
sliding clip up.
2. Using a flat head screw driver or edge of a coin
(a quarter may be used), remove the screw securing
the back battery panel.
3. Open the battery compartment cover, connect the
connector of the battery to the socket of the radio
inside the battery compartment.
4. Place the battery inside battery compartment and
align the wires as shown.
Ensure the battery connector with cables are tucked
into the hole (keeps the connector to the left) located
at bottom as shown.
(Note: Wires are required to be tucked into the battery
compartment completely and carefully. If any object
interferes the O-ring, its sealing perfomence will be
affected.)
5. Place the battery compartment cover, screw down the
screws mildly.
(Screw nuts may be damaged if overtightened)
6. Re-attach the belt clip.
To charge batteries in radio:
1. Check to see that the batteries have been
inserted properly.
2. Insert the cable into the charge jack located at the
right side of the radio.
3. Plug the cable into USB-compatible power port.
Only use the supplied rechargeable batteries and desktop charger for
recharging your Cobra microTALK
®
radio.
Please charge new batteries for 8 hours for first time of use.
Cobra recommends your radio is turned off while being charged.
3
Maximum range may vary and is based on
unobstructed line-of-sight communication
under ideal conditions.
1
2
3
4
5
16
11
13
14
15
10
8
7
6
9
12
Remove Screw
USB Charger Jack
Remove Belt Clip
1
2
Features
• 60 Channels
• 10 Channel
Weather Radio
• Weather Alert
• 121 Privacy Codes
(38 CTCSS codes/
83 DCS codes)
• Hands-Free Operation
(VOX)
• VibrAlert
®
Paging
• Scan
Channels, privacy codes
• Backlit LCD Display
• LED/S.O.S Flashlight
• Call Alert
Ten selectable tones
• Button Lock
• Speaker/Microphone
• Charge Jack
• Roger Beep
Selectable On/Off
• Battery/Power Saver
• Keystroke Tones
Selectable On/Off
• Battery Level Indicator
• Low Battery
Audible Alert
• Auto Squelch
• Maximum Range
Extender
• Belt Clip
• Emergency Call
• IP54 Waterproof and
Dustproof
1. Receive/Transmit Icon
2. Battery Level Indicator
3. Hi/Low Power Icon
4. Roger Beep Icon
5. VOX Icon
6. Weather Icon
7. Lock Icon
8. Key Tone Icon
9. Weather Alert Icon
10. DCS/CTCSS Icons
11. DCS/CTCSS Privacy Code
Numbers
12. Power Saver Icon
13. Memory Channel Number
14. Scan/Memory Icon
15. Channel Numbers
16. VibrAlert
®
/ Call Alert Icon
2
O-ring
Wires alignment
1
Battery connector
Turning your Radio On and Off
Turn ON/OFF Knob clockwise to turn the radio on and counterclockwise to turn
the radio off.
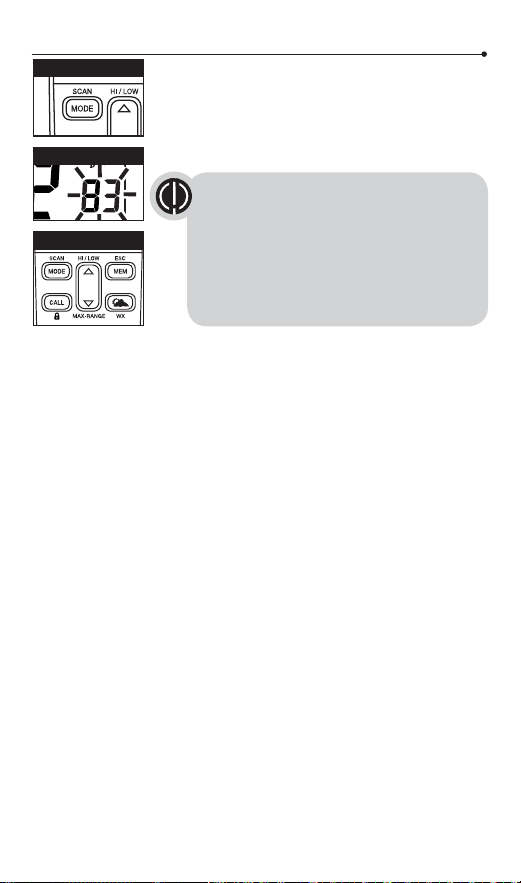
1. In the ON position, the radio chirps and briefly shows
all feature icons available on the radio.
2. The display screen then shows the current channel,
code and all features that are enabled.
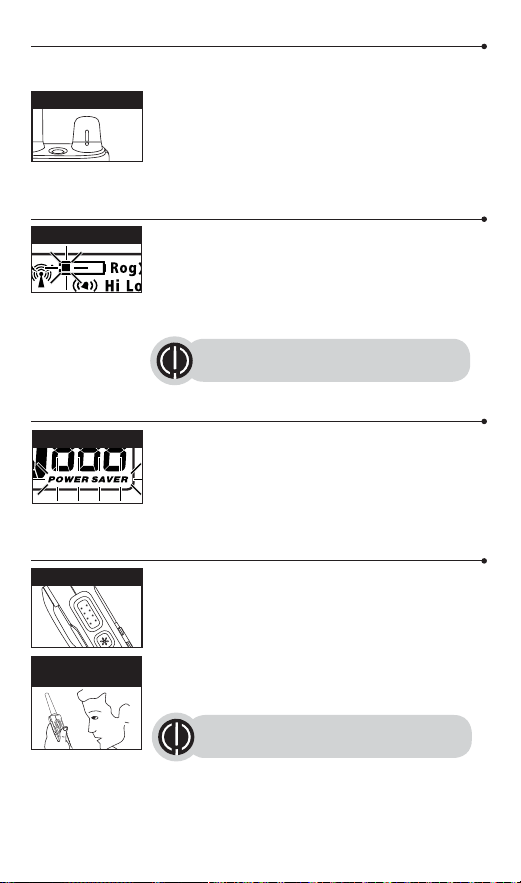
Battery Low
When battery power is low, the final bar in the Battery
Low icon will blink and an audible tone will sound twice
before the radio shuts off. Your batteries should be
recharged. It normally takes about 8 hours to fully charge
batteries.
Auto Battery Save
If there are no transmissions within 10 seconds, the radio
will automatically switch to Battery Save mode and the
Power Saver icon will flash in the display. This will not
affect the radio’s ability to receive incoming
transmissions.
Communicating with Another Person
1. Press and hold the Talk button.
2. With the microphone about two inches (5 cm) from
your mouth, speak in a normal voice.
3. Release the Talk button when you are finished talking
and listen for a response.
You cannot receive incoming calls while pressing the
Talk button.
Operation
Using Your Radio
4 5
Battery Low
ON/OFF Knob
Two Inches
from Mouth
The radio will display flashing battery icon
while charging if the radio is on.
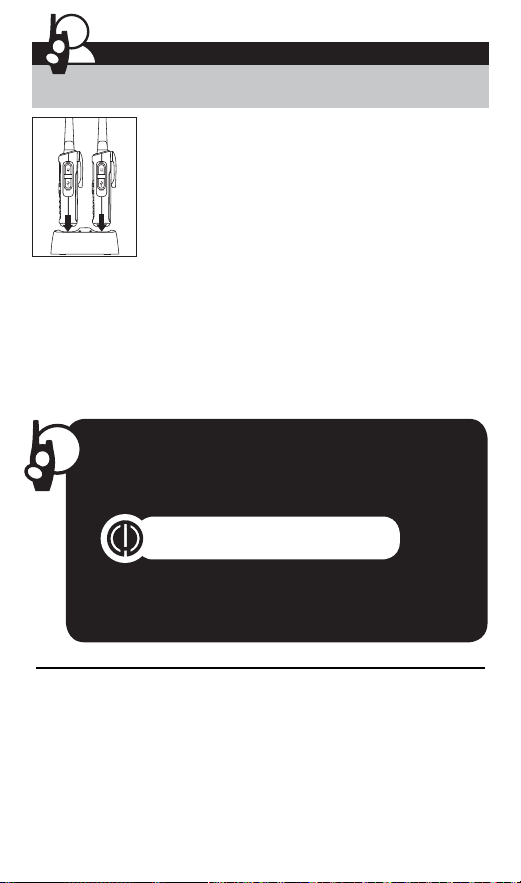
For charging microTALK
®
radio(s) in desktop charger:
1. Insert radio(s) into desktop charger as shown.
2. Insert the micro-USB cable into jack on back of charger.
3. Plug the cable into USB-compatible power port. For
pluggable equipment, the socket-outlet shall be installed
near the equipment and shall be easily accessible.
If charging light is not on, check position of radio. Radio
should be upright. The charge indicator light will stay on
(Red) as long as the radio is in the charging well, and the light will go off when
the charging is complete.
Note: To charge a single radio, you can bypass the desktop charger and simply
insert the micro-USB’s connector directly into the charge jack located at the
right of the radio.
The radio will display flashing battery icon while charging.
Cobra recommends your radio be turned off while being charged.
Battery Save Mode
Talk Button
Getting Started
Quick Start
1. Turn ON/OFF/Volume Knob clockwise to turn the radio
on and
counter clockwise to turn the radio off.
2. Select a desired channel. (Details please refer P.8)
3. Press and hold the Talk button while speaking into the
microphone.
4. When finished talking, release the Talk button and listen for a
response.
Both radios must be tuned to the same
channel/privacy code to communicate.
Waterproof
This radio is waterproof to IP54 standards. It is dust / splashproof from any
direction. The radio is resistant to water and rain splashes only when the
battery cover, headset accessory and micro-USB ports are sealed. Open the
battery compartment door or headset port/USB charge cover only when the
radio is dry. Use of a headset accessory should be in dry environments only.
The micro-USB cable and plug is not waterproof. Do not expose the charger to
rain or snow. Charge the radios only in a dry location. The battery door must be
tightly closed with the screw to maintain the weatherproof seal of the radio.
Both radios must be tuned to the same
channel/privacy code to communicate.
Turning your Radio On and Off
Turn ON/OFF Knob clockwise to turn the radio on and counterclockwise to turn
the radio off.
1. In the ON position, the radio chirps and briefly shows
all feature icons available on the radio.
2. The display screen then shows the current channel,
code and all features that are enabled.
Battery Low
When battery power is low, the final bar in the Battery
Low icon will blink and an audible tone will sound twice
before the radio shuts off. Your batteries should be
recharged. It normally takes about 8 hours to fully charge
batteries.
Auto Battery Save
If there are no transmissions within 10 seconds, the radio
will automatically switch to Battery Save mode and the
Power Saver icon will flash in the display. This will not
affect the radio’s ability to receive incoming
transmissions.
Communicating with Another Person
1. Press and hold the Talk button.
2. With the microphone about two inches (5 cm) from
your mouth, speak in a normal voice.
3. Release the Talk button when you are finished talking
and listen for a response.
You cannot receive incoming calls while pressing the
Talk button.
Operation
Using Your Radio
4 5
Battery Low
ON/OFF Knob
Two Inches
from Mouth
The radio will display flashing battery icon
while charging if the radio is on.
For charging microTALK
®
radio(s) in desktop charger:
1. Insert radio(s) into desktop charger as shown.
2. Insert the micro-USB cable into jack on back of charger.
3. Plug the cable into USB-compatible power port. For
pluggable equipment, the socket-outlet shall be installed
near the equipment and shall be easily accessible.
If charging light is not on, check position of radio. Radio
should be upright. The charge indicator light will stay on
(Red) as long as the radio is in the charging well, and the light will go off when
the charging is complete.
Note: To charge a single radio, you can bypass the desktop charger and simply
insert the micro-USB’s connector directly into the charge jack located at the
right of the radio.
The radio will display flashing battery icon while charging.
Cobra recommends your radio be turned off while being charged.
Battery Save Mode
Talk Button
Getting Started
Quick Start
1. Turn ON/OFF/Volume Knob clockwise to turn the radio
on and
counter clockwise to turn the radio off.
2. Select a desired channel. (Details please refer P.8)
3. Press and hold the Talk button while speaking into the
microphone.
4. When finished talking, release the Talk button and listen for a
response.
Both radios must be tuned to the same
channel/privacy code to communicate.
Waterproof
This radio is waterproof to IP54 standards. It is dust / splashproof from any
direction. The radio is resistant to water and rain splashes only when the
battery cover, headset accessory and micro-USB ports are sealed. Open the
battery compartment door or headset port/USB charge cover only when the
radio is dry. Use of a headset accessory should be in dry environments only.
The micro-USB cable and plug is not waterproof. Do not expose the charger to
rain or snow. Charge the radios only in a dry location. The battery door must be
tightly closed with the screw to maintain the weatherproof seal of the radio.
Both radios must be tuned to the same
channel/privacy code to communicate.
Listening for a Response
Release the Talk button to receive incoming
transmissions. Your microTALK
®
radio is always in
Standby mode while the Talk or Call buttons are
not pressed.
To Adjust Volume
Press and hold MAX-RANGE Button for three seconds to
turn off the auto squelch, then rotating Volume Knob until
you reach a comfortable listening level.
1. Rotate Volume Knob clockwise to increase the
volume.
2. Rotate Volume Knob counterclockwise to decrease the volume.
3. Press and hold MAX-RANGE Button to enable the auto squelch.
Do not hold the radio close to your ear. If the volume is set to an uncomfortable
level, it could hurt your ear.
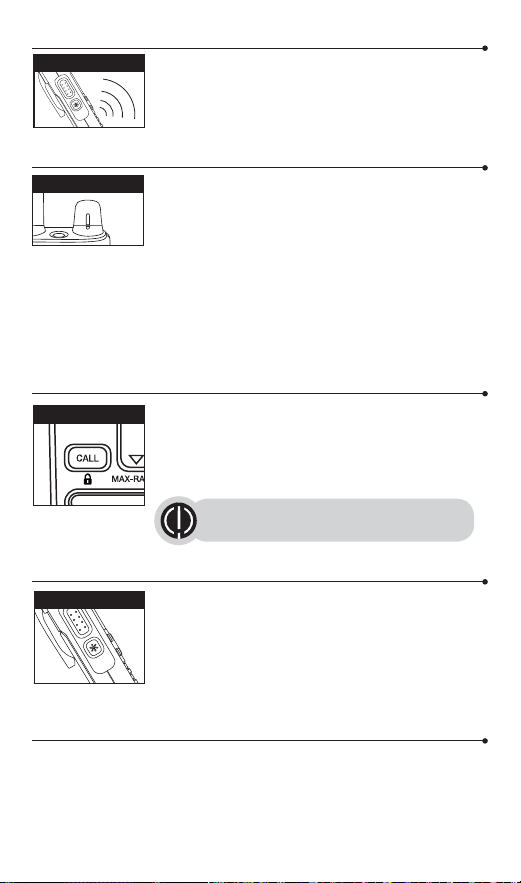
Call Button
Press and release the Call button to alert others that you
are calling.
The other person will hear a two second call tone.
This tone is used only to establish voice
communications.
LED/S.O.S. Flashlight
Press and release the LED/S.O.S Flashlight button below
the Talk button to use the LED flashlight located at the
bottom of the radio.
To activate S.O.S. function, press and hold the LED/S.O.S
Flashlight button to turn on. Press and release to turn off
the flashlight or S.O.S. function.
Auto Squelch/Maximum Range
Your microTALK
®
radio will automatically shut off weak transmissions and
unwanted noise due to terrain, conditions or if you’ve reached your Maximum
Range limit.
You can turn off auto squelch (or turn on maximum range extender), allowing
all signals to be received and extending the maximum range of your radio.
To turn maximum range extender on (Turn off auto
squelch):
– Press and hold the MAX-RANGE button for at least
three seconds until you hear two beeps which indicates
the maximum range extender is on.
To turn maximum range extender off (Turn on auto
squelch):
– Press and hold the MAX-RANGE button.
Lock Function
The Lock function locks the Up, Down, Weather,
Memory and Mode buttons to prevent accidental
operation.
To turn the lock on or off:
– Press and hold the Call/Lock button for three seconds.
A double beep sound is used to confirm your lock on or
off request. When in Lock mode, the Lock icon will be
displayed.
microTALK
®
Range
Your range will vary depending on terrain and conditions.
In flat, open country your radio will operate at maximum
range.
Buildings and foliage in the path of the signal can reduce
the range of the radio.
Dense foliage and hilly terrain will further reduce the
range of the radio.
On Channels 8 through 14, 34 through 37, 53 through 56,
your radio automatically switches to low power, which
will limit the range the radio can communicate.
6 7
See page 12 on how to select between
ten call tone settings.
Remember, you can achieve maximum
range by using maximum range extender.
See page 6 for details.
Listening
Lock Icon
Maximum Range
Reduced Range
Reduced Range
Call Button
Lock Button
MAX-RANGE Button
LED/S.O.S. Flashlight
Volume Knob

Listening for a Response
Release the Talk button to receive incoming
transmissions. Your microTALK
®
radio is always in
Standby mode while the Talk or Call buttons are
not pressed.
To Adjust Volume
Press and hold MAX-RANGE Button for three seconds to
turn off the auto squelch, then rotating Volume Knob until
you reach a comfortable listening level.
1. Rotate Volume Knob clockwise to increase the
volume.
2. Rotate Volume Knob counterclockwise to decrease the volume.
3. Press and hold MAX-RANGE Button to enable the auto squelch.
Do not hold the radio close to your ear. If the volume is set to an uncomfortable
level, it could hurt your ear.
Call Button
Press and release the Call button to alert others that you
are calling.
The other person will hear a two second call tone.
This tone is used only to establish voice
communications.
LED/S.O.S. Flashlight
Press and release the LED/S.O.S Flashlight button below
the Talk button to use the LED flashlight located at the
bottom of the radio.
To activate S.O.S. function, press and hold the LED/S.O.S
Flashlight button to turn on. Press and release to turn off
the flashlight or S.O.S. function.
Auto Squelch/Maximum Range
Your microTALK
®
radio will automatically shut off weak transmissions and
unwanted noise due to terrain, conditions or if you’ve reached your Maximum
Range limit.
You can turn off auto squelch (or turn on maximum range extender), allowing
all signals to be received and extending the maximum range of your radio.
To turn maximum range extender on (Turn off auto
squelch):
– Press and hold the MAX-RANGE button for at least
three seconds until you hear two beeps which indicates
the maximum range extender is on.
To turn maximum range extender off (Turn on auto
squelch):
– Press and hold the MAX-RANGE button.
Lock Function
The Lock function locks the Up, Down, Weather,
Memory and Mode buttons to prevent accidental
operation.
To turn the lock on or off:
– Press and hold the Call/Lock button for three seconds.
A double beep sound is used to confirm your lock on or
off request. When in Lock mode, the Lock icon will be
displayed.
microTALK
®
Range
Your range will vary depending on terrain and conditions.
In flat, open country your radio will operate at maximum
range.
Buildings and foliage in the path of the signal can reduce
the range of the radio.
Dense foliage and hilly terrain will further reduce the
range of the radio.
On Channels 8 through 14, 34 through 37, 53 through 56,
your radio automatically switches to low power, which
will limit the range the radio can communicate.
6 7
See page 12 on how to select between
ten call tone settings.
Remember, you can achieve maximum
range by using maximum range extender.
See page 6 for details.
Listening
Lock Icon
Maximum Range
Reduced Range
Reduced Range
Call Button
Lock Button
MAX-RANGE Button
LED/S.O.S. Flashlight
Volume Knob
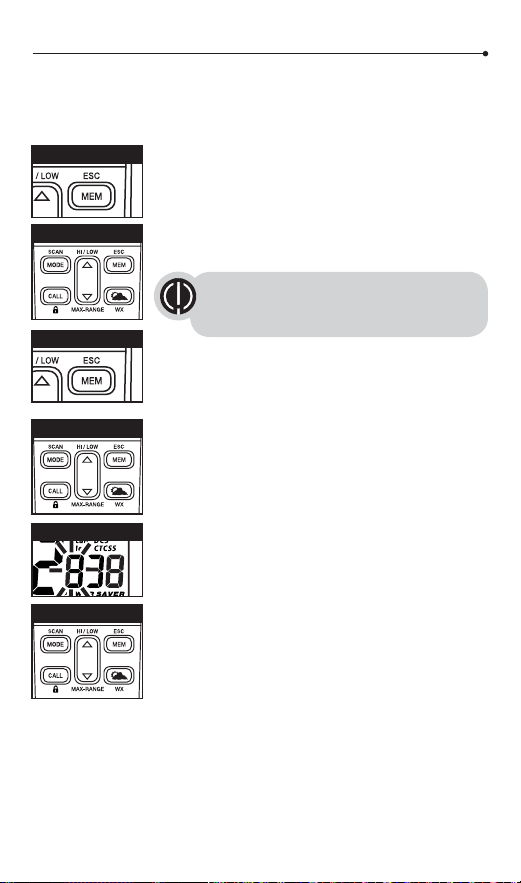
Set CTCSS Privacy Codes
To select a CTCSS privacy code:
1. After selecting a channel (only be available on channel
1~22), press the Mode button until the CTCSS icon
appears and the small numbers next to the channel
number flash on the display.
2. Press using the Up or Down button to select a privacy code. You can hold
the Up or Down button for fast advance.
3. When your desired CTCSS privacy code is displayed, choose one of the
following:
a. Press the Mode button to enter the new setting and proceed to other
functions.
b. Press the Talk or Call/Lock button to enter the new setting and return to
Standby mode.
c. Do not press any buttons for 6 seconds to enter the new setting and
return to Standby mode.
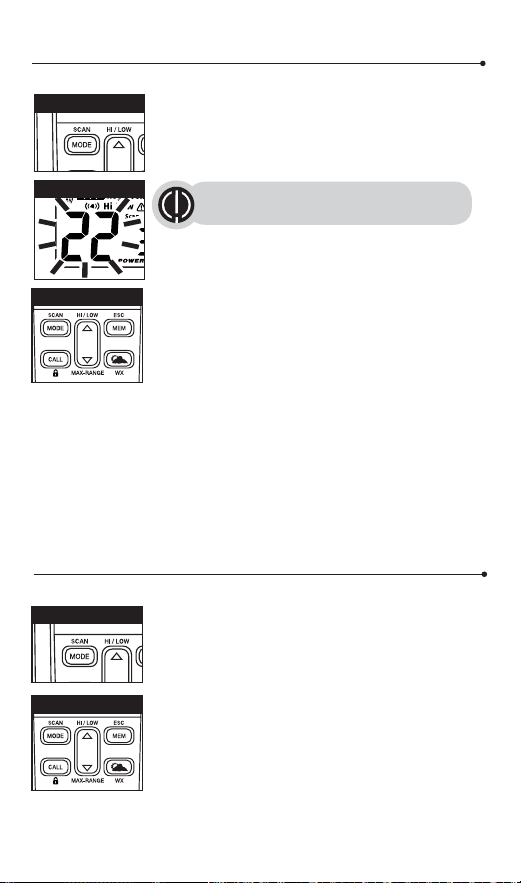
Channel Selection
The radio has 60 channels, Channel 1 to 22 are compatible with other brands
of Two-Way radios.
1. Briefly press and release Mode button, the channel
number flashes.
2. Press Up or Down button to select a channel. (You can
hold the Up or Down button for fast advance)
3. When the desired channel is displayed, choose one of
the following.
a. Press the Mode button to enter the new setting and
proceed to other functions.
b. Press the Talk or Call button to enter the new setting
and return to Standby mode.
c. Do not press any buttons for 6 seconds to enter the
new setting and return to Standby mode.
8
Both radios must be tuned to the
same channel to communicate.
See page 20 for frequency
allocations charts.
Channel Selection
Set CTCSS Privacy Codes
Set DCS Privacy Codes
Set Vox On/Off
Set Vox Sensitivity
Set Call Tones 1-10
Set VibrAlert On/Off
Set Roger Beep On/Off
Set Key Tones On/Off
To successfully communicate using a privacy code, both
the sending and receiving radios must be tuned to the same
channel and to the same privacy code system (CTCSS or DCS)
and privacy code number. Each channel will remember the
last privacy code system and number you select.
Operation
Mode Functions
CTCSS Privacy Code
Channel Number
Up/Down Button
Up/Down Button
Mode Button
Mode Button
Mode Button
9
Privacy Codes
Your microTALK
®
radio incorporates two advanced coded squelch systems that
can help to reduce interference from other users on any given channel. CTCSS
(Continuous Tone Coded Squelch System) provides 38 privacy codes and DCS
(Digitally Coded Squelch) provides 83 privacy codes. This provides a total of
121 Privacy Codes. Either system can be used on channels (CH1-CH22), but
both systems cannot be used on the same channel at the same time.
Scrolling Through the Mode Function
By scrolling through the Mode function, you will be able to select or turn on
preferred features of your microTALK
®
radio. When scrolling through the Mode
function, your radio features will be displayed in the same predetermined
order:
If DCS is turned on at the channel selected,
the display will flash the CTCSS icon and
“OFF.” To switch from DCS to CTCSS, press
the Up or Down button while the display is
flashing “OFF.” The display will then show the
small numbers flashing and you will then be
able to proceed to step 2.
The privacy code 00 is not a privacy code, but allows all signals
to be heard on a channel that is set to 00 on both the CTCSS
and DCS systems.
Set CTCSS Privacy Codes
To select a CTCSS privacy code:
1. After selecting a channel (only be available on channel
1~22), press the Mode button until the CTCSS icon
appears and the small numbers next to the channel
number flash on the display.
2. Press using the Up or Down button to select a privacy code. You can hold
the Up or Down button for fast advance.
3. When your desired CTCSS privacy code is displayed, choose one of the
following:
a. Press the Mode button to enter the new setting and proceed to other
functions.
b. Press the Talk or Call/Lock button to enter the new setting and return to
Standby mode.
c. Do not press any buttons for 6 seconds to enter the new setting and
return to Standby mode.
Channel Selection
The radio has 60 channels, Channel 1 to 22 are compatible with other brands
of Two-Way radios.
1. Briefly press and release Mode button, the channel
number flashes.
2. Press Up or Down button to select a channel. (You can
hold the Up or Down button for fast advance)
3. When the desired channel is displayed, choose one of
the following.
a. Press the Mode button to enter the new setting and
proceed to other functions.
b. Press the Talk or Call button to enter the new setting
and return to Standby mode.
c. Do not press any buttons for 6 seconds to enter the
new setting and return to Standby mode.
8
Both radios must be tuned to the
same channel to communicate.
See page 20 for frequency
allocations charts.
Channel Selection
Set CTCSS Privacy Codes
Set DCS Privacy Codes
Set Vox On/Off
Set Vox Sensitivity
Set Call Tones 1-10
Set VibrAlert On/Off
Set Roger Beep On/Off
Set Key Tones On/Off
To successfully communicate using a privacy code, both
the sending and receiving radios must be tuned to the same
channel and to the same privacy code system (CTCSS or DCS)
and privacy code number. Each channel will remember the
last privacy code system and number you select.
Operation
Mode Functions
CTCSS Privacy Code
Channel Number
Up/Down Button
Up/Down Button
Mode Button
Mode Button
Mode Button
9
Privacy Codes
Your microTALK
®
radio incorporates two advanced coded squelch systems that
can help to reduce interference from other users on any given channel. CTCSS
(Continuous Tone Coded Squelch System) provides 38 privacy codes and DCS
(Digitally Coded Squelch) provides 83 privacy codes. This provides a total of
121 Privacy Codes. Either system can be used on channels (CH1-CH22), but
both systems cannot be used on the same channel at the same time.
Scrolling Through the Mode Function
By scrolling through the Mode function, you will be able to select or turn on
preferred features of your microTALK
®
radio. When scrolling through the Mode
function, your radio features will be displayed in the same predetermined
order:
If DCS is turned on at the channel selected,
the display will flash the CTCSS icon and
“OFF.” To switch from DCS to CTCSS, press
the Up or Down button while the display is
flashing “OFF.” The display will then show the
small numbers flashing and you will then be
able to proceed to step 2.
The privacy code 00 is not a privacy code, but allows all signals
to be heard on a channel that is set to 00 on both the CTCSS
and DCS systems.
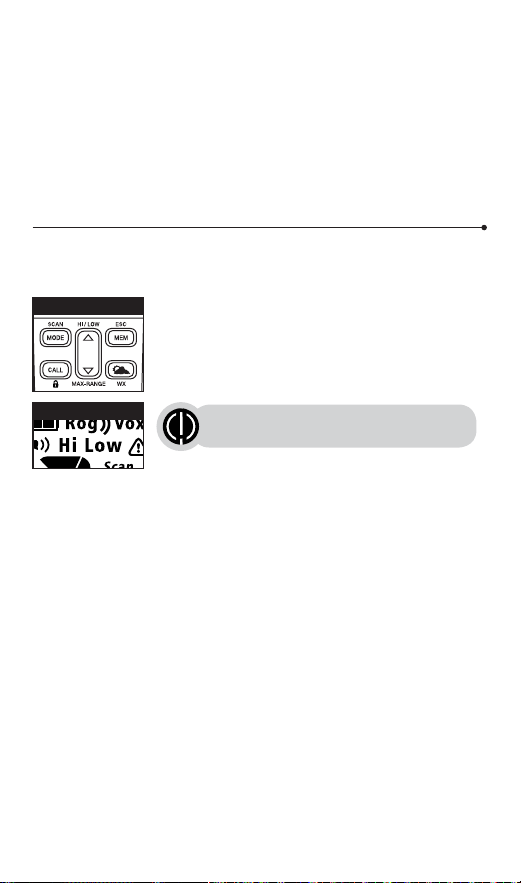
Voice Activated Transmit (VOX)
In VOX mode, your microTALK
®
radio can be used “hands-free,” automatically
transmitting when you speak. You can set the VOX sensitivity level to fit the
volume of your voice and avoid transmissions triggered by background noise.
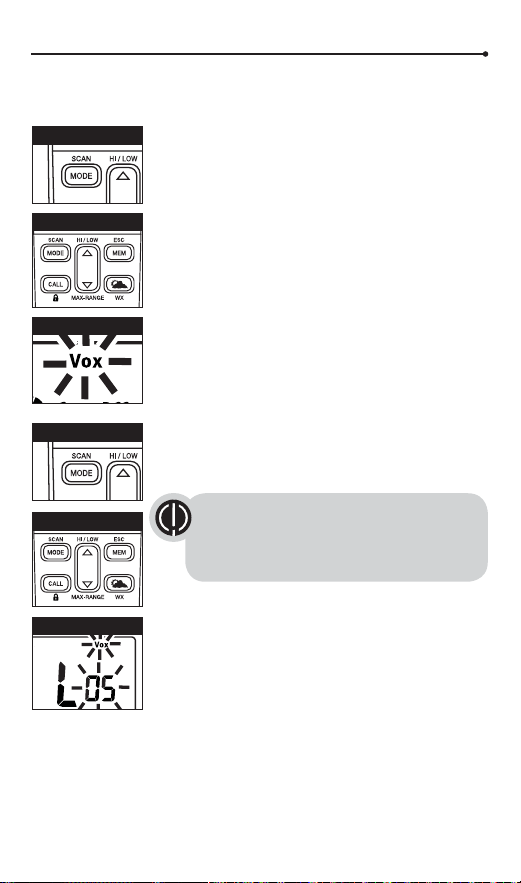
To turn VOX mode on or off:
1. Press the Mode button until the VOX icon flashes on the
display. The current On or Off setting is displayed.
2. Press the Up or Down button to turn VOX On or Off.
3. Choose one of the following:
a. Press the Mode button to enter the new setting and
proceed to other functions.
b. Press the Talk or Call/Lock button to enter the new
setting and return to Standby mode.
c. Do not press any buttons for 6 seconds to enter the
new setting and return to Standby mode.
To set VOX sensitivity:
1. Press the Mode button until the VOX icon flashes and
the current sensitivity level is displayed.
2. Press the Up or Down button to change the setting.
3. Choose one of the following:
a. Press the Mode button to enter the new setting and
proceed to other functions.
b. Press the Talk or Call/Lock button to enter the new
setting and return to Standby mode.
c. Do not press any buttons for 6 seconds to enter the
new setting and return to Standby mode.
Set DCS Privacy Codes
To select a DCS privacy code:
1. After selecting a channel (only be available on channel
1~22), press the Mode button until the DCS icon
appears and the small numbers flash on the display (00
through 83).
2. Press using the Up or Down button to select a DCS privacy code. You can
hold the Up or Down button for fast advance.
3. When your desired DCS privacy code is displayed, choose one of the
following:
a. Press the Mode button to enter the new setting and proceed to other
functions.
b. Press the Talk or Call/Lock button to enter the new setting and return to
Standby mode.
c. Do not press any buttons for 6 seconds to enter the new setting and
return to Standby mode.
DCS Privacy Code
Up/Down Button
Up/Down Button
Up/Down Button
Mode Button
Mode Button
Mode Button
10 11
VOX Icon
VOX Sensitivity Level
If CTCSS is turned on at the channel selected,
the display will flash the DCS icon and “OFF.”
To switch from CTCSS to DCS, press the Up
or Down button while the display is flashing
“OFF.” The display will then show the small
numbers flashing and you will then be able to
proceed to step 2.
The current VOX sensitivity level is displayed
with letters “L” and a Number 1 through 5,
with Number 5 being the most sensitive level
and Number 1 being the least sensitive level.
Voice Activated Transmit (VOX)
In VOX mode, your microTALK
®
radio can be used “hands-free,” automatically
transmitting when you speak. You can set the VOX sensitivity level to fit the
volume of your voice and avoid transmissions triggered by background noise.
To turn VOX mode on or off:
1. Press the Mode button until the VOX icon flashes on the
display. The current On or Off setting is displayed.
2. Press the Up or Down button to turn VOX On or Off.
3. Choose one of the following:
a. Press the Mode button to enter the new setting and
proceed to other functions.
b. Press the Talk or Call/Lock button to enter the new
setting and return to Standby mode.
c. Do not press any buttons for 6 seconds to enter the
new setting and return to Standby mode.
To set VOX sensitivity:
1. Press the Mode button until the VOX icon flashes and
the current sensitivity level is displayed.
2. Press the Up or Down button to change the setting.
3. Choose one of the following:
a. Press the Mode button to enter the new setting and
proceed to other functions.
b. Press the Talk or Call/Lock button to enter the new
setting and return to Standby mode.
c. Do not press any buttons for 6 seconds to enter the
new setting and return to Standby mode.
Set DCS Privacy Codes
To select a DCS privacy code:
1. After selecting a channel (only be available on channel
1~22), press the Mode button until the DCS icon
appears and the small numbers flash on the display (00
through 83).
2. Press using the Up or Down button to select a DCS privacy code. You can
hold the Up or Down button for fast advance.
3. When your desired DCS privacy code is displayed, choose one of the
following:
a. Press the Mode button to enter the new setting and proceed to other
functions.
b. Press the Talk or Call/Lock button to enter the new setting and return to
Standby mode.
c. Do not press any buttons for 6 seconds to enter the new setting and
return to Standby mode.
DCS Privacy Code
Up/Down Button
Up/Down Button
Up/Down Button
Mode Button
Mode Button
Mode Button
10 11
VOX Icon
VOX Sensitivity Level
If CTCSS is turned on at the channel selected,
the display will flash the DCS icon and “OFF.”
To switch from CTCSS to DCS, press the Up
or Down button while the display is flashing
“OFF.” The display will then show the small
numbers flashing and you will then be able to
proceed to step 2.
The current VOX sensitivity level is displayed
with letters “L” and a Number 1 through 5,
with Number 5 being the most sensitive level
and Number 1 being the least sensitive level.
Roger Beep Conrmation Tone
Your listener will hear an audible tone when you release the Talk button. This
alerts the other party that you are finished talking and it is OK for them to
speak.
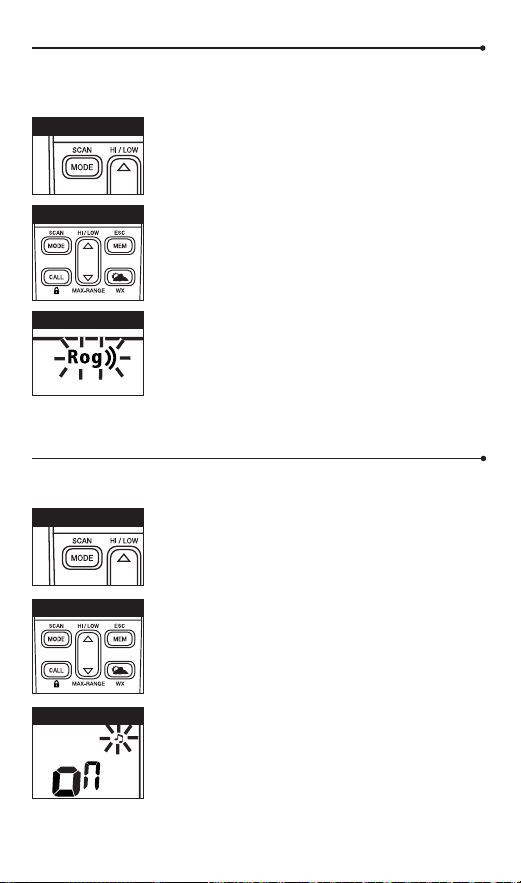
To turn roger beep on or off:
1. Press the Mode button until the Roger Beep icon
flashes. The current on or off setting is displayed.
2. Press the Up or Down button to select Roger Beep on
or off.
3. Choose one of the following:
a. Press the Mode button to enter the new setting and
proceed to other functions.
b. Press Talk or Call/Lock button to enter the new
setting and return to Standby mode.
c. Do not press any buttons for 6 seconds to enter the
new setting and return to Standby mode.
Key Tone On/Off
When Key Tone is On, an audible tone will sound each time a button is
pressed.
To turn key tone on or off:
1. Press the Mode button until Key Tone icon flashes.
Current key tone status on or off will flash.
2. Press the Up or Down button to select key tone
on or off.
3. Choose one of the following:
a. Press the Mode button to enter the new setting and
return to Standby mode.
b. Press Talk or Call/Lock button to enter the new
setting and return to Standby mode.
c. Do not press any buttons for 6 seconds to enter the
new setting and return to Standby mode.
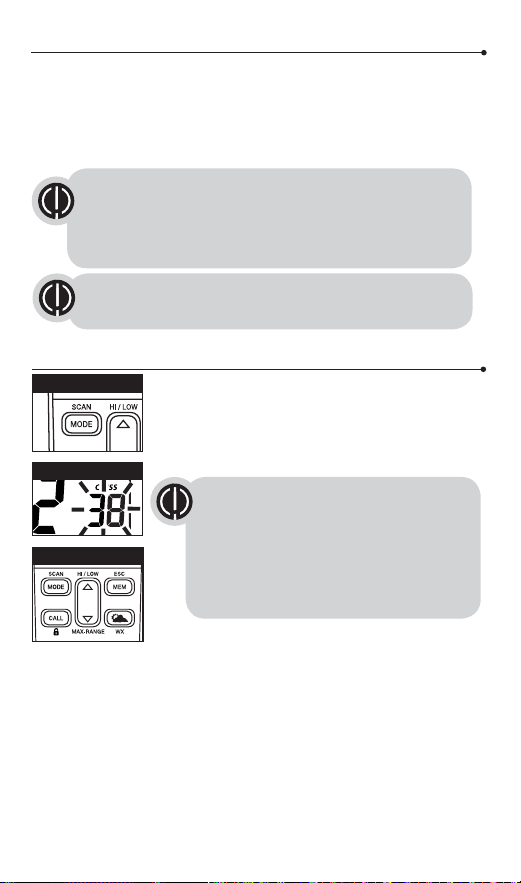
Ten Call Tone Settings
You can choose between ten different Call Tone Settings to transmit
a call alert.
To change a call tone setting:
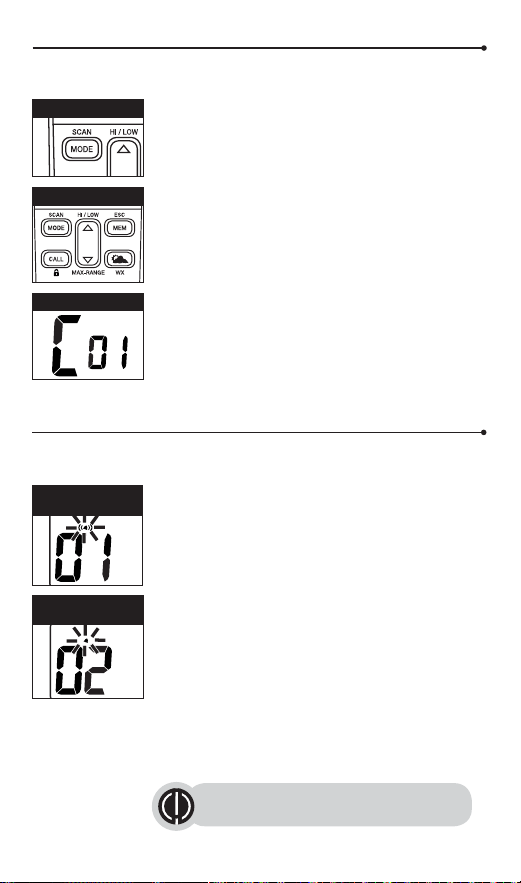
1. Press the Mode button until the letter “C” and the
current call tone number (01 through 10) is displayed.
The current call tone will sound for three seconds.
2. Press the Up or Down button to hear the other call
tone settings.
3. Choose one of the following:
a. Press the Mode button to enter the new setting and
proceed to other functions.
b. Press Talk or Call/Lock button to enter the new
setting and return to Standby mode.
c. Do not press any buttons for 6 seconds to enter the
new setting and return to Standby mode.
VibrAlert
®
and Call Alert
Your microTALK
®
radio can alert you to incoming signals by sounding an
audible call tone only or both with vibrating.
To change call settings:
1. Press the Mode button until the Call Setting icon
flashes on the display. The current setting (“01”
vibrate + ring, “02” ring only) is displayed.
2. Press the Up or Down button to change the call
setting.
3. Choose one of the following:
a. Press the Mode button to enter the new setting and
proceed to other functions.
b. Press Talk or Call/Lock button to enter the new
setting and return to Standby mode.
c. Do not press any buttons for 6 seconds to enter
the new setting and return to Standby mode.
Up/Down Button
Up/Down Button
Up/Down Button
Mode Button
Mode Button
Mode Button
12 13
Call Tone Setting
Call Tone On/
Vibrate On
Call Tone On/
Vibrate Off
Roger Beep Icon
Key Tone Icon
Note: VibraAlert will be suspended during
charging.
Roger Beep Conrmation Tone
Your listener will hear an audible tone when you release the Talk button. This
alerts the other party that you are finished talking and it is OK for them to
speak.
To turn roger beep on or off:
1. Press the Mode button until the Roger Beep icon
flashes. The current on or off setting is displayed.
2. Press the Up or Down button to select Roger Beep on
or off.
3. Choose one of the following:
a. Press the Mode button to enter the new setting and
proceed to other functions.
b. Press Talk or Call/Lock button to enter the new
setting and return to Standby mode.
c. Do not press any buttons for 6 seconds to enter the
new setting and return to Standby mode.
Key Tone On/Off
When Key Tone is On, an audible tone will sound each time a button is
pressed.
To turn key tone on or off:
1. Press the Mode button until Key Tone icon flashes.
Current key tone status on or off will flash.
2. Press the Up or Down button to select key tone
on or off.
3. Choose one of the following:
a. Press the Mode button to enter the new setting and
return to Standby mode.
b. Press Talk or Call/Lock button to enter the new
setting and return to Standby mode.
c. Do not press any buttons for 6 seconds to enter the
new setting and return to Standby mode.
Ten Call Tone Settings
You can choose between ten different Call Tone Settings to transmit
a call alert.
To change a call tone setting:
1. Press the Mode button until the letter “C” and the
current call tone number (01 through 10) is displayed.
The current call tone will sound for three seconds.
2. Press the Up or Down button to hear the other call
tone settings.
3. Choose one of the following:
a. Press the Mode button to enter the new setting and
proceed to other functions.
b. Press Talk or Call/Lock button to enter the new
setting and return to Standby mode.
c. Do not press any buttons for 6 seconds to enter the
new setting and return to Standby mode.
VibrAlert
®
and Call Alert
Your microTALK
®
radio can alert you to incoming signals by sounding an
audible call tone only or both with vibrating.
To change call settings:
1. Press the Mode button until the Call Setting icon
flashes on the display. The current setting (“01”
vibrate + ring, “02” ring only) is displayed.
2. Press the Up or Down button to change the call
setting.
3. Choose one of the following:
a. Press the Mode button to enter the new setting and
proceed to other functions.
b. Press Talk or Call/Lock button to enter the new
setting and return to Standby mode.
c. Do not press any buttons for 6 seconds to enter
the new setting and return to Standby mode.
Up/Down Button
Up/Down Button
Up/Down Button
Mode Button
Mode Button
Mode Button
12 13
Call Tone Setting
Call Tone On/
Vibrate On
Call Tone On/
Vibrate Off
Roger Beep Icon
Key Tone Icon
Note: VibraAlert will be suspended during
charging.
9. Choose one of the following:
a. Press the MEM/ESC button to enter the channel/privacy code in the
selected memory location. Radio then proceeds to next memory
location, which will blink.
b. Press and hold the MEM/ESC button to save the current state of the
Set Memory Function and return to Standby mode.
To recall a stored memory channel location:
1. Press the MEM/ESC button until the Memory icon and
the memory location number flash on the display.
2. Press the Up or Down button to select a memory
location (0 through 9).
3. Press and hold the MEM/ESC button to return to
Standby mode on the selected memory location.
10 Memory Location
Your microTALK
®
radio has 10 Memory Locations for storing your most
frequently used channels and channel/privacy code combinations.
These Memory Locations can be selected individually or can be scanned.
(See page 16 for memory location scan.)
To program a memory location:
1. Press the MEM/ESC button. Memory icon and the
Memory Location show on the display.
2. Press the Up or Down button to select the memory
location (0 through 9).
3. Press the MEM/ESC button to enter a new memory
location or edit an already programmed memory
location.
4. Press the Up or Down button to select the memory
location.
5. Press the MEM/ESC button. The channel numbers will
flash on the display.
6. Press the Up or Down button to select a channel (1
through 60).
7. Press the MEM/ESC button. The CTCSS icon and
privacy code numbers will flash on the display (only be
available on channel 1~22).
8. Choose one of the following:
a. Press the Up or Down button to select a CTCSS
privacy code (00 through 38) for the channel.
b. Press the MEM/ESC button to switch from CTCSS
to DCS. The DCS icon and privacy code numbers
will flash on the display. The Up or Down button
can then be used to select a DCS privacy code (00
through 83) for the channel (only be available on
channel 1~22).
Up/Down Button
Up/Down Button
Up/Down Button
Up/Down Button
14 15
Memory Channel
Memory Channel
If a location has been programmed before,
its associated channel/privacy code will be
shown on the display.
If a location has been programmed before,
its associated channel/privacy code will
be shown on the display.
A memory location can be reprogrammed
at any time it is displayed. Press the
MEM/ESC button to begin.
MEM/ESC Button
MEM/ESC Button
MEM/ESC Button
If “oF” flashes in place of the privacy code numbers, a privacy
code is already set in the opposite (CTCSS or DCS) system. Press
the Up or Down button to cancel the opposite code and select a
privacy code from the active system for the selected channel.
During scanning (while receiving an incoming transmission), you can
choose from the following:
a. Press and hold the Talk button to communicate on that channel. Your radio
will remain on that channel and return to Memory Standby mode.
b. Press the Up or Down button to resume scanning channels.
c. Press and hold the Scan button to return to Memory Standby.
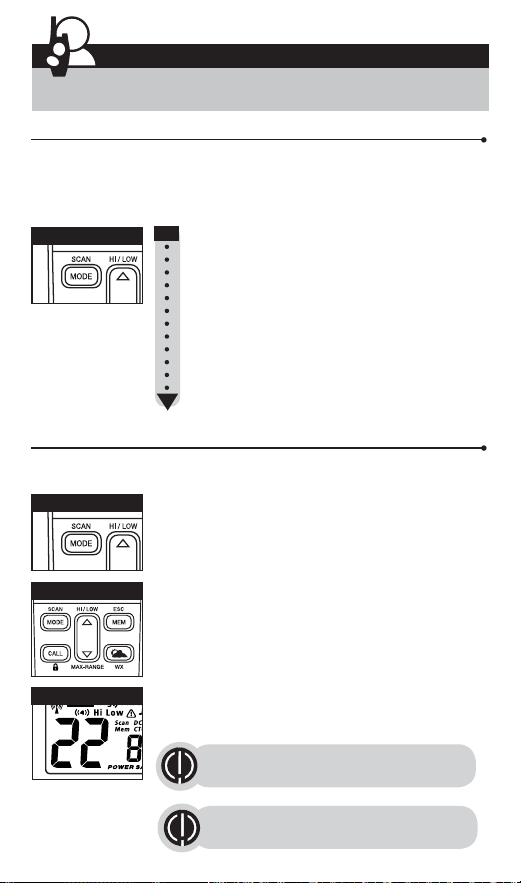
Set High / Low (H - L) Transmit Power Level
Your radio can transmit selectively at 0.5 or 2 watts of power. Use the low
power setting for short-range communications and use the high power setting
for long-range communications.
To toggle between H - L Power Modes:
1. Press and hold the HI/LOW button until Hi or Low
icon toggles.
Channel Scan
Your microTALK
®
radio can automatically scan channels.
To scan channels:
1. Press and hold the Scan button until the Scan icon
appears and the radio begins scanning channels.
The Scan icon will continue to be displayed when scan is
on. Your radio will continue to scan all channels and stop
if an incoming transmission is detected. Your radio will
remain on that channel for 8 seconds after the last
incoming transmission.
During scanning (while receiving an incoming transmission), you can
choose from the following:
a. Press and hold the Talk button to communicate on that channel. Your radio
will remain on that channel and return to Standby mode.
b. Press the Up or Down button to resume scanning channels.
c. Press and hold the Scan button to return to Standby.
Memory Scan
Your microTALK
®
radio can automatically scan memory channels.
To scan Memory channels:
1. Press and hold the Scan button while you are on
Memory Standby mode until the Scan Mem icons
show on the display.
2. Press either Up or Down to begin scanning
memory channels.
The Scan Mem will continue to be displayed when scan
is on. Your radio will continue to scan all memory
channels and stop if an incoming transmission is
detected. Your radio will remain on the channel
for 5 seconds after the last incoming transmission.
Up/Down Button
HI/LOW Button
Up/Down Button
16 17
The radio will check privacy
codes while scanning channels.
Scan Channels
Hi/Low Icon
Scan Button
Scan Button
Channel 8~14, 34~37, 53~56 only operate
on Low power setting.
During scanning (while receiving an incoming transmission), you can
choose from the following:
a. Press and hold the Talk button to communicate on that channel. Your radio
will remain on that channel and return to Memory Standby mode.
b. Press the Up or Down button to resume scanning channels.
c. Press and hold the Scan button to return to Memory Standby.
Set High / Low (H - L) Transmit Power Level
Your radio can transmit selectively at 0.5 or 2 watts of power. Use the low
power setting for short-range communications and use the high power setting
for long-range communications.
To toggle between H - L Power Modes:
1. Press and hold the HI/LOW button until Hi or Low
icon toggles.
Channel Scan
Your microTALK
®
radio can automatically scan channels.
To scan channels:
1. Press and hold the Scan button until the Scan icon
appears and the radio begins scanning channels.
The Scan icon will continue to be displayed when scan is
on. Your radio will continue to scan all channels and stop
if an incoming transmission is detected. Your radio will
remain on that channel for 8 seconds after the last
incoming transmission.
During scanning (while receiving an incoming transmission), you can
choose from the following:
a. Press and hold the Talk button to communicate on that channel. Your radio
will remain on that channel and return to Standby mode.
b. Press the Up or Down button to resume scanning channels.
c. Press and hold the Scan button to return to Standby.
Memory Scan
Your microTALK
®
radio can automatically scan memory channels.
To scan Memory channels:
1. Press and hold the Scan button while you are on
Memory Standby mode until the Scan Mem icons
show on the display.
2. Press either Up or Down to begin scanning
memory channels.
The Scan Mem will continue to be displayed when scan
is on. Your radio will continue to scan all memory
channels and stop if an incoming transmission is
detected. Your radio will remain on the channel
for 5 seconds after the last incoming transmission.
Up/Down Button
HI/LOW Button
Up/Down Button
16 17
The radio will check privacy
codes while scanning channels.
Scan Channels
Hi/Low Icon
Scan Button
Scan Button
Channel 8~14, 34~37, 53~56 only operate
on Low power setting.
Emergency Alert Mode
The Emergency Alert feature can be used to signal members in your group of
your need for urgent help. RX680 series radios will operate in an automatic
“hands-free” emergency control mode for a total of 30 seconds after activating
the Emergency Alert. RX680 series radios in your group will automatically
advance the speaker volume to the maximum setting and sound a warbling
alert tone for 8 seconds. The alert tone is emitted from your own radio speaker
and the receiving radios in your group. After the 8 seconds alert, any spoken
words or incidental sounds at your end will be transmitted to the group for 22
seconds. For the 30 seconds duration of Emergency Alert mode, RX680 series
radio controls and buttons will be locked to maximize reception of the
emergency message.
1. Press and hold the Emergency Alert button for 3
seconds.
2. Release the button after the LCD backlight flashes and
the alert tone begins to sound. There is no need to
continue to hold the Emergency Alert button or use
PTT for your message to be transmitted.
3. After the alert tone ends you may speak into the
microphone. Your voice or incidental sounds will be
transmitted. The LCD backlight will continue to flash for
the duration of the 22 seconds period.
4. After 30 seconds your radio speaker will emit a Talk
Confirmation Tone and the LCD backlight will stop
flash. Operation then returns to normal two-way mode.
NOAA* All Hazards Radio Channels
You can use your microTALK
®
radio to listen to NOAA All Hazards Radio
channels transmitting in your area.
To listen to All Hazards Radio channels:
1. Press the Weather button once until the All Hazards
Radio icon and the currently selected All Hazards
Radio channel are displayed.
2. Use the Up or Down button to change All Hazards
Radio channels.
3. The All Hazards Radio icon will continue to be
displayed when All Hazards Radio is on.
4. To exit All Hazards Radio, press and hold the
Weather button.
*National Oceanographic and Atmospheric Administration
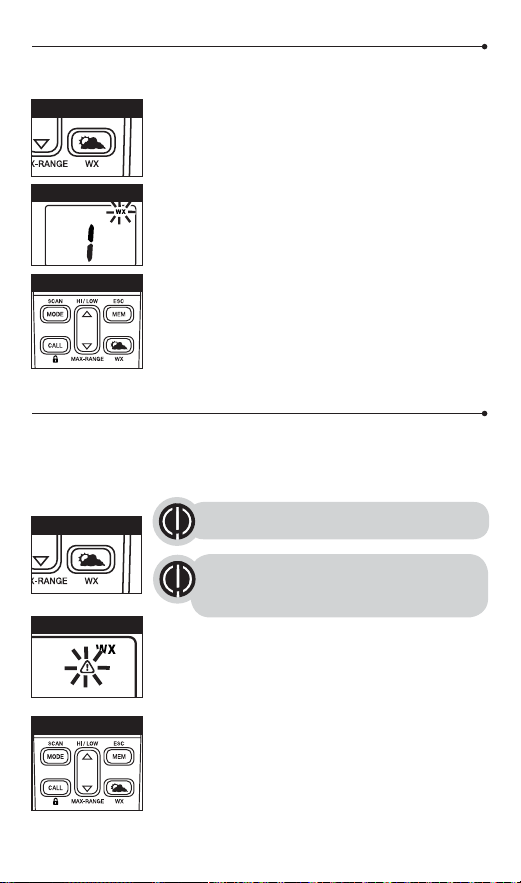
Weather (WX) Alert Mode
Turning On the Weather Alert function will allow your radio to automatically
receive NOAA weather signals and warnings from designated weather
broadcast stations. If the radio is turned ON, it will alert to Weather and other
emergency alerts broadcast by NOAA.
To turn Weather Alert On or Off:
1. Press the Weather button twice until the Weather
Alert icon flashes on the display. The current On or Off
setting is displayed.
2. Press the Up and Down button to turn Weather Alert
On or Off.
3. Press and hold the Weather button again to save the
new setting and exit the Weather Alert Mode and
return to Standby mode. The Weather Alert icon show
on the display when it turned on.
Up/Down Button
Emergency Alert Button
Up/Down Button
18 19
Hazards Radio Icon
Weather Alert Icon
LCD backlight ashes
This feature is set to OFF by default.
Weather Button
Weather Button
Make sure the strongest Weather channel is
selected for your area using the channel
selection in the previous menu.
Warning: The Emergency Alert feature should only be used in the
event of an actual emergency. Cobra is not responsible if there is
no response to the emergency alert from the receiving group.
Note: All Cobra RX680/CXY900/PX650 series radios are fully
compatible with the Emergency Alert feature if they would be tuned
to the same channel and same privacy code. Radio brands other
than Cobra RX680/CXY900/PX650 series can receive the emergency
alert signal, but may not respond with adjusted volume settings,
locked controls, or a warbling alert tone. Users of other radio models
set to the same channel and code will hear a steady tone for 8
seconds followed by the voice transmission for 22 seconds.
Emergency Alert Mode
The Emergency Alert feature can be used to signal members in your group of
your need for urgent help. RX680 series radios will operate in an automatic
“hands-free” emergency control mode for a total of 30 seconds after activating
the Emergency Alert. RX680 series radios in your group will automatically
advance the speaker volume to the maximum setting and sound a warbling
alert tone for 8 seconds. The alert tone is emitted from your own radio speaker
and the receiving radios in your group. After the 8 seconds alert, any spoken
words or incidental sounds at your end will be transmitted to the group for 22
seconds. For the 30 seconds duration of Emergency Alert mode, RX680 series
radio controls and buttons will be locked to maximize reception of the
emergency message.
1. Press and hold the Emergency Alert button for 3
seconds.
2. Release the button after the LCD backlight flashes and
the alert tone begins to sound. There is no need to
continue to hold the Emergency Alert button or use
PTT for your message to be transmitted.
3. After the alert tone ends you may speak into the
microphone. Your voice or incidental sounds will be
transmitted. The LCD backlight will continue to flash for
the duration of the 22 seconds period.
4. After 30 seconds your radio speaker will emit a Talk
Confirmation Tone and the LCD backlight will stop
flash. Operation then returns to normal two-way mode.
NOAA* All Hazards Radio Channels
You can use your microTALK
®
radio to listen to NOAA All Hazards Radio
channels transmitting in your area.
To listen to All Hazards Radio channels:
1. Press the Weather button once until the All Hazards
Radio icon and the currently selected All Hazards
Radio channel are displayed.
2. Use the Up or Down button to change All Hazards
Radio channels.
3. The All Hazards Radio icon will continue to be
displayed when All Hazards Radio is on.
4. To exit All Hazards Radio, press and hold the
Weather button.
*National Oceanographic and Atmospheric Administration
Weather (WX) Alert Mode
Turning On the Weather Alert function will allow your radio to automatically
receive NOAA weather signals and warnings from designated weather
broadcast stations. If the radio is turned ON, it will alert to Weather and other
emergency alerts broadcast by NOAA.
To turn Weather Alert On or Off:
1. Press the Weather button twice until the Weather
Alert icon flashes on the display. The current On or Off
setting is displayed.
2. Press the Up and Down button to turn Weather Alert
On or Off.
3. Press and hold the Weather button again to save the
new setting and exit the Weather Alert Mode and
return to Standby mode. The Weather Alert icon show
on the display when it turned on.
Up/Down Button
Emergency Alert Button
Up/Down Button
18 19
Hazards Radio Icon
Weather Alert Icon
LCD backlight ashes
This feature is set to OFF by default.
Weather Button
Weather Button
Make sure the strongest Weather channel is
selected for your area using the channel
selection in the previous menu.
Warning: The Emergency Alert feature should only be used in the
event of an actual emergency. Cobra is not responsible if there is
no response to the emergency alert from the receiving group.
Note: All Cobra RX680/CXY900/PX650 series radios are fully
compatible with the Emergency Alert feature if they would be tuned
to the same channel and same privacy code. Radio brands other
than Cobra RX680/CXY900/PX650 series can receive the emergency
alert signal, but may not respond with adjusted volume settings,
locked controls, or a warbling alert tone. Users of other radio models
set to the same channel and code will hear a steady tone for 8
seconds followed by the voice transmission for 22 seconds.

Operation
General Specications
20 21
Frequency Allocation and Compatibility
A = Channel No. for 60 Channel Models
B = Frequency in MHz
C = Power Output
D = Code System / Code No.
A B C D
1 462.5625 High ANY
2 462.5875 High ANY
3 462.6125 High ANY
4 462.6375 High ANY
5 462.6625 High ANY
6 462.6875 High ANY
7 462.7125 High ANY
8 467.5625 Low ANY
9 467.5875 Low ANY
10 467.6125 Low ANY
11 467.6375 Low ANY
12 467.6625 Low ANY
13 467.6875 Low ANY
14 467.7125 Low ANY
15 462.5500 High ANY
16 462.5750 High ANY
17 462.6000 High ANY
18 462.6250 High ANY
19 462.6500 High ANY
20 462.6750 High ANY
21 462.7000 High ANY
22 462.7250 High ANY
23 462.5625 High CTCSS / 38
24 462.6125 High CTCSS / 35
25 462.6625 High CTCSS / 32
26 462.7125 High CTCSS / 29
27 462.5500 High CTCSS / 26
28 462.6000 High CTCSS / 23
29 462.6500 High CTCSS / 20
30 462.7000 High CTCSS / 17
A B C D
31 462.5875 High DCS / 1
32 462.6375 High DCS / 4
33 462.6875 High DCS / 7
34 467.5625 Low DCS / 10
35 467.6125 Low DCS / 13
36 467.6625 Low DCS / 16
37 467.7125 Low DCS / 19
38 462.5750 High DCS / 22
39 462.6250 High DCS / 25
40 462.6750 High DCS / 28
41 462.7250 High DCS / 31
42 462.5625 High CTCSS / 14
43 462.6125 High CTCSS / 11
44 462.6625 High CTCSS / 8
45 462.7125 High CTCSS / 5
46 462.5500 High CTCSS / 2
47 462.6000 High CTCSS / 37
48 462.6500 High CTCSS / 34
49 462.7000 High CTCSS / 31
50 462.5875 High DCS / 2
51 462.6375 High DCS / 5
52 462.6875 High DCS / 8
53 467.5625 Low DCS / 11
54 467.6125 Low DCS / 14
55 467.6625 Low DCS / 17
56 467.7125 Low DCS / 20
57 462.5750 High DCS / 23
58 462.6250 High DCS / 26
59 462.6750 High DCS / 29
60. 462.7250 High DCS / 32
The NOAA NWR Frequency Table
Channel No. NWR Frequency
1 163.275MHz
2 162.550MHz
3 162.400MHz
4 162.475MHz
5 162.425MHz
Channel No. NWR Frequency
6 162.450MHz
7 162.500MHz
8 162.525MHz
9 161.650MHz
10 161.775MHz
IMPORTANT NOTICE:
WARNING: Changes or modifications to this unit not expressly approved by the party
responsible for compliance could void the user’s authority to operate the equipment.
This device complies with part 15 of the FCC Rules. Operation is subject to the following two
conditions: 1) This device may not cause harmful interference, and 2) this device must
accept any interference received, including interference that may cause undesired operation.
NOTE: This equipment has been tested and found to comply with the limits for a Class B
digital device, pursuant to Part 15 of the FCC Rules. These limits are designed to provide
reasonable protection against harmful interference in a residential installation. This
equipment generates, uses and can radiate radio frequency energy and, if not installed and
used in accordance with the instructions, may cause harmful interference to radio
communications.
However, there is no guarantee that interference will not occur in a particular installation. If
this equipment does cause harmful interference to radio or television reception, which can
be determined by turning the equipment off and on, the user is encouraged to try to correct
the interference by one or more of the following measures:
• Reorient or relocate the receiving antenna.
• Increase the separation between the equipment and receiver.
• Connect the equipment into an outlet on a circuit different from that to which the receiver
is connected.
• Consult the dealer or an experienced radio/TV technician for help.
Safety Information for microTALK Radios
Your wireless handheld portable transceiver contains a low power transmitter. When the talk
button is pushed, it sends out radio frequency (RF) signals. The device is authorized to operate
at a duty factor not to exceed 50%. In August 1996, the Federal Communications Commissions
(FCC) adopted RF exposure guidelines with safety levels for handheld wireless devices.
Important
FCC RF Exposure Requirements: For body-worn operation, this radio has been tested and
meets the FCC RF exposure guidelines when used with Cobra accessories supplied or
designated for this product. Use of other accessories may not ensure compliance with FCC
RF exposure guidelines. Use only the supplied antenna. Unauthorized antennas,
modifications or attachments could damage the transmitter and may violate FCC regulations.
Normal Position:
Hold the transmitter approximately two (2) inches from your face and speak in a normal
voice, with the antenna pointed up and away.
FCC Part 15.21 Warning Statement-
NOTE: THE GRANTEE IS NOT RESPONSIBLE FOR ANY CHANGES OR MODIFICATIONS NOT
EXPRESSLY APPROVED BY THE PARTY RESPONSIBLE FOR COMPLIANCE. SUCH
MODIFICATIONS COULD VOID THE USER’S AUTHORITY TO OPERATE THE EQUIPMENT.
IC RSS-GEN
This device complies with Industry Canada license-exempt RSS standard(s). Operation is
subject to the following two conditions:
(1) this device may not cause interference, and
(2) this device must accept any interference, including interference that may
cause undesired operation of the device.
Le présent appareil est conforme aux CNR d’Industrie Canada applicables aux appareils
radio excempts de licence. L;exploitation est autorisée aux deux condtions suivantes:
(1) l’appariel ne doit pas produire de brouillage, et
(2) l’utilisateur de l’appareil doit accepter tout brouillage radioélectrique subi, même si le
brouillage est susceptible d’en compromettre le fonctionnement.
Radiation Exposure Statement:
Under ISEDC regulations, this radio transmitter may only operate using the antenna that is
affixed to the radio transmitter. Use only the supplied antenna. Unauthorized antennas,
modifications, or attachments could damage the transmitter and may void the user’s authority
to operate the radio.
Any changes of modifications not expressly approved by the party responsible for compliance
could void the user’s ability to operate the equipment.
SAR tests are conducted using standard operating positions accepted by the FCC/ISEDC with
the device transmitting at its highest certified power level in all tested frequency bands.
Although the SAR is determined at the highest certified power level, the actual SAR level of
the device while operating can be well below the maximum value.
This device has been tested and certified to not exceed the exposure limit established by the
FCC/ISEDC. Tests for each device are performed in positions and locations (e.g. at the ear
and worn on the body) as required by the FCC/ISEDC.
For body worn operation, this device has been tested and meets the FCC/ISEDC RF exposure
guidelines when used with an accessory designated for this product or when used with an
accessory that contains no metal and that positions the handset a minimum of 10mm from
the body. Non-compliance with the above restrictions may result in a violation of RF
exposure guidelines.

Warranty
22 23
MODEL RX680:
This device complies with part 15 of the FCC Rules. Operation is subject to the
following two conditions: 1) This device may not cause harmful interference,
and 2) this device must accept any interference received,including interference
that may cause undesired operation.
FCC Warnings: Replacement or substitution of transistors, regular diodes or
other parts of a unique nature, with parts other than those recommended by
Cobra may cause a violation of the technical regulations of part 95 of the FCC
rules, or violation of type acceptance requirements of part 2 of the rules.
IMPORTANT NOTICE:
WARNING: Changes or modifications to this unit not expressly approved by the party
responsible for compliance could void the user’s authority to operate the equipment.
This device complies with part 15 of the FCC Rules. Operation is subject to the following two
conditions: 1) This device may not cause harmful interference, and 2) this device must
accept any interference received, including interference that may cause undesired operation.
NOTE: This equipment has been tested and found to comply with the limits for a Class B
digital device, pursuant to Part 15 of the FCC Rules. These limits are designed to provide
reasonable protection against harmful interference in a residential installation. This
equipment generates, uses and can radiate radio frequency energy and, if not installed and
used in accordance with the instructions, may cause harmful interference to radio
communications.
However, there is no guarantee that interference will not occur in a particular installation. If
this equipment does cause harmful interference to radio or television reception, which can
be determined by turning the equipment off and on, the user is encouraged to try to correct
the interference by one or more of the following measures:
• Reorient or relocate the receiving antenna.
• Increase the separation between the equipment and receiver.
• Connect the equipment into an outlet on a circuit different from that to which the receiver
is connected.
• Consult the dealer or an experienced radio/TV technician for help.
Safety Information for microTALK Radios
Your wireless handheld portable transceiver contains a low power transmitter. When the talk
button is pushed, it sends out radio frequency (RF) signals. The device is authorized to operate
at a duty factor not to exceed 50%. In August 1996, the Federal Communications Commissions
(FCC) adopted RF exposure guidelines with safety levels for handheld wireless devices.
Important
FCC RF Exposure Requirements: For body-worn operation, this radio has been tested and
meets the FCC RF exposure guidelines when used with Cobra accessories supplied or
designated for this product. Use of other accessories may not ensure compliance with FCC
RF exposure guidelines. Use only the supplied antenna. Unauthorized antennas,
modifications or attachments could damage the transmitter and may violate FCC regulations.
Normal Position:
Hold the transmitter approximately two (2) inches from your face and speak in a normal
voice, with the antenna pointed up and away.
FCC Part 15.21 Warning Statement-
NOTE: THE GRANTEE IS NOT RESPONSIBLE FOR ANY CHANGES OR MODIFICATIONS NOT
EXPRESSLY APPROVED BY THE PARTY RESPONSIBLE FOR COMPLIANCE. SUCH
MODIFICATIONS COULD VOID THE USER’S AUTHORITY TO OPERATE THE EQUIPMENT.
IC RSS-GEN
This device complies with Industry Canada license-exempt RSS standard(s). Operation is
subject to the following two conditions:
(1) this device may not cause interference, and
(2) this device must accept any interference, including interference that may
cause undesired operation of the device.
Le présent appareil est conforme aux CNR d’Industrie Canada applicables aux appareils
radio excempts de licence. L;exploitation est autorisée aux deux condtions suivantes:
(1) l’appariel ne doit pas produire de brouillage, et
(2) l’utilisateur de l’appareil doit accepter tout brouillage radioélectrique subi, même si le
brouillage est susceptible d’en compromettre le fonctionnement.
Radiation Exposure Statement:
Under ISEDC regulations, this radio transmitter may only operate using the antenna that is
affixed to the radio transmitter. Use only the supplied antenna. Unauthorized antennas,
modifications, or attachments could damage the transmitter and may void the user’s authority
to operate the radio.
Any changes of modifications not expressly approved by the party responsible for compliance
could void the user’s ability to operate the equipment.
SAR tests are conducted using standard operating positions accepted by the FCC/ISEDC with
the device transmitting at its highest certified power level in all tested frequency bands.
Although the SAR is determined at the highest certified power level, the actual SAR level of
the device while operating can be well below the maximum value.
This device has been tested and certified to not exceed the exposure limit established by the
FCC/ISEDC. Tests for each device are performed in positions and locations (e.g. at the ear
and worn on the body) as required by the FCC/ISEDC.
For body worn operation, this device has been tested and meets the FCC/ISEDC RF exposure
guidelines when used with an accessory designated for this product or when used with an
accessory that contains no metal and that positions the handset a minimum of 10mm from
the body. Non-compliance with the above restrictions may result in a violation of RF
exposure guidelines.
Limited One-Year Warranty
Cobra warrants your product against all defects in materials and workmanship for a period
of one (1) year from the date of original purchase.
Cobra, at our sole discretion, will repair or replace your product (with the same or
comparable product) free of charge.
Cobra will not pay shipping charges that you incur for sending your product to us. Products
received COD will be refused.
To make a warranty claim, we will require proof or purchase in the form of an invoice or
receipt. No proof of purchase is required for factory direct purchases.
Warranty Exclusions: Warranty does not apply to your product under any of the following
conditions: 1. The serial number has been removed or modified. 2. Your product has been
subjected to misuse or damage (including water damage, physical abuse, and/or improper
installation). 3. Your product has been modified in any way. 4. Your receipt or
proof-of-purchase is from a non-authorized dealer or internet auction site including E-bay,
U-bid, or other non-authorized resellers.
LIMITATION OF WARRANTY: EXCEPT AS EXPRESSLY PROVIDED HEREIN, YOU ARE ACQUIRING
THE PRODUCT “AS IS” AND “WHERE IS”, WITHOUT REPRESENTATION OR WARRANTY.
COBRA SPECIFICALLY DISCLAIMS ANY REPRESENTATION OR WARRANTY INCLUDING, BUT
NOT LIMITED TO THOSE CONCERNING THE MERCHANTABILITY AND SUITABILITY OF THE
PRODUCT FOR A PARTICULAR PURPOSE. COBRA SHALL NOT BE LIABLE FOR
CONSEQUENTIAL, SPECIAL OR INCIDENTAL DAMAGES INCLUDING, WITHOUT LIMITATION,
DAMAGES ARISING OUT OF THE USE, MISUSE OR MOUNTING OF THE PRODUCT.
The above limitations or exclusions shall be limited to the extent they violate the laws of any
particular state. Cobra is not responsible for products lost in shipment between the owner
and our service center.
General Warranty Information
Each product we manufacture is covered by our factory warranty. While each product may have
unique components and policy, the general guideline below will apply to most Cobra products.
All Cobra products purchased factory-direct or from our Authorized Resellers will come with
a full one to three (1-3) year warranty from the date of the original retail purchase (see
policy statement above for full warranty details and exclusions).
Standard accessories packaged with each model will have a one-year factory warranty.
Accessory items have a one-year factory warranty.
Shipping to our facility is not covered in our warranty. Return shipping is included within the US.
This warranty is non-transferrable.
For the sake of clarity, ‘repair or replace the Product or its defective part’ does not include
removal or installation work, costs or expenses which include but are not limited to labor
costs or expenses.
Cobra will not be responsible for lost packages.
For Products Purchased Outside the U.S.A.
Please contact your authorized local reseller or agent for warranty information.
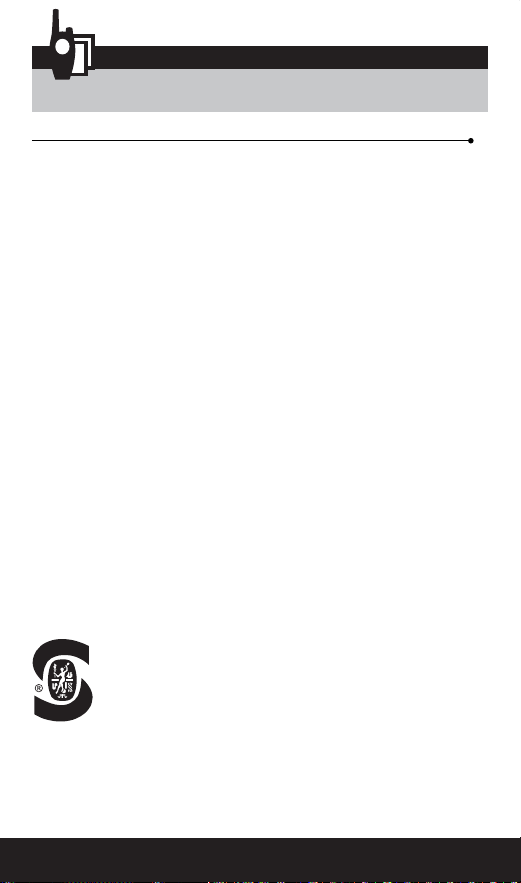
Owner’s Manual
Printed in China
Part No. 814-RX6801-101
English
TWO-WAY
RADIO MODEL
RX680
Nothing Comes Close to a Cobra
®
Nothing Comes Close to a Cobra
®
CS28710
Energy Efciency
Veried
Trademark Acknowledgment
©2022 Cobra Electronics Corporation. Cobra and the snake design are proprietary
trademarks of Cobra Electronics Corporation, USA. Other trademarks and trade names
are those of their respective owners.
Cobra Electronics Corporation™ is a trademark of Cobra Electronics Corporation, USA.
Trademark Acknowledgment