Loading ...
Loading ...
Loading ...
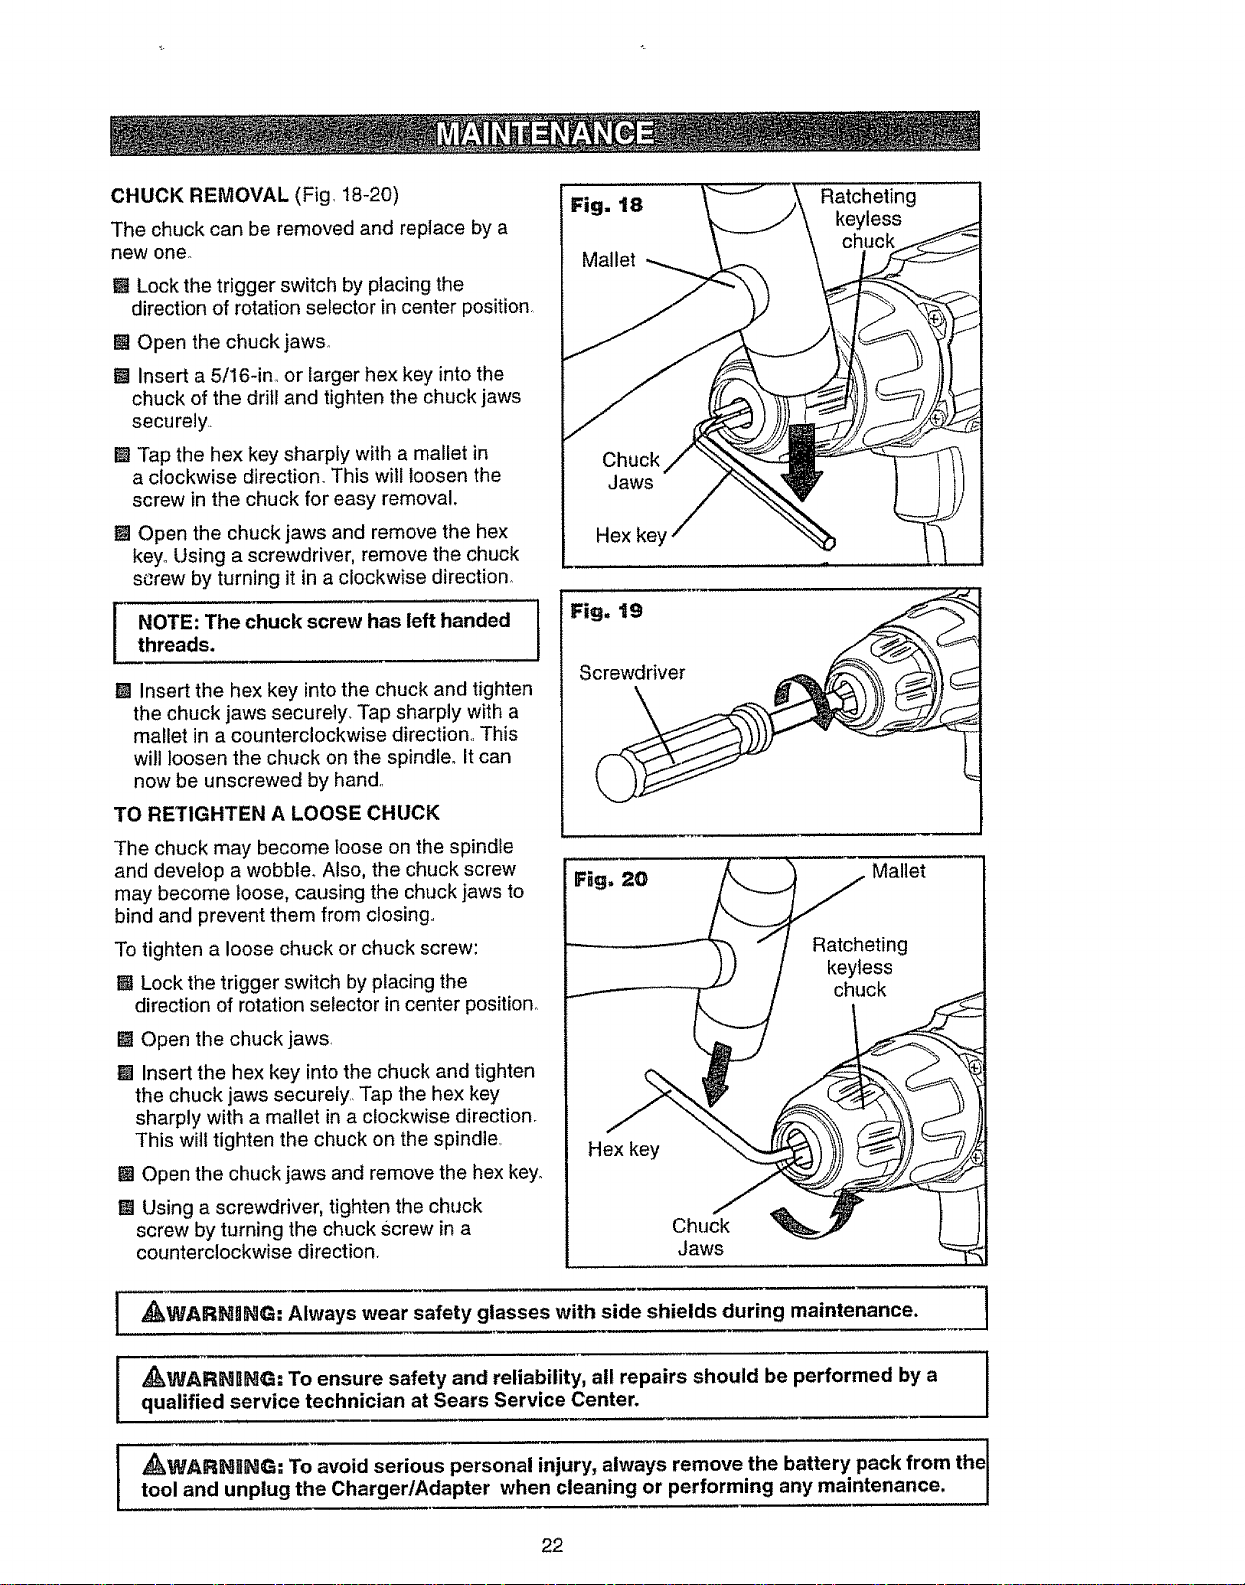
CHUCKREMOVAL(Fig,18-20)
Thechuckcanberemovedandreplacebya
newone.
E Lockthetriggerswitchbyplacingthe
directionofrotationselectorincenterposition,
[] Openthechuckjaws,.
M Inserta5/16-in,orlargerhexkeyintothe
chuckofthedrillandtightenthechuckjaws
securely.
[] Tapthehexkeysharpfywithamalletin
aclockwisedirection.Thiswillloosenthe
screwinthechuckforeasyremoval,
[] Openthechuckjawsandremovethehex
key°Usingascrewdriver,removethechuck
screwbyturningitinaclockwisedirection,.
NOTE:The chuck screw has left handed |
1
threads.
J
[] Insert the hex key intothe chuck and tighten
the chuck jaws securely. Tap sharply with a
mallet in a counterclockwise direction., This
will loosen the chuck on the spindle. It can
now be unscrewed by hand.,
TO RETIGHTEN A LOOSE CHUCK
The chuck may become loose on the spindle
and develop a wobbler Also, the chuck screw
may become loose, causing the chuck jaws to
bind and prevent them from closing,,
To tighten a loose chuck or chuck screw:
El Lock the trigger switch by placing the
direction of rotation selector in center position.
[] Open the chuck jaws,
[] Insert the hex key into the chuck and tighten
the chuck jaws securely,, Tap the hex key
sharply with a mallet in a clockwise direction.
This will tighten the chuck on the spindle,
[] Open the chuck jaws and remove the hex key.
[] Using a screwdriver, tighten the chuck
screw by turning the chuck Screw in a
counterclockwise direction_
Fig. 18
Mallet
Chuck
Jaws
Hex key
Screwdriver
Hex key
Chuck
Jaws
Ratcheting
keyless
chuck
Mallet
Ratcheting
keyless
chuck
_WARNgNG: Always wear safety glasses with side shields during maintenance.
_WARI_J_NG: To ensure safety and reliability, all repairs should be performed by a l
qualified service technician at Sears Service Center.
l
22
Loading ...
Loading ...
Loading ...