Loading ...
Loading ...
Loading ...
MAINTENANCE
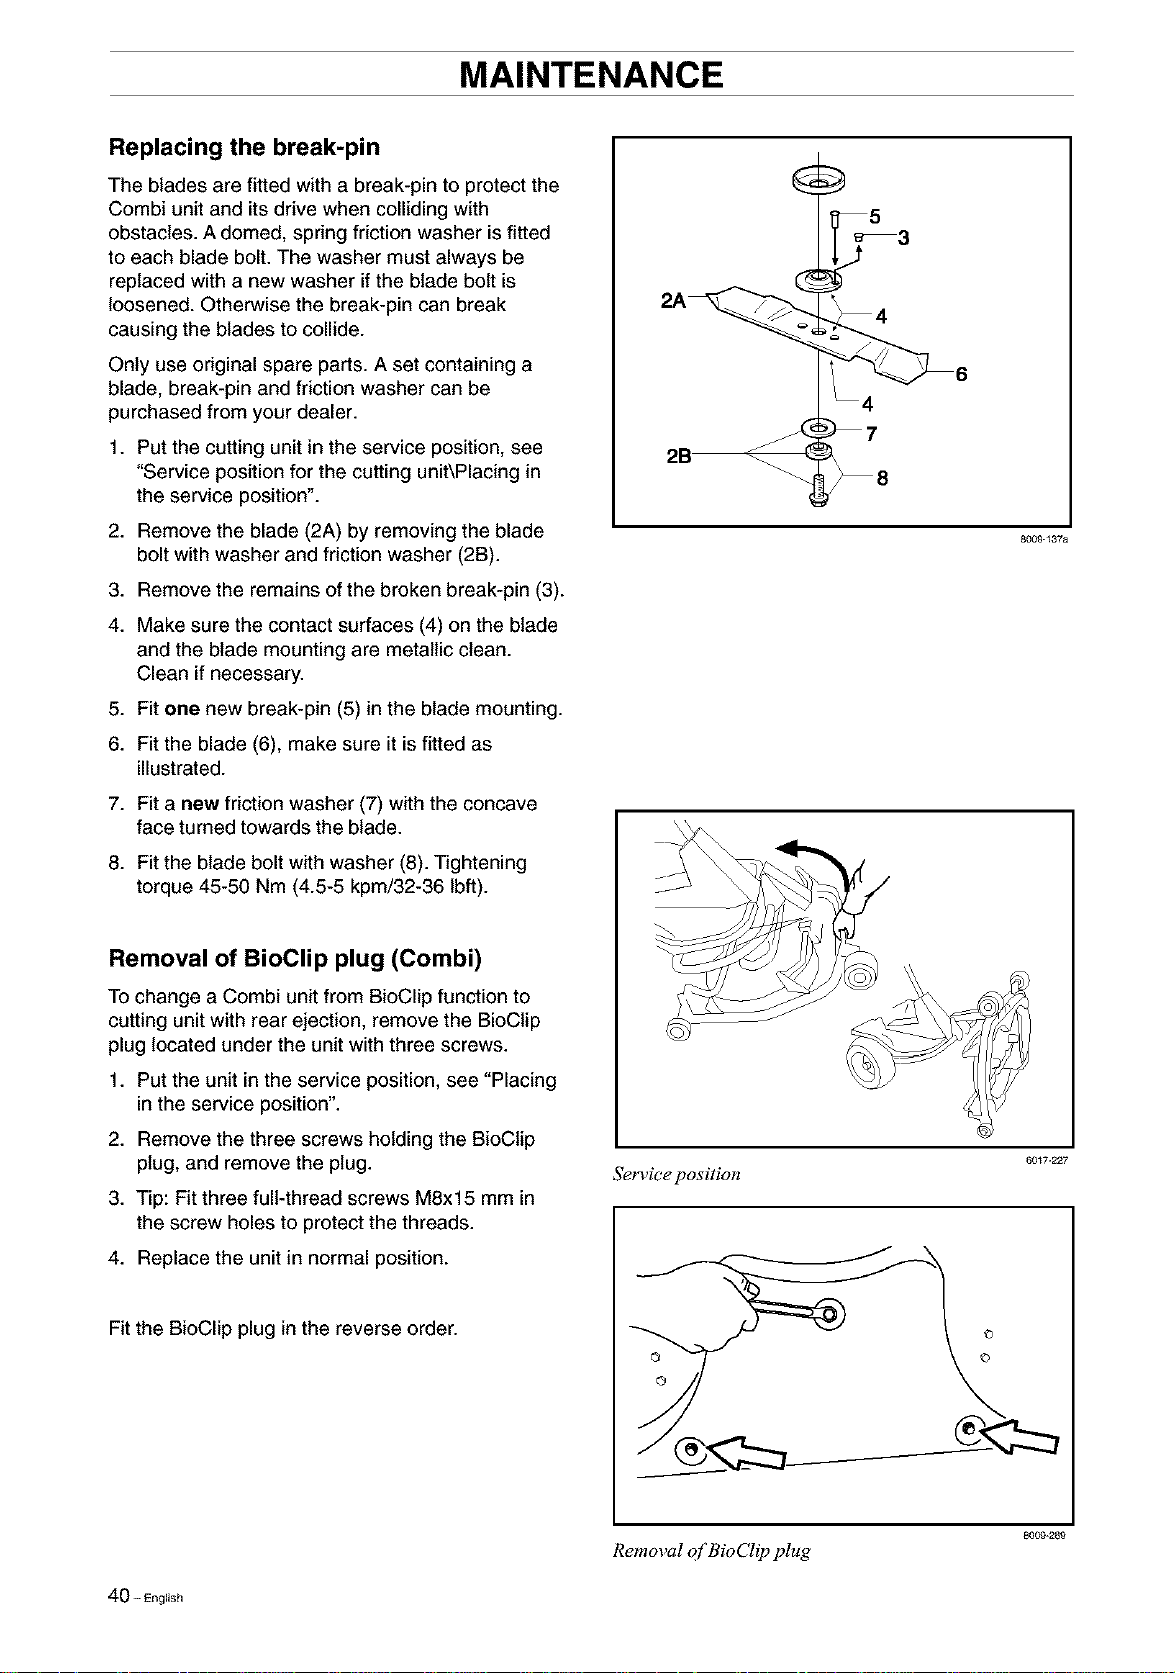
Replacing the break-pin
The blades are fitted with a break-pin to protect the
Combi unit and its drive when colliding with
obstacles. A domed, spring friction washer is fitted
to each blade bolt. The washer must always be
replaced with a new washer if the blade bolt is
loosened. Otherwise the break-pin can break
causing the blades to collide.
Only use original spare parts. A set containing a
blade, break-pin and friction washer can be
purchased from your dealer.
1. Put the cutting unit in the service position, see
"Service position for the cutting unit\Placing in
the service position".
2. Remove the blade (2A) by removing the blade
bolt with washer and friction washer (2B).
3. Remove the remains of the broken break-pin (3).
4. Make sure the contact surfaces (4) on the blade
and the blade mounting are metallic clean.
Clean if necessary.
5. Fit one new break-pin (5) in the blade mounting.
6. Fit the blade (6), make sure it is fitted as
illustrated.
7. Fit a new friction washer (7) with the concave
face turned towards the blade.
8. Fit the blade bolt with washer (8). Tightening
torque 45-50 Nm (4.5-5 kpm/32-36 lbft).
5
8009.137a
Removal of BioClip plug (Combi)
To change a Combi unit from BioClip function to
cutting unit with rear ejection, remove the BioClip
plug located under the unit with three screws.
1. Put the unit in the service position, see "Placing
in the service position".
2. Remove the three screws holding the BioClip
plug, and remove the plug.
3. Tip: Fit three full-thread screws M8x15 mm in
the screw holes to protect the threads.
4. Replace the unit in normal position.
Fit the BioClip plug in the reverse order.
6017-227
Service position
©
Removal qf BioClip plug
8009-289
40= English
Loading ...
Loading ...
Loading ...