Loading ...
Loading ...
Loading ...
ChuteDirectional Control
1.
Remove the plastic cap (if present), flat washer and hairpin
clip from the end of the chute directional control. See Fig.
3-4.
J
Figure 3-4
2. Insert the end of the chute directional control into the
lower bracket and secure with the flat washer and hairpin
clip just removed. If necessary, the lower bracket can be
adjusted. Refer to Chute Bracket Adjustment on Page 16.
Set-Up
ShearPins
A pair of replacement auger shear pins and bow tie cotter pins
are included with your snow thrower. See Fig. 3-5 Store them in a
safe place until needed.
Figure 3-5
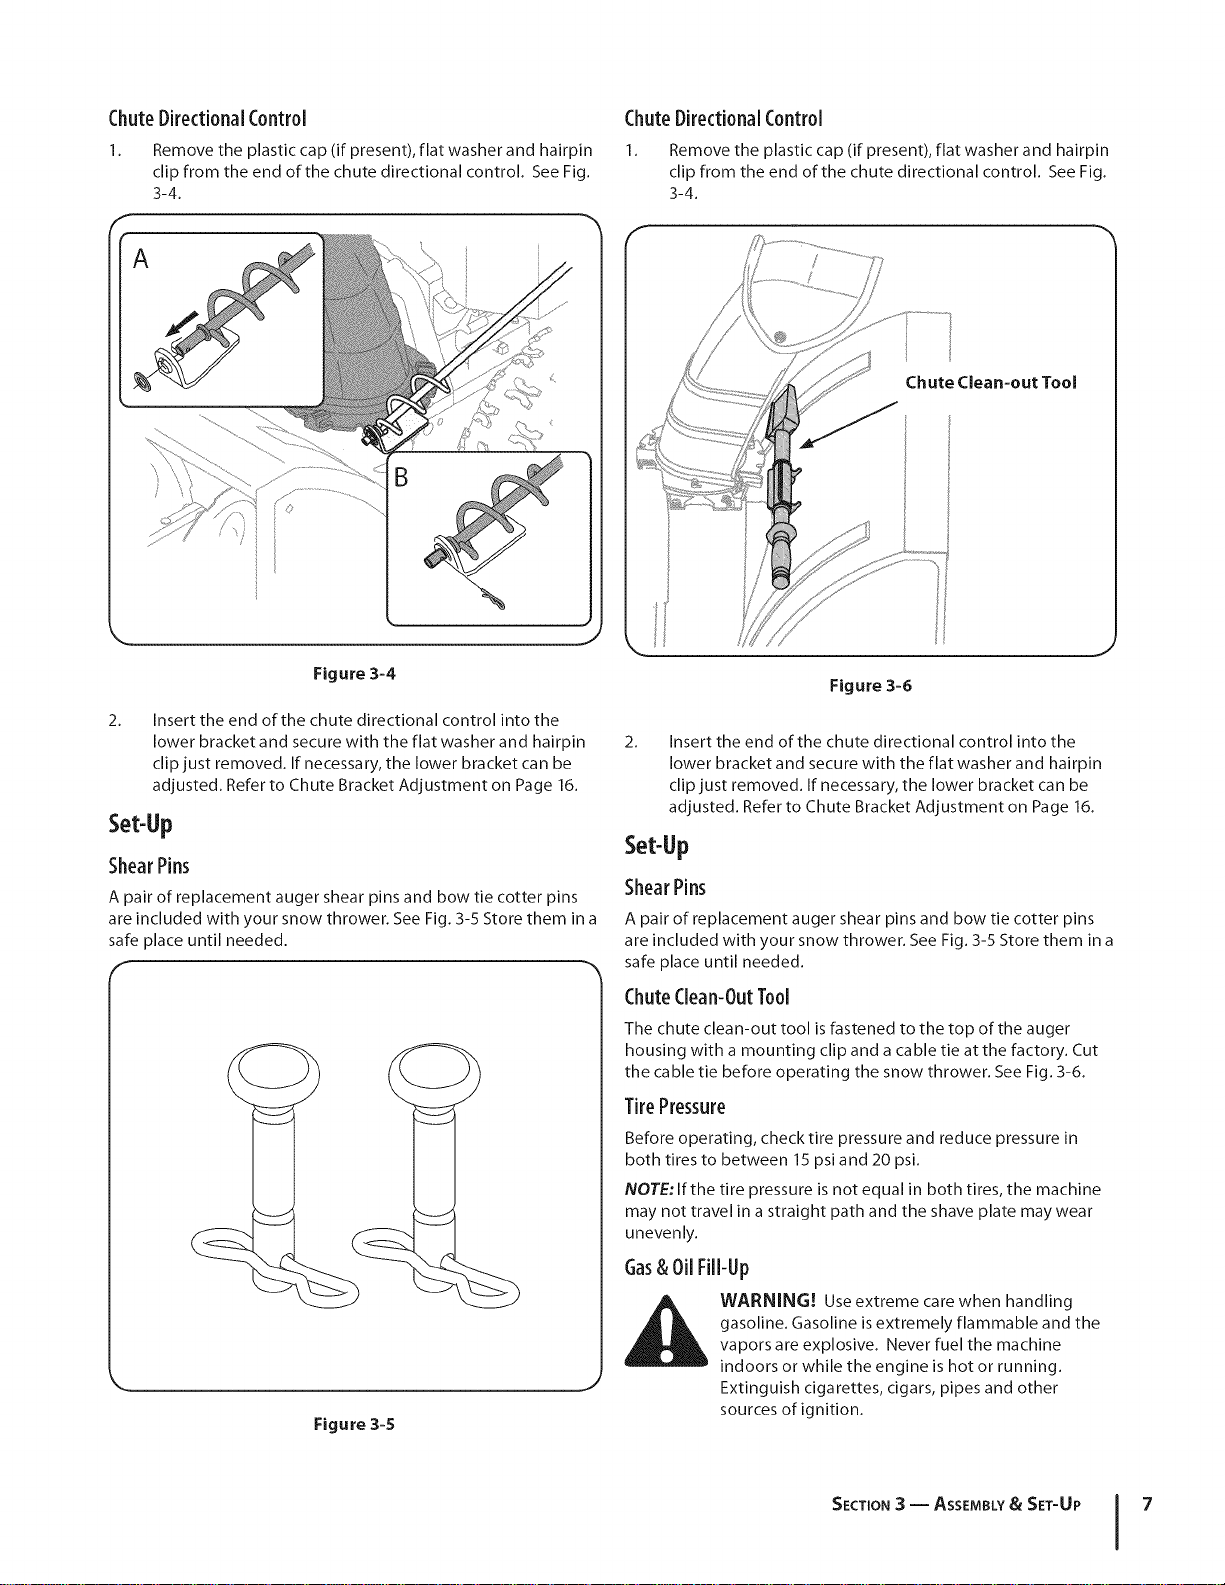
ChuteDirectionalControl
Remove the plastic cap (if present), flat washer and hairpin
clip from the end of the chute directional control. See Fig.
3-4.
Figure 3-6
2. Insert the end of the chute directional control into the
lower bracket and secure with the flat washer and hairpin
clip just removed. If necessary, the lower bracket can be
adjusted. Refer to Chute Bracket Adjustment on Page 16.
Set-Up
ShearPins
A pair of replacement auger shear pins and bow tie cotter pins
are included with your snow thrower. See Fig. 3-5 Store them in a
safe place until needed.
ChuteClean-OutT001
The chute clea n-out tool is fastened to the top of the auger
housing with a mounting clip and a cable tie at the factory. Cut
the cable tie before operating the snow thrower. See Fig. 3-6.
TirePressure
Before operating, check tire pressure and reduce pressure in
both tires to between 15 psi and 20 psi.
NOTE: If the tire pressure is not equal in both tires, the machine
may not travel in a straight path and the shave plate may wear
unevenly.
Gas& OilFill-Up
WARNING! Use extreme care when handling
gasoline. Gasoline is extremely flammable and the
vapors are explosive. Never fuel the machine
indoors or while the engine is hot or running.
Extinguish cigarettes, cigars, pipes and other
sources of ignition.
SECTION3 -- ASSEMBLY& SET-UP 7
Loading ...
Loading ...
Loading ...