Loading ...
Loading ...
Loading ...
BGA1601
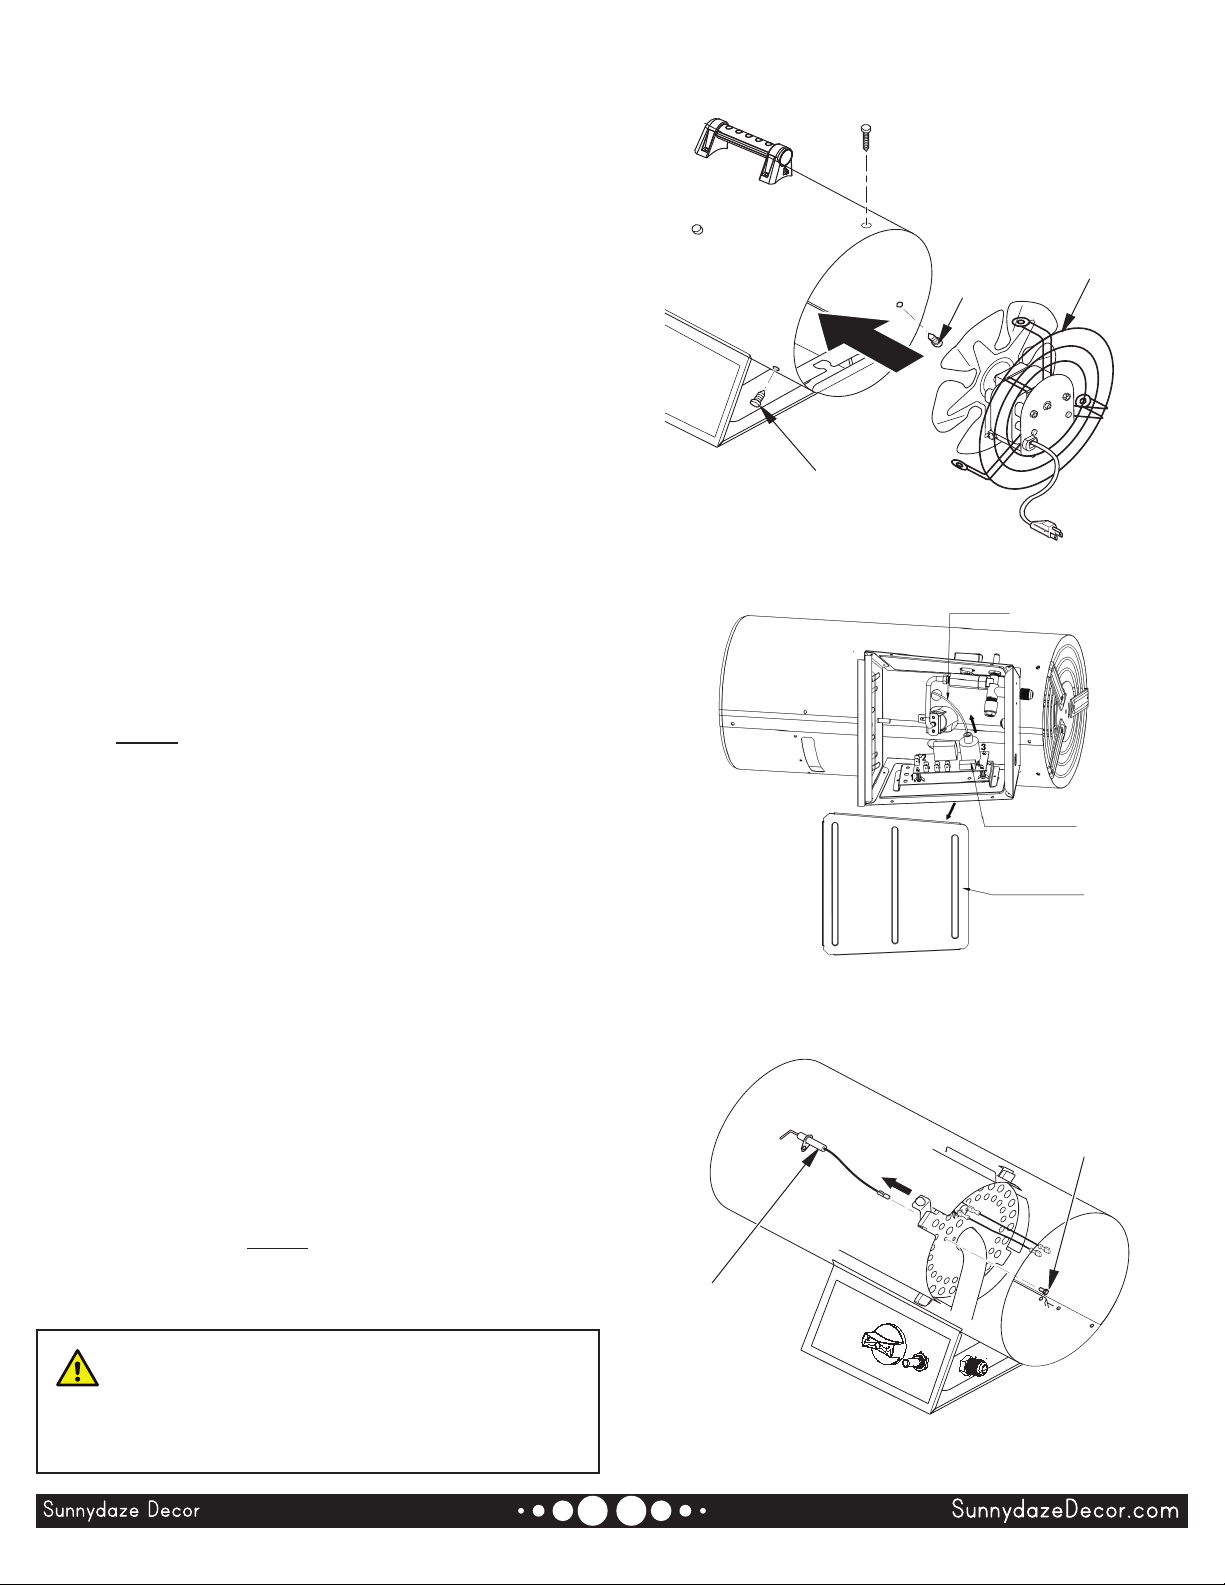
FAN
1. Remove the motor, the motor mount and fan (see
Motor, steps 1 through 8, page 8).
2. Clean the fan using a soft cloth moistened with
kerosene or solvent.
3. Dry the fan thoroughly.
4. Replace the fan onto the new motor shaft. Make
sure the set screw contacts the at surface on
the motor shaft (see Figure 6, page 8). Tighten
set screw rmly (40-50 inch-pounds [46.08-57.60
kilogram-centimeters]).
5. Place the motor and the fan guard into the rear
of the heater shell. Make sure the power cord is
properly located (see Figure 7).
6. Insert three screws through the heater shell and
into fan guard (see Figure 7). Tighten screws rmly.
SERVICE PROCEDURES
Continued
IGNITER
1. Remove the motor and fan the guard from heater
(see Motor, page 8, steps 1 through 6).
2. Remove the black igniter wire from Piezo igniter.
Access the igniter wire through the underside of
the heater base (see Figure 8). Push the wire up
through the notch in the ller panel.
3. Use a nut-driver or standard screwdriver to remove
the igniter mounting screw from the rear head (see
Figure 8).
4. Install the new igniter by attaching it to the rear
head with the igniter mounting screw.
5. Run the igniter wire from new igniter through notch
in the ller panel. Attach the igniter wire to the Piezo
igniter.
6. Set gap between igniter electrode and target plate
to 0.17" (43.18 cm) (see Figure 9).
7. Place the motor and fan guard into the rear of the
heater shell (see Motor, page 8, steps 11, 12, 13).
Page 9 / 13
Motor and
Fan Guard
Screw
Screw
Figure 7 - Replacing Motor
and Fan Guard into Heater
from Igniter
Igniter Wire
Auto Igniter
Bottom Plate
Figure 8 - Removing Igniter Wire
Figure 9 - Removing Igniter Mounting
Screw and Igniter
Igniter
Mounting
Screw
CAUTION:
while servicing the heater is not covered
1/2021
Loading ...
Loading ...
Loading ...