Loading ...
Loading ...
Loading ...
15
ArtNo.320-0008 Removing the oven lining
Ovens
Cleaning is easier if carried out while the oven is still warm.
Before cleaning, cover the burner to prevent the burner holes
becoming blocked.
The inside of the oven and inner door panel can be cleaned
using an approved cleaner (Table 5-1).
Take care not to disturb the oven thermostat temperature
sensor at the top of the oven opening (Fig.5-7).
The enamelled oven burner trim (Fig.5-8) can be removed for
cleaning.
The oven burner trim hooks onto the front of the oven burner
bracket. When retting make sure that the trim is in the
middle of the front of the oven burner bracket (Fig.5-9).
‘Cook & Clean’ Panels
The ovens have panels which have been coated with a special
enamel that partly cleans itself. This does not stop all marks
on the lining, but helps to reduce the amount of manual
cleaning needed.
The ‘Cook & Clean’ panels work better above 200 °C. If you do
most of your cooking below this temperature, occasionally
remove the panels and wipe with a lint free cloth and hot
soapy water. The panels should then be dried and replaced
and the oven heated at 200 °C for about one hour. This
will make sure that the ‘Cook & Clean’ panels are working
eectively.
DO NOT use steel wool, oven cleaning pads, or any other
materials that will scratch the surface.
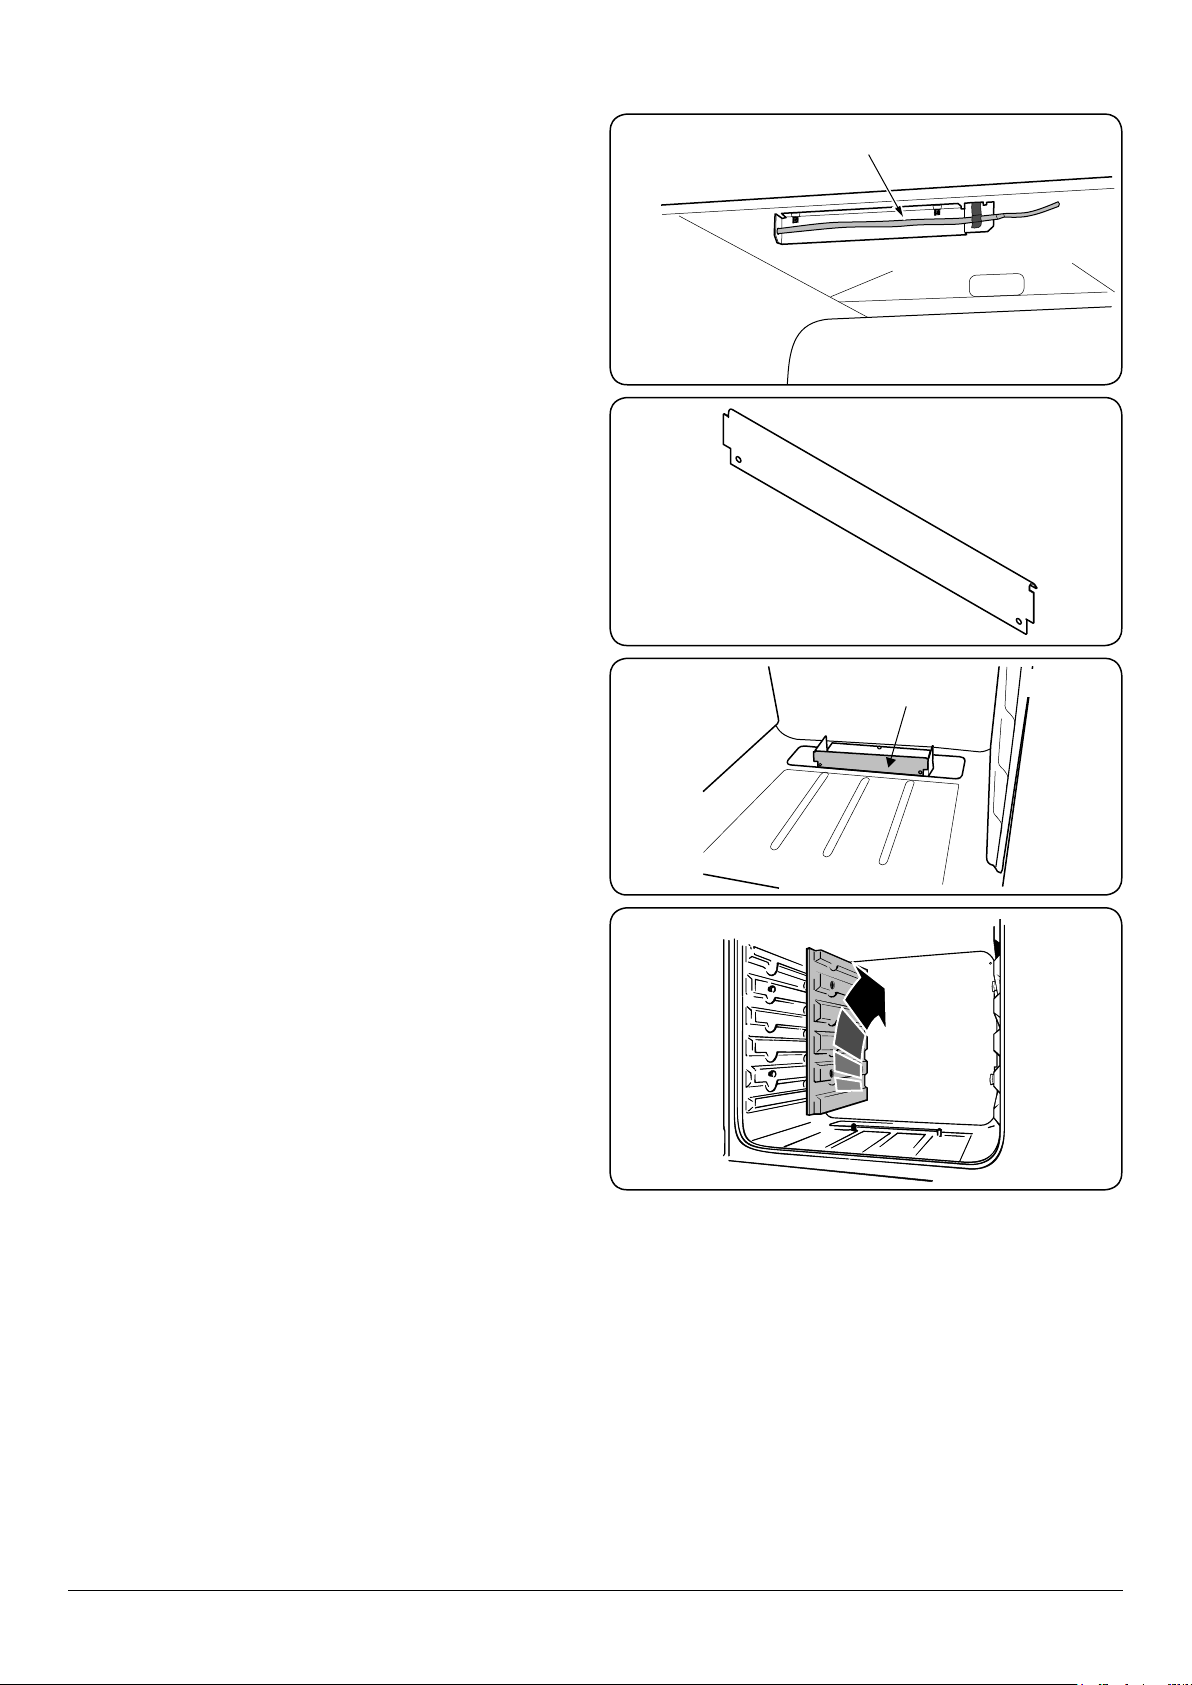
Removing the Main Oven Linings
Some of the lining panels can be removed for cleaning. You
will need to remove the shelves before removing the panels.
Each side of the oven is xed with 4 xing screws. You do not
have to remove the screws to remove the oven linings. Simply
lift each side panel upwards and they will slide o the screws
(Fig.5-10). Then pull them forwards.
Once the linings are removed, the oven enamel interior can
be cleaned.
Fig.5-10
Thermostat temperature sensor
ArtNo.323-0009 - Bray burner shield fitted
Oven burner trim
ArtNo.323-00011 - Bray burner front shield
Fig.5-7
Fig.5-8
Fig.5-9
Loading ...
Loading ...
Loading ...