
1
Owner’s Manual & Complete Recipe Book
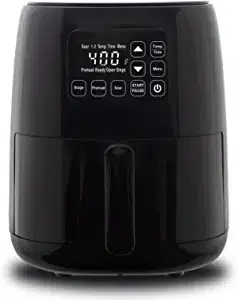
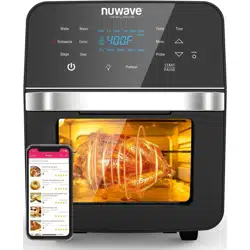
NuWave Brio
™
Digital Air Fryer

2
TABLE OF CONTENTS
Important Safeguards ............................3-4
Save These Instructions ............................4
Parts Description ....................................... 5
Operating Instructions ...........................6-9
Care & Maintenance .................................. 9
Care & Use For Accessories ................... 10
Guide ........................................................ 11
Troubleshooting Guide ........................... 12
Warranty ................................................... 13
Recipes
Baked Potato ........................................... 15
Roasted Brussel Sprouts ......................... 16
Home Fries .............................................. 17
Air Baked Eggs ........................................ 18
Air Fried Tortilla Chips ............................. 19
Sliders .....................................................20
Buffalo Style Wings Chicken .................... 21
Chicken Kiev ............................................22
Chicken Satay ......................................... 23
Grilled Chicken Tenders .......................... 24
Parmesan Chicken Tenders .....................25
Roasted Cornish Game Hen w/Honey
Mustard Glaze ......................................... 26
Cajun Shrimp ........................................... 27
Chimichurri Skirt Steak ............................ 28
Grilled Ham and Cheese ......................... 29
Tortilla Crusted Tilapia ............................. 30
Tuna Sliders ............................................. 31
Turkey Sliders .......................................... 32
Pork Loin Sandwiches ............................. 33
Citrus Green Beans ................................. 34
Crispy Tofu ............................................... 35
Air Fryer Curry Calamari ......................... 36
Party Meatballs ....................................... 37
Kale Chips ............................................... 38
Roasted Tomatoes ...................................39
Roasted Root Vegetables
........................ 40
Apple Pie ................................................. 41
Banana and Nutella Wontons
.................. 42
Pineapple Crescents ...............................43
Crescents Rolls ....................................... 44
Spanish Manual ....................................... 45
Table of Contents

3
Important Safeguards
IMPORTANT SAFEGUARDS
When using electrical units, basic safety precautions should always be followed
including the following:
1. Do not touch hot surfaces.
2. To protect against electrical shock, do not immerse cord, plugs, or the unit in water or other liquid.
3. Close supervision is necessary when any unit is used by or near children.
4. Unplug from outlet when not in use and before cleaning. Allow to cool before putting on
or taking off parts.
5. The use of other accessories that are not intended to be use with this unit is not
recommended. Doing so may damage the unit and can cause accidents.
6. NOT INTENDED FOR OUTDOOR USE.
7. Do not let cord hang over edge of table or counter, or touch hot surface.
8. Do not place on or near a hot gas, electric burner and or in a heated oven.
9. Extreme caution must be used when moving unit containing hot oil or other hot liquids.
10. To disconnect, turn any control “OFF”, then remove plug from the wall outlet.
11. Never put the appliance against the wall or other appliances. There should be at least 3
inches of free space for the back side. Left/right sides and the upper side of the appliance.
Do not place anything on top of appliance.
12. During air frying, hot steam is released from the air outlet opening. Keep your hands and
face distance from the steam and from the air outlet opening. Also, be careful of hot steam
and air when you remove the frying pan from the appliance.
13. Make sure the ingredients prepared in this appliance come out golden yellow instead of
dark or brown. Remove burnt remnants.
Accessories:
The Grill Pan, Baking Pot and Reversible Rack become extremely HOT during the cooking process.
Do not touch the accessories during and immediately after cooking. Only hold the grill pan by the
handle and use caution when removing these items from the unit. Always wear oven mitts or use pot
holders when handling potentially hot accessories. Allow everything to cool completely before cleaning.
1. Do not use the Grill Pan, Baking Pot or Reversible Rack in a microwave, toaster oven,
convection oven, conventional oven, ceramic cooktop, electric coil, gas burner range
or an outdoor grill.
2. Do not use sharp edged metal utensils or knives as doing so will scratch the
non-stick surface.
3. Do not ll the Base Tray, Basket or Grill Pan with oil or any other liquid.
DO NOT USE THE UNIT FOR OTHER THAN INTENDED USE.
Note: Put the appliance on a surface that is horizontal, even and stable. This appliance is
intended normal household use. It is not intended to be used in environments such as staff
kitchen of shops, offices, farms or other work environments. Nor is it intended to be used by
clients in hotels, motels, bed and breakfast and other residential environments.
READ ALL INSTRUCTIONS
WARNING
Please immediately cut off circuit and send unit to our Customer
Service Department in case of other problems.
1-877-689-2838 • Monday - Friday from 7:00 AM to 7:00 PM
Central Standard Time.

4
SAVE THESE INSTRUCTIONS
1. Do not place the unit close to ammable materials heating units or wet environments.
2. Height of ingredients placed in the Base Tray should comply with the directions listed under
“Operation Instructions”.
3. Do not replace with other parts that are not designed specically for the NuWave Brio
Digital Air Fryer.
4. Do not put any other cooking pans in the Fry Pan Basket. Do not replace any parts
with other containers.
5. If a lot of smoke is escaping from the air vent during operation, unplug the unit
immediately and contact customer service.*
6. Do not move the unit while in operation. Only after the NuWave Brio Digital Air Fryer
has completely cooled down should you attempt to move it. Always wait for the
NuWave Brio Digital Air Fryer to cool down prior to handling it.
7. Never use a towel to block the vent.
8. If any troubles arise during operation, any necessary service must be done
by NuWave, LLC or authorized by the manufacturer for repairs.
9. Do not disassemble the unit on your own or replace any parts.
10. Do not use metal utensils with the coated Fry Pan Basket as this can damage
the surface.
11. If the power cord is damaged, do not attempt to operate the unit.*
12. Keep the unit out of reach of children when the unit is operating or cooling down.
13. Keep hands and face away from the venting outlet or where heat or steam is
being released.
14. Make sure NuWave Brio Digital Air Fryer is always clean prior to cooking.
15. It is normal for some smoke to escape the unit when heating for the rst time.
*Customer Service Department at 1-877-689-2838 Monday - Friday 7:00 AM - 7:00 PM (CST)
Important Safeguards
Save These Instructions
IMPORTANT SAFEGUARDS (Continued)
CAUTION
• Always put the ingredients to be fried in the Fry Pan Basket to prevent
direct contact with the heating components.
• Do not cover the air inlet and outlet opening while the appliance
is operating.
• Do not pour oil into the Base Tray, this may create a re hazard.
• Never touch the inside of the appliance while it is operating.
5
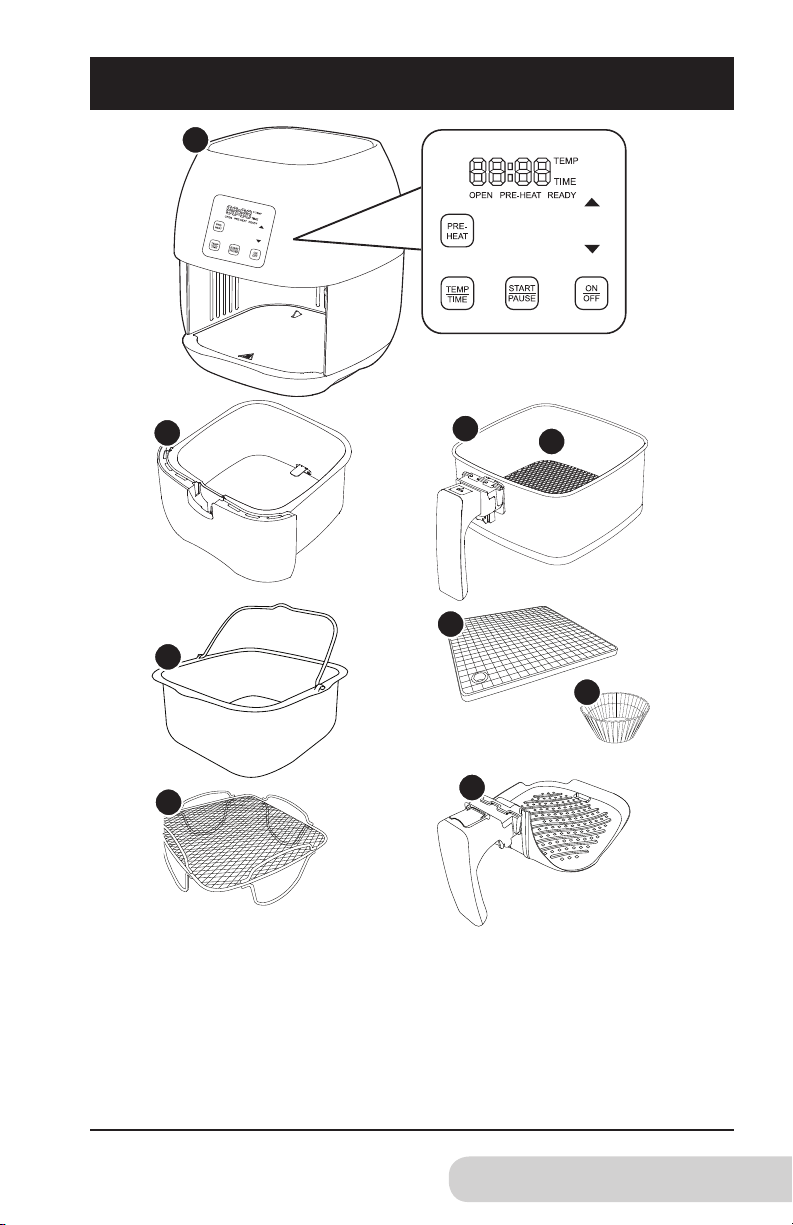
PARTS DESCRIPTION
1
2
3
Parts Description
1.
Air Fryer
Part #: 36001
5.
Baking Pot*
Part #: 36207
9.
Grill Pan*
Part #: 36205
2.
Base Tray
Part #: 36201
6.
Silicone Mat*
Part #: 36208
Carrying Case*
Part #: 36203
3.
Fry Pan Basket
Part #: 36202
7.
Silicone Cup Cake Liners*
Part #: 36209 (10 Pack)
4.
Fry Pan Basket Net
Part #: 36204
8.
Reversible Rack*
Part #: 36206
4
5
6
7
8
9
*Optional

6
Operating Instructions
Operation Functions
On/Off Function:
Press “On/Off” button once to turn the unit on. The control panel should display “0”
indicating that no cooking time or temperature has been selected and the unit is powered
on. Press “On/Off” button again to turn the unit off.
Start/Pause Function:
Press “Start/Pause” button once to begin cooking.
To interrupt the cooking process, press the “Start/Pause” button again.
To resume cooking or preheating, press the “Start/Pause” button again.
Easy Start:
Place the food inside the Base Tray. The NuWave Brio Digital Air Fryer is set to cook at 360˚F
for 10 minutes by default once you press “Start/Pause” button. To set a different cooking
temperature or time, refer to the Adjusting Temperature and Adjusting Time sections.
“Pre-Heat” Function:
The “Pre-Heat” function ensures that the NuWave Brio Digital Air Fryer reaches the desired
temperature before you begin cooking your food. The “Pre-Heat” function is the perfect choice
for foods that require a crispier nish, such as frozen appetizers, French fries or chicken wings.
Press the “Pre-Heat” button. The control panel will display “360˚F”. “Pre-Heat” and “Temp”
will be ashing. If needed, manually adjust the cooking temperature and time, then press
“Start/Pause”. Once you press “Start”, the current NuWave Brio Digital Air Fryer temperature
will be displayed as well as “Pre-Heat”.
If you cook another batch of food shortly after cooking in the NuWave Brio Digital Air
Fryer, you do not need to use the “Pre-Heat” Function as the NuWave Brio Digital
Air Fryer will already be hot. If you wish to cook your food longer, simply place the Base
Tray and Fry Pan Basket back into the appliance and continue cooking in 2-3 minutes
increments until desired consistency has been reached.
1. Remove all the packaging materials.
2. Remove the glue and labels on the appliance.
3. Clean the Fry Pan Basket, Base Tray, Baking Pot*, Reversible Rack* and Grill
Pan* thoroughly with hot water, a nonabrasive sponge and a mild dish detergent,
or in the dishwasher, top rack only.
4. Wipe the inside and outside of the appliance with a wet cloth. Do not immerse the
appliance in water.
Note: This appliance cooks using hot air. DO NOT ll the basket with oil.
*Accessories are optional.
OPERATING INSTRUCTIONS
Before Use:
1. Place the appliance on a level, even and stable heat-resistant surface.
2. Place the Base Tray and Fry Pan Basket in the NuWave Brio Digital Air Fryer.
3. Plug the appliance into a standard wall socket. The power plug is included in the
package.
Note: Do not cover or block the vent located on the top of the NuWave Brio Digital
Air Fryer. Doing so can prevent proper ventilation and will adversely affect the
cooking results.
Operation Preparation:

7
Once the NuWave Brio Digital Air Fryer reaches the set temperature, the control panel will
display “Ready” and the NuWave Brio Digital Air Fryer will beep once. The NuWave Brio
Digital Air Fryer will start a countdown of 5 minutes and the number “5” will start ashing.
It will remain at this temperature for up to 5 minutes, or until you remove the Fry Pan
Basket, whichever comes rst. Once the food has been added to the Fry Pan Basket, insert
the Fry Pan Basket back in place. This will start the countdown on the set cooking time.
Note: If you remove the Fry Pan Basket at any point during the preheating stage, the
NuWave Brio Digital Air Fryer will automatically pause, start a countdown of 5 minutes until
you replace the Fry Pan Basket. Once the NuWave Brio Digital Air Fryer shows “ready”
on the display, press the “Start /Pause” button to begin the cooking process and start the
countdown timer.
Adjusting Temperature:
The NuWave Brio Digital Air Fryer is set to cook at 360°F by default. To set a different
cooking temperature, press the “Temp/Time” button. The display will show “360˚F”. “Temp”
will be ashing. To adjust the temperature, simply press the “up” and “down” arrows. You can
adjust your temperature in 5-degree increments between 100˚F and 390˚F. To quickly adjust
the temperature in large increments, simply hold down the “up” or “down” arrow to adjust the
temperature by 50-degree increments.
You can change the cooking temperature at any point during the cooking process.
Press the “Temp/Time” button. Programed temperature will be displayed. “Temp” will be
ashing. Press the “Up” or “Down” arrow until you reach your desired temperature.
Once your temperature has been selected, the NuWave Brio Digital Air Fryer will
automatically adjust to the new temperature and the display will show the remaining
cooking time. If no new temperature has been selected within 3 seconds, the NuWave
Brio Digital Air Fryer display will once again show the remaining cooking time.
Adjusting Time:
The NuWave Brio Digital Air Fryer is set to cook for 10 minutes by default. To set a different
cooking time, press the “Temp/Time” button twice. The display will show “10”. “Time” will be
ashing. To adjust the time, simply press the “Up” and “Down” arrows. You can adjust your
cooking time in 1 minute increments. To quickly adjust the time in large increments, simply
hold down the “Up” or “Down” arrow to adjust the time by 10-minutes increments, followed
by 20-minutesute increments, followed by 30-minutes increments. The minutes selectable
cooking time is 1 minute. The maximum selectable cooking time differs depending on the
selected cooking temperature.
• 100˚F – 345˚F maximum cooking time is 99 hours and 59 minutes
• 350˚F – 390˚F maximum cooking time is 1 hours
You can change the cooking time at any point during the cooking process. Press the
“Temp/Time” button twice. The remaining cooking time will be displayed. “Time” will be
ashing. Press the “Up” or “Down” arrow until you reach your desired cooking time.
Once your cooking time has been selected, the display will show the new remaining
cooking time. “Time” will no longer be ashing. If no new cooking time has been selected
within 3 seconds, the NuWave Brio Digital Air Fryer display will once again show the
remaining cooking time.
Note: After timer reaches 1 minute, the display will begin showing the remaining time in
seconds (59, 58, etc.).
OPERATING INSTRUCTIONS (Continued)
Operating Instructions
8
OPERATING INSTRUCTIONS (Continued)
Operating Instructions
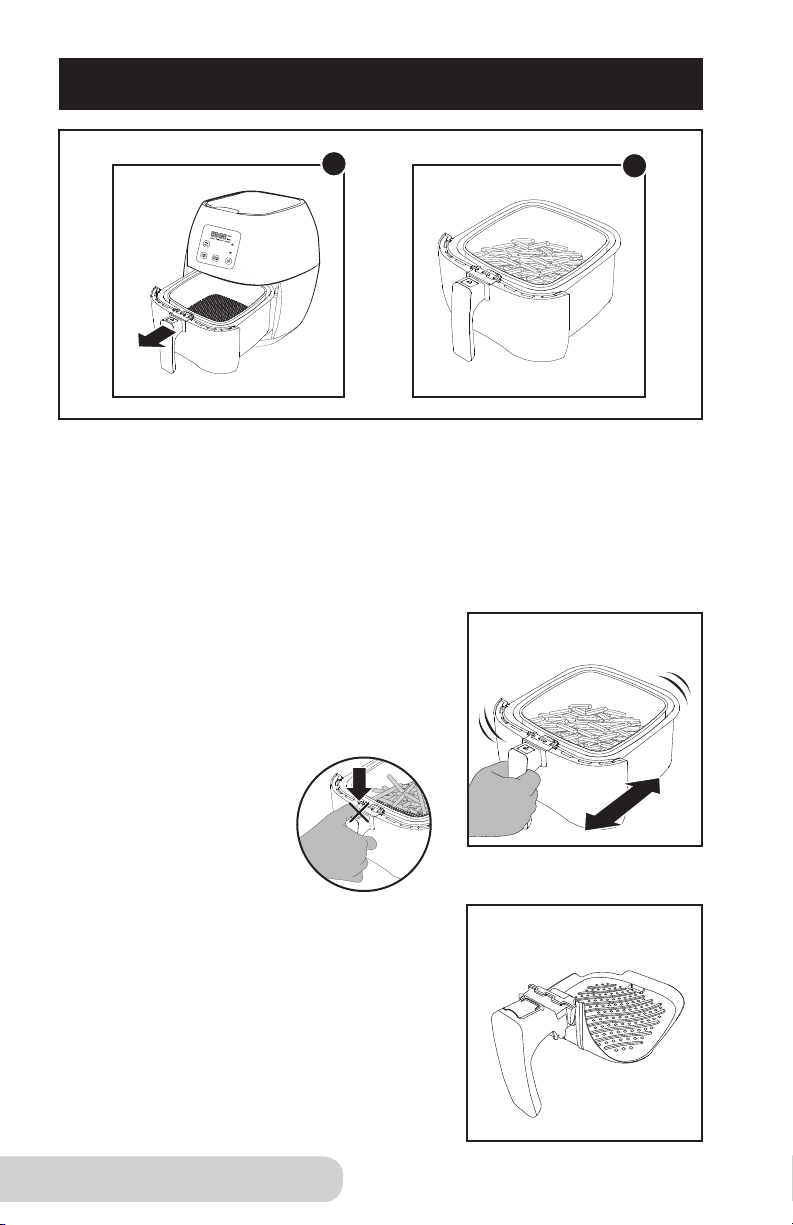
For Best Results
After you have selected your cooking time and temperature and you are ready to add your
ingredients to the NuWave Brio Digital Air Fryer: Pull out the Base Tray and Fry Pan Basket
from the NuWave Brio Digital Air Fryer. (Fig. 1)
Note: Do not ll more than 4/5 full. Slip the frying pan back in place in the NuWave Brio
Digital Air Fryer. Do not use the Base Tray without the Fry Pan Basket in it. (Fig. 2)
Note: Do not touch the inside of the Base Tray immediately after cooking as the pan can
become very hot. Only hold the pan by the handle.
Shaking Food:
Some foods require shaking halfway through cooking.
To properly shake the food, hold the handle, remove the
Base Tray from the appliance and shake. Once the food
has been adequately shaken, slide the Base Tray and
Fry Pan Basket back into the NuWave Brio Digital Air Fryer.
2
1
DO NOT PRESS THE
DEMOUNTING BUTTON
WHILE SHAKING.
How To Use Grill Pan:
Pull out the Fry Pan Basket from the Base Tray and
place it on a at surface, lift the safety cover, press
the demounting button and lift out the Fry Pan Basket.
Replace in the Grill Pan into the Fry Pan Basket.

9
Cleaning:
Clean the appliance after every use or in between a large amount of batches.
The Fry Pan Basket and insides of the Base Tray have a non-stick coating. Do not
use metal utensils or harsh abrasives when cleaning as this can damage the coating.
• Unplug the appliance and make sure it cools completely.
Note: Remove the Base Tray and Fry Pan Basket, place on a heat resistant
surface to help cool the appliance quicker.
• Use a damp cloth to wipe the outside of the appliance.
• Clean the Fry Pan Basket and inside components with a nonabrasive
sponge, hot water and mild detergent.
Note: If you place the Base Tray and Fry Pan Basket into the dishwasher, use
the top rack only.
Tip: If there is residual food in the Base Tray and Fry Pan Basket, add
some hot water and let it soak separately for about 10 minutes for easier cleaning.
• Clean the inside of the appliance with a nonabrasive sponge and hot water.
• Clean the heating components with a cleaning brush to remove any lingering food.
Storage:
• Unplug the appliance and let it cool down completely.
• Make sure that all the parts are cleaned and dry.
• Push the power cord into the storing capsule.
Fix the cord by inserting it into the cord xing unit.
IMPORTANT - Do not immerse unit in water
or attempt to cycle through dishwasher. The outer
surface may be cleaned by wiping carefully with
a damp dishcloth or sponge. Make sure unit has
cooled completely prior to cleaning.
CARE & MAINTENANCE
OPERATING INSTRUCTIONS (Continued)
Operating Instructions
To remove the Grill Pan or the Fry Pan Basket from
the Base Tray,
1. lift open the safety cover, press the
demounting button.
2. Lift the Fry Pan Basket or Grill Pan out
of the Base Tray.
This will reduce the extra weight
of the Base Tray and makes it
easier to pour smaller foods, such
as French fries.
Grill Pan
Fry Pan
Basket
Base Tray

10
Care & Maintenance
Care & Use:
Before use, wash with mild soap and water or in a dishwasher, top rack only.
This should never be cleaned with harsh abrasives nor cut with any sharp objects.
• Do not use steel wool or any sharp objects that may scratch or damage the silicone.
• Do not place silicone products on the top rack of a nor cook on broil in a conventional oven.
• Do not attempt to cut foods while they are in the accessories. Any misuse of the
accessories will void the warranty.
Our silicone material can withstand temperatures up to 500°F, but keep in mind that these
temperatures are above and beyond the recommended use for this product. Damages
caused by this type of usage will not be covered under warranty.
• Clean the Grill Pan, Baking Pot and Reversible Rack with hot soapy water and
a non-abrasive sponge or in the dishwasher before rst use and after each use.
Dry thoroughly. Do not soak the accessories for long periods of time.
• Do not scrub the accessories with steel wool, oven cleaning solutions or use any
harsh abrasive cleansers or materials as scratching may occur. Minor scratches
or discolor will not impact the pans performance.
• Store in a cool dry place.
CARE & USE FOR ACCESSORIES
Grill Pan
Baking Pot
Reversible Rack
Silicone Mat
10 Silicone
Cup Cake Liners
Note:
Accessories are all optional.

11
GUIDE
The following guide indicates the amount of weight, time and temperature for
the various food types that are listed below.
Guide
Food Type Shake Time Temp
Minutes
Max
Additional
(minutes) (˚F)
Food
Amount
(oz)
Breakfast
Frozen French Toast 12-16 390 25
Spray w/
Cooking Oil
Hard Boiled Eggs 12-20 390 25
Cool in
water
Frozen Hash Brown Patties 18-30 360 28
Spray w/
Cooking Oil
Cinnamon Rolls 18-22 360 28
Place in
Muffin Cups
Potatoes and Fries
Thin Frozen Fries Shake 12-16 390 25
Thick Frozen Fries Shake 12-20 390 25
Homemade Fries Shake 18-30 360 28 ½ tbs of Oil
Homemade Potato Wedges Shake 18-22 360 28 ½ tbs of Oil
Homemade Potato Cubes Shake 12-18 360 26 ½ tbs of Oil
Meat and Poultry
Steak 8-12 360 4-18
Pork Chops 10-14 360 4-18
Hamburger 7- 14 360 4-18
Italian Sausage 13-15 375 4-18
Drumsticks 18-22 360 4-18
Chicken Breast 10-15 360 4-18
Frozen Snacks
Spring Rolls Shake 8-10 390 14
Chicken Nuggets Shake 6-10 390 18
Fish Sticks 6-10 390 14
Stuffed Poppers 8-10 360 14
Onion Rings 8-10 360 14
Breaded Mushrooms
Mozz. Sticks/Zucchini
10 360 14
Note:
Many ingredients can vary greatly in size and shape, which will affect cooking times so
we cannot guarantee that these settings will work best for your ingredients. Adjust the settings
as necessary to suit your needs. The NuWave Brio Digital Air Fryer is able to heat extremely
quickly, therefore briey removing the frying pan while the appliance in operation has a minimal
effect on the cooking process.
min-max

12
TROUBLESHOOTING GUIDE
PROBLEM POSSIBLE CAUSE(S) RESOLUTION(S)
The NuWave Brio Digital Air
Fryer does not work.
The appliance is not plugged in.
Did not press On/OFF button.
Fry Pan Basket is not in the
NuWave Brio Digital Air Fryer.
Insert the plug into an appropriate
grounded power socket. Press
ON/OFF button after settings
are selected. Place the Fry Pan
Basket in the NuWave Brio
Digital Air Fryer.
The ingredients fried in the
Fry Pan Basket are not
completely cooked.
Too many ingredients were used.
The cooking temperature is
too low.
The cooking time is too short.
Remove some ingredients from
the Fry Pan Basket. Smaller
batches are fried more evenly.
Fry at a higher temperature.
Set the NuWave Brio Digital Air
Fryer to fry for a longer time.
The food is fried unevenly. Certain types of ingredients
need to be shaken halfway
through the preparation time.
Ingredients that are on the top
need to be shaken halfway
through the preparation time.
Fried snacks are not crispy when
they come out of the NuWave
Brio Digital Air Fryer.
You used a type of snack meant
to be prepared in a traditional
deep fryer.
Use snacks designed to be
baked in a traditional oven, or
lightly brush some olive oil onto
the snacks for a crispier result.
I cannot slide the Fry Pan
Basket into the appliance
properly.
The Fry Pan Basket is overlled.
The Fry Pan Basket is not
placed in the Base Tray
correctly.
Do not ll the Fry Pan Basket
more than 4/5. Push the Fry Pan
Basket down into the Base Tray
until you hear a click.
White smoke is coming out of
the product.
You are frying greasy foods. The
pan contains greasy residue
from previous uses.
When you are preparing greasy
ingredients in the NuWave Brio
Digital Air Fryer, large amounts
of oil can smoke and inltrate
into the pan. The oil will produce
white smoke and the frying pan
might become hotter than usual.
This will not affect the nal
cooking effect. White smoke is
caused by greasy heating up in
the pan. Make sure you clean
the frying pan properly after
each use.
French fries are fried
unevenly in the NuWave Brio
Digital Air Fryer.
You did not soak the potato sticks
properly before you fried them.
You did not use the right
potato type.
Soak potato sticks in a bowl of
water for at least 30 minutes,
take them out and dry them with
paper towel. Use fresh potatoes
and make sure they stay rm
during frying.
French fries are not crispy when
they come out of the NuWave
Brio Digital Air Fryer.
The crispiness of the fries
depends on the amount of oil
and water in the fries.
Make sure you dry the potato
sticks properly before you add the
oil. Cut the potato sticks smaller
for a crispier result. Add slightly
more oil for a crispier result.
If the unit needs to be replaced or returned to the manufacturer, please contact our Customer Service
Department at: 1-877-689-2838 • Monday - Friday from 7:00 AM to 7:00 PM Central Standard Time.
Contact Costumer Service if any of these errors occur
Code
Error
E1 E2 E3
Sensor open
ended
Sensor short
circuit
Over heat
Troubleshooting Guide

13
Warranty
WARRANTY
The NuWave Brio Digital Air Fryer
THE MANUFACTURER WARRANTS
The NuWave Brio Digital Air Fryer including the Base Tray, Fry Pan Basket, Fry Pan Basket Net,
Baking Pot, Silicone Mat, Silicone Cup Cake Liner, Reversible Rack and Grill Pan (optional) are
to be free from manufacturer defects.
All electrical components are warranted for 1 year from the date of purchase, under normal
household use, and when operated in accordance with the Manufacturer’s written instructions.
The Manufacturer will provide the necessary parts and labor to repair any part of the NuWave
Brio Digital Air Fryer at NuWave, LLC. Service Department. After the expiration of the warranty,
the cost of the labor and parts will be the responsibility of the owner.
THE WARRANTY DOES NOT COVER
The Limited Warranty is voided if repairs are made by an unauthorized dealer or the
serial number data plate is removed or defaced. Normal deterioration of nish due to use
or exposure is not covered by this Warranty. This Limited Warranty does not cover failure,
damages or inadequate performance due to accident, acts of God (such as lightning),
uctuations in electric power, alterations, abuse, misuse, misapplications, corrosive type
atmospheres, improper installation, failure to operate in accordance with the Manufacturer’s
written instructions, abnormal use or commercial use.
TO OBTAIN SERVICE
The owner shall have the obligation and responsibility to: Pay for all services and parts not
covered by the warranty; Prepay the freight to and from Service Department for any part
or system returned under this warranty; Carefully package the product using adequate
padding material to prevent damage in transit. The original container is ideal for this
purpose. Include in the package the owner’s name, address, day time telephone number,
a detailed description of the problem, and your “RGA number.” (Call 1-877-689-2838,
MONDAY – FRIDAY 7:00AM – 7:00PM CST) or e-mail help@nuwavenow.com to obtain
the RGA (Return Goods Authorization number). Provide the cooking system model & serial
number and proof of date of purchase (a copy of the receipt) when making claims under
this warranty.
MANUFACTURER’S OBLIGATION
The Manufacturer’s obligation under this Limited Warranty is limited to repairing or replacing
any part covered by this Limited Warranty which upon examination is found to be defective
under normal use. The Limited Warranty is applicable only within the continental United States
and only to the original purchaser of the manufacturer’s authorized channels of distribution.
THE LIMITED WARRANTY MAY NOT BE ALTERED, VARIED OR EXTENDED EXCEPT
BY A WRITTEN INSTRUMENT EXECUTED BY THE MANUFACTURER. THE REMEDY
OF REPAIR OR REPLACEMENT AS PROVIDED UNDER THIS LIMITED WARRANTY
IS EXCLUSIVE. IN NO EVENT SHALL THE MANUFACTURER BE LIABLE FOR ANY
CONSEQUENTIAL OR INCIDENTAL DAMAGES TO ANY PERSON, WHETHER OR NOT
OCCASIONED BY NEGLIGENCE OF THE MANUFACTURER, INCLUDING WITHOUT
LIMITATION, DAMAGES FOR LOSS OF USE, COSTS OF SUBSTITUTION, PROPERTY
DAMAGE, OR OTHER MONEY LOSS.
Some states do not allow the exclusion or limitation of incidental or consequential damages,
so the above limitation exclusions may not apply. This Limited Warranty gives specic
legal rights, and there may also be other rights which vary from state to state. EXCEPT
AS OTHERWISE EXPRESSLY PROVIDED ABOVE, THE MANUFACTURER MAKES
NO WARRANTIES EXPRESSED OR IMPLIED ARISING BY LAW OR OTHERWISE,
INCLUDING WITHOUT LIMITATION, THE IMPLIED WARRANTIES OF MERCHANTABILITY
AND FITNESS FOR A PARTICULAR PURPOSE TO ANY OTHER PERSON. READ YOUR
OWNER’S MANUAL. IF YOU STILL HAVE ANY QUESTIONS ABOUT OPERATION OR
WARRANTY OF THE PRODUCT, PLEASE CONTACT NUWAVE, LLC.
READ YOUR OWNER’S MANUAL: If you still have any questions about operation or
warranty of the product, please contact NuWave, LLC at: 1-877-689-2838 M-F from to
7:00AM – 7:00PM CST or e-mail help@nuwavenow.com.

14
Pressure Canning
Recipes

15
Baked Potato (Serves 2)
Prep Time: 5 minutes
Cook Time: 40 minutes
Total: 45 minutes
Temp: 350˚F
Ingredients:
2 Idaho or Russet Baking Potatoes
1-2 tsp Olive Oil
1 tbs Salt
1 tbs Granulated Garlic
1 tsp Parsley
Directions:
1.
Wash potatoes and then pierce the skin with a fork.
2.
Press “Pre-Heat”, set temperature at 350˚F and set cooking time at 40
minutes. Press “Start”.
3.
Drizzle olive oil onto potatoes and rub seasonings evenly over potatoes.
4.
Once ready, place coated potatoes in Fry Pan Basket, and cook until
fork tender.
5.
Cook for an additional 5 minutes if necessary.
Baked Potato

16
Roasted Brussels Sprouts (Serves 4)
Prep Time: 10 minutes
Cook Time: 15 minutes
Total: 25 minutes
Temp: 390˚F
Ingredients:
1 lb Fresh Brussels Sprouts
2 tsp Olive Oil
½ tsp Kosher Salt
½ tsp Black Pepper
½ tsp Granulated Garlic
Directions:
1.
Remove any tough or bruised outer Brussels sprouts leaves.
2.
Trim the stems on the sprouts and cut in half vertically.
3.
Rinse sprouts, shake dry and set aside.
4.
Press “Pre-Heat”, set temperature at 390°F and set cooking time at 15
minutes. Press “Start”.
5.
Combined salt, pepper garlic and olive oil in bowl.
6.
Add sprouts to bowl and toss to coat.
7.
Once ready, place sprouts in Fry Pan Basket and cook, pausing occasionally
to shake.
Tip: The sprouts are done when the centers are tender and the outsides are
caramelized and a bit crispy.
Roasted Brussels Sprouts

17
Directions:
1.
Boil potatoes in salted water for 40 minutes or until fork tender. Cool completely.
2.
Add oil, garlic, paprika, pepper and salt in mixing bowl and mix to combine.
3.
Cut cooled potatoes into quarters and lightly toss in the mixture of oil and spices.
4.
Press “Pre-Heat”, set temperature at 390˚F and set cooking time at 14-16
minutes. Press “Start”.
5.
Once ready, add the potato wedges to Fry Pan Basket skin side down, being
careful not to overcrowd.
6.
Cook wedges until golden brown.
Home Fries (Serves 6)
Prep Time: 40 minutes
Cook Time: 15 minutes
Total: 55 minutes
Temp: 390˚F
Ingredients:
6 Medium Russet Potatoes
2 tbs Oil
½ tbs Granulated Garlic
1½ tsp Paprika
½ tsp Black Pepper
½ tsp Salt
Home Fries

18
Air Baked Eggs (Serves 3)
Prep Time: 10 minutes
Cook Time: 7 minutes
Total: 17 minutes
Temp: 300˚F
Ingredients:
3 Ramekins
6 oz Diced Ham
3 Large Eggs
3-6 Spinach Leaves (optional)
3 tsp Milk, Divided
Non-Stick Cooking Spray or Butter
Salt and Pepper To Taste
Directions:
1.
Press “Pre-Heat”, set temperature at 300˚F and set cooking time at 7
minutes. Press “Start”.
2.
Spray ramekins with non-stick spray.
3.
Add spinach, ham, 1 egg, 1 teaspoon milk, salt and pepper to each ramekin.
4.
Once ready, place ramekins in Fry Pan Basket and cook.
Air Baked Eggs

19
Air Fried Tortilla Chips (Serves 4)
Prep: 5 minutes
Cook: 4 minutes
Total: 9 minutes
Temp: 390˚F
Ingredients:
8 Corn Tortillas
1 tsp Olive Oil
Salt To Taste
Directions:
1.
Press “Pre-Heat”, set temperature at 390˚F and set cooking time for 4
minutes. Press “Start”.
2.
Brush tortillas with olive oil.
3.
Cut tortillas into triangles.
4.
Once ready, place in Fry Pan Basket and cook.
5.
Season with salt and enjoy.
Tip: Serve with your favorite salsa or guacamole.
Air Fried Tortilla Chips

20
Prep Time: 5 minutes
Cook Time: 10 minutes
Total: 15 minutes
Temp: 390˚F
Ingredients:
8 oz Ground Beef
2 Slices Cheddar Cheese
2 Dinner Rolls
¼ tsp Granulated Garlic Powder
¼ tsp Salt
¼ tsp Pepper
Directions:
1.
Press “Pre-Heat”, set temperature at 390˚F and set cooking time at 10
minutes. Press “Start”.
2.
Form the ground beef into 2 (4 oz). patties and season with salt pepper
and garlic.
3.
Once ready, add burgers to Fry Pan Basket and cook.
4.
Open Air Fryer, top each burger with cheese, set cooking time for 1 minute
and cook until cheese has melted.
Tip: You can adjust the cooking time, depending on the level of doneness you prefer
your burgers.
Sliders (Serves 2)
Sliders

21
Buffalo Wings (Serves 4)
Prep Time: 10 minutes
Cook Time: 25 minutes
Total: 35 minutes
Temp: 360˚F
Ingredients:
2 lb. Chicken Wings
(tips removed and wings cut into
drummettes and ats)
½ tsp Salt
½ tsp Pepper
½ tsp Granulated Garlic
¼ Cup Your Favorite Wing Sauce
Directions:
1.
Press “Pre-Heat”, set temperature at 360˚F and set cooking time at 25
minutes. Press “Start”.
2.
Combine salt, pepper, garlic and oil in bowl and mix well.
3.
Add wings to bowl and toss until fully coated.
4.
Once ready, place half of the chicken wings in the Fry Pan Basket, and cook,
shake the Fry Pan Basket to ensure that the wings are evenly cooked.
5.
Transfer cooked wings to large bowl and toss with 2 tablespoons wing sauce.
6.
Repeat steps 4-5 with remaining wings and sauce.
Buffalo Wings

22
Chicken Kiev (Serves 2)
Prep Time: 10 minutes
Cook Time: 25 minutes
Total: 35 minutes
Temp: 350˚F
Ingredients:
1 Medium Chicken Breast
4 oz Soft Cheese
½ tsp Chopped Garlic
1 tsp Parsley, Divided
1 Medium Egg, Beaten
Breadcrumbs
Salt and Pepper to Taste
Directions:
1.
Combine cheese, garlic and ½ teaspoon parsley in small bowl; set aside.
2.
Using a meat tenderizer, pound chicken breast at and slice in half
lengthwise.
3.
In mixing bowl, combine breadcrumbs, salt, pepper and remaining parsley.
4.
Press “Pre-Heat”, set temperature at 350˚F and set cooking time at 25
minutes. Press “Start”.
5.
Coat chicken in beaten egg and roll in prepared breadcrumbs, ensuring all
sides are coated.
6.
Place chicken in small, oven-safe dish or line Fry Pan Basket with foil
before adding the chicken to the Fry Pan Basket.
7.
Once ready, place chicken in Fry Pan Basket, and cook.
Tip: Use garlic and herb avored cheese for maximum avor. Wrap the chicken
in plastic wrap when tenderizing to minimize the mess. Placing the chicken in a
small, oven-safe dish inside the NuWave Brio Digital Air Fryer or lining the Fry
Pan Basket with foil helps minimize the mess.
Chicken Kiev

23
Chicken Satay (Serves 4)
Prep Time: 15 minutes
Cook Time: 6-8 minutes
Total: 25 minutes
Temp: 390˚F
Ingredients:
1 lb. Boneless Chicken Thighs
½ Cup Soy Sauce
½ Cup Pineapple Juice
¼ Cup Sesame Oil
4 Garlic Cloves
4 Scallions Chopped
1 tbs Spoon Grated Ginger
2 tsp Toasted Sesame Seeds
1 Pinch Black Pepper
Directions:
1.
Cut each thigh into strips, trim excess fat.
2.
Combine all the other ingredients into a large mixing bowl and mix well.
3.
Place chicken onto skewers.
4.
Add skewered chicken to mixing bowl and spoon marinade onto chicken
to coat all sides.
5.
Cover and refrigerate chicken for at least 2 hours, up to 24 hours.
6.
Press “Pre-Heat”, set temperature at 390˚F and set cooking time at 6-8
minutes. Press “Start”.
7. Once ready place skewers in the Fry Pan Basket and cook.
8.
Repeat steps 6-7 with remaining skewers.
Tip: If using wooden skewers, soak the skewers in water before adding
chicken to keep them from burning.
Chicken Satay

24
Grilled Chicken Tenders (Serves 3)
Prep Time: 5 minutes
Cook Time: 15 minutes
Total: 20 minutes
Temp: 390˚F
Ingredients:
½ lb Boneless Chicken Tenderloins
¼ Cup Creamy Caesar Dressing
1 tbs Olive Oil
Dash Garlic Powder
½ tsp Dried Leaf Basil
1 tsp Dried Minced Onion
Dash Pepper
Directions:
1.
Rinse chicken and pat dry.
2.
Combine chicken with all remaining ingredients in bowl or food storage bag.
3.
Seal or cover chicken and refrigerate for 1-2 hours.
4.
Press “Pre-Heat”, set temperature at 390˚F and set cooking time at 15 minutes.
Press “Start”.
5.
Once ready, place chicken in Fry Pan Basket, and cook, halfway through to
ip the tenders to ensure they are evenly cooked.
Grilled Chicken Tenders

25
Parmesan Chicken Tenders (Serves 4)
Prep Time: 10 minutes
Cook Time: 8-12 minutes
Total: 22 minutes
Temp: 330˚F
Ingredients:
Non-Stick Cooking Spray
¼ Cup All-Purpose Flour
2 Large Eggs
½ Cup Finely Shredded Parmesan
Cheese
1 Cup Coarse Dry Breadcrumbs
1 lb Chicken Tenders
1 tbs Italian Seasoning
1 tsp Garlic Powder
¼ tsp Salt
Directions:
1.
Press “Pre-Heat”, set temperature at 330˚F and set cooking time at 8-12
minutes. Press “Start”.
2.
Place our in shallow dish.
3.
Lightly beat eggs in separate shallow dish.
4.
Combine Parmesan and breadcrumbs in separate shallow dish.
5.
In medium bowl, toss chicken tenders in Italian seasoning, garlic powder
and salt.
6.
Coat each chicken tender in our, shaking off any excess.
7.
Dip tender in egg and let any excess drip off.
8.
Roll tender in breadcrumb mixture.
9.
Once ready, spray Fry Pan Basket with non-stick cooking spray and place
half of the tenders in the Fry Pan Basket. Set remaining half aside for later.
10.
Generously coat tops of each tender with non-stick cooking spray.
11.
Halfway through carefully turn each tender and top with more cooking spray.
12.
Ensure cooking time is 4 minutes, and cook until outside is crisp and
tenders are cooked through.
13.
Repeat steps 9-12 with remaining tenders.
Parmesan Chicken Tenders

26
Roasted Cornish Game Hen w/Honey Mustard Glaze
(Serves 4)
Prep: 15 minutes
Cook: 20 minutes
Total: 35-40 minutes
Temp: 375˚F
Ingredients:
1 (1½-lb) Cornish Hen
½ tsp Kosher Salt
½ tsp Freshly Ground Black Pepper
1 Bay Leaf
4 Garlic Cloves, Peeled & Smashed
2 tsp Dried Thyme
½ tsp Chili Flakes
2 tbs Olive Oil
¼ cup Honey
¼ cup Stone Ground Dijon Mustard
1½ tsp Balsamic Vinegar
½ tsp Ground Cumin
1 tbs Fresh Cilantro, Chopped
(optional)
Directions:
1.
Press “Pre-Heat”, set temperature at 375˚F and set cooking time at 20
minutes. Press “Start”.
2.
Season hen inside and out with salt and pepper.
3.
Place bay leaf, garlic, thyme and chili akes inside the cavity of the hen.
4.
Brush hen with oil.
5.
Once ready, place hen, breast side down, in Fry Pan Basket and roast.
6.
Meanwhile, combine the honey, mustard, vinegar, cumin and cilantro in a bowl.
7.
Brush over the hen.
8.
Continue cooking for an additional 5 minutes.
Tip: Check the hen after roasting to see if the leg pulls away easily from
the body and the meat is no longer pink. If the meat is still pink, roast for an
additional 5-10 minutes.
Roasted Cornish Game Hen
w/Honey Mustard Glaze

27
Cajun Shrimp (Serves 2)
Prep Time: 5 minutes
Cook Time: 6 minutes
Total: 11 minutes
Temp: 390˚F
Ingredients:
½ lb Shrimp, Peeled and Deveined
¼ tsp Cayenne Pepper
½ tsp Old Bay Seasoning
¼ tsp Smoked Paprika
1 tbs Olive Oil
Pinch of Salt
Directions:
1.
Press “Pre-Heat”, set temperature at 390˚F and set cooking time at 6
minutes. Press “Start”.
2.
Add all ingredients to mixing bowl and mix until shrimp is completely coated.
3.
Once ready, place shrimp in Fry Pan Basket and cook.
Cajun Shrimp

28
Chimichurri Skirt Steak (Serves 2)
Prep Time: 1 hr 30 minutes
Cook Time: 10-15 minutes
Total: 1 hr 45 minutes
Temp: 390˚F
Sauce Ingredients:
1 Bunch Flat Leaf Parsley, roughly
chopped (about 1 cup, packed)
5 Large Garlic Cloves, roughly
chopped (about 3 tbs)
1 tbs Dried Oregano
1 tsp Crushed Red Pepper Flakes
½ cup Distilled White Vinegar
½ cup Extra Virgin Olive Oil
1 tsp Salt
1 tsp Pepper
Steak Ingredients:
1 lb Skirt Steak
Salt and Pepper, To Taste
Directions:
1.
Place all sauce ingredients in food processor or blender and blend until
just combined; set aside.
2.
Place steak in bowl or container.
3.
Add 4 tablespoons chimichurri sauce to container, spreading evenly on all
sides of the steak
4.
Let steak marinate at room temperature for 1 hour, or in the refrigerator
for at least 2 hours, or overnight.
5.
Press “Pre-Heat”, set temperature at 390˚F and set cooking time at 8-10
minutes. Press “Start”.
6.
Once ready, season steak with salt and pepper and place in Fry Pan Basket.
7.
Press Start cook steak. Add additional time if you prefer your steak more done.
8.
Let steak rest for 5 minutes, then slice against the grain.
9.
Serve steak with remaining chimichurri sauce.
Tip: Marinate the steak in a container made from non-reactive materials, such
as plastic, enamel, glass or stainless steel. If you marinate the steak in the
refrigerator, allow the steak to return to room temperature before s cooking.
This should take about 30 minutes. Chimichurri sauce is best served at room
temperature.
Chimichurri Skirt Steak

29
Grilled Ham and Cheese (Serves 2)
Prep Time: 10 minutes
Cook Time: 4-5 minutes
Total: 15 minutes
Temp: 360˚F
Ingredients:
4 Slices White Bread
2 Slices American Cheese
2 Slices of Thinly Sliced Ham
¼ Cup Melted Butter
Directions:
1.
Press “Pre-Heat”, set temperature at 360˚F and set cooking time at 4-5
minutes. Press “Start”.
2.
Brush each bread slice with butter on one side.
3.
Layer ham and cheese on bread and assemble sandwiches with the
buttered sides of the bread out.
4.
One ready, place sandwiches in Fry Pan Basket and cook until golden brown.
Tip: Use precooked bacon or sliced turkey instead of ham for a different avor.
Grilled Ham and Cheese

30
Tortilla Crusted Tilapia (Serves 2)
Prep Time: 5 minutes
Cook Time: 15 minutes
Total: 20 minutes
Temp: 375˚F
Ingredients:
1 Whole Jalapeño, Seeded & Deveined
¾ Cups Cilantro
½ tsp Chili Powder
¼ tsp Cumin
¼ tsp Onion Powder
1 tsp Seasoning Salt
18 Whole Tortilla Chips
1 Whole Large Egg, Beaten
2 Whole Tilapia Fillets
Directions:
1.
Press “Pre-Heat”, set temperature at 375˚F and set cooking time at 12-15
minutes. Press “Start”.
2.
Add jalapeño, cilantro, chili powder, cumin, onion powder and salt to food
processor and mix to combine.
3.
Add tortilla chips to food processor and mix until mixture forms small chunks.
4.
Transfer chip mixture to plate.
5.
Place beaten egg in small dish.
6.
Dredge each tilapia let in egg, then chip mixture, ensuring mixture
adheres to each side.
7.
Once ready, spray Fry Pan Basket with non-stick cooking spray and place
breaded lets in Fry Pan Basket and cook till golden.
Tortilla Crusted Tilapia

31
Tuna Sliders (Serves 2)
Prep: 25 minutes
Cook: 6-10 minutes
Total: 35 minutes
Temp: 390˚F
Ingredients:
2 (6.4-oz) Pouches Chunk Light Tuna
in Water
1 Egg
¼ tsp Black Pepper
¼ tsp Granulated Garlic
¼ Cup Dry, Unseasoned Breadcrumbs
Directions:
1.
Press “Pre-Heat”, set temperature at 390˚F and set cooking time at 6-10
minutes. Press “Start”.
2.
Combine all ingredients in medium bowl and mix to combine.
3.
Shape tuna mixture into 8 (½-inch thick) patties.
4.
Once ready, add patties to Fry Pan Basket, press Start and cook, halfway
through to ip the sliders to ensure they are evenly cooked.
Tuna Sliders

32
Turkey Sliders (Serves 2)
Prep Time: 5 minutes
Cook Time: 10 minutes
Total: 15 minutes
Temp: 390˚F
Ingredients:
8 oz Ground Turkey
2 Slices Colby Jack Cheese
2 Dinner Rolls
¼ tsp Granulated Garlic Powder
¼ tsp Salt
¼ tsp Pepper
Directions:
1.
Press “Pre-Heat”, set temperature at 390˚F and set cooking time at 10
minutes. Press “Start”.
2.
Form ground turkey into 2 (4-ounce) patties and season with salt, pepper
and garlic.
3.
Once ready, add burgers to Fry Pan Basket and cook. Halfway through to ip
the tenders to ensure they are evenly cooked.
4.
Open Air Fryer and top each burger with cheese.
5.
Set cooking time at 1 minute, press Start and cook burgers until cheese
has melted.
Turkey Sliders

33
Pork Loin Sandwiches (Serves 4)
Prep: 20 minutes
Cook: 15 minutes
Total: 35 minutes
Temp: 350˚F
Ingredients:
1 (1½-lb) Pork Loin
4 Buns, toasted
1 tsp Salt
1 tsp Pepper
½ tsp Granulated Garlic
½ tsp Crushed Red Pepper
Non-Stick Cooking Spray
Directions:
1.
Cut pork loin in half to t in the Fry Pan Basket.
2.
Combine all seasonings in bowl.
3.
Press “Pre-Heat”, set temperature at 350˚F and set cooking time at 15
minutes. Press “Start”.
4.
Once ready, arrange pork loin halves in Fry Pan Basket.
5.
Spray pork with non-stick spray and apply seasonings.
6.
Cook pork, halfway through to ip the pork loins to ensure they are
evenly cooked.
7.
After cooking is complete, allow pork loin to rest for 5-10 minutes.
8.
Slice pork loin against the grain and assemble sandwiches on toasted buns.
Pork Loin Sandwiches

34
Citrus Green Beans (Serves 4)
Prep Time: 10 minutes
Cook Time: 10 minutes
Total: 20 minutes
Temp: 390˚F
Ingredients:
1 lb Green Beans, Washed &
Destemmed
Juice from 1 Lemon
Pinch Salt
Black Pepper To Taste
¼ tsp Oil
Directions:
1.
Press “Pre-Heat”, set temperature at 390˚F and set cooking time at 10
minutes. Press “Start”.
2.
Once ready, place green beans in Fry Pan Basket
3.
Squeeze lemon juice onto green beans.
4.
Season green beans with salt and pepper and top with oil.
Citrus Green Beans

35
Crispy Tofu (Serves 6)
Prep: 10 minutes
Cook: 18 minutes
Total: 28 minutes
Temp: 350˚F
Ingredients:
12 oz Low Fat, Extra Firm Tofu
1 tsp Sesame Oil
1 tsp Teriyaki Sauce
1 tbs Coriander Paste (optional)
2 tbs Fish Sauce
2 tbs Low Sodium Soy Sauce
1 tsp Oil
Directions:
1.
Cut tofu into 1-inch cubes; set aside in medium bowl.
2.
Combine all remaining ingredients and pour over tofu, mixing to combine.
3.
Let tofu marinate for at least 30 minutes, tossing a few times.
4.
Press “Pre-Heat”, set temperature at 350˚F and set cooking time at 18
minutes. Press “Start”.
5.
Once ready, add marinated tofu to Fry Pan Basket, and cook, halfway
through to ip the tofu to ensure they are evenly cooked.
Crispy Tofu

36
Air Fryer Curry Calamari (Serves 4)
Prep: 15 minutes
Cook: 30 minutes
Total: 45 minutes
Temp: 390˚F
Ingredients:
16 oz Raw, Boneless Squid
½ Cup Cornstarch
¼ Cup Olive Oil
½ tsp Paprika
½ tsp Curry Powder
8 oz Water
Non-Stick Cooking Spray
Directions:
1.
Cut squid into rings.
2.
Combine all remaining ingredients and whisk together until smooth.
3.
Add squid to cornstarch mixture and stir to coat.
4.
Press “Pre-Heat”, set temperature at 390˚F and set cooking time at 30
minutes. Press “Start”.
5.
Spray Fry Pan Basket with non-stick spray and add one third of the squid
to Fry Pan Basket.
6.
Cook squid, halfway through to ip the calamari to ensure they are
evenly cooked.
7.
Repeat steps 5-6 for remaining batches.
Air Fryer Curry Calamari

37
Party Meatballs (Serves 4)
Prep: 20 minutes
Cook: 15 minutes
Total: 35 minutes
Temp: 350˚F
Ingredients:
1 lb Ground Beef
¾ Cup Tomato Ketchup
1 tbs Tabasco Sauce
2 tsp Worcestershire Sauce
¼ Cup Vinegar
1 tbs Lemon Juice
½ Cup Brown Sugar
½ tsp Dry Mustard
3 Gingersnaps, Crushed
Directions:
1.
Add all seasonings to large mixing bowl and mix to combine.
2.
Add beef to bowl and mix well.
3.
Press “Pre-Heat”, set temperature at 350˚F and set cooking time at 15
minutes. Press “Start”.
4.
Form beef into medium sized meatballs.
5.
Once ready, place meatballs in Fry Pan Basket and cook.
Tip: Do not overcrowd the Fry Pan Basket. Cook in batches if you need to.
Party Meatballs

38
Kale Chips (Serves 4)
Prep: 5 minutes
Cook: 2-3 minutes
Total: 8 minutes
Temp: 390˚F
Ingredients:
1 Head Kale
1 tsp Olive Oil
1 tsp Soy Sauce
Directions:
1.
Press “Pre-Heat”, set temperature at 390˚F and set cooking time at 2-3
minutes. Press “Start”.
2.
Remove the center stem from kale and cut leaves into 1½-inch pieces.
3.
Wash kale pieces and dry thoroughly.
4.
Toss kale with the olive oil and soy sauce.
5.
Once ready, place kale in Fry Pan Basket, and cook, halfway through to ip
the kale chips to ensure they are evenly cooked.
Tip: Place the Reversible Rack on top of the kale to prevent the leaves from
moving during the cooking process.
Kale Chips

39
Roasted Tomatoes (Serves 4)
Prep: 5 minutes
Cook: 20 minutes
Total: 25 minutes
Temp: 320˚F
Ingredients:
2 Tomatoes
Parsley To Taste
Oregano To Taste
Basil To Taste
Thyme To Taste
Rosemary To Taste
Sage To Taste
Black pepper To Taste
Non-stick Cooking Spray
½ tbsp Extra-Virgin Olive Oil
Directions:
1.
Press “Pre-Heat”, set temperature at 320˚F and set cooking time at 20
minutes. Press “Start”.
2.
Wash tomatoes and cut in half.
3.
Once ready, spray bottoms of tomato halves with non-stick spray and place
tomatoes in Fry Pan Basket.
5.
Drizzle olive oil onto tomatoes and top with seasonings and cook.
6.
Check for doneness and cook for additional 3-5 minutes if needed.
Roasted Tomatoes

40
Directions:
1.
Press “Pre-Heat”, set temperature at 330˚F and set cooking time at 35
minutes. Press “Start”.
2.
Place all vegetables into bowl and drizzle with vegetable oil.
3.
Add cumin seeds, coriander, garlic, salt and pepper to bowl and stir well
to combine.
4.
Once ready, place vegetables in Fry Pan Basket, and cook, pausing halfway
through to shake.
Roasted Root Vegetables (Serves 4)
Prep Time: 10 minutes
Cook Time: 35 minutes
Total: 35 minutes
Temp: 330˚F
Ingredients:
2 Carrots, Peeled, Halved
& Cut Into Chunks
2 Parsnips, Peeled, Halved
& Cut Into Chunks
½ Butternut Squash, De-seeded,
Peeled & Cut Into Chunks
4 Celery Stalks, Peeled and Cut Into
Chunks
1 tsp ground Cumin Seeds
1 tsp Ground Coriander
1 tbs Vegetable Oil
1 tsp Granulated Garlic
Salt and Pepper To Taste
Roasted Root Vegetables

41
Apple Pie (Serves 2-3)
Prep Time: 10 minutes
Cook Time: 30 minutes
Total: 40 minutes
Temp: 320˚F
Ingredients:
1 Premade Frozen Pie Crust
Baking Spray
1 Large Apple, Chopped
2 tsp Lemon Juice
1 tbs Ground Cinnamon
2 tbs Sugar
½ tsp Vanilla Extract
1 tbs Butter
1 Beaten Egg
1 tbs Raw Sugar
Directions:
1.
Defrost pie crust according to package directions.
2.
Press “Pre-Heat”, set temperature at 320˚F and set cooking time at 30
minutes. Press “Start”.
3.
Cut enough dough from premade crust to t ⅛ inch larger than small pie tin.
4.
Use remaining dough to form smaller top crust; set aside.
5.
Spray baking tin with baking spray and place the larger cut crust inside the
baking pan; set aside.
6.
Add chopped apple, lemon juice, cinnamon, sugar and vanilla extract to
small bowl and mix to combine.
7.
Pour apple mixture into prepared pie crust.
8.
Top apples with butter, spreading evenly.
9.
Top pie with second pie crust and pinch edges closed. Make a few slits in the
top of the dough.
10.
Spread beaten egg onto pie crust and sprinkle on raw sugar.
11.
Once ready, place pie in Fry Pan Basket, and bake.
Tip: If necessary, roll the larger crust with a rolling pin to stretch to a uniform
thickness. Any baking tin 7 inches wide or smaller will t in the Air Fryer.
Apple Pie

42
Banana and Nutella Wontons (Serves 2)
Prep Time: 10 minutes
Cook Time: 6-8 minutes
Total: 20 minutes
Temp: 350˚F
Ingredients:
8 Wonton Wrappers
8 tsp Nutella
1 Banana
1 Egg
1 tsp Water
Cinnamon Sugar or Powdered Sugar
for Garnish
Directions:
1.
Press “Pre-Heat”, set temperature at 350˚F and set cooking time at 6-8
minutes. Press “Start”.
2.
Add egg and water to small bowl and mix together to make egg wash.
3.
Place 1 tsp Nutella in center of wonton wrapper.
4.
Slice banana and place atop Nutella.
5.
Brush egg wash along two sides of the wonton.
6.
Seal wonton wrapper by folding the sides together.
7.
Once ready, place wontons in Fry Pan Basket and cook.
8.
Once the wontons have sufficiently browned, carefully remove from the Air
Fryer and dust with cinnamon sugar or powdered sugar.
Banana and Nutella
Wontons

43
Prep Time: 20 minutes
Cook Time: 10 minutes
Total: 30 minutes
Temp: 350˚F
Ingredients:
½ Pineapple
½ Cup Shredded Coconut
1 Small Sprig Fresh Mint
1 Cup Vanilla Yogurt
Directions:
1.
Cut pineapple into ½-inch thick slices, then cut slices in half and remove
the core.
2.
Press “Pre-Heat”, set temperature at 350˚F and set cooking time at 10
minutes. Press “Start”.
3.
Dip pineapple slices into shredded coconut.
4.
Once ready, gently place pineapple in Fry Pan Basket and cook.
5.
While pineapple cooks, nely dice mint leaves and stir into vanilla yogurt.
6.
Serve pineapple with yogurt dip.
Pineapple Crescents (Serves 4)
Pineapple Crescents

44
Prep Time: 5 minutes
Cook Time: 7 minutes
Total: 12 minutes
Temp: 350˚F
Ingredients:
1 Package Refrigerator Crescents
(8 Crescents)
Non-Stick Cooking Spray
Directions:
1.
Press “Pre-Heat”, set temperature at 350˚F and set cooking time at 12
minutes. Press “Start”.
2.
Place small square of aluminum foil on Fry Pan Basket.
3.
Lightly spray foil with cooking spray.
4.
Once ready, place crescent dough in Fry Pan Basket, and bake.
5.
Remove rolls from Fry Pan Basket and enjoy.
Crescent Rolls (Serves 4)
Crescents Rolls

58
FOR HOUSEHOLD USE ONLY
Model: 36001 120V, 60Hz, 1,300 Watts
Designed & Developed in USA by NuWave, LLC • Made in China
1755 N. Buttereld Rd.
LIbertyville, IL 60048, U.S.A.
1.877.689.2838 Monday-Friday 7:00 AM - 7:00 PM CST
www.NuWaveNow.com • help@nuwavenow.com
©2016 NuWave, LLC • All Rights Reserved.
ON-1605-05A
NuWave Brio
™
Digital Air Fryer