Loading ...
Loading ...
Loading ...
• Verify power has been turned o before starting any work!
• The Register model RM can only be mounted with the element up. It cannot be mounted in the
ceiling. For multiple heater wiring, see page 6.
• For cleaner performance and longer heater life, install your heater 12 inches from the floor.
• All models can be installed to be Americans with Disabilities Act (ADA) compliant. Check your
state and local requirements.
• A thermostat is required for all models. An electronic wall thermostat is recommended for ultimate
comfort and energy savings.
• The wall can label arrow shows the correct mounting orientation (arrow must point up).
If you haven’t installed drywall yet, make sure the front of the wall can extends beyond the front edge
of the wall stud to match the drywall depth (Figure 2).
If you already have drywall installed, rotate the wall can into the cutout legs first. Keep the front of the
wall can flush with the drywall.
Fasten the wall can to a stud (on either left or right side), with two screws (not included) through the
larger holes provided in the wall can (Figure 2).
tip: if not installing at minimum height, for additional support in new construction, legs can bend 90
degrees on the wall can (see Figure 2).
STEP 3
Mount the wall can
STEP 1
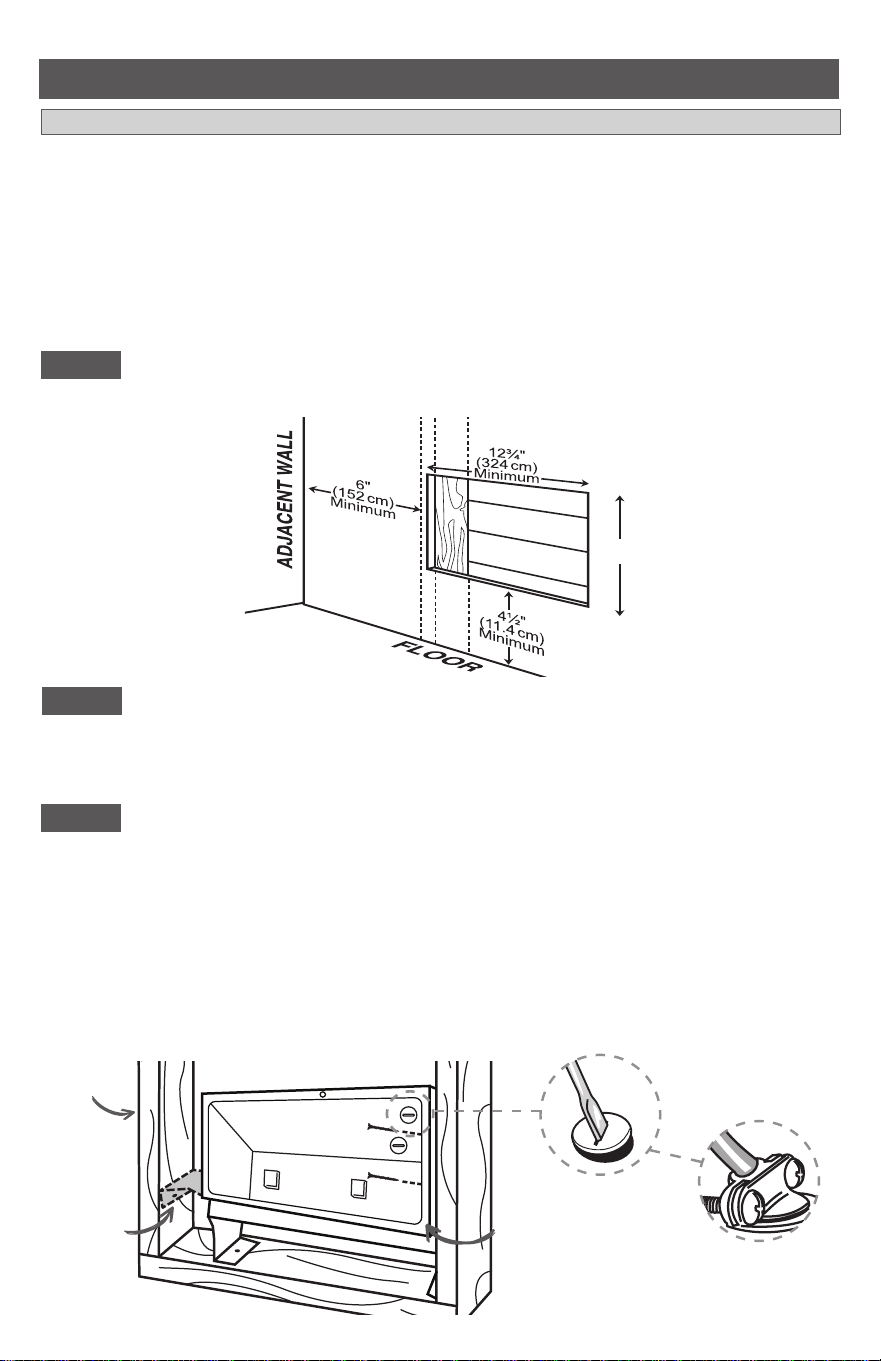
Cut a hole in the wall next to a wall stud
6"
(152 cm)
STEP 2
Locate or route electrical supply wires
Route the electrical supply wire from the circuit breaker to the wall thermostat, and then to the heater
location.
Remove a knockout from the wall can and attach the supply wire with a cable clamp connector (not
included) leaving a minimum of 6 inches wire lead (See Figure 2).
INSTALLATION INSTRUCTIONS
4
Figure 2
If you haven’t installed drywall yet, skip this step.
TIPS BEFORE YOU BEGIN
Figure 1
Model RM
front of wall
can extends
beyond front
edge of wall
stud to match
drywall depth
legs can
bend 90
degrees for
additional
support if
mounting
higher on
wall
Proceed to STEP 4. If you have a multi-watt model and want to lower the wattage, proceed to HOW
TO CHANGE THE WATTAGE.
wall
stud
twist with screwdriver
to remove one of the
knockouts
attach supply wire
with a cable clamp
connector
fasten with 2
wood screws
Loading ...
Loading ...
Loading ...