Loading ...
Loading ...
Loading ...
EN
W415-2841 / E / 12.22.20
11
installation
5. With the wall mounting bracket installed, have 2 people lift the appliance up and insert the 4 bracket hooks (2
hooks per bracket) into the 2 slots on the back of the appliance.
6. Check the appliance for stability, ensuring that the bracket will not pull free from the wall.
2.3 wall mount installation
Due to the many different materials used on different walls, it is highly recommended that you consult your local
builder before you install this appliance on the wall.
1. Select a location that is not prone to moisture and is located at least 36” (91.4cm) away from combustible
materials such as curtain drapes, furniture, bedding, paper, etc.
2. Have 2 people hold the appliance against the wall to determine the final location.
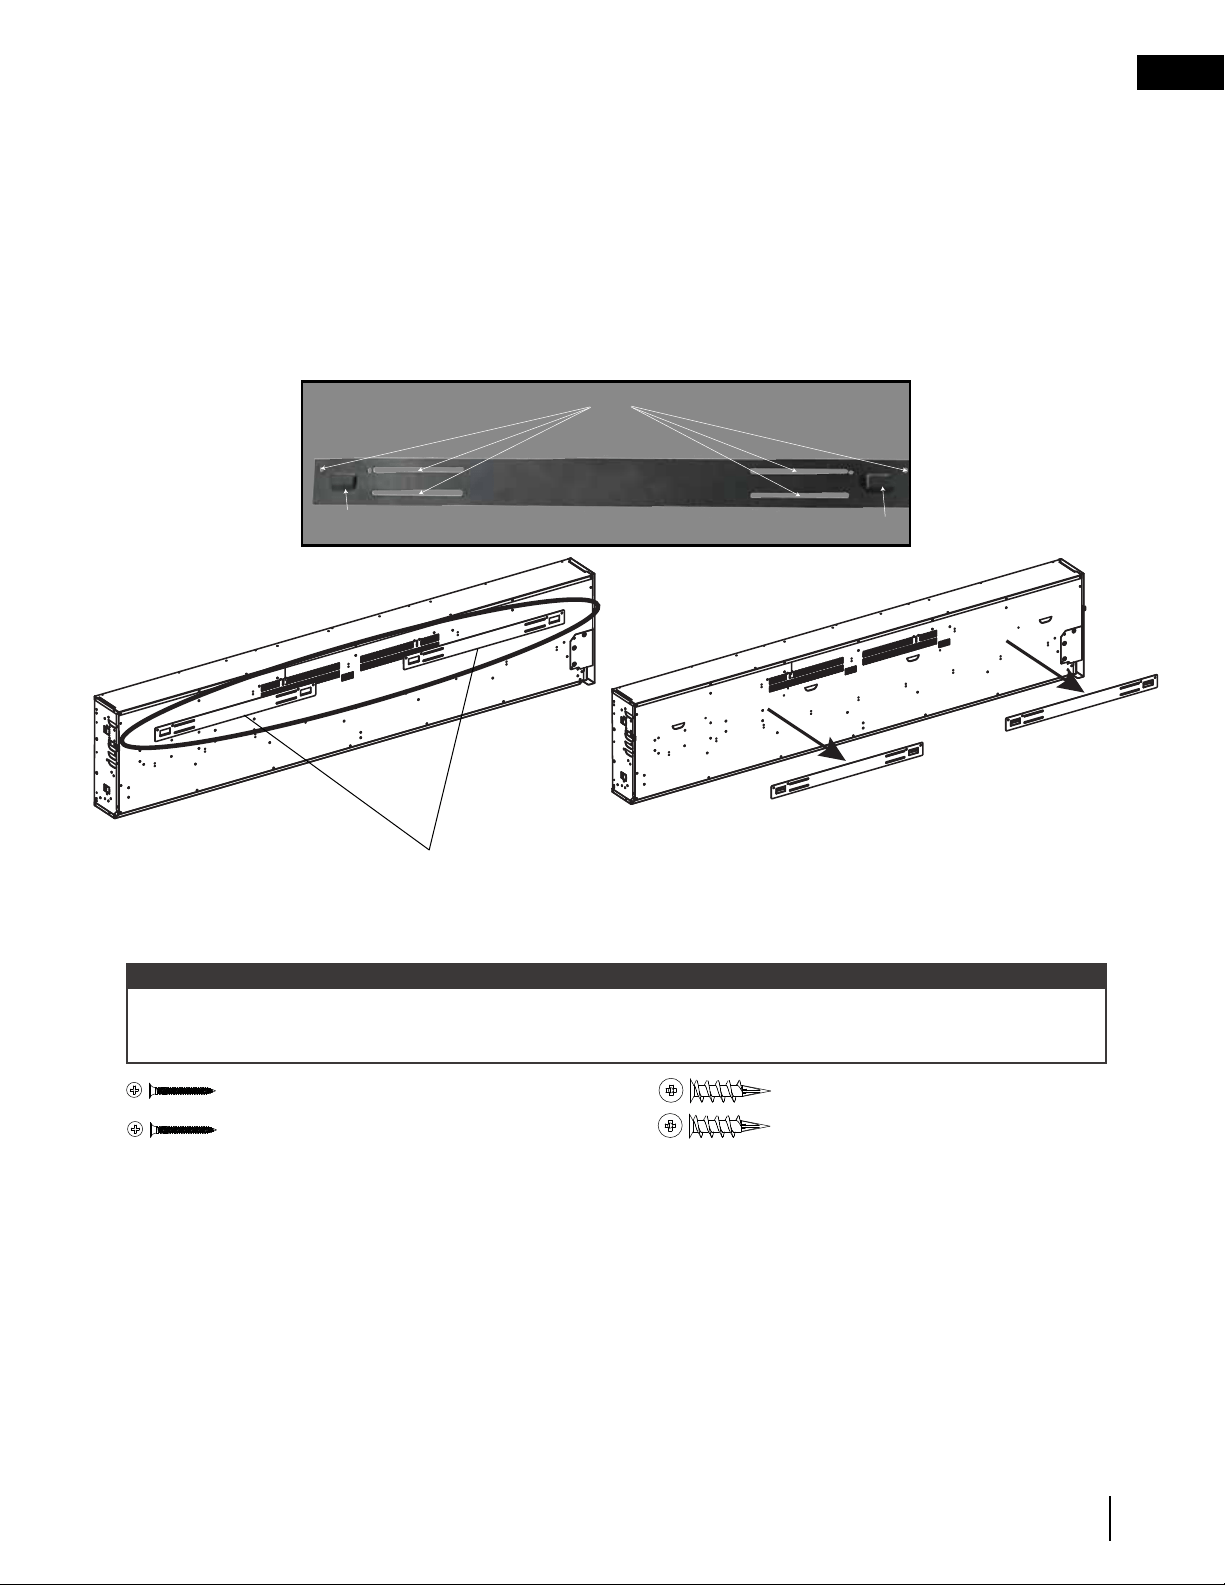
3. Place appliance face down on a soft, non-abrasive surface. Remove the bracket from the back of the
appliance by removing the screws (Fig. 2-1). Set the screws aside.
The mounting bracket must be screwed into the wall studs with at least 2 screws. If the remaining screws
cannot be screwed into a stud, ensure that plastic anchors (provided) are used to affix the bracket to the wall
and that the bracket is adequately secured.
note:
HOOK
SCREWS
HOOK
Fig. 2-1
4. Mark out location, then mount the bracket(s) onto the wall using screws (supplied). This bracket must have
the hooks facing upward and be level.
Wall Brackets
A x 6 for NEFL42/50CHS/D-1
A x 12 for NEFL60/74CHS/D-1 & NEFL100CHD-1
B x 6 for NEFL42/50CHS/D-1
B x 12 for NEFL60/74CHS/D-1 & NEFL100CHD-1
Loading ...
Loading ...
Loading ...