Loading ...
Loading ...
Loading ...
31
EN
Note: Several
programmed heating
periods can be
used for one day. A
programmed heating
period can also be
used for several days.
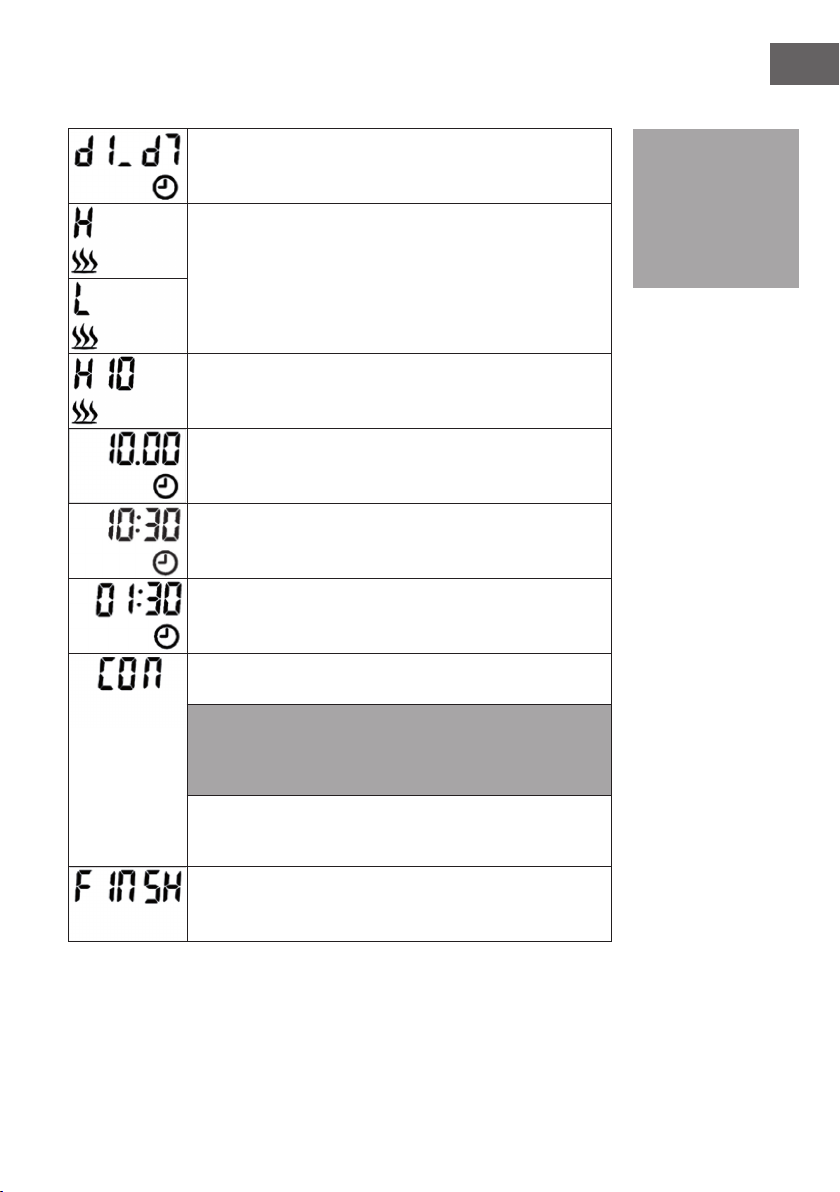
Example of a manually set weekly timer
For selecting “d1” (Monday) as rst activation day, and “d7”
(Sunday) as last activation day.
Press the (+) or (-) button to select the heating level:
H = high heat output,
L = low heat output.
Press OK to conrm the selection
Press the (+) or (-) button to set the desired temperature. Press OK
to conrm the selection.
Press the (+) or (-) button to select the hour at which to start the
heating. Press OK to conrm the selection.
Press the (+) or (-) button to select the minute at which to start the
heating. Each press of the button increases the minute display by 5
minutes. Press OK to conrm the selection.
Press the (+) or (-) button to set how long the heater will run. Each
press of the button increases the display by 30 minutes. Press OK
to conrm the selection.
Now the setting of the rst heating period of the program is
completed. The display will show [CON] (conrmed).
Note: The program cannot run until the next day. The maximum
duration may not exceed midnight. That is, if the start time is 20:30
and you set 4 hours for the duration, the program ends after 3:30
because that is when midnight is.
To set a second heating period, press OK. If you have set the
second heating period, press OK again and the display will return
to the day selection for the second heating period.
To complete the setting, press the (+) or (-) button until [FINSH]
appears in the display. Then press OK to complete the
programming.
Loading ...
Loading ...
Loading ...