Loading ...
Loading ...
Loading ...
Attach heating panel sets to joists
1. Align a heating panel set with one of the joists to which it will be attached. Make reference to the layout made
in Part 1 for heating panel locations.
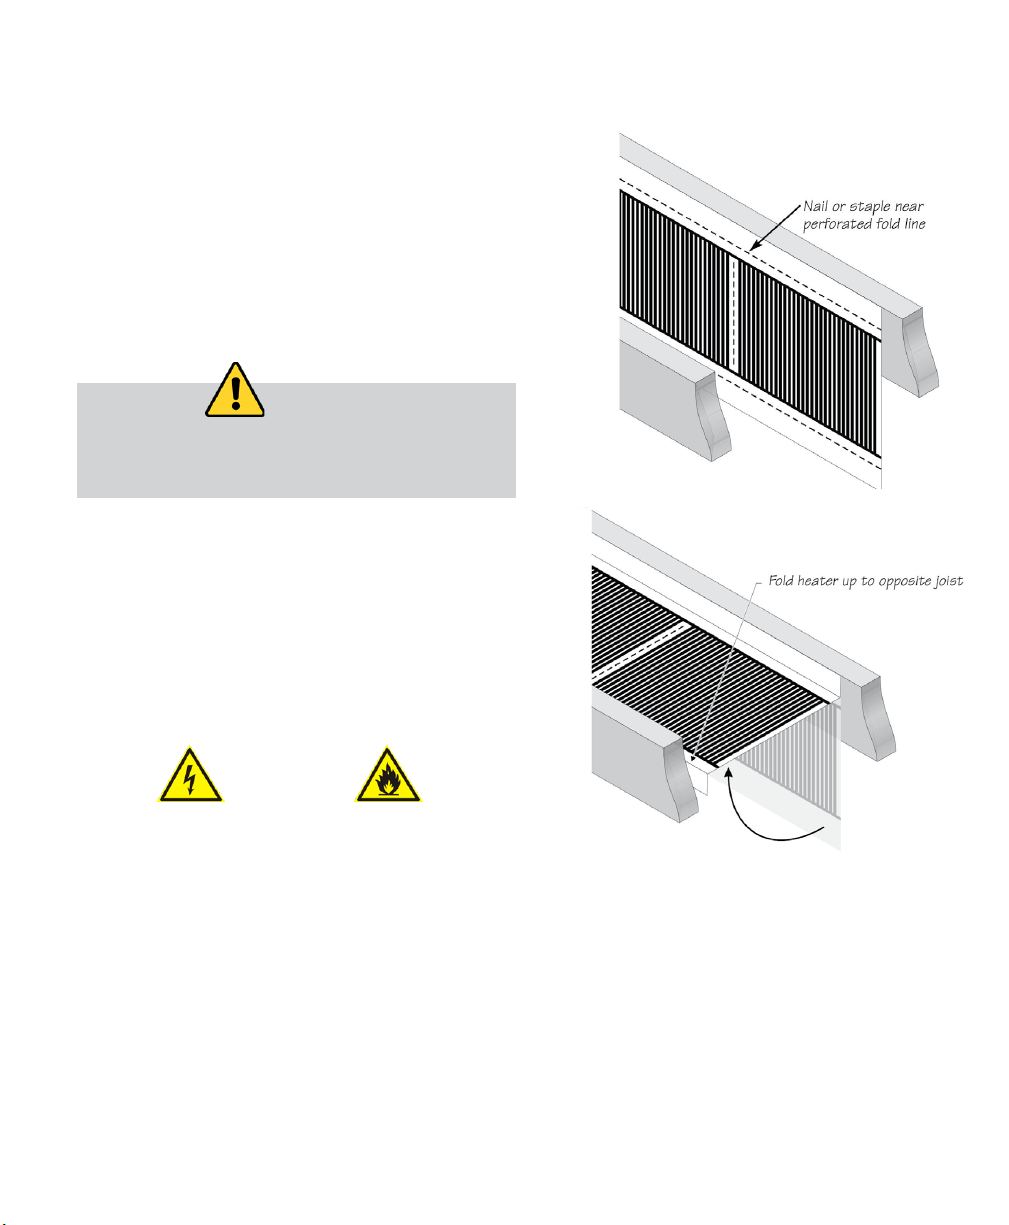
2. Nail or staple the panel set in place, leaving at least 6 inches /
150 mm clearance to walls or partitions at the connector end for
wiring and final assembly. Nail or staple as close to the perforated
bending line as possible, keeping the edge of the panel set
straight along the top edge of the joist. Nails or staples must be
placed at least once every 12 inches / 300 mm along each side of
the heating panel set.
3. Fold the heating panel so that it runs level between the two
joists and nail or staple the other side into position.
4. Repeat for each heating panel set, then continue to the next
section, Wire the Heating Panel Sets.
Installation & Owner’s Guide QW-JOIST 6
CAUTION:
Do not pierce the panels within 3/8 inch / 10 mm of
the bus bar or heating portion of the panel.
The heating panels must run smooth and flat between
the joists. There must be no wrinkles in the heating
panels. Heating panels must run parallel to the joists
they are attached to.
NOTE:
To insure efficient operation of heating panel, please
leave an air gap of 2” or 50 mm between the heating
panel and subfloor.
Loading ...
Loading ...
Loading ...