
Loading ...
Loading ...
Loading ...
4
1
Using the iron
1) Filling the tank
Before first use, remove all packaging, including the protective cover on the soleplate. Make sure the iron is not
p
lugged in. Set the steam switch
(
6)
t
o off. Fill the water tank
(
17)
v
ia the filling hole
(
13)
.
To fill the tank with the
m
aximum amount of water, we recommend the iron is tilted approximately 45º whilst being filled.
Do not overfill the iron otherwise it will cause leaking from around the filler cap and may run down the iron.
WE RECOMMEND THE USE OF DEIONISED, DISTILLED OR DEMINERALISED WATER.
N
ever use battery topping up fluid or water containing any substances like starch, sugar, fragrant additives
o
r defrosted water from a refrigerator. NOTE: Please see point 2 of ‘Exclusions’ on page 8.
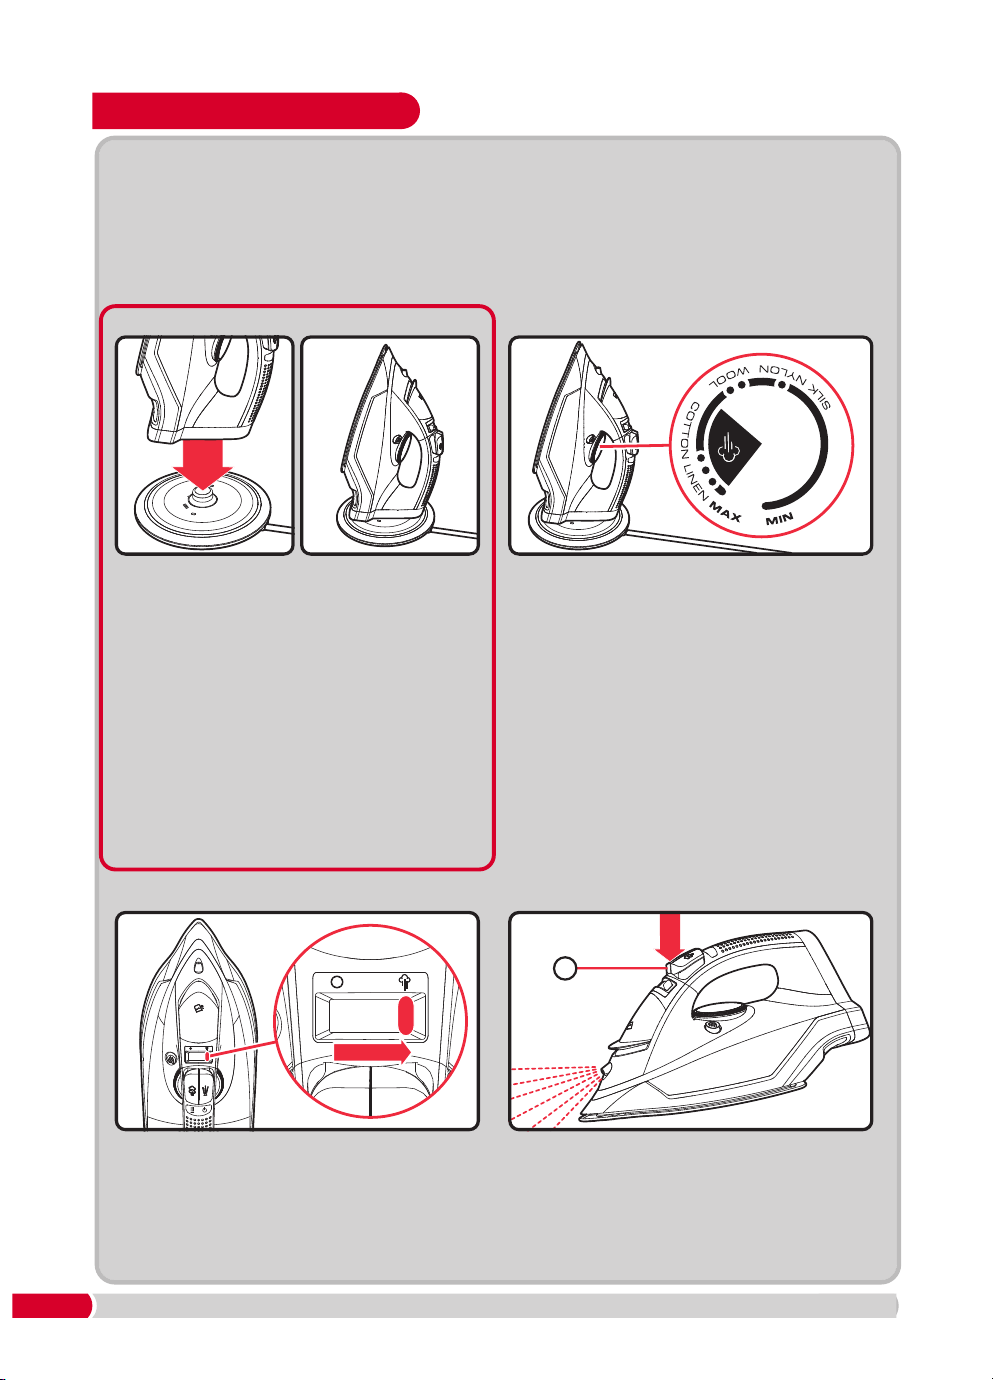
Plug in the charging base (10) and switch on at
the mains. The charging base indicator light (7)
will illuminate red.
Rest the iron on its heel
(4) on the charging base,
ensuring that the heel connector (5) meets the
charging base connector
(9). Connection is made
when the temperature indicator light
(3) on the
handle illuminates red
.
Wait until the iron reaches
the desired temperature (see step 3), then
commence ironing.
Throughout your ironing session, the iron
must be replaced onto the charging base
every few seconds or whenever you adjust
your garments, to keep the heat topped up. If
the charging base indicator light
(7) is fl
ashing
red, the iron must be replaced onto the
charging base until the red light turns green
again, then you can recommence ironing.
Set the temperature dial (16) to the temperature
required (see ‘Temperature Guide’ on page 3).
The charging base indicator light (7) and the
temperature indicator light (3)
will illuminate
red until the required temperature is reached,
then they will turn green.
NOTE: It is normal for the temperature indicator
light
(3)
to flicker between red and green whilst
the temperature cycles up and down during
charging.
Tip: We recommend the temperature indicator
light is allowed to cycle red and green twice
before you begin ironing.
The temperature indicator light
(3)
will extinguish
when the iron is removed from the base.
Tip: Begin with cool fabrics and work up to higher
settings. An iron heats up quicker than it cools
down so this will save you time and energy.
If required, switch on the steam using the steam
switch
(6).
The amount of steam is automatically adjusted
to suit the temperature selected.
The iron will only produce steam when the
temperature is set within the steam quadrant on
the temperature dial
(16), eg. if the 2 Dot setting
is selected, the iron will not steam.
For stubborn creases, use the water spray
button
(1).
If using for the first time, you may need to press
this a few times to pull the water through.
2) Charging base 3) Temperature Selection
4) Switching on the steam 5) Using the water spray
RN303251MUK Rev1.qxp_Instruction Booklet 03/03/2021 09:29 Page 4
Loading ...
Loading ...
Loading ...