Loading ...
Loading ...
Loading ...

www.insigniaproducts.com
31
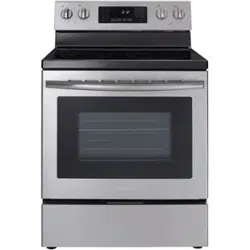
4.8 Cu. Ft. Electric Convection Range with Steam Cleaning
Selecting the 12-hour or 24-hour display setting
1 Press and hold the AM / PM pad three seconds.The display shows the present mode.
2 Press the AM / PM pad to change between the 12-hour and 24-hour display setting. The display shows 12Hr or 24Hr
depending on your selection.
3 Press the Start pad to save the clock display mode.
Using the timer
The timer serves as an extra timer that beeps when the set time has elapsed. It does not start or stop cooking functions.
You can use this function at the same time as any other oven function or even when neither the cooktop or oven are in
use. You can set the timer for any amount of time from 1 minute to 23 hours and 59 minutes.
1 Press the Timer On/Off pad. The display shows Timer, and 00:00 blinks in the display.
2 Use the number pads to enter the amount of time you want in minutes or hours and minutes. The display shows the
set time.
3 Press the Start pad to start the timer. The display shows the remaining time. When time has elapsed, the timer
continues to beep until you press the Timer On/Off pad. After you press the Timer On/Off pad, the display shows the
time of day.
Baking
The Bake function lets you program the oven to bake to any temperature between 150°F (66°C) and 550°F (288°C).
1 Position the oven rack where you want it.
2 Press the Bake pad. The display blinks bake icon and shows of 350°. If the default temperature is the cooking
temperature you want, skip to step 4.
3 (Optional) Press the number pads to enter the cooking temperature you want. The display blinks the temperature.
4 Press the Start pad. The oven automatically turns on and starts preheating. Place food in the oven after preheating is
complete. Preheating is important for good baking results.
The display shows PRE, 100°, and bake icons until the oven reaches 100°. Then, the display shows the actual oven
temperature. When the oven reaches the temperature you set, it beeps three times.
5 When baking is complete, remove the food from the oven, close the oven door, then press Off/Clear. The oven shuts
off and the display shows the time of day.
6 To change a programmed baking temperature, press Bake, enter the new baking temperature, then press Start. The
oven completes cooking at the new temperature.
Adjusting the thermostat
If your baking results are not what you are used to, the present oven cooking thermostat can be adjusted by up to ±35° F
(±19° C).
1 Press and hold the °F / °C pad for three seconds while in standby mode. The display shows 0.
2 Use the number pads to enter the temperature adjustment you want. For example, if you want the oven temperature
to be 10° higher than the displayed temperature, press 1, then 0. If you want the temperature to be 10 degrees lower,
press 1, 0, then press °F / °C for one second. The display change to -10.
3 Press the Start pad. The display shows the time of day. The next time you bake, the oven uses the new temperature
setting.
Fan baking and roasting
The Fan Bake and Fan Roast functions let you program the oven to bake or roast at any temperature between 150° F (66° C)
and 550° F (288° C). The fan in the back of the oven cavity circulates the hot air evenly throughout the oven cavity. As a
result, foods are more evenly cooked and browned in less time than with regular heat.
For fan baking:
• Ideal for foods being cooked on multiple racks.
• Good for large quantities of baked foods.
• Provides good results with cookies, biscuits, brownies, cupcakes, cream puffs, sweet rolls, angel food cake, and bread.
• Cookies have best cooking results when cooked on flat cookie sheets.
• When fan baking on a single rack, place the oven rack in position 3 or 4.
• When fan baking on multiple racks, place the oven racks in position 3 and 5.
For fan roasting:
• Good for larger tender cuts of meat, uncovered.
• Place a broil pan and grid under the meat or poultry during fan roast for best results. The pan catches grease spills and
the grid prevents grease spatters.
Note: This temperature adjustment is retained in memory after a power failure. This adjustment will be used in all future baking
including Bake, Fan Bake, Fan Roast, Broil, and Keep Warm. Adjusting the thermostat does not affect steam-cleaning. If you want to
adjust the temperature for a single baking task, see Baking on page 31.
Loading ...
Loading ...
Loading ...