Loading ...
Loading ...
Loading ...
Drainage
While the water tank is full, the compressor will stop for self-protection and the water
full indicator light will turn red.
To move the water tank, pull it out squarely from the unit.
After empting the water tank, place the water tank carefully back into its location into
space. The tank must be properly located in order for the ‘water full’ light to go out
and for your dehumidier to start operating again.
Please note, if the water tank has not been positioned/located correctly, the water full
indicator will stay red and the product will not operate.
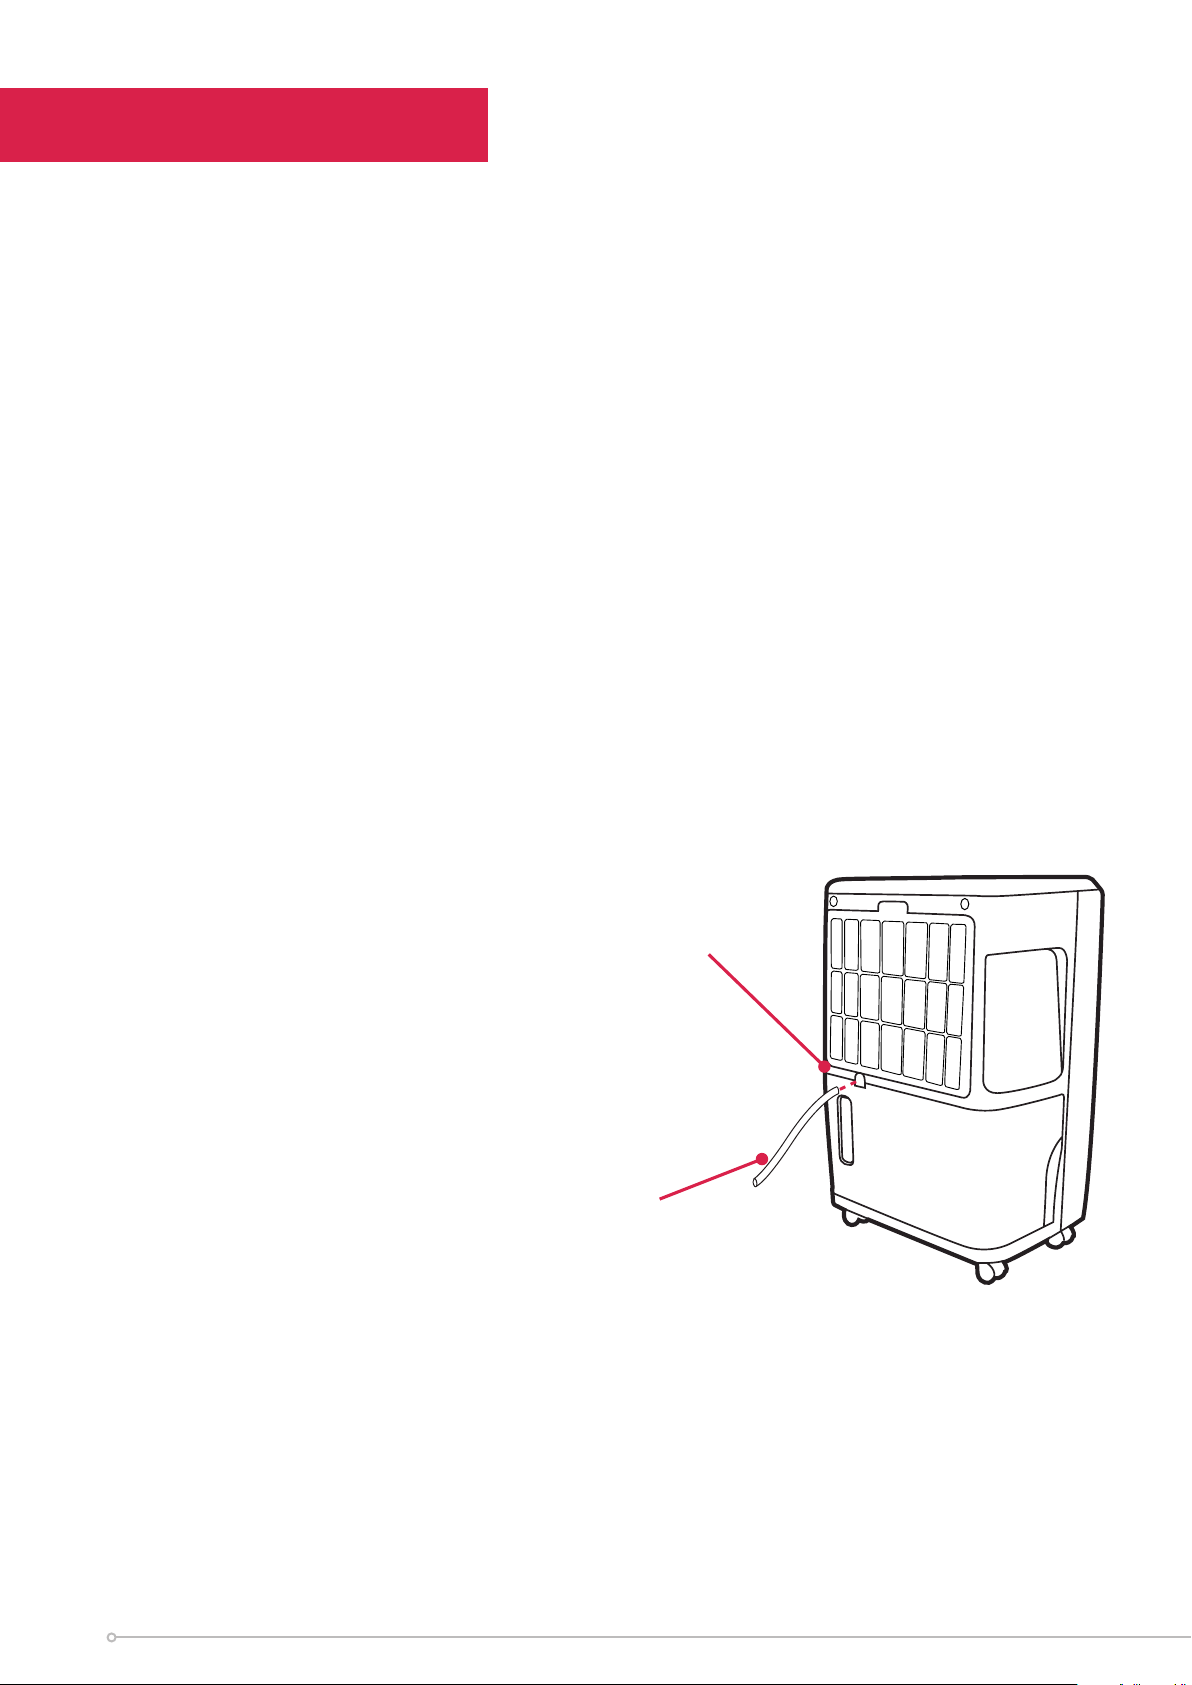
CONTINUOUS DRAINAGE
When the dehumidier is operated at very high humidity levels, the water tank will
require more frequent emptying. In this situation, it may be more convenient to set the
unit up for continuous drainage, this can be done as follows;
1 . P u l l o u t t h e w a t e r t a n k .
2. Connect a water drain tube of inner
diameter 11 mm to the drain spout
connection outlet at the top of the
tank location area.
* Please note, the water tube is not supplied
with the unit.
3. Ensure the drain tube is xed properly
and that water will always drain away
freely through the tube (the drain
point/open end of the tube must be
at a lower height than the drain outlet
from the product).
Note! In very cold weather conditions,
precautions should be taken to prevent the
water tube from freezing.
4. Put the water tank back to its position.
Spout connection
for continuous
drainage
Water drain tube
with 11mm internal
diameter
Always unplug the unit from the mains before carrying out any maintenance or cleaning
of the unit.
CLEANING THE BODY
Use a soft damp cloth to wipe the unit clean.
Don’t ever use volatile chemicals, gasoline, detergents, chemically treated clothes, or
other cleansing solutions. These all could possibly damage the enclosure.
CLEANING THE FILTER
This dehumidier is equipped with 2 lters.
The plastic dust lter is washable and should be cleaned approximately every 2 weeks
when in use (see instruction below).
The active carbon lter is not washable its life span is variable and depends on the
ambient conditions where the unit is used. The lter should be checked periodically
and replaced if necessary.
WASHING THE PLASTIC DUST FILTER
•
Remove the anti-dust lter and separate the active carbon lter (not washable)
and set it aside carefully.
•
Use a vacuum cleaner or tap the plastic air lter lightly for easy cleaning. If the
lter is particularly dirty, use warm water with a small amount of medium strength
detergent to rinse the lter.
• Allow it to dry naturally and make sure the lter is completely dry before replacing.
• Do not expose the lter to sunlight.
STORAGE
If not using the unit for an extended period of time. Please:
• Turn the unit o, unplug and take care of the mains lead & plug.
• Completely empty the water tank and clean it thoroughly and wipe it dry.
•
Cover the unit and store it upright in a location where it will not receive direct sunlight.
NB- Prolonged exposure to direct sunlight will discolour the enclosure.
Maintenance
Anti-Dust
Filter
Active Carbon
Filter
Air Inlet
13
12
Loading ...
Loading ...
Loading ...