Loading ...
Loading ...
Loading ...

17
EN
BEFORE FIRST USE
• All parts of the food mixer are to be thoroughly cleaned before being used for the
rst time (see section: Cleaning).
• Take out the required length of cable from the cable tidy on the base of the food
mixer and connect the device to the mains supply.
USE AND OPERATION
Note: For safety reasons, the lid or glass container must be tted before the machine
can be put into operation. Otherwise the machine may not start.
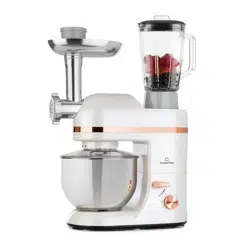
Assembly of the Glass Jar
1. Mount the jar sealing ring onto the blade base ,and Mount the blade base into the
jar base, and the inside ring of jar base is tighten on jar base as far as xed the
blade base tight.
2. After putting the ingredients in the jar, x the lid onto the jar by pressing down.
3. Insert the Measuring cup into the opening of the lid, and tune it in anticlockwise
direction until it is locked.
4. Mount the jar with jar unit onto the main base, and tune the jar in anticlockwise
direction until the jar is locked.
Trial Use
1. Revolve the Shaft knob, then lift the machine arm.
2. Put the mixing bowl and mixing bowl cover onto the base, and lock it as the
arrowhead denotes.
3. Revolve the Shaft knob, then push the upper cover down and make the arm down.
Make sure the arm is xed together the base, then Revolve the Shaft knob up to
lock the arm solidly.
4. Plug-in the cord, and turn the switch to P, then try every speed for a few seconds.
5. After the trial, turn the switch to Speed 0.
6. Turn the Shaft knob and lift the arm, then take apart the mixing blade from the blade
conector.
7. Take off the back cover from the upper housing.
8. Pure a cup of water into the blender jar, set the blender jar onto the machine, then
repeat step 4, 5 and 6.
9. Take off the blender jar, and set the Caudal cover to the machine.
Loading ...
Loading ...
Loading ...
