Documents: Go to download!
User Manual
- Owner's manual - (English)
- Warranty - (English)

- CHARGING THE INTERNAL BATTERY OF THE JUMP STARTER
- OPERATING INSTRUCTIONS
- MAINTENANCE INSTRUCTIONS
- MOVING AND STORAGE INSTRUCTIONS
- TROUBLESHOOTING
- SPECIFICATIONS
- REPLACEMENT PARTS
- ACCESSORIES
- WARRANTY
Table of contents
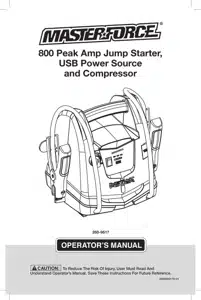
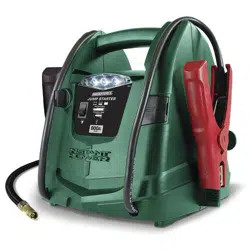
User Manual for Masterforce MF182
Table of Contents
CHARGING THE INTERNAL BATTERY OF THE JUMP STARTER
IMPORTANT: CHARGE IMMEDIATELY AFTER PURCHASE, AFTER EACH USE AND EVERY 30 DAYS, TO KEEP THE JUMP STARTER’S INTERNAL BATTERY FULLY CHARGED AND PROLONG BATTERY LIFE.
CHECKING THE LEVEL OF THE INTERNAL BATTERY
Press the Battery Status button on the front of the unit. The LED lights will indicate the current charge level as follows:
• RED – less than 20% of full charge; immediately charge the unit.
• YELLOW/ORANGE – 20-80% of full charge.
• GREEN – more than 80% of full charge.
CHARGING THE INTERNAL BATTERY
Charge the unit’s internal battery using an extension cord (not included).
NOTE: Use of an improper extension cord could result in a risk of fire and electric shock.
1. To charge, flip the AC connector on the back of the unit DOWN and plug in an 18 AWG or larger extension cord.
2. Plug the extension cord into a 120VAC electrical wall outlet.
3. While the jump starter is charging, the RED LED will be on. Complete charging may take up to 72 hours. When the RED LED turns off, the jump starter is ready to use.
4. When the internal battery is fully charged, the charger will automatically go into maintain mode and maintain the battery at full charge without damaging it. When in maintain mode, the GREEN LED will light, as long as there is an AC cord connected to the charging port.
5. Charge the jump starter as soon as possible after use.
CHARGING THE INTERNAL BATTERY WHILE DRIVING
You may also charge the internal battery while driving, using a male-to-male charger cable (part number 94500109 – not included).
IMPORTANT: DO NOT CHARGE INTERNAL BATTERY FOR MORE THAN 30 MINUTES OR LEAVE THE BATTERY UNATTENDED. IT COULD EXPLODE, CAUSING PROPERTY DAMAGE OR PERSONAL INJURY.
1. Make sure the car is running.
2. Insert one end of the accessory cable into the 12V DC power outlet.
3. Insert the other end of the accessory cable into the vehicle’s accessory outlet (lighter socket).
NOTE: The RED LED does not operate during this method of charging. Using this method to charge the battery overrides the maintain mode and the battery can be overcharged.
4. Monitor the progress of the charge by pressing the Battery Status button on the front of the unit. When the battery is fully charged, disconnect the accessory cable from the unit, and then from the lighter socket of the vehicle.
NOTE: Completely disconnect the charger cable when the engine is not running.
OPERATING INSTRUCTIONS
JUMP STARTING A VEHICLE
IMPORTANT: Using the jump starter without a battery installed in the vehicle will damage the vehicle’s electrical system.
1. Turn the ignition OFF.
2. Lay the DC cables away from any fan blades, belts, pulleys and other moving parts.
3. For a negative-ground vehicle (as in most vehicles), connect the Instant Power’s POSITIVE (RED) clamp to the POSITIVE (POS, P, +) battery post. Next, connect the NEGATIVE (BLACK) clamp to the vehicle chassis or engine block, away from the battery.
4. For a positive-ground vehicle, connect the Instant Power’s NEGATIVE (BLACK) clamp to the NEGATIVE (NEG, N, -) battery post. Next, connect the POSITIVE (RED) clamp to the vehicle chassis or engine block away from the battery.
5. Turn the switch to the ON position
6. Crank the engine for no more than 8 seconds. If the engine does not start, wait 2 minutes before cranking again.
7. After the engine starts, turn the switch to the OFF position and remove the unit from the battery.
8. Charge the unit.
USING THE USB PORT
The USB port provides up to 2A at 5V DC.
1. Ensure the battery clamps are securely clipped on the storage holders.
2. Turn the unit ON.
3. Plug your device into the USB port.
4. When finished using the USB port, turn the switch to the OFF position.
5. Charge the unit.
USING THE WORK LIGHT
The work light is controlled by a sliding ON/ OFF switch located on the front of the unit.
• Make sure the lamp is turned OFF when the unit is being recharged or stored.
• Position the unit on a flat, stable surface near the intended work area.
• Ensure the battery clamps are securely clipped on the storage holders.
POWERING A 12V DC DEVICE
The unit is a power source for all 12V DC accessories that are equipped with a 12V accessory plug. Use it for power outages and on fishing or camping trips.
NOTE: Do not power a 12V device with the unit while charging the internal battery.
1. Make sure the device to be powered is OFF before inserting the 12V DC accessory plug into the 12V DC accessory outlet.
2. Open the protective cover of the DC power outlet on the unit.
3. Plug the 12V DC device into the DC power outlet and turn on the 12V DC device (if required).
4. When finished, turn off the DC device (if required) and unplug from the DC power outlet.
CAUTION : Do not use the unit to run appliances that draw more than 20A DC.
NOTE: Extended operation of a 12V DC device may result in excessive battery drain. Recharge the unit immediately after unplugging the 12V DC device.
ESTIMATED RUN-TIMES

NOTE: Actual time may vary. Times are based on the internal battery being fully charged.
USING THE AIR COMPRESSOR
WARNING: Read the instructions of the product being inflated before using the compressor. Avoid overinflation; do not exceed the manufacturer’s recommended pressures. Do not leave the air compressor unattended during use.
NOTE: Wrap cleats are provided for convenient storage of the air compressor hose. Wrap the hose around these cleats when the hose is not in use.
1. Ensure the battery clips are securely on the storage holders.
2. Remove the air compressor hose from the storage cleats.
3. Connect the adapter to the valve stem by threading it onto the end. If necessary, use one of the additional adaptors.
4. Press the air compressor power switch to turn ON and inflate to the desired pressure or fullness (refer to the gauge next to the switch).
5. When the desired pressure is reached, press the air compressor power switch to turn OFF and remove the connector from the valve stem.
6. Allow unit to cool.
7. Recharge the unit before storing.
NOTE: The air compressor is rated for 150 PSI.
ESTIMATED TIME FOR INFLATING
- Vehicle tires 13-16" : 6-24 minutes
- Bike tires : 1-3 minutes
- Sports balls : 30 seconds
MAINTENANCE INSTRUCTIONS
• After use and before performing maintenance, unplug and disconnect the jump starter.
• Use a dry cloth to wipe all battery corrosion and other dirt or oil from the battery clips, cords and the jump starter case.
• Ensure that all of the jump starter components are in place and in good working condition.
• All servicing should be performed by qualified service personnel.
MOVING AND STORAGE INSTRUCTIONS
• Store inside, in a cool, dry place.
• Do not store the clips on the handle, clipped together, on or around metal, or clipped to cables. The clips on the jump starter are live when the switch is in the ON position and will produce arcing or sparking if they come in contact with each other. To prevent accidental arcing, always place the switch in the OFF position and keep the clips on the storage holders when not using it to jump start a vehicle.
• If the jump starter is moved around the shop or transported to another location, take care to avoid/prevent damage to the cords, clips and jump starter. Failure to do so could result in personal injury or property damage.
IMPORTANT: Do not use and/or store the jump starter in or on any area or surface where damage could occur if the internal battery should unexpectedly leak acid.
IMPORTANT:
• CHARGE IMMEDIATELY AFTER PURCHASE
• KEEP FULLY CHARGED
Charge the jump starter’s internal battery immediately after purchase, after every use and every 30 days.
All batteries are affected by temperature. The ideal storage temperature is at 70°F. The internal battery will gradually self-discharge (lose power) over time, especially in warm environments. Leaving the battery in a discharged state may result in permanent battery damage. To ensure satisfactory performance and avoid permanent damage, charge the internal battery every month.
TROUBLESHOOTING

SPECIFICATIONS
Internal battery type ...............................Sealed maintenance-free AGM lead-acid
Nominal voltage ............................................................................................. 12V DC
USB output.................................................................................................5V DC, 2A
Jump start........................................................................800A peak/400A cranking
REPLACEMENT PARTS
Air compressor accessory kit (3 hose adapters)................................ 2299001425Z
ACCESSORIES
Male-to-male accessory cable.................................................................. 94500109
WARRANTY
90-DAY MONEY BACK GUARANTEE
This MASTERFORCE™ brand jump starter carries our 90-Day Money Back Guarantee. If you are not completely satisfied with your MASTERFORCE™ brand product for any reason within ninety (90) days from the date of purchase, return the item with your original receipt to any MENARDS® retail store, and we will provide you a refund – no questions asked.
3-YEAR LIMITED WARRANTY
This MASTERFORCE™ brand jump starter carries our famous No Hassle 3-Year Limited Warranty to the original purchaser. If, during normal use, this MASTERFORCE™ product breaks or fails due to a defect in material or workmanship within three (3) years from the date of original purchase, simply bring the item with the original sales receipt back to your nearest MENARDS® retail store. At its discretion, MASTERFORCE™ agrees to have the item or any defective part(s) repaired or replaced with the same or similar MASTERFORCE™ product or part free of charge, within the stated warranty period, when returned by the original purchaser with original sales receipt. Not withstanding the foregoing, this limited warranty does not cover any damage that has resulted from abuse or misuse of the Merchandise. This warranty: (1) excludes expendable parts including but not limited to blades, brushes, belts, bits, light bulbs, and/or batteries; (2) shall be void if this product is used for commercial and/or rental purposes; and (3) does not cover any losses, injuries to persons/property or costs. This warranty does give you specific legal rights and you may have other rights, which vary from state to state. Be careful, jump starters are dangerous if improperly used or maintained. Seller’s employees are not qualified to advise you on the use of this merchandise. Any oral representation(s) made will not be binding on seller or its employees. The rights under this limited warranty are to the original purchaser of the merchandise and may not be transferred to any subsequent owner. This limited warranty is in lieu of all warranties, expressed or implied including warranties or merchantability and fitness for a particular purpose. Seller shall not be liable for any special, incidental, or consequential damages. The sole exclusive remedy against the seller will be for the replacement of any defects as provided herein, as long as the seller is willing or able to replace this product or is willing to refund the purchase price as provided above. For insurance purposes, seller is not allowed to demonstrate any of these products for you. For questions/comments, technical assistance or repair parts— Please call toll free at: 1-800-621-5485
See other models: 3406409 MF183 MF181 MF180 MF192

