Loading ...
Loading ...
Loading ...
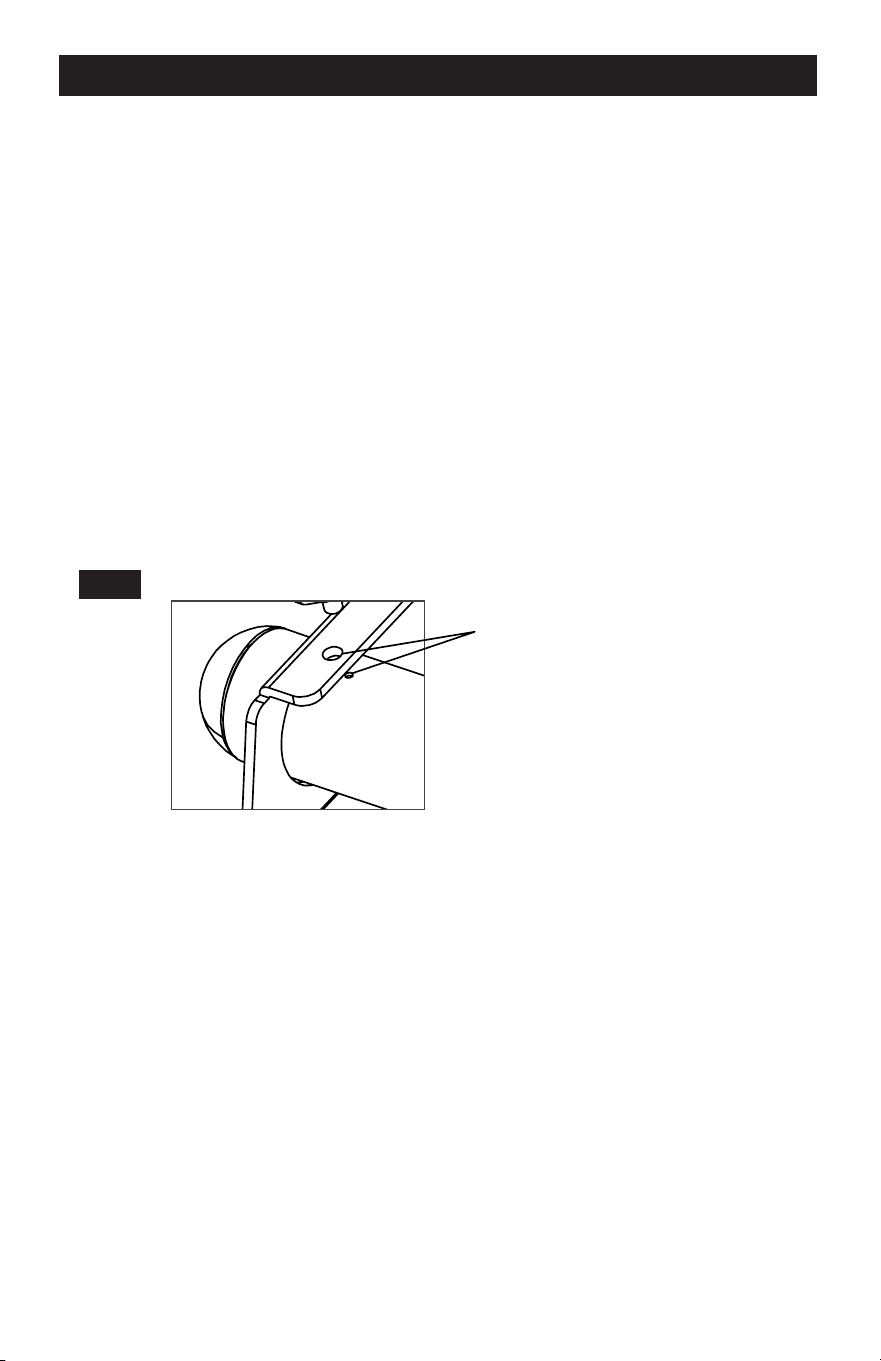
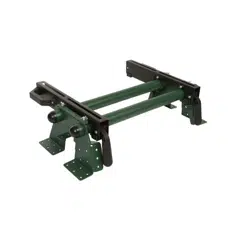
FIG 1
-
ASSEMBLY INSTRUCTIONS
MOUNTING INSTRUCTIONS
Required Tools: Phillips Head Screwdriver, Hex Key Wrench (Included), Box Wrench
2x4 Mounted Sawhorse Mounted
1. Carefully remove the contents of the box and place the
materials on a flat surface (table, floor, etc.).
2. Identify the included parts: Mounting Beams (2), Rapid
Clamp Tool Mounts (2), Mounting Plates (2) and Hardware.
NOTE
The hardware packet includes:
Carriage Bolts with Nuts (4),
Flat Washers (4), Lock Washers (4)
Locating Screws and Nuts (4),
Hex Key Wrench (1)
3. Slide both Mounting Beams through the large holes in
one of the Mounting Plates until the smaller locating
holes in the Mounting Beam align with the holes in the
Work Tables Wall Mounted
Mounting Plates. Repeat for the opposite side.
Smaller Locating holes
Freestanding
4. Thread the nuts onto the Locating Screws until flush with the head of the bolt.
5. Using the supplied Hex Key Wrench, thread the Locating Screws into the holes in the
Mounting Bracket until they stop.
NOTE
The two holes in either end of the Mounting Beams are intentionally not large enough to accept
the shaft of the Locating Screws. DO NOT ATTEMPT TO MAKE THESE HOLES LARGER. The
purpose of these holes is only to have a visual confirmation of proper alignment for wall
mounting scenarios.
6. Using a Box Wrench, turn the nuts on the Locating Screws clockwise until snug. The nuts
serve to keep the screws from backing out of the holes and becoming loose.
Page 5
Page 10
Loading ...
Loading ...