Loading ...
Loading ...
Loading ...
Installation and Maintenance
NOTE:
These appliances are designed for indoor
installation only.
The indoor units can be installed in one of the
upright, horizontal left, or horizontal right
orientations as shown in the Figures below.
Minor field modifications are necessary to
convert to horizontal left.
2.2 Installation Location
2.3 Installation
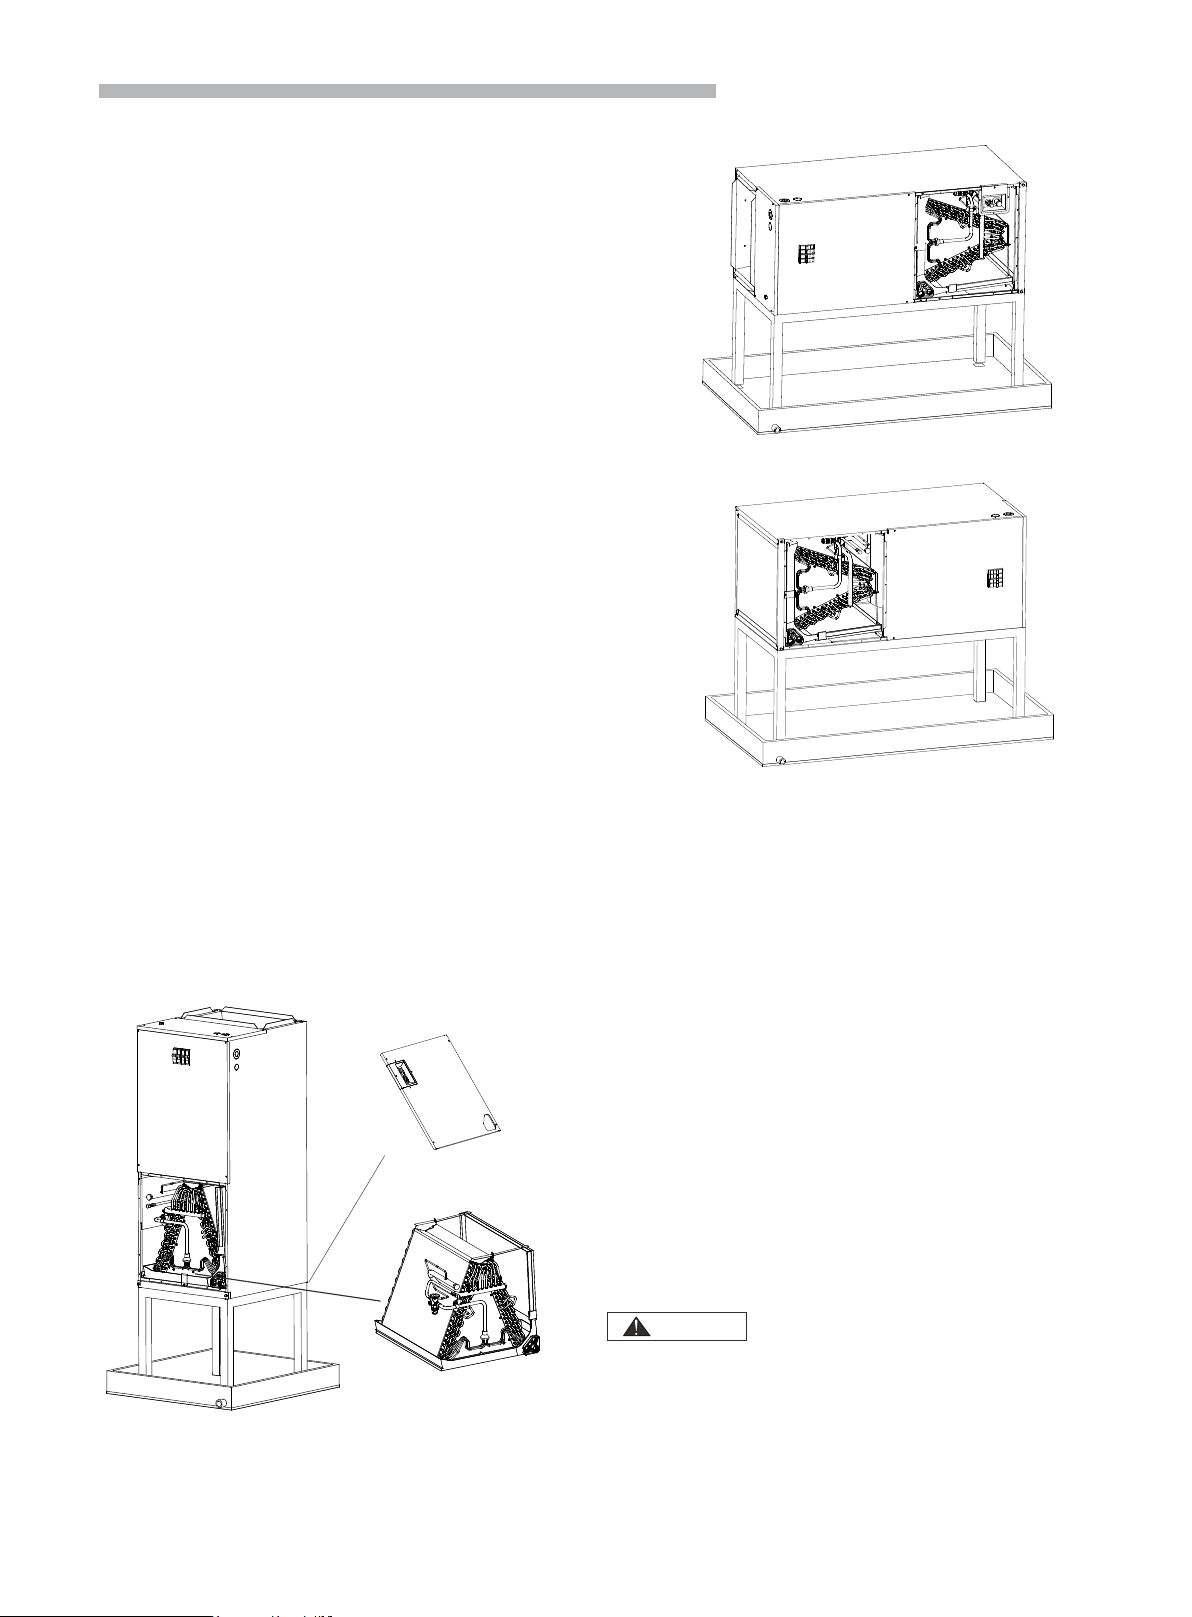
2.3a: Upright Installation
Evaporator
Lower Panel and
the Sealed Plate
2.3b: Horizontal Left Installation
2.3c: Horizontal Right Installation
Before selecting the installation site, obtain all required
permissions and follow the below parameters:
·Optimal air distribution is ensured.
·The air path is not blocked or obstructed.
·Condensation is able to drain properly.
·Ensure sufficient clearance for future maintenance and
servicing.
·Piping between the indoor and outdoor units should be
within the allowable limits. (Refer to the installation of
the outdoor unit manual)
·The indoor unit, outdoor unit, power supply wiring, and
transmission wiring should be kept at least 3 feet away
from televisions and radio, which prevents image
interference and noise in those electrical appliances.
(Noise may be generated depending on the conditions
under which the electric wave is generated, even if this
distance is maintained.)
·Do not install the indoor unit in a machinery shop or
kitchen where vapors from oils or any mists can reach
the indoor unit. Any oils will collect on the heat
exchanger, thereby reducing the performance of the
indoor unit, and may deform, and in the worst case,
break the plastic parts of the indoor unit.
6
The upright installation method is selected by default.
When the unit is horizontal-right mounted, rotate it to
the right by 90 degrees, as shown in the image for
horizontal-right installation (2.3c).
When the unit is horizontally-left mounted, the following
steps are required.
1). Disassemble the lower panel and the sealed plate.
2). Disassemble the retaining clips for the evaporator
so that the evaporator can be pulled out along the
lead rail easily.
3). Rotate the evaporator by 180 degrees and insert it
into the upper side of the lead rail.
4). Rotate the unit to the left by 90 degrees, as shown
in the image "2.3b: Horizontal-Left Installation".
5). Reinstall the sealed plate and the lower panel.
2.4 Air Duct
Field duct work must comply with the National Fire
Protection Association NFPA 90NFPA 90B, and any
applicable local ordinances.
Do not, under any circumstances, connect return duct
work to any other heat producing device such as a
fireplace insert, stove, etc. Unauthorized use of such
devices may result in fire, carbon monoxide poisoning,
explosion, personal injury or property damage.
WARNING
Loading ...
Loading ...
Loading ...