
Loading ...
Loading ...
Loading ...
W415-3030 / A / 10.29.21
EN
12
installation
2.6 installing the appliance
A. Frame an opening (see “framing” section for details).
B. Make hardwire connections on the left of the intended front side.
C. Remove the front trims of the appliance (see “front trim removal / installation” section).
D. Remove the front glass from the appliance (see “front glass removal / installation” section).
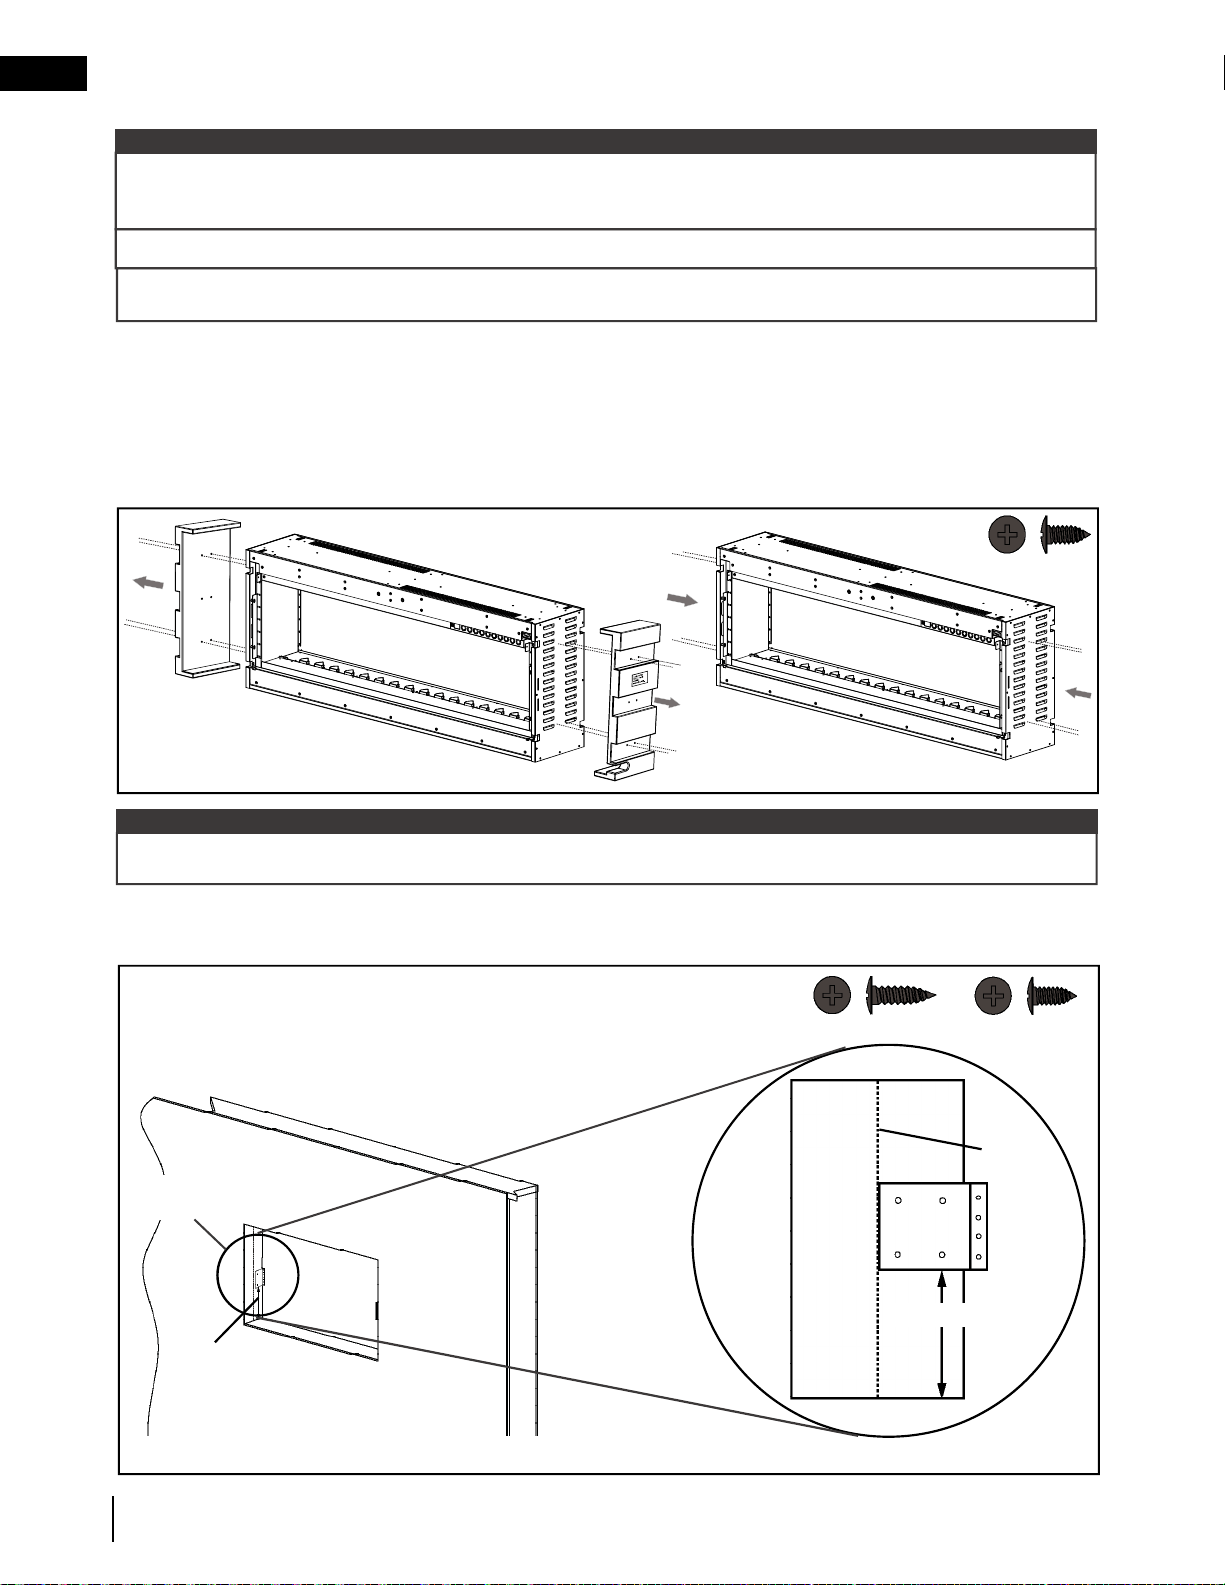
E. Remove the 2 MDF support ends from the appliance by removing the screws. Discard both MDF boards.
Use 4 new screws (supplied) on each side to cover MDF board screw holes (Fig. 2-1).
6 1/8” (164mm)
Center
of stud
Fig. 2-2
It is recommended to have the walls of the appliance enclosure be fi nished (i.e. drywall) to avoid exposed
insulation or vapour barrier coming in contact with the appliance. This will ensure clearance to combustibles is
maintained.
note:
Wall anchors are not required when screwing into the wall stud.
B x 4
A x 4
It is recommended to use a magnetic screwdriver bit during installation to prevent the screws from falling into the
appliance.
B x 8
Fig. 2-1
F. Mark the centre of the wall depth on the vertical stud and install the mounting brackets by aligning the
edge of the bracket with the centre marking. Measure 6 1/8” (164mm) from the bottom of the bracket to
the bottom of the opening (Fig. 2-2).
FRONT
Hard-wiring
location
Installation uses 2 mounting brackets in opposite corners. Looking at the stud from the centre of the opening,
the brackets will extend out to the right (Fig. 2-2).
note:
6 1/8” (164mm)
Loading ...
Loading ...
Loading ...