
Loading ...
Loading ...
Loading ...
Page 12
OPERATION
10. Open the lock-off button and press
the trigger switch to start the saw and
bring it to the maximum desired cutting
speed before applying the blade to the
workpiece.
11. Do not force the tool. Place the shoe
rmly on the workpiece while cutting.
Use only enough steady pressure on the
blade to keep the saw cutting.
12. Reduce pressure as the blade comes to
the end of the cut.
13. Allow the saw to come to a complete
stop before removing the blade from the
workpiece.
14. If sawing berglass, plaster, wallboard,
or spackling compound, clean the saw
motor vents frequently with a vacuum
or compressed air. These materials are
highly abrasive and may accelerate the
wear on motor bearings and brushes.
WARNING:
Always wear safety
goggles or safety glasses with side
shields during power tool operations, or
when blowing dust.
NOTICE: Cutting speeds should vary with
the workpiece. Hard materials, such as
metals, require lower speeds; for softer
materials use higher speeds.
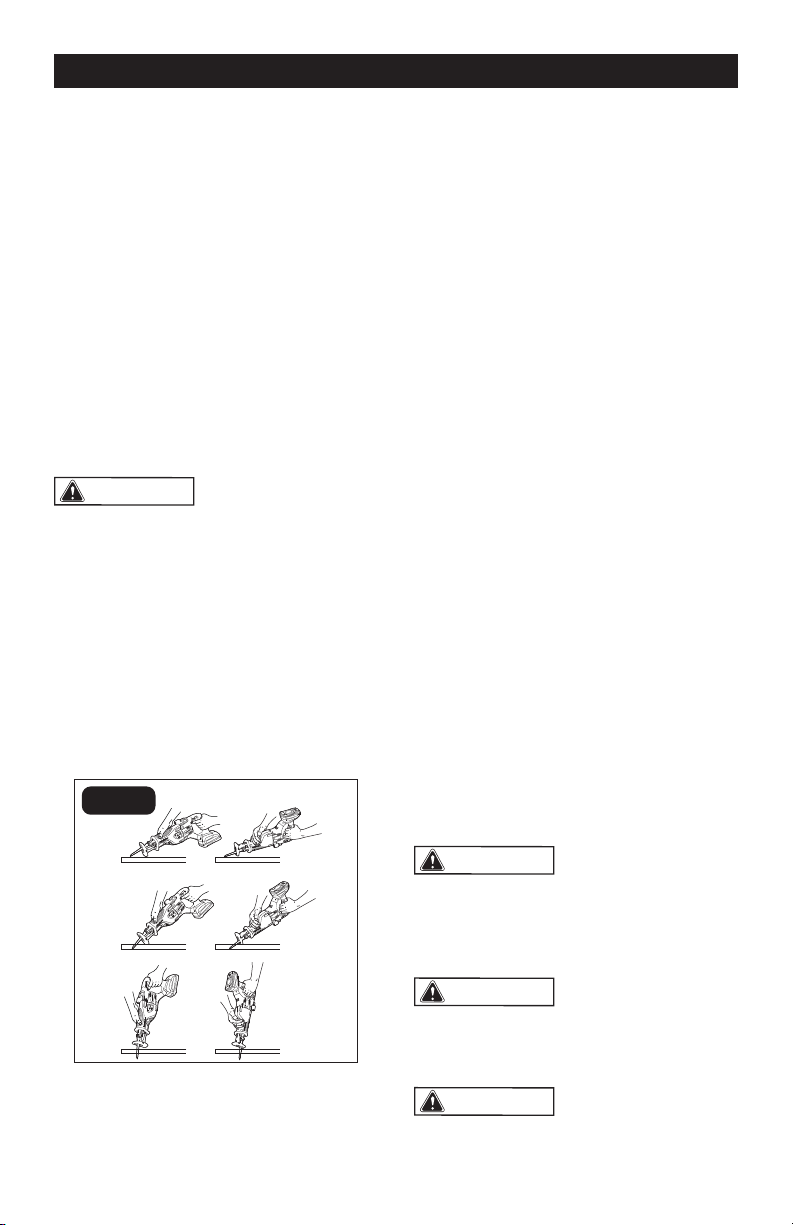
PLUNGE CUTTING (FIG. 8)
A B
FIG. 8
Your reciprocating saw is ideal for plunge
cutting directly into surfaces that cannot be
cut from an edge, such as walls or oors.
Plunge cutting may be done two ways,
depending on how the blade is inserted.
Column A shows how to plunge cut with the
teeth of the blade facing down. Column B
shows how to plunge cut with the teeth of
the blade facing up.
1. Insert the blade into the tool. If the
blade is inserted with the teeth facing
downward, hold the tool as shown in
Column A, resting the edge of the shoe
on the workpiece.
2. If you inserted the blade with the teeth
facing upward, hold the tool as shown in
Column B, resting the edge of the shoe
on the workpiece as shown.
3. With the blade just above the workpiece,
depress the trigger switch, and using
the edge of the shoe as a pivot, lower
the blade into the workpiece.
4. As the blade starts cutting, raise the
handle of the tool slowly until the shoe
rests rmly on the workpiece.
5. After the blade has penetrated through
the workpiece, guide the tool along your
cutting line to achieve the desired cut.
6. Release the trigger switch. Do not
remove the blade from the material
until the blade has completely stopped
moving.
NOTICE: To make plunge cutting easier,
use a heavy gauge blade and install the
blade with the teeth facing upward as
show in column B (FIG. 8).
WARNING:
To reduce the risk of
explosion, electric shock and property
damage, always check the work area for
hidden gas pipes, electrical wires or water
pipes when making blind or plunge cut.
WARNING:
To avoid loss of control
and serious injury, make sure that the
blade reaches maximum speed before
touching it to the workpiece.
WARNING:
Do not make plunge
cuts in metal materials.
Loading ...
Loading ...
Loading ...