Loading ...
Loading ...
Loading ...
Step 2 - Install the Weblink plugin (for PC only)
Gotoidatalinkmaestro.com/pluginandfollowthe
installationsteps.ReviewtheSystemRequirements
beforeinstalling.Macintosh not supported.
Step 3 - Register a Weblink account
Gotoidatalinkmaestro.com/registerandcompletethe
registrationprocess.Aconrmationemailwillbesentto
yourequiringvalidation.
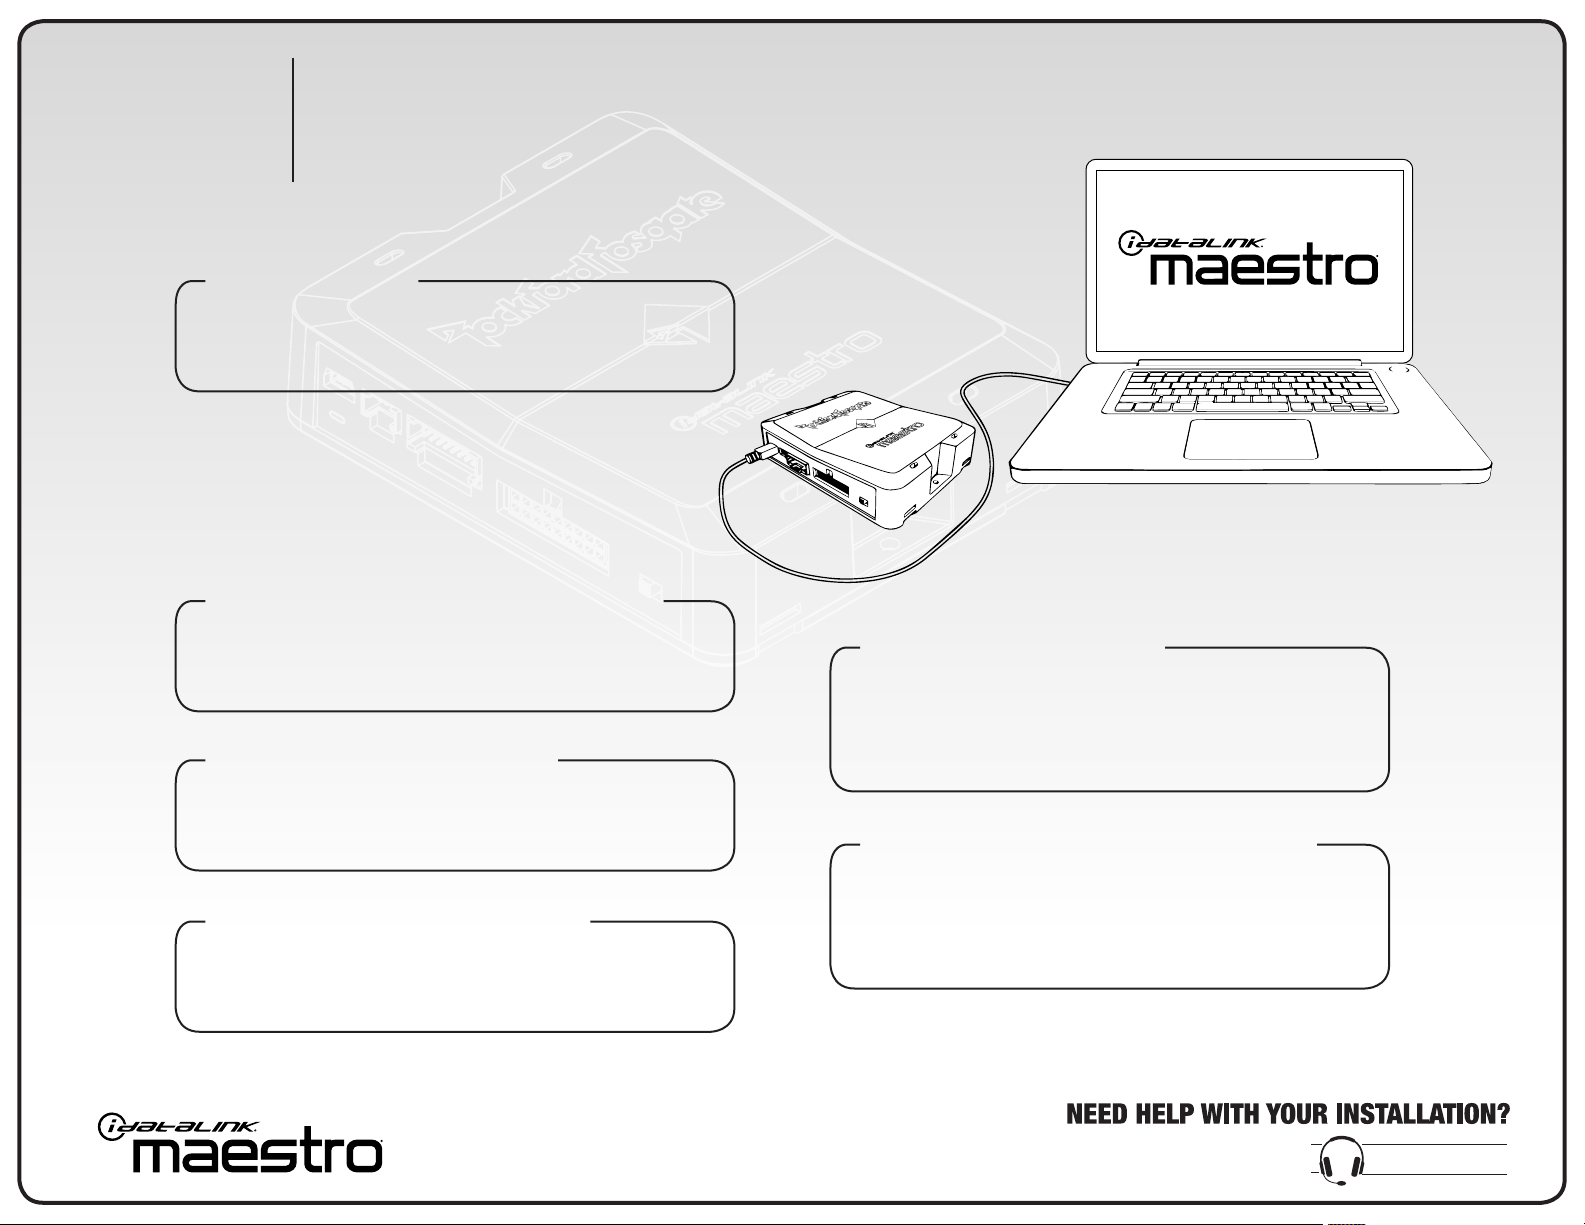
Step 4 - Connect Maestro module to PC
UsetheincludedminiUSBcabletoconnectyourDSR1
moduletoyourPC.
Step 5 - Weblink Programming
Gotoidatalinkmaestro.com/login.Enteryour
usernameandpassword,thenclickOK.Followthe
installationstepsinWeblinkuntilyourmoduleisashed,
thendownloadyourinstallguide.
Step 6 - Complete Vehicle-Specific Installation
Followthestepsinyourinstallguideandcompletethe
installation.ADSrecommendshavingtheDSR1installed
byacertiedtechnician.Vehicle-specific T-harness
required and sold separately.
DSR1
MAESTRO PROGRAMMING & INSTALLATION
TheDSR1modulewillrequireweb-programmingasperthestepsbelow,
beforeinstallationaswellasavehicle-specicT-harnesssoldseparately.
877.212.6169
1230-61763-01-C
Step 1 - Update DSR1
PriortoMaestroprogramming,updatetheDSR1at
www.rockfordfosgate.com/products/details/dsr1
forthelatestaudiofeatures.