Loading ...
Loading ...
Loading ...
16
CARE AND USE/INSTALLATION
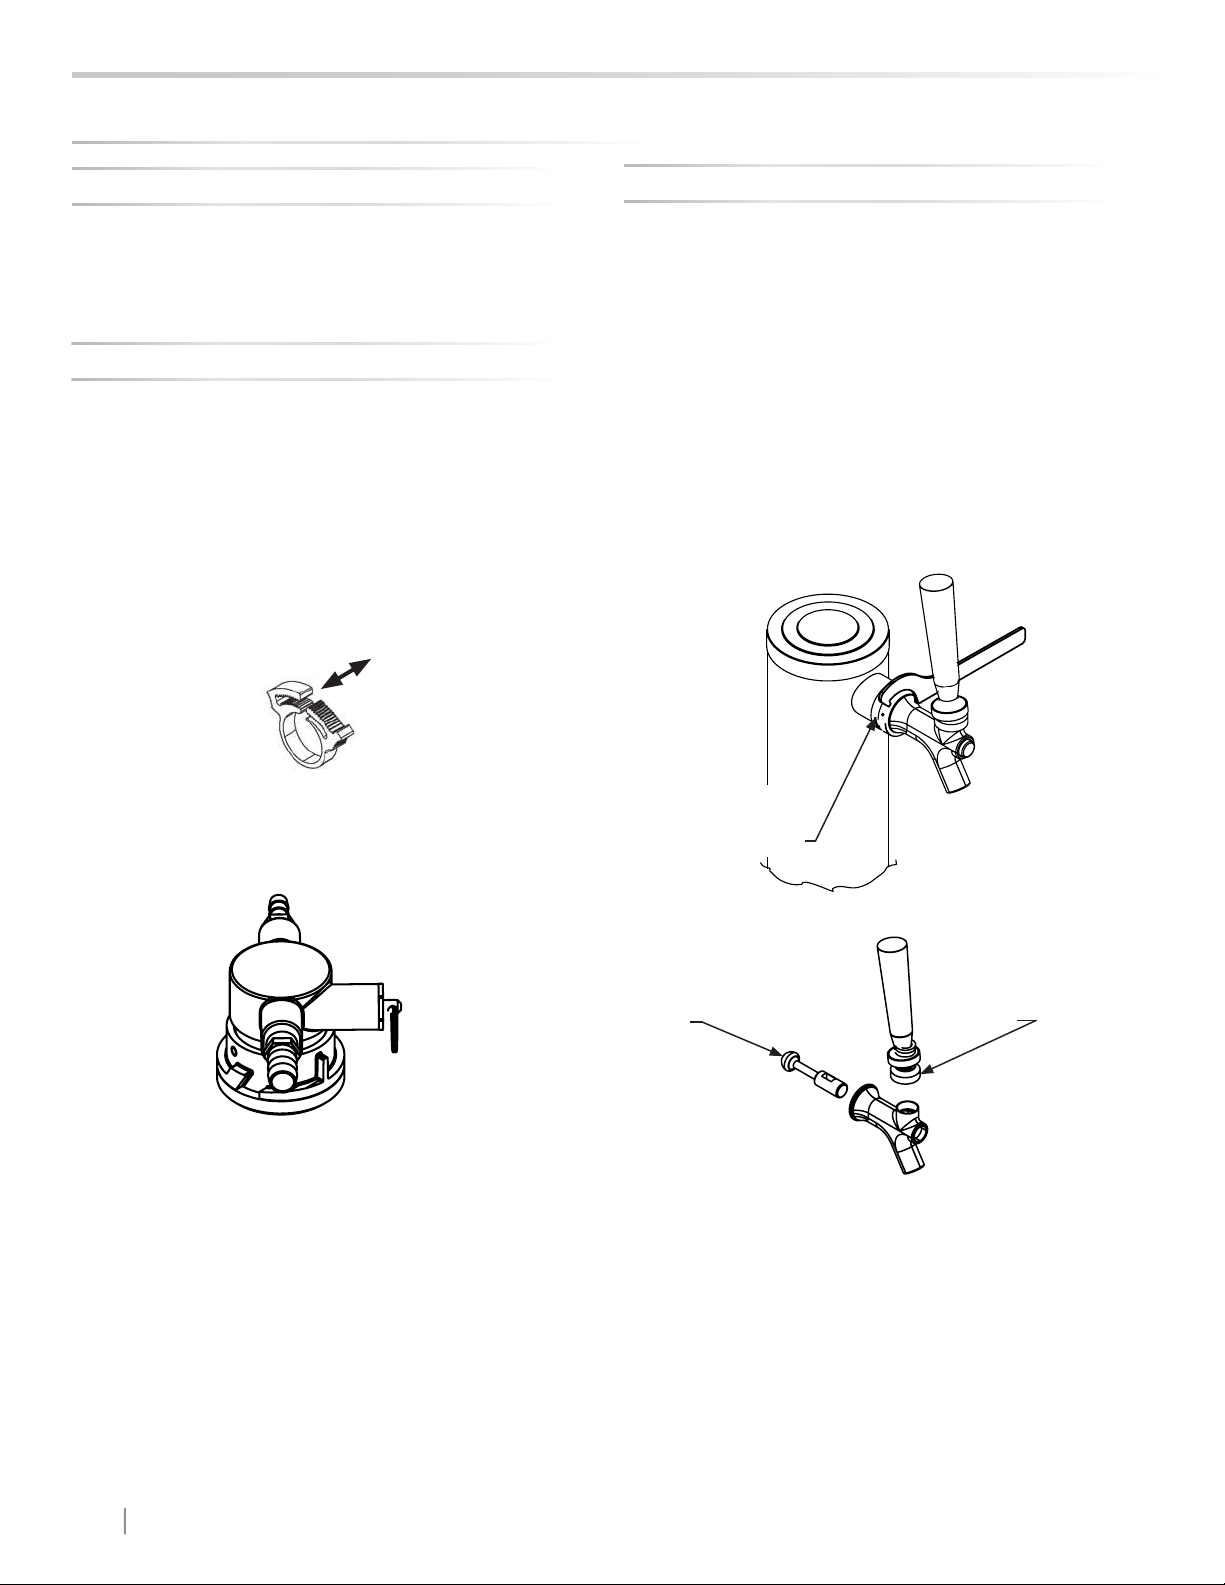
Turn o the gas supply with the shuto valve(s) under the
regulator (see Figure 33 or Figure 34) and open the faucet
to relieve the pressure. To remove the faucet from the tow-
er use the spanner wrench provided. Place the pin on the
wrench into the hole on the faucet collar and turn clockwise
↷ to remove the faucet. (See Figure 39).
Remove the knurled cap from the faucet body just below
the handle and pull the handle assembly from the faucet.
This will allow the shaft to be removed from the back of the
faucet, see Figure 40.
Soak all faucet parts in hot clear water or a solution of hot
water and a sanitizing solution. Do not use soap. Rinse
thoroughly with clean water.
Reassemble faucet, assemble faucet to tower (be sure
faucet is in o position), and turn on gas valve.
Figure 39
Figure 40
After removing the
handle the shaft will
slide out the back of the
faucet
Unscrew knurled
cap on faucet body
and remove handle
assembly
Place pin on
wrench into hole
in faucet collar.
CARE AND CLEANING
Remove the keg coupler from the keg if necessary. Close
the gas valve(s) below the regulator, remove both the gas
line(s) and clear beverage line(s) from the keg coupler(s)
by removing the plastic hose clamps (See Figure 37). Soak
and brush the keg coupler in hot water or a sanitizing solu-
tion. Rinse thoroughly with clean water. Dry all parts and
reassemble.
The dispensing system needs to be cleaned between
usage to prevent spoilage and/or foul taste in your beer
or wine.
Figure 38
Figure 37
Hose clamps can be
released by a lateral
movement to the head.
Cleaning and Maintaining Dispensing System
Keg Coupler Cleaning
Faucet Cleaning
Loading ...
Loading ...
Loading ...