Loading ...
2
INSTALLATION REQUIREMENTS
Tools and Parts
Tools Needed
Gather the required tools and parts before starting installation.
Read and follow the instructions provided with any tools
listed here:
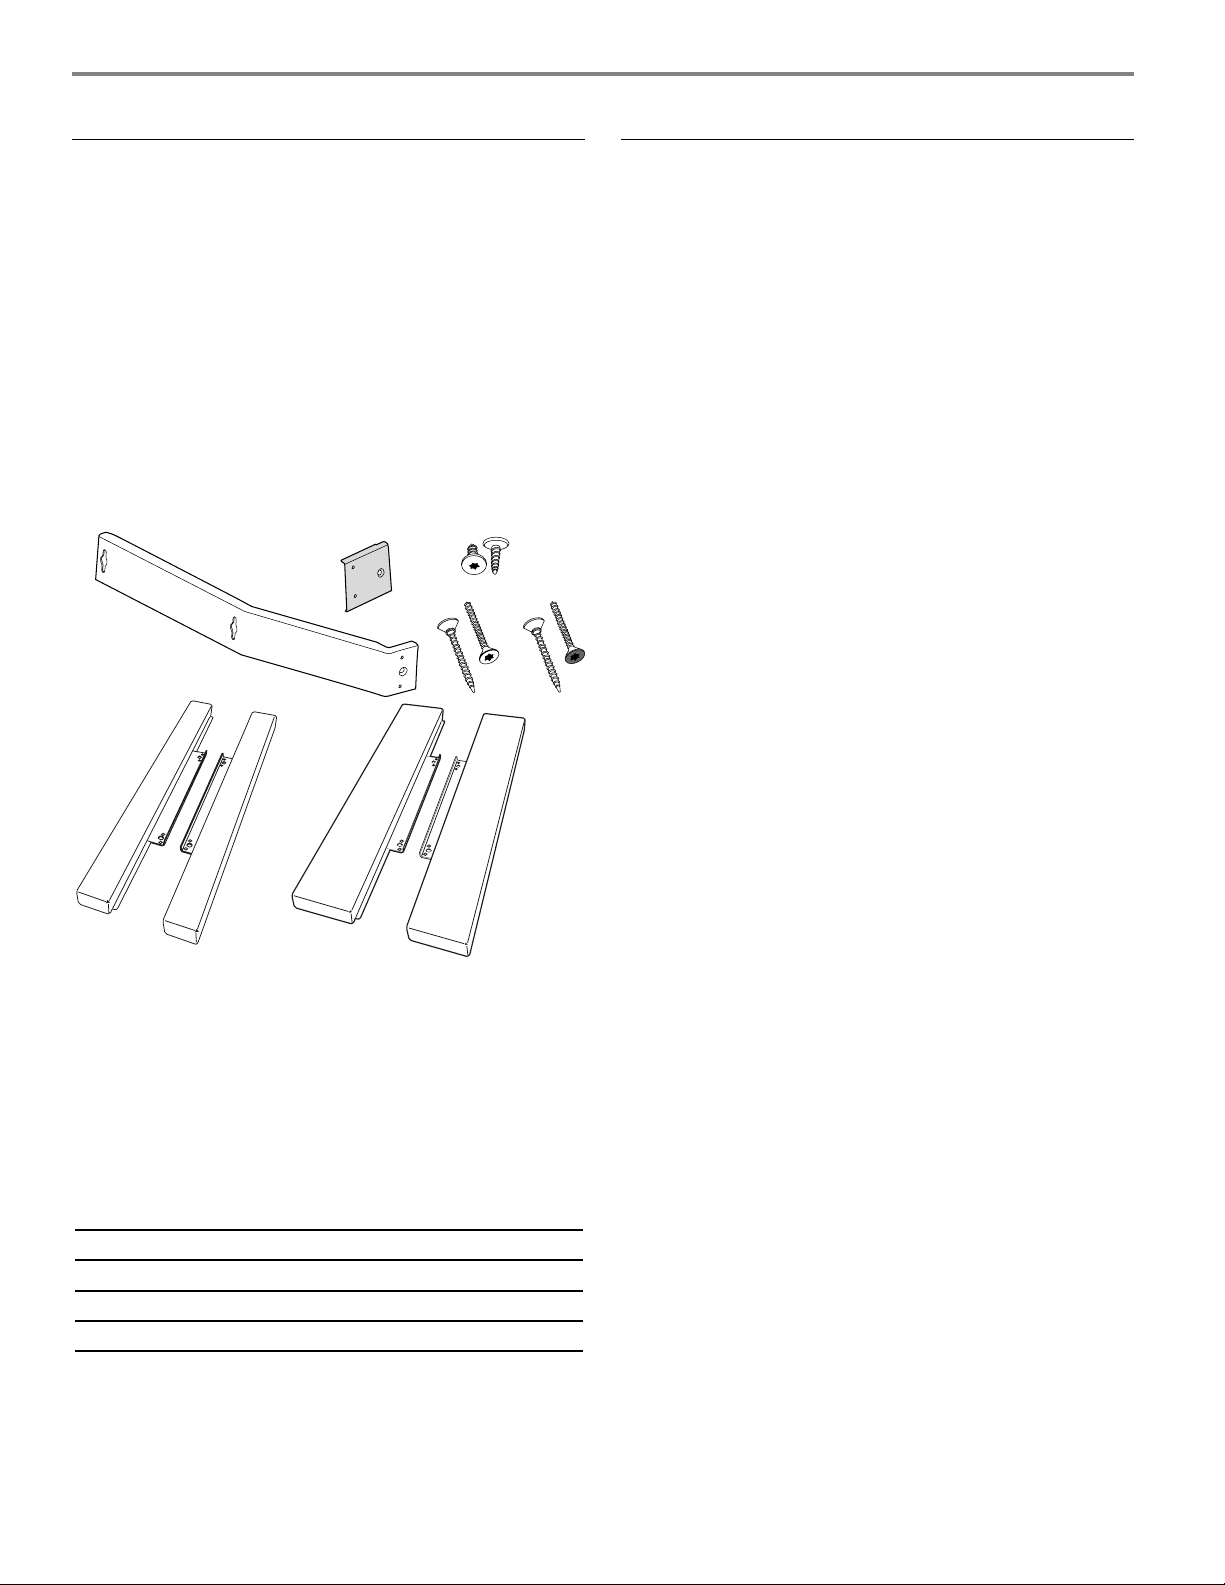
Parts Supplied
All of the following parts are provided, but not all parts will
be used. The cutout opening size will determine which parts
you will use. See chart below parts list to see which parts are
used for each installation.
Location Requirements
The microwave oven may be located in a cabinet, and/or above
a built-in oven, or below the counter and/or below a non-vented
cooktop. Check the opening where the microwave oven will
be installed. The location must provide:
■ Wood cabinetry.
■ Cutout opening that is plumb and square. See “Minimum
Cutout Dimensions” in “Minimum Dimensions” section.
■ Cutout floor that is solid, level, and flush with bottom
of cabinet cutout.
■ Support for weight of at least 150 lbs (68 kg), which includes
microwave oven and items placed inside.
■ Grounded electrical outlet. See “Electrical Requirements”
section.
■ Minimum installation clearances for installation location.
See “Minimum Dimensions” section.
■ Complete enclosure around the recessed portion
of the microwave oven.
■ Measuring tape
■ Pencil
■ T10 TORX
®†
screwdriver
■ Drill
■ 5/64" (2 mm) drill bit
A
B
C
D
GF
E
A. Side brackets (2)
B. Extension plates (2)
C. 3/8" T10 screws (4)
D. 1" T10 screws – stainless steel (6)
E. 1" T10 screws – black (4)
F. Narrow side trim panels (2)
G. Wide side trim panels (2)
NOTE: On some models, side brackets (A), extension plates
(B), and 3/8" T10 screws (C) may come pre-assembled.
INSTALLATION PARTS USED
24" (61.0 cm) installation D or E
27" (68.6 cm) installation A, D or E, F
30" (76.2 cm) installation A, B, C, D or E, G
†®TORX is a registered trademark of Acument Intellectual Properties, LLC.
Loading ...
Loading ...
Loading ...