Loading ...
Loading ...
Loading ...
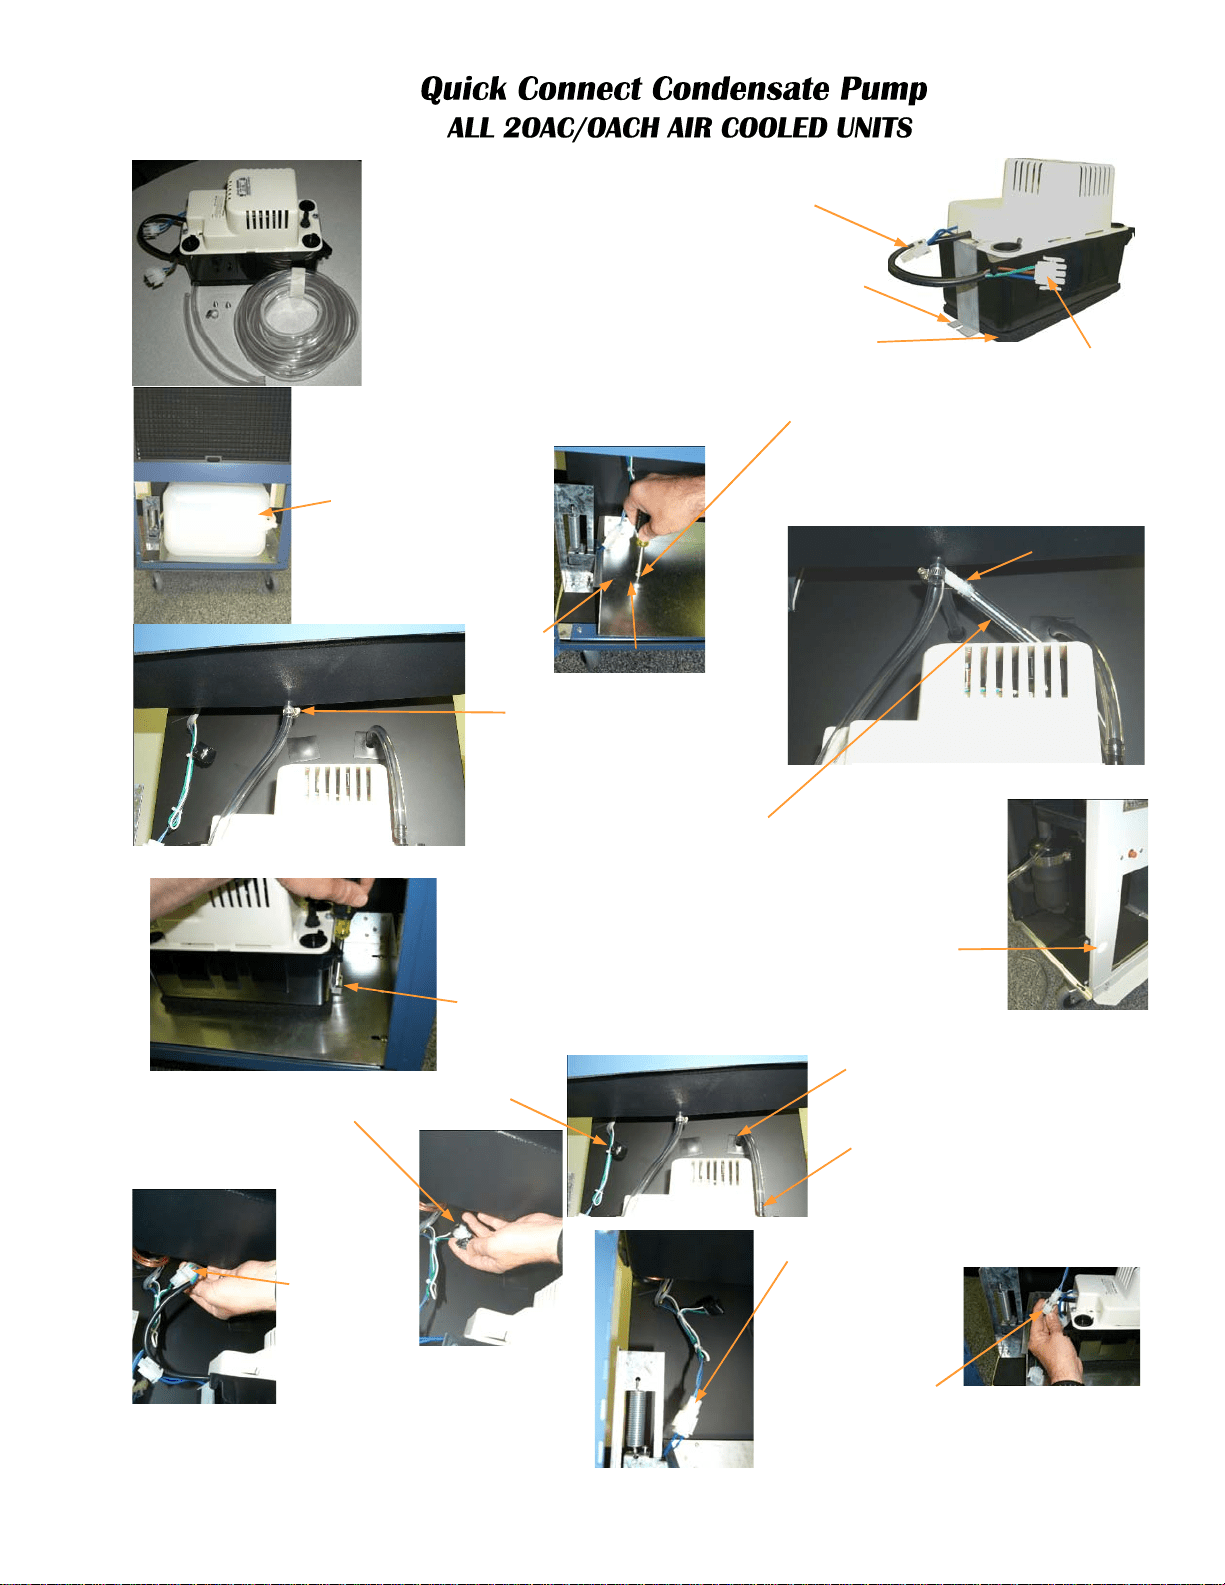
1) Unplug unit. Open lower
front door to expose
condensate bucket.
Remove bucket.
The Quick Connect Condensate Pump may be
easily installed for one job, and just as easily
reinstall the bucket for the next job. Our quick
connect kit consists of our specially prepared
and wired condensate pump, 20 feet of 3/8
plastic tubing, 2-10 inch pieces of 3/8 drain
hose, 1 hose clamp, and 2 attaching screws.
Low voltage molex
plug (for safety
switch)
Line voltage molex plug
(for pump motor)
Mounting brackets,
One on each side
Cushion mounting
pad
TOOLS REQUIRED:
Phillips screwdriver
(for side panel & pump brackets)
Slotted screwdriver (for hose clamp)
2) Start the first pump bracket mounting
screw into the second hole located on
the left side of the bucket tray. Just turn
the screw enough to catch a few threads.
Later you will slide the bracket under it.
First hole
Second hole
3) Attach 10 inch piece of 3/8 drain hose to
condensate drain using hose clamp
supplied. Route other end of hose into
condensate pump tank.
HEAT PUMP ONLY
3a) There is a second drain line from the rear
coil on all heat pump models.
Use a 10 inch piece of hose (1 of 2 supplied)
and push the drain hose over the barbed fitting
as shown. No hose clamp is required. Route the
other end into the condensate pump tank. If
this line is removed in the future, slit the plastic
drain hose over the barb to release the pressure
fit tension. It will then be easy to remove.
Pictured 2OAC Cooling Only
Pictured 2OACH Heating Cooling
Barbed fitting from rear coil
4) Slide the left side pump mounting bracket under the
screw started in step 1. Install the right side pump
bracket mounting screw into the predrilled hole on the
bucket tray. Tighten both screws firmly, but do not
over tighten.
5) Using the Phillips
screw driver,
remove the right
side panel (viewed
from the front of the
unit) and remove
the plastic knock-
out plug as pictured.
6) From the outside of the unit, route the drain
hose into the unit through the hole. Continue
through the partition panel bushing, located
above the compressor. Remove or cut
through the foam tape to reveal the bushing.
Pull the drain through the partition and
attach it to the pump discharge fitting as
shown. Re-attach side panel.
7) Remove electrical tape covering pre-wired line voltage
molex plug. This plug is located on the wiring harness
above the condensate pump
8) Push large
molex plug from
the pump, into
the pre-wired
receptacle.
9) Disconnect molex plug
from the low voltage
micro switch that was
used by the bucket.
10) Push the low voltage
molex from the pump
into the pre wired
molex receptacle.
Installation
complete
Kit
10
Loading ...
Loading ...
Loading ...