
Loading ...
Loading ...
Loading ...
15
!
WARNING: Never carry the saw with your finger
on the trigger switch. The saw could be
accidentally started and cause severe personal
injury.
GENERAL CUTTING
1. Make sure there are no nails, screws,
clamps or foreign materials in the path of
the saw blade.
2. With both hands firmly gripping the saw,
and with the blade NOT in contact with the
surface to be cut, start the saw by
squeezing the trigger switch.
3. Once the saw has reached full speed,
place the front edge of the base plate on
the workpiece and gradually bring the
moving blade into contact with the
workpiece at the appropriate location.
WARNING: DO NOT force the Plunge
cut circular saw. Use only enough force to
keep the blade cutting at full speed.
Excessive pressure on the blade will cause it
to slow down and overheat, resulting in poor
cut quality and damage to the motor.
PLUNGE CUTTING
WARNING: To avoid loss of control,
damage to the blade or damage to the
workpiece, always use extreme caution
when making plunge cuts. It is not
recommended to plunge cut any material
other than wood.
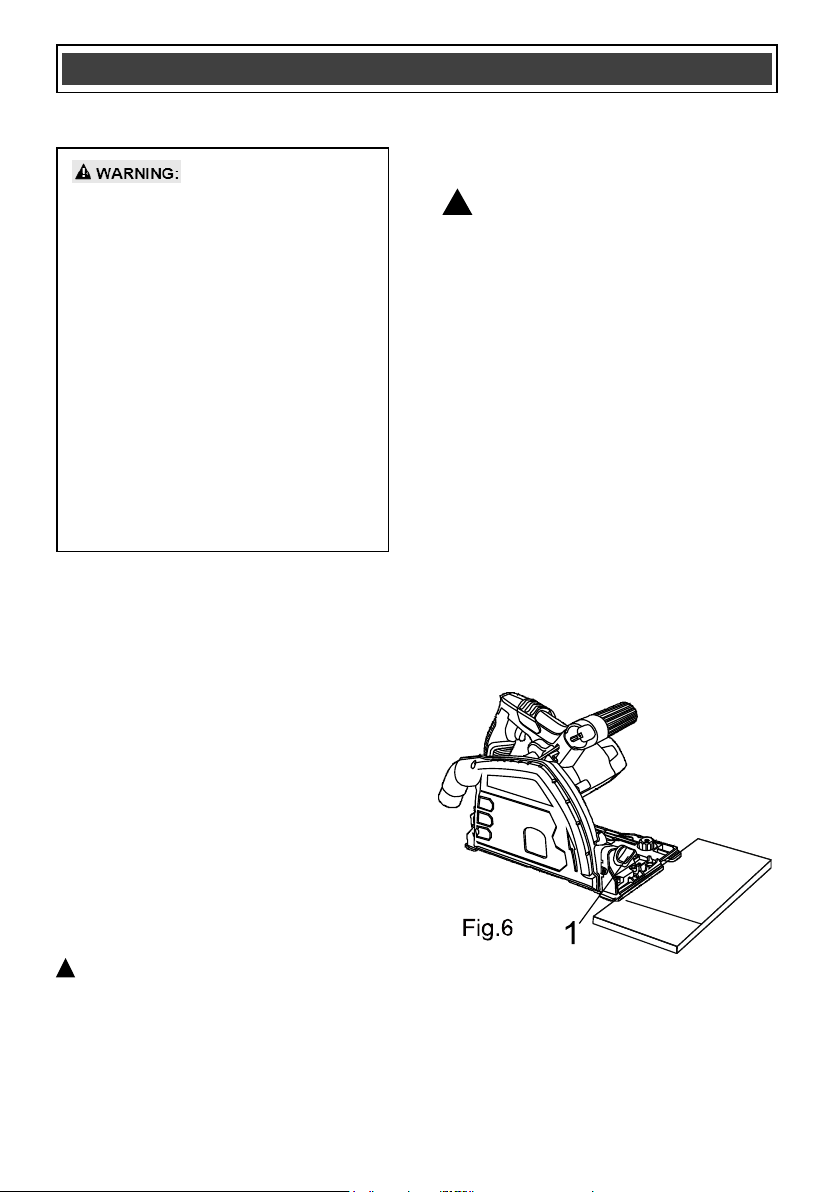
1. To plunge cut inside the edges of a
workpiece, clearly mark the cutting line on
the workpiece.
2. Set the saw on the workpiece (1) so the
base plate is flat on the workpiece (Fig. 6).
3. Align the saw blade with the cutting line (3).
4. Press the plunge release (12) and switch
trigger (11) to start the saw and slowly
lower the blade onto the workpiece to allow
the blade to cut into the workpiece (Fig. 7).
Allow the blade to cut through the wood.
5. Continue lowering the blade into the
workpiece until the full cutting depth has
been achieved. Continue sawing toward
the cutting line and complete the cut as
required.
NOTE: Make sure the saw blade is inside the
area to be cut out.
BEVEL CUTTING
Loosen both the angle adjustment lock knob (7)
and tilt the tool to the desired angle for bevel
cuts (0 -45°). Secure the lock knob (7) tightly
after making the adjustment.
ASSEMBLY AND OPERATING
For safety reasons, the operator must
read the sections of this Owner’s Manual
entitled "GENERAL SAFETY
WARNINGS", "POWER TOOL SAFETY",
"SPECIFIC SAFETY RULES",
"EXTENSION CORD SAFETY" and
"SYMBOLS" before using this circular
saw.
Verify the following every time the
Plunge Cut Circular Saw is used:
1. The blade is tight and sharp.
2. All adjustments are tight.
3. The workpiece is properly secured.
4. Safety glasses and hearing
protection are being worn.
Failure to adhere to these safety rules can
greatly increase the chances of serious
injury.
SAVE THESE INSTRUCTIONS FOR REFERENCE
!
Loading ...
Loading ...
Loading ...