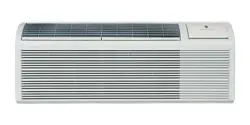
Use and Care Manual for Portable Air Conditioner
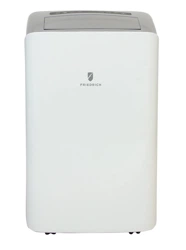
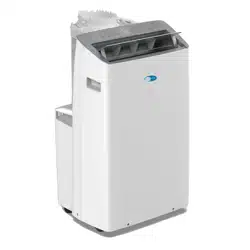
IDENTIFICATION OF PARTS
Identification of parts


|
|
1. Control panel
2. Air outlet
3. Handle hole
4. Caster
5. Air filter
6. Air outlet ( Heat exchange )
7. Air intake ( Evaporator)
8. Air intake ( Condenser)
9. Water outlet drain for continuous drain operation
( Dehumidify mode only)
10. Water outlet drain
(Note: Please ensure that the water outlet drain is properly installed before use.)
11. Power supply cord
12. Built-in drain pump (ZHP14DA model only)
|
OPERATION
CONTROL PANEL
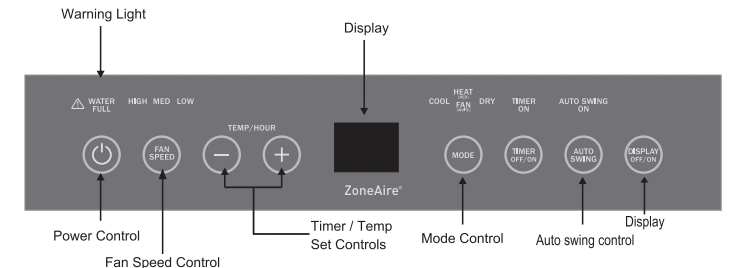
Power Control
The power control turns the unit on and off.
Warning Light
Condensed water may accumulate in the unit. If the internal tank becomes full, the Warning Light will shine and the unit will not operate until the unit has been drained.
Mode Control
The Mode Control has 4 settings: • Cool • Dehumidify • Fan • Heating
The settings are adjusted with Mode Control button. A light will indicate which setting is currently being used.
- Cooling Mode: During the cooling mode the air is cooled and hot air is exhausted to the outside through the exhaust tube. Adjust fan speed and air temperature to suit your desired comfort level. Note : The air exchange hoses must vent outside the room when using cool mode
- Dehumidify Mode: Air is dehumidified as it passes through the unit, without being in full cooling mode. If room temperature is > 25 degree Celsius, fan speed can be adjusted; otherwise fan speed is fixed to" low". Note: If the unit is to be used as a dehumidifier, do not connect the exhaust hose let the warm air return to the room. Continuous drainage is then necessary
- Fan Mode: Air is circulated throughout the room with no cooling. Note: unit does not need to be vented in Fan mode
- Heating Mode (ZHP14DA model only): When Heating mode is selected the indicator light will shine red. Heating is activated only when the ambient temperature is below 25 degree Celsius. Note : The air exchange hoses must vent outside the room when using heating mode.
Fan Speed Control
The Fan Speed Control has 3 settings: High, Medium, and Low.
Timer
Auto turn off: With machine in running mode, press timer button to select number of hours you would like the unit to run in air conditioning mode until it automatically shuts off.
Auto turn on: With machine in stand by mode, press timer button to select number of hours until you would like the unit to automatically start running in air conditioning mode.
Timer / Temp set controls
- Used for adjusting the timer and thermostat.
- The default display is room temperature.
- In cooling mode, when " + " or " -" button is pressed, the set temperature is displayed and may be adjusted. A few seconds after, the display will revert back to room temperature. Temperature is only adjustable in cool mode. The time is adjustable between 1~24 hours. Note: By pressing both " + " / " -" set buttons at the same time, the display will toggle between Celsius and Fahrenheit.
Auto swing control
Auto swing function switch
Display
You can turn the front and top panel lights on and off by hitting the Lamp On/Off switch.
After switching the air conditioner off, you must wait 3 minutes before switching it back on again.
Air Conditioner Remote Control
The functions work the same as your air conditioner's touch controls. All key functions can be accessed from the remote control.
CONTROL PANEL
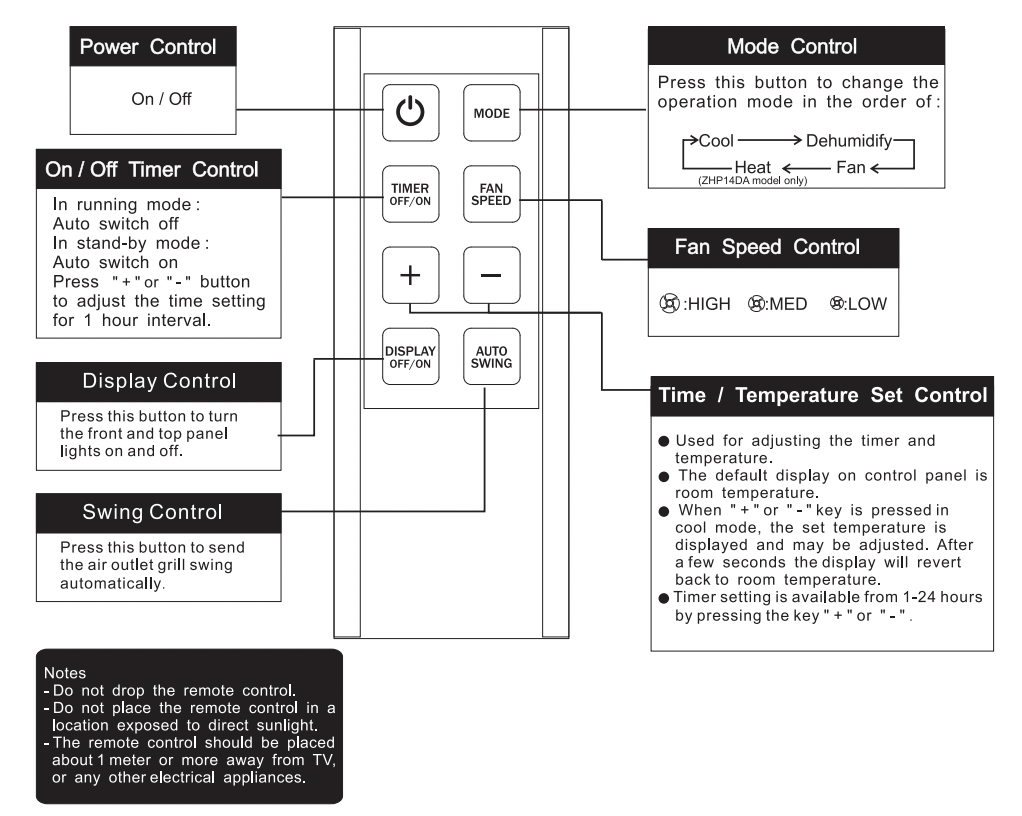
Battery replacement: Remove the cover on the back of the remote control and insert the batteries with the ( + ) and (-) poles pointing in the proper direction.

CAUTION:
- Use only AAA or IEC R03 1.5V batteries.
- Remove the batteries if the remote control is not used for a month or longer. Do not attempt to recharge the supplied batteries.
- All batteries should be replaced at the same time, do not mix old battery.
- Do not dispose of the batteries in a fire as they may explode.
INSTALLATION INSTRUCTIONS
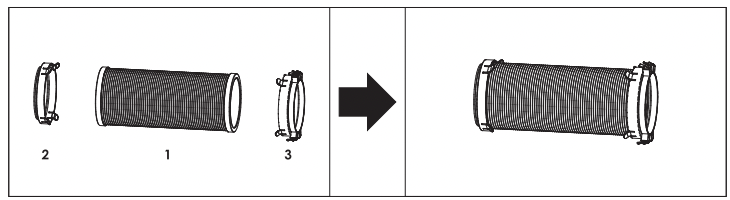
1 .Connect the connectors #2, and #3 to 2 sides of exhaust hose #1 to create an exhaust assembly.
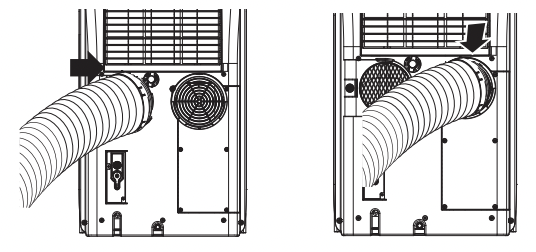
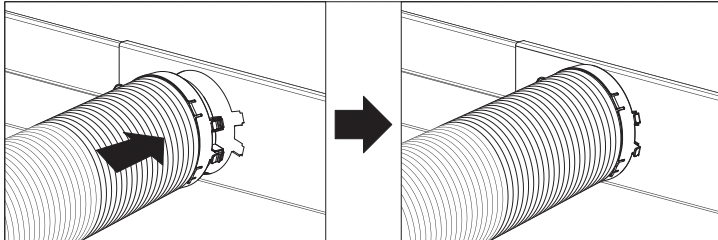
2. Sliding in one end of hose assembly (with hose connector #2) to rear panel.
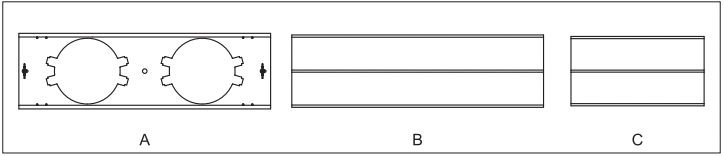
3.Insert the window panels B and C to each end of main panel A. Adjusting to fix the length of window panels by using the screws and nuts mounted on the 2 ends of main panel A.
4.Open the window and place window panels into window. Adjust the extension panels to fit width or height of window by the screw and nut sets mounted on the main panel A.
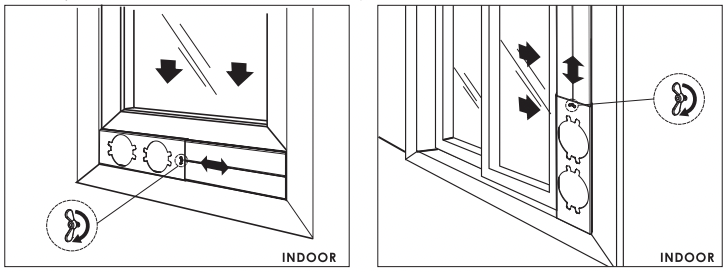
5.Insert the other end of exhaust hose assembly (with hose connector #3) onto window bracket.
6. Repeat procedures 1 -5 above for the installation of second hose assembly.
7. Plug the power cord into the wall outlet and press the “Reset” button.
8. Please allow 8” of space around the unit for proper air circulation.
9. When removing the portable air conditioner for storage, the window panel may be left in place. Simply place the cover (#5) over the hole on the window panel.
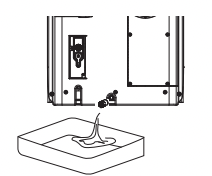
CONTINUOUS DRAINAGE
Built-in Drain Pump (ZHP14DA model only)
The condensate produced in heating mode can also be drained through the supplied drain hose utilizing the internal built-in drain pump. Follow the steps below for proper operation of the pump. NOTE: The built in drain pump can be used in all modes.
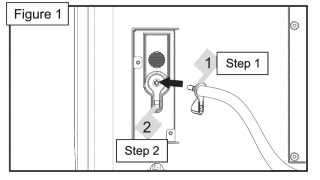
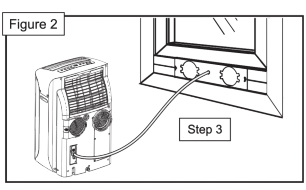
Installation: (See Figures 1&2)
STEP 1. Connect the supplied drain hose to the drain key.
STEP 2. Connect the drain key and hose to the drain outlet located on the rear panel. STEP 3. Lead the other end of drain hose to a suitable location for drainage, like a drain or sink or the outlet located on the window panel kit. Use caution when using the drainage outlet on window panel kit to avoid creating a slipping hazard.
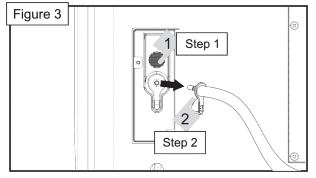
Dismantle: (See Figure 3)
STEP 1. Press the release button on the unit rear panel.
STEP 2. Pull out the drain key and hose.
STEP 3. Store the drain hose for next time usage.
(No image for this step)
TROUBLESHOOTING
The following cases may not always be a malfunction, please check it before asking for service.
|
Trouble
|
Analysis
|
|
Does not run
|
■If the protector trip or fuse is blown.
■Please wait for 3 minutes and start again, protector device may be preventing unit from working.
■If batteries in the remote control are used up.
■If the plug is not properly plugged.
|
|
Stops running during operation
|
■If the set temperature is close to room temperature, you can lower the set temperature.
■Air outlet be blocked by obstacle. Take the obstacle away.
|
|
Runs but does not cool
|
■ If the door or window open.
■If there is other heater appliance work nearby, like heater or lamp, etc...
■The air filter is dirty, please clean it.
■Air outlet or intake be blocked.
■Set temperature is too high.
|
|
Does not run and water full indicator is lit
|
■Drain the water into a prepared container by the drainage pipe on the rear panel of the unit. If it still doesn't work, please consult a qualified technician.
|
|
LED display "E1"
|
■The temperature sensor error
|
|
LED display "E2"
|
■The coil sensor error
|
INSTALLATION INSTRUCTIONS
Appliance maintenance
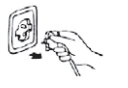
1. Cut off the power supply. Turn off the appliance first before disconnecting from power supply
2. Wipe with a soft dry cloth. If unit is quite dirty use a mild detergent and damp cloth.
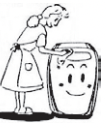
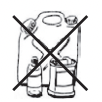
3. Never use volatile substance such as gasoline or polishing powder to clean the appliance.
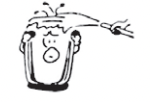
4. Never sprinkle water onto the main unit.
Dangerous! Electric shock!
Air filter maintenance
It is necessary to clean the air filter after using it for about 100 hours. Clean it as follows:
- Stop the appliance and remove the air filter.

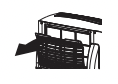
Stop the appliance first, then pull back the air filter.
2. Clean and reinstall the air filter
If the dirt is conspicuous, wash it with a solution of detergent in lukewarm water. After cleaning, dry it in a shaded and cool place, then reinstall it....
3. Clean the air filter every two weeks If the air conditioner operates in an extremely dusty environment.
Maintenance after using
1. If the appliance will not be used for a long time, be sure to pull out the rubber plug of the drain port underside, in order to drain the water.
2. Before storing away run the unit in fan mode only for few hours to dry any moisture on the coils to prevent mold.
3. Stop the appliance and pull out the power supply plug, then take out the batteries of remote controller and keep it in a safe place.
4. Clean the air filter and reinstall it.
5. Remove the air hoses and keep them in a safe place, and cover the hole tightly.