Loading ...
Loading ...
Loading ...
15
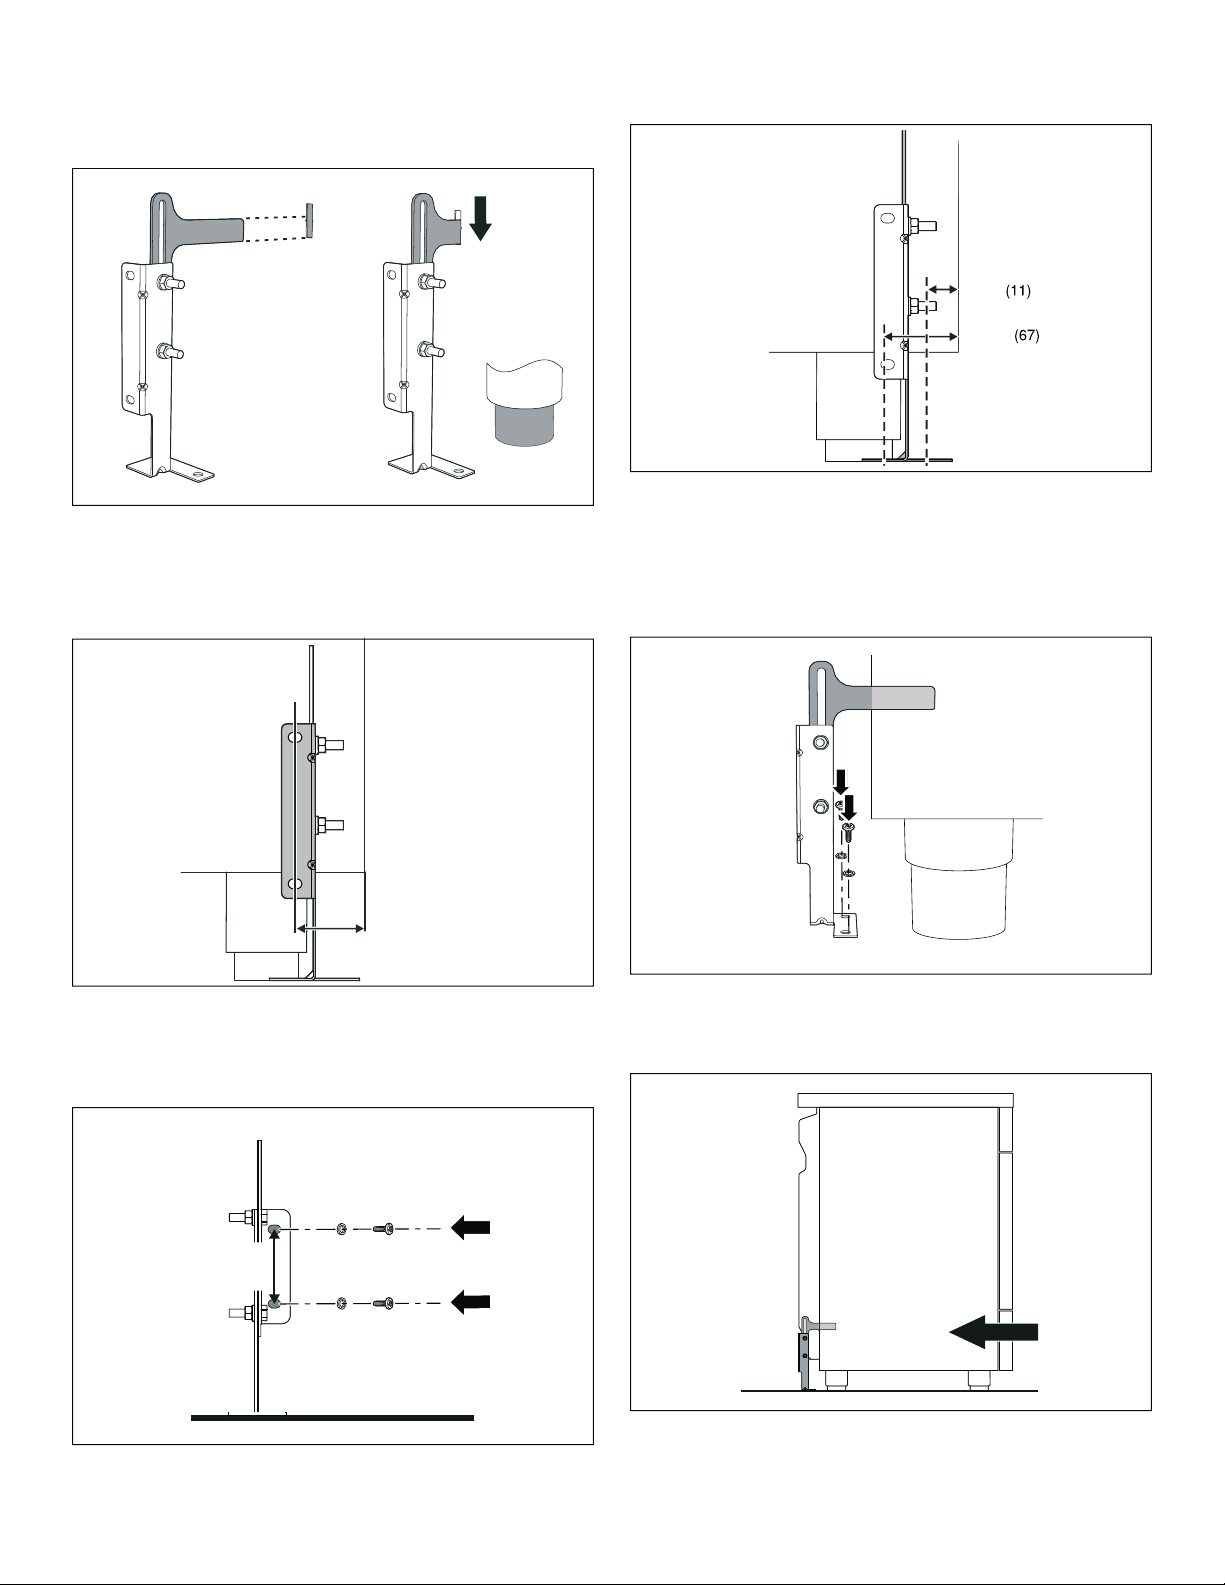
3.
Align the base of the hook of the bracket with the base
on the slot of the rear wall fastening bracket. Align the
base of the fastening bracket with the ground and
tighten the screws to fix the measurements.
4.
For wall mounting, proceed with steps 5–7and 10.
For floor mounting, proceed with steps 8–9and 10.
5.
Use the specified distance from the side of the
appliance to the bracket holes.
6.
Move the bracket onto the wall and fix with the two
washers and screws. A qualified technician must verify
suitability of the materials in accordance with the type
and condition of the wall.
7.
Use the following distances for the distance from the
side of the appliance to the bracket holes.
8.
After having positioned and leveled the appliance,
move the bracket close to the rear of the appliance
and anchor it to the floor with the two washers and
screws. A qualified technician must verify suitability of
the materials in accordance with the type and
condition of the floor.
9.
Push the cooker towards the wall, and at the same
time, insert the bracket in the plate fastened to the rear
of the appliance.
çʓʘ
èʚ
ʎʓʘ
ʌʚ
Loading ...
Loading ...
Loading ...