Loading ...
Loading ...
Loading ...
15
Installation Instructions
Final Assembly and Test
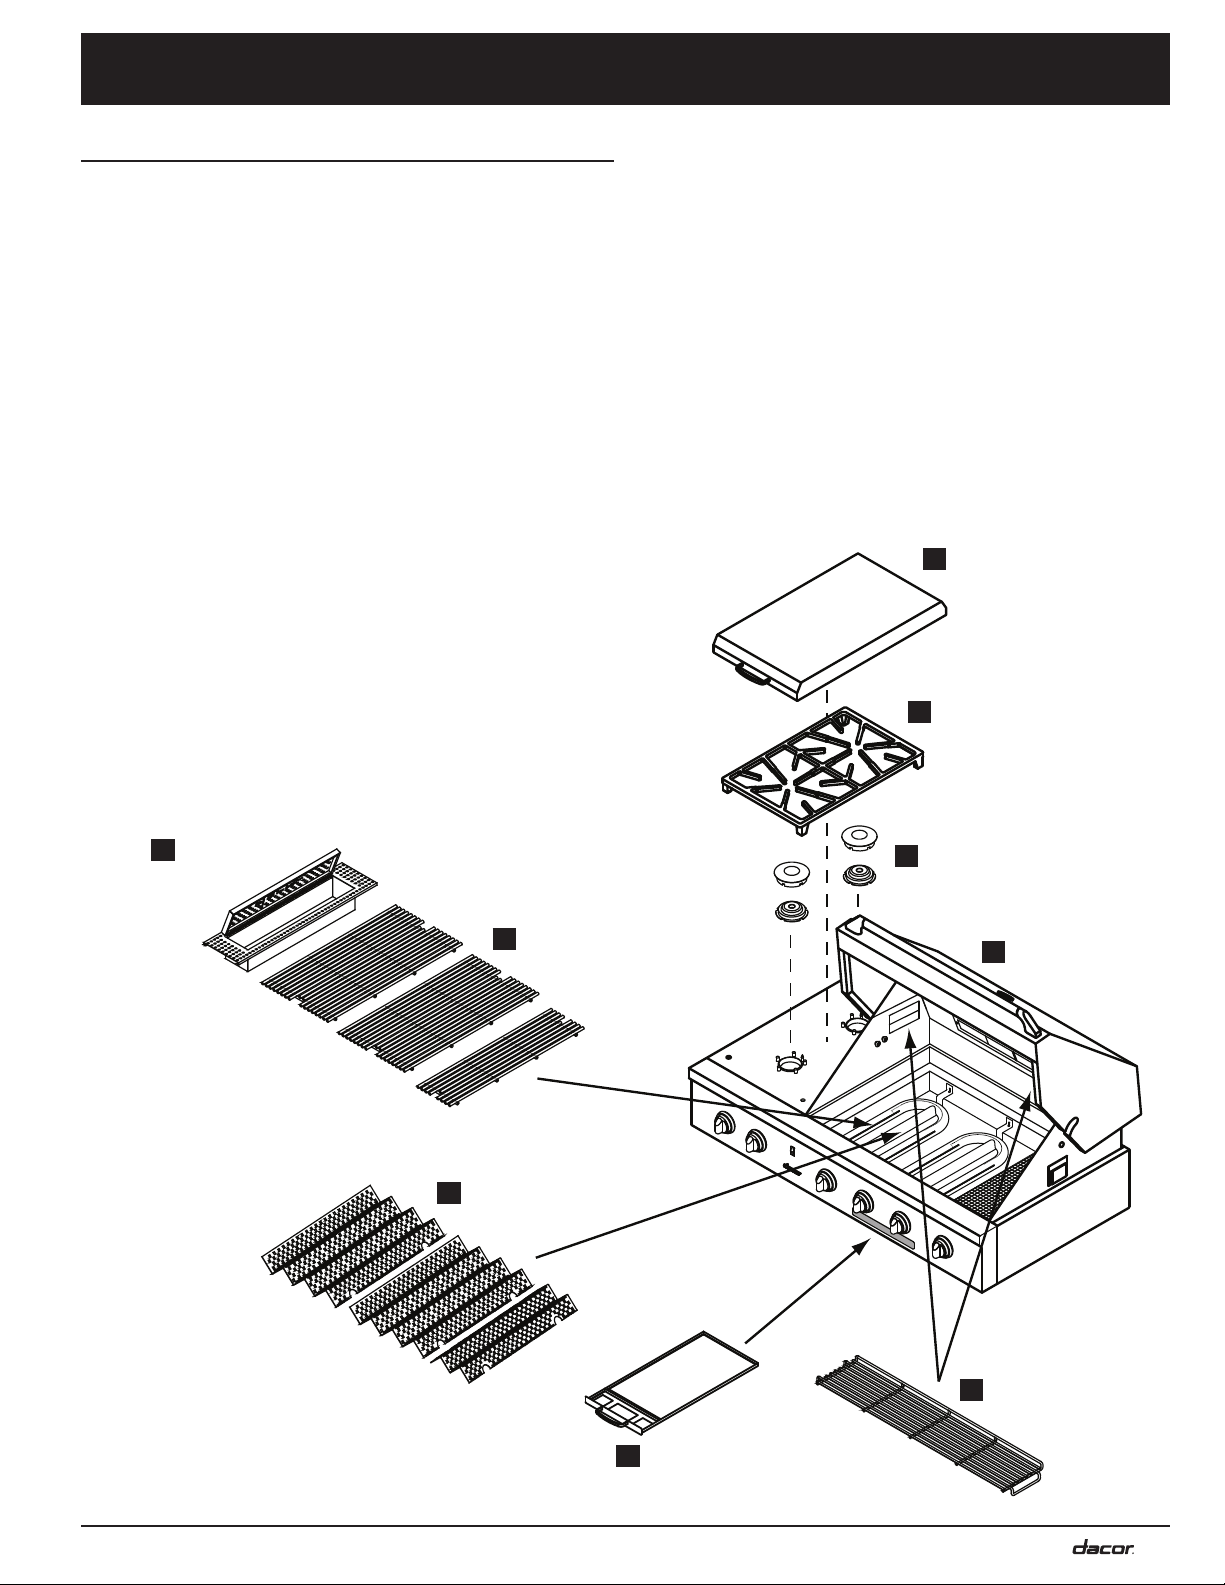
Assemble the Grill
1. Open the canopy on the unit.
2. Insert the drip tray completely into the slot on the front
of the unit.
3. Put the flame spreaders on the floor of the appliance,
inside the canopy. The large holes go toward the front
of the unit. The holes are used to light the burners in
case of power failure. Push the spreaders as far to the
right as possible, leaving an opening on the left for the
smoker box.
4. Install the grills on the shelves above the flame spread-
ers. Push the grills as far to the right as possible, leav-
ing an opening on the left for the smoker box.
5. Insert the smoker box into the opening to the left side
of the grills.
6. Place the warming rack on the holders on the walls
inside the canopy.
9 Burner cover
8 Grate
7 Burner heads and caps
1 Open canopy
6 Warming rack
2 Drip tray
3 Flame spreaders
4 Grills
5 Smoker box
Assemble the Side Burner - 52 Inch Models
7. Put the burner heads on to the burner bases. Line up
the slots on each head with the pins on the base so
that it lies flat. Put the burner caps on top of the burner
heads. Line up the slots on each cap with the pins on
the base so that it lies flat.
8. Put the grate over the top of the side burner. Line up
the legs with the dimples on the top of the side burner
chassis.
Loading ...
Loading ...
Loading ...