Producers of Professional Projection Screens
OWNERS MANUAL
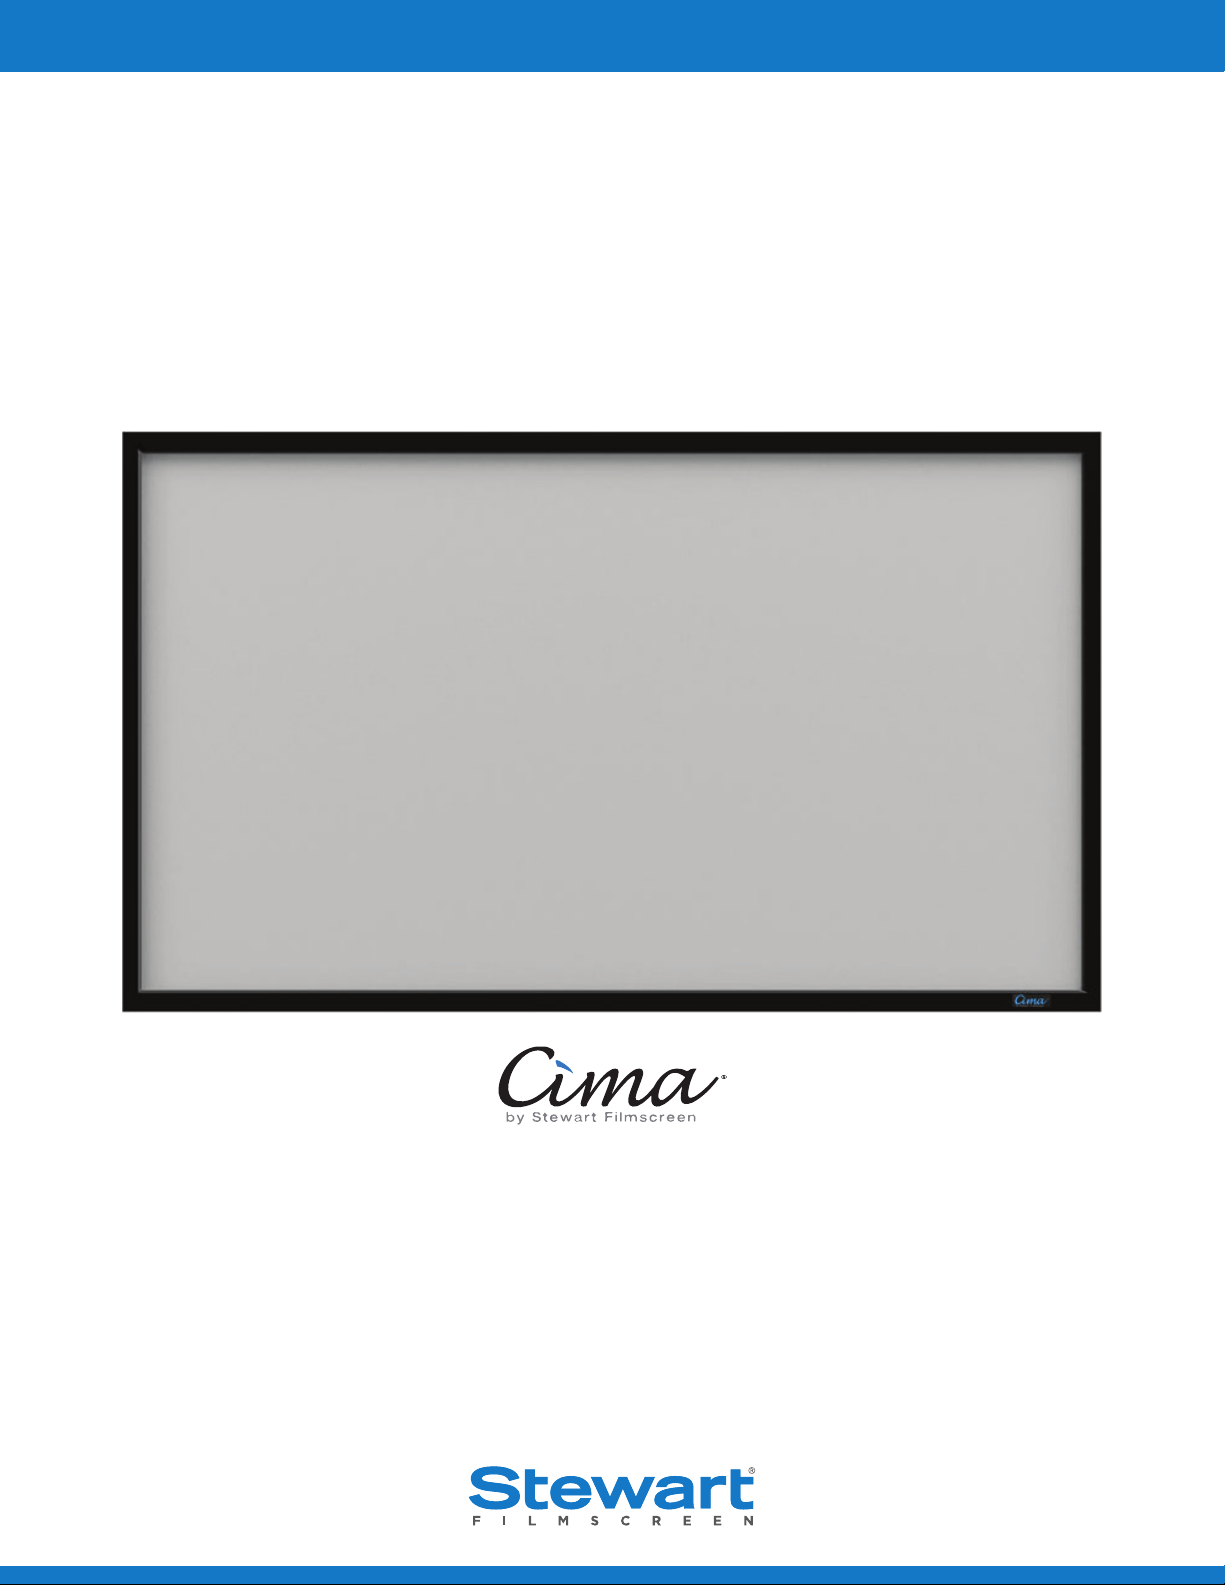
Cima FF
Fixed Frame, Snap Screen

Printed in U.S.A. ©2019 Stewart Filmscreen Corporation
Stewart Filmscreen reserves the right to make changes to the product specified in this document.
Sizes and specifications subject to change without notice at Manufacturer’s discretion. From time to time, this
document is updated. Current versions of documentation are posted on the Stewart Filmscreen website at:
www.stewartfilmscreen.com

Cima FF
OWNERS MANUAL
Contents
To the Owner . . . . . . . . . . . . . . . . . . . . . . . . . . . . . . . . . . . . . . . . . . . . . . . . . . . . . . . . . . . . . 4
Preparing the Installation . . . . . . . . . . . . . . . . . . . . . . . . . . . . . . . . . . . . . . . . . . . . . . . . . . . . .5
Assembling the Frame . . . . . . . . . . . . . . . . . . . . . . . . . . . . . . . . . . . . . . . . . . . . . . . . . . . . . . .6
Mounting the Frame . . . . . . . . . . . . . . . . . . . . . . . . . . . . . . . . . . . . . . . . . . . . . . . . . . . . . . . 7-8
Attaching the Screen to the Frame . . . . . . . . . . . . . . . . . . . . . . . . . . . . . . . . . . . . . . . . . . . . . 9-10
Caring for & Cleaning the Screen . . . . . . . . . . . . . . . . . . . . . . . . . . . . . . . . . . . . . . . . . . . . . . . .11
Maintenance Notes . . . . . . . . . . . . . . . . . . . . . . . . . . . . . . . . . . . . . . . . . . . . . . . . . . . . . . 12-13
Product Warranty . . . . . . . . . . . . . . . . . . . . . . . . . . . . . . . . . . . . . . . . . . . . . . . . . . . . . . . . . 14

4 Stewart Filmscreen
TO THE OWNER
Congratulations on your purchase of one of our highly versatile Cima projection screens, representing
“Top of the Class” in standard commercial and residential projection screens. Please take a moment to
review this manual as it will help ensure you many years of trouble-free service from your new Cima by
Stewart Filmscreen product.
ABOUT THE CIMA FIXED FRAME SCREEN
Designed and manufactured in the USA by Stewart’s award winning team, your Cima Fixed Frame screen
supports a majority of projection applications. The utilitarian design and features of this product address
the needs of most common residential and commercial 2-piece projection applications without
compromising the superior performance, quality and durability you have come to expect from Stewart.
The Cima Fixed Frame acts as a projection overscan border and the VeLux™ finish is designed to absorb
any overscanning.
``
Its angled corners and beveled edge bring the image area closer to the frame.
``
The frame features snaps that move on the frame to allow for adjustments.
``
The standard mount is a wall mount.
USING THIS MANUAL FOR INSTALLATION
The Cima Fixed Frame Screen is designed for ease of installation. There are no user-servicable parts
contained within the unit.

Cima FF 5
PREPARING THE INSTALLATION
Before proceeding with the installation of this screen, take time to thoroughly read and understand
these installation instructions.
PREPARATION
Specifications regarding the individual screen dimensions, weight, etc. are provided by the factory when
the unit is ordered.
Before beginning the installation:
``
Make sure there is a clean surface on which to unroll the screen and assemble the frame.
``
Check the size and weight of the screen to be installed so that you can plan for the number of people
required for installation. You need at least two people to mount the smaller screens; more are needed
for larger, heavier screens.
You will need:
``
Lint-free, clean cloth gloves for handling the screen
``
Ladders for the personnel supporting the screen during the mounting process
``
A level
``
Fasteners appropriate for the surface on which the screen is being mounted
``
A drill
``
Tools for tightening fasteners
Note: Bolts and other fasteners for the screen are standard gauge and sizes used in the U.S.,
regardless of where they will be installed. For this reason, the sizes are expressed in inches rather
than metric measurements.
UNPACKING
Be sure to unpack carefully in a clean area. Use special care when handling the screen so that it does not
become soiled or damaged. If you plan to repack your screen and hardware for transportation to another
location, you may wish to photograph or make a note of how it was packed. Keep the packing material.
i CAUTION
Do not stand on the screen tube or store it on its end. This will cause screen damage. If you are not
going to install the screen immediately, make sure it remains horizontal during storage.
6 Stewart Filmscreen
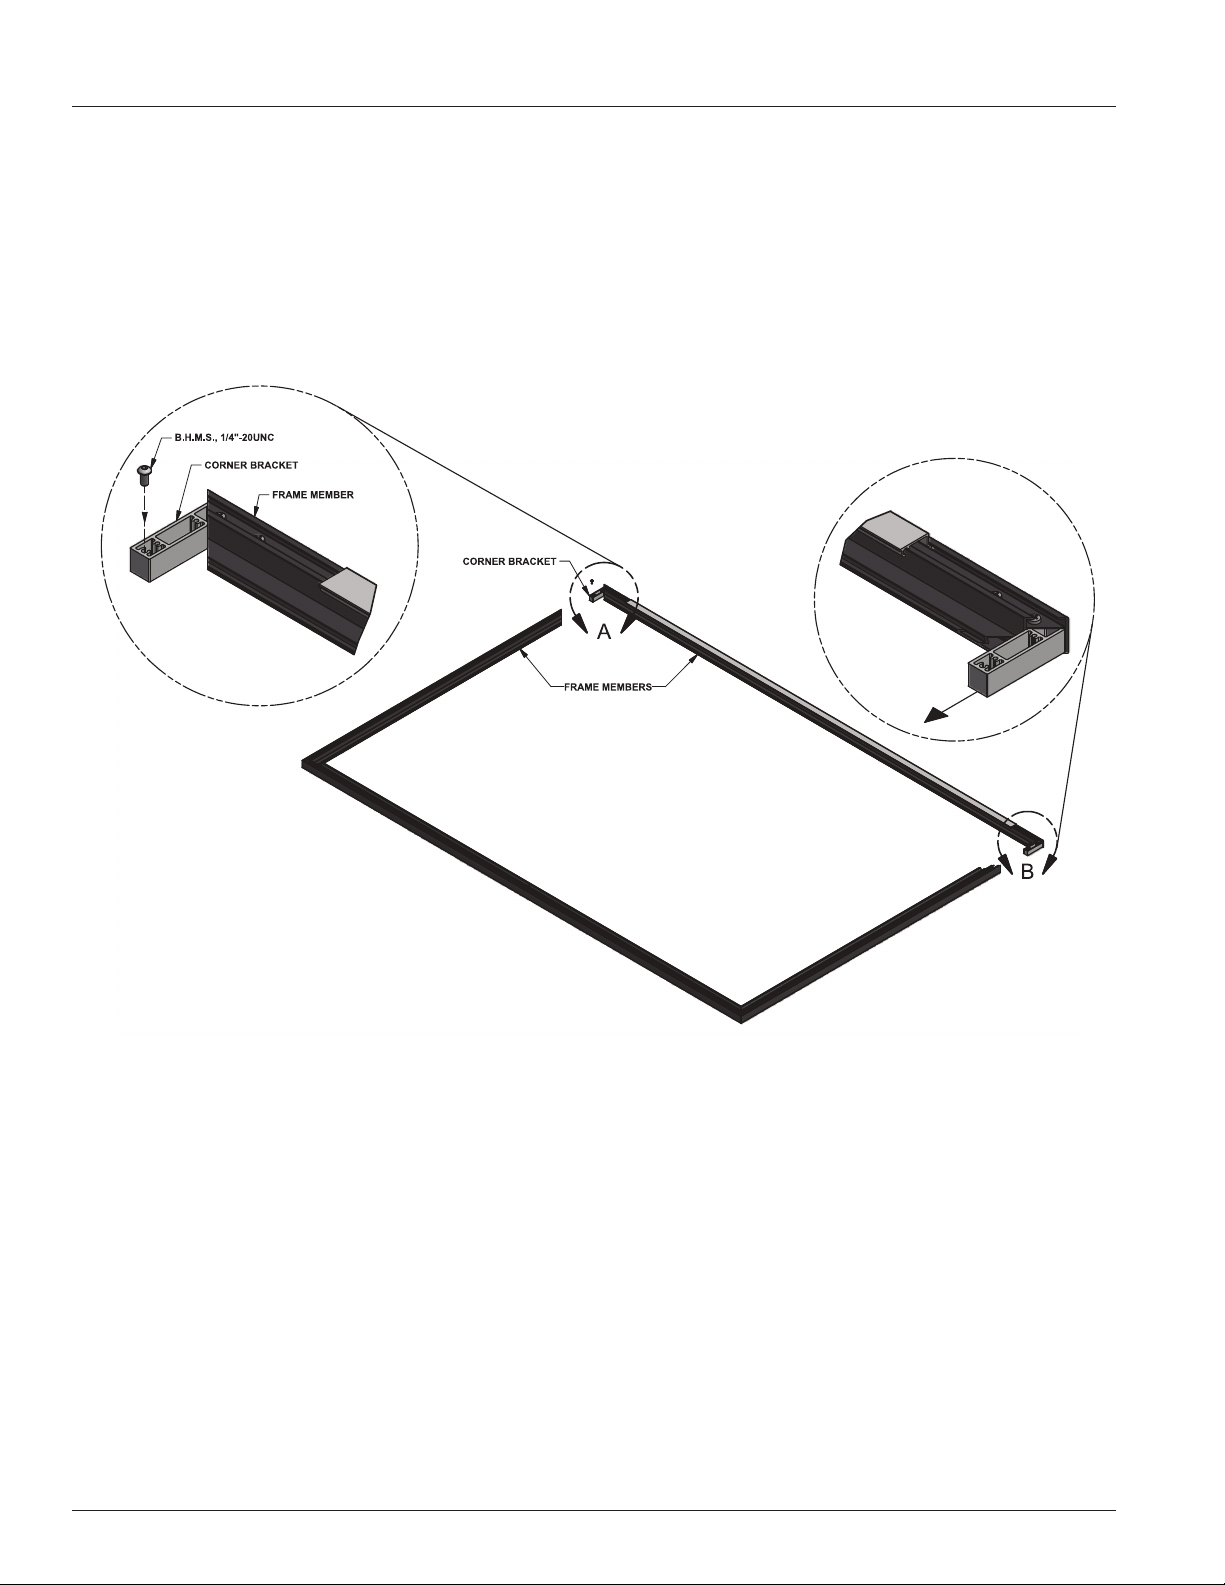
ASSEMBLING THE FRAME
Be sure to work in a clean area that will not damage the frame.
1. Connect the frame members by matching the labels on the ends of each member. See Figure 1.
2. Secure frame sections with the supplied bolts and allen wrench.
Figure 1. Frame Rear View

Cima FF 7
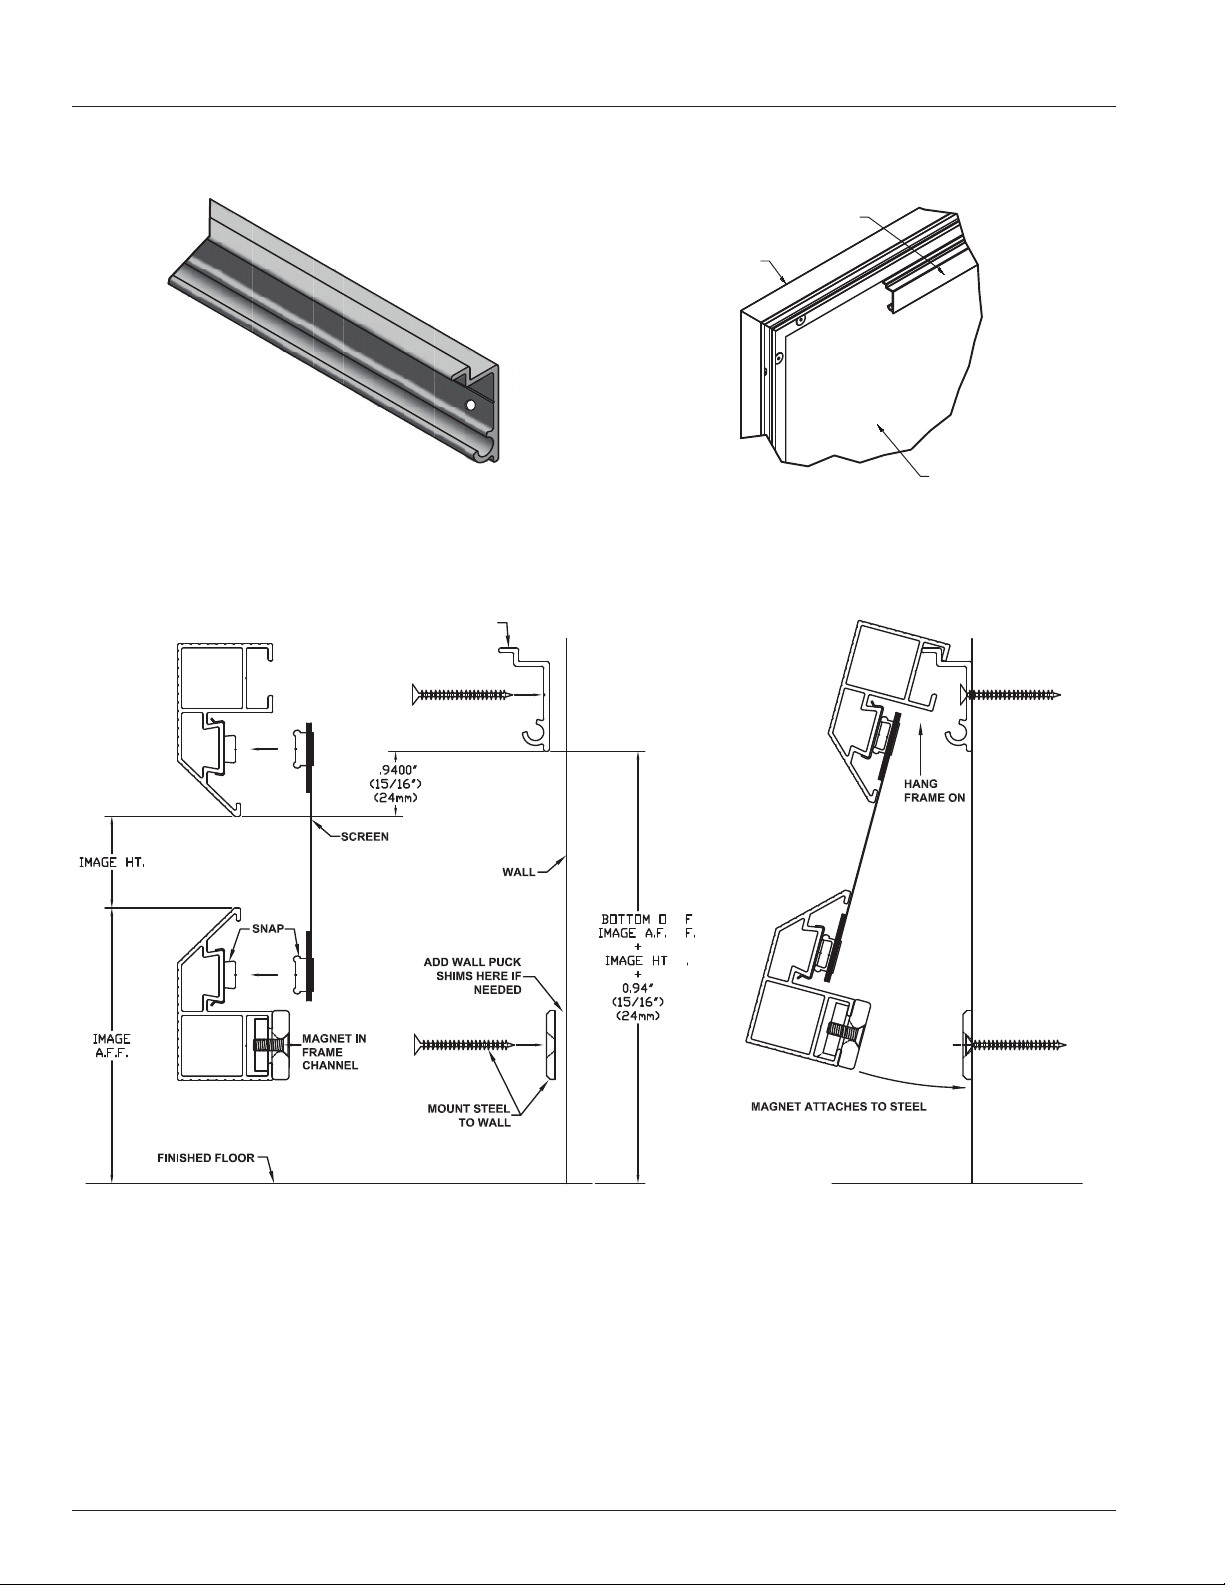
MOUNTING THE FRAME
Professional mounting techniques should be used. Stewart Filmscreen can not be liable for
substandard or faulty installations.
To accurately position the frame, you will mount the hanging bar and temporarily hang the frame prior
to attaching the screen material. On the bottom of the frame, there are magnets you can slide to line up
with steel pucks you will align with wall studs. If the wall is not perfectly flat, the force of the magnet may
cause the frame to bend. For this reason, shims can be placed between the wall and the steel pucks so
that the frame lays completely flat. The screen should not be attached to the frame at this point. Refer
to figures 2-5 on page 8.
1. Identify the location of wall studs where you can securely mount the hanging bar.
2. Use a level to accurately position the hanging bar on the wall.
3. Drill holes through the bar into the studs.
4. Use the provided screws or other appropriate fasteners to secure the hanging bar to the wall studs.
Note: A minimum of three (3) screws are recommended to safely secure the frame.
5. Check to make sure the bar is level.
6. Assemble the frame (see page 6).
7. Hang the assembled frame, without the screen attached, on the hanging bar to ensure that it is cor-
rectly mounted.
8. Mark on the wall where you will mount the steel pucks that will align with the magnets fastened on
the frame.
9. Remove the frame. Drill into the studs and mount the steel pucks with the provided screws or other
appropriate fasteners. Use shims as needed.
10. Reposition the frame, slide and secure the magnets so that they align with the steel pucks mounted
on the wall.
Note: Find studs that allow the pucks and magnets to be positioned approximately 12” to 24” from
the edge of the frame on each side.
11. Remove the frame and follow the steps for attaching the screen to the frame (see pages 9-10).
12. Your Fixed Frame is now ready to hang in its final position. See figures 2-5 on page 8.
8 Stewart Filmscreen
MOUNTING THE FRAME (CONTINUED)
Figure 2: Hanging Bar Front View Figure 3: Wall Mount Rear View
Figure 4: Components for Wall Mounting - Side View Figure 5: Hanging the Screen - Side View
HANGING
BAR
PUCK
HANGING BAR
PUCK
HANGING BAR
SCREEN
FRAME
Cima FF 9
ATTACHING THE SCREEN TO THE FRAME
DO NOT perform this step UNTIL instructed to do so in the mounting section.
i CAUTION
``
Be careful not to touch or scratch the image surface with fingernails.
``
Do not use any tools to fasten the screen to the frame.
``
Do not fold or crease the screen.
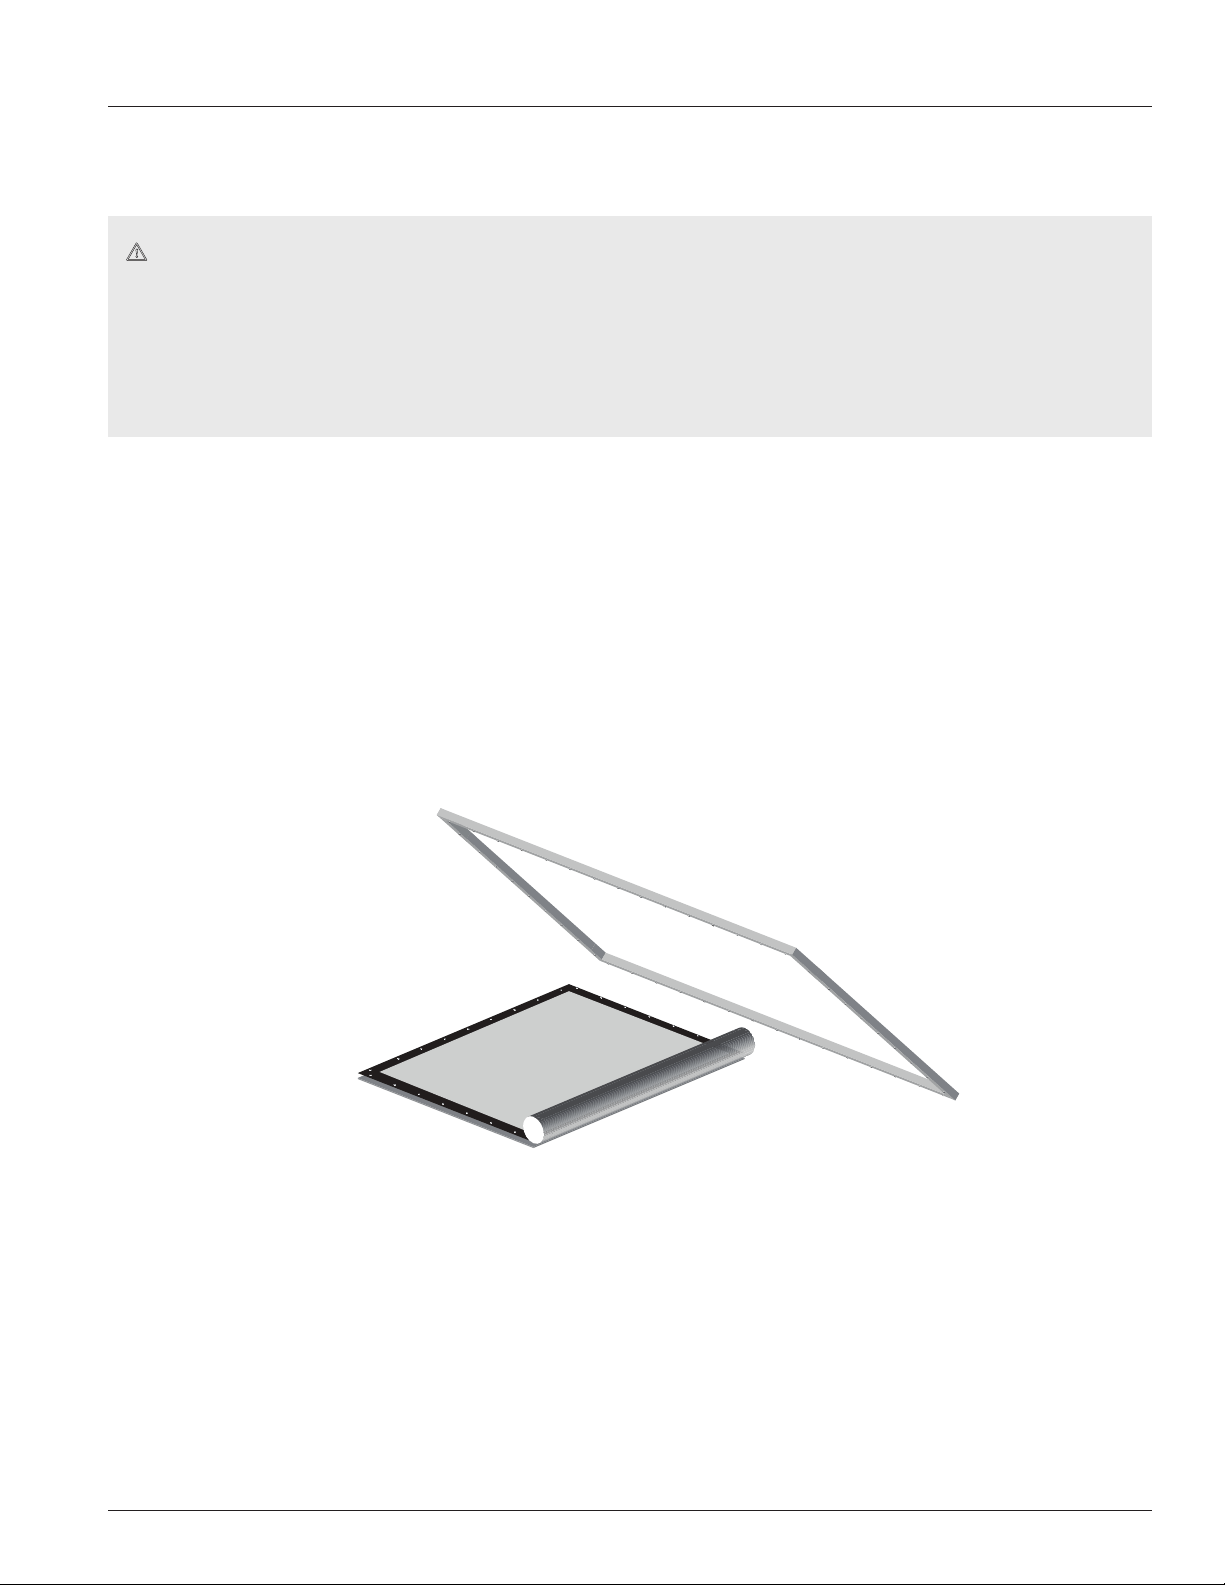
UNPACKING AND UNROLLING THE SCREEN
The viewing side of the projection screen is rolled to the inside to protect the optical coating. The screen
is rolled lengthwise.
1. Remove the screen from the cardboard shipping tube.
2. On a clean surface, unroll the screen viewing side up.
3. Remove the protective foam from the screen material.
Figure 6: Unrolling the Screen

10 Stewart Filmscreen
ATTACHING THE SCREEN TO THE FRAME (CONTINUED)
ATTACHING THE SCREEN TO THE FRAME
1. Place the frame over the screen (snap side down).
2. Starting with the snaps on the top corners and then horizontally along the top, while lifting the frame
with one hand, snap the screen into the frame. Gently allow the screen to stretch onto the snaps.
Do not jerk, wrinkle or crease the screen material, as it can be damaged. Refer to Figure 7.
3. Lift the frame to a vertical position to finish attaching the sides and bottom rows of the snaps. Refer
to Figure 8.
Figure 7: Attaching Top Corner Snaps
Figure 8: Attaching Remaining Snaps

Cima FF 11
CARING FOR AND CLEANING THE SCREEN
With reasonable care, you may expect many years of dependable use of your Stewart projection screen.
GENERAL MAINTENANCE
The surface of your screen is delicate, so we encourage you to keep your screen clean. Special attention
to these instructions should be followed when cleaning.
``
Avoid getting any foreign objects on the screen, as cleaning may prove very difficult. It may not be
possible to remove scratches, paint, ink, etc.
``
A draftsman-style brush may be used to lightly whisk away any loose dirt or dust particles. (This type of
brush is usually available at office supply stores.) Stewart Filmscreen has an optional screen cleaning kit
that contains the proper type of brush. Contact your dealer if you would like to obtain this cleaning kit.
``
For tougher spots, you can make a cleaning solution using a water-based detergent and warm water. To
make the solution, mix one part Simple Green, 409, or other water based industrial cleaner with three
parts warm water. Moisten a clean cotton cloth or Q-Tip with this solution, moisten the stained area,
and gently lift off the stain. Never use an aggressive scrubbing action as you could damage the screen
surface by removing the optical coating. Remoisten the area with clean water and dab dry with a clean
sponge or cotton cloth. Any residual watermarks will evaporate on their own in a few minutes.
``
Contact the factory if you have questions about removing difficult spots.
i CAUTION
``
Do not use any other cleaning materials on the screen.
``
Do not use chemicals or solvents to clean the screen. Use only commercially available, water-
based de-greaser.
``
Do not use chemicals, solvents, or liquid cleaners to clean the VeLux covering.
``
Do not fold or crease the screen.
VELUX™ COVERING
``
Use a lint roller to remove particles from the VeLux, which is the velvet material covering the frame.
``
A brush may be used to comb (lift) the nap of the VeLux material to help eliminate depression marks.
REPLACEMENT PARTS & SERVICE
No user-serviceable parts are contained within the unit. Contact your dealer or the factory if you require
part replacement or service.

12 Stewart Filmscreen
LIMITED ONE YEAR WARRANTY
STEWART FILMSCREEN CORPORATION (Stewart) warrants all products to the original purchaser only.
Stewart products are guaranteed to be free from defects in materials and workmanship for a period
of one (1) year from the date of purchase by the original purchaser or eighteen (18) months from date
of manufacture, as defined in the serial number. Additionally, all products must be properly operated
and maintained according to Stewart instructions and cannot be damaged due to improper handling or
treatment after shipment from the factory. This warranty does not apply to equipment showing evidence
of misuse, abuse, or accidental damage, including neglect caused by improper installation (i.e. proximity
to hot lights, exposure to extreme heat or cold, exposure to excessive humidity, etc.)
Stewart on-site warranty repair services are not available for this product. Stewart’s sole obligation
under this warranty shall be to repair or to replace (at Stewart’s sole discretion) the defective part of the
merchandise. This warranty expressly does not cover any costs of removal, installation, framing, or other
costs incidental to replacing the screen or returning it to Stewart. Returns for service should be made to
your Stewart dealer. If it is necessary for the dealer to return the screen or part to Stewart, transportation
(freight) expenses to and from Stewart are payable by the purchaser. Stewart is not responsible for
damage in shipment. To protect against damage or loss in transit, insure the product and prepay all
transportation expenses.
This warranty is in lieu of all other warranties, expressed or implied, including warranties as to fitness for
use or merchantability. Any implied warranties of fitness for use, or merchantability, that may be mandated
by statute or rule of law are limited to the one (1) year warranty period. This warranty gives you specific
legal rights, and you may also have other rights which vary from state to state. In no event will Stewart
be liable for sums in excess of the purchase price of the product. No liability is assumed by Stewart for
expenses or damages resulting from interruption in operation of equipment, or for incidental, direct, or
consequential damages of any nature. In the event that there is a defect in materials or workmanship of
a Stewart Filmscreen product, you may contact our Customer Service Department at 1161 W Sepulveda
Blvd, Torrance, California 90502- 2797 (310-784-5300) Toll free (800-762-4999).
IMPORTANT: This warranty shall not be valid and Stewart shall not be bound by this warranty if the product
is not operated and maintained in accordance with Stewart’s written instructions. Stewart Filmscreen
Corporation shall not be liable for any and all consequential damage(s) occasioned by the breach of
any written or implied warranty pertaining to the sale of a Stewart Filmscreen product in excess of the
purchase price of the product sold.

Cima FF 13
MAINTENANCE NOTES

www.stewartfilmscreen.com
1161 W. Sepulveda Blvd., Torrance CA 90502 USA l 800.762.4999 l Tel: 310.784.5300 l Fax: 310.326.6870 l Email: request@stewartfilmscreen.com
©2019 Stewart Filmscreen. Specifications are subject to change without notice.
xxx