Loading ...
Loading ...
Loading ...
Page 6
ASSEMBLY
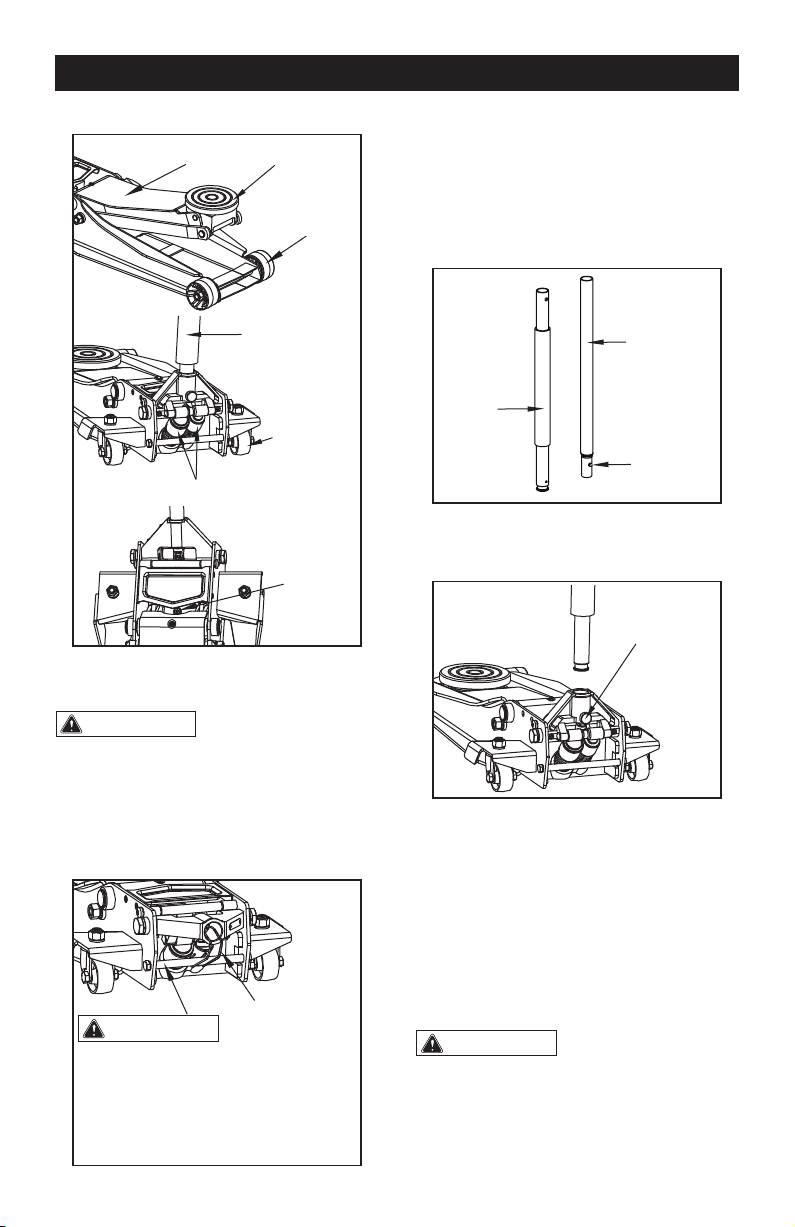
1. Familiarize yourself with the jack.
2. Prior to assembly, carefully remove the
stopper attached to the handle socket.
4. Unfasten the screw located in the Handle
Socket to insert the assembled handle.
3. Refer to picture below when performing
assembling handle sections. Press Quick
Disconnect on handle piece 2, this will allow
slide handle pieces 1 and 2 to connect, align
the holes on both sections to allow quick
disconnect to trigger. Quick disconnect will
automatically pop out when hole position is
correct.
5. Line up the square whole located at the
bottom of the handle over the square bolt
inside the Handle Socket.
6. Secure the handle in place by tightening the
screw in the handle socket without any vehicle
on the jack. Cycle the lift up and down several
times to insure the hydraulic system is operating
properly. (Perform to the System Air Purge
Procedure before first use.)
CAUTION:
The socket will tend to
spring upward when the stopper is removed.
To prevent possible injury, place one hand on
the top of handle socket to control the upward
motion of the handle socket, and then carefully
remove the stopper. After removed slowly
allow handle socket to rise back into resting
position.
WARNING:
Do not lift or carry jack
by handle. Handle could dislodge and jack
may fall, resulting in possible injury or property
damage.
Quick
Disconnect
Handle
PC. 2
Handle
PC. 1
Lifting Arm
Saddle
Front
Wheel
Handle
Rear Swivel
Casters
Pump Plunger
Oil Fill
Plug
WARNING:
Once retaining clip is removed,
SLOWLY allow handle socket to rise
back into resting position. Use
CAUTION when removing retaining
clip, handle socket will spring forward
rapidly.
Clip
Handle Socket
Screw
Loading ...
Loading ...
Loading ...