Loading ...
Loading ...
Loading ...
18
DRAIN HOSE CONNECTION
Put provided silver clamp over elbow end of drain hose.
Then push the hose onto the drain port with the hose facing
underneath the dishwasher. Using pliers squeeze, open the drain
hose clamp and slide it over the elbow to ensure those hose is
attached in place. Route the hose out of the back of the product.
NOTE:
■ If the hose is installed with the rubber elbow facing out, the
drain hose may become kinked causing slow or incomplete
draining in tight cabinet installations.
■ There may be a plastic plug in the drain port for shipping
purposes where you will connect the drain hose. Remove
this plug before installing drain hose, if present.
POWER CORD CONNECTION
If installing product using a Power Cord.
NOTE: Route drain hose out the back of unit before standing unit
upright. Proceed to Step 18. If installing a product with direct
wiring, wait until after Step 44 when the unit has been installed in
the cabinet opening.
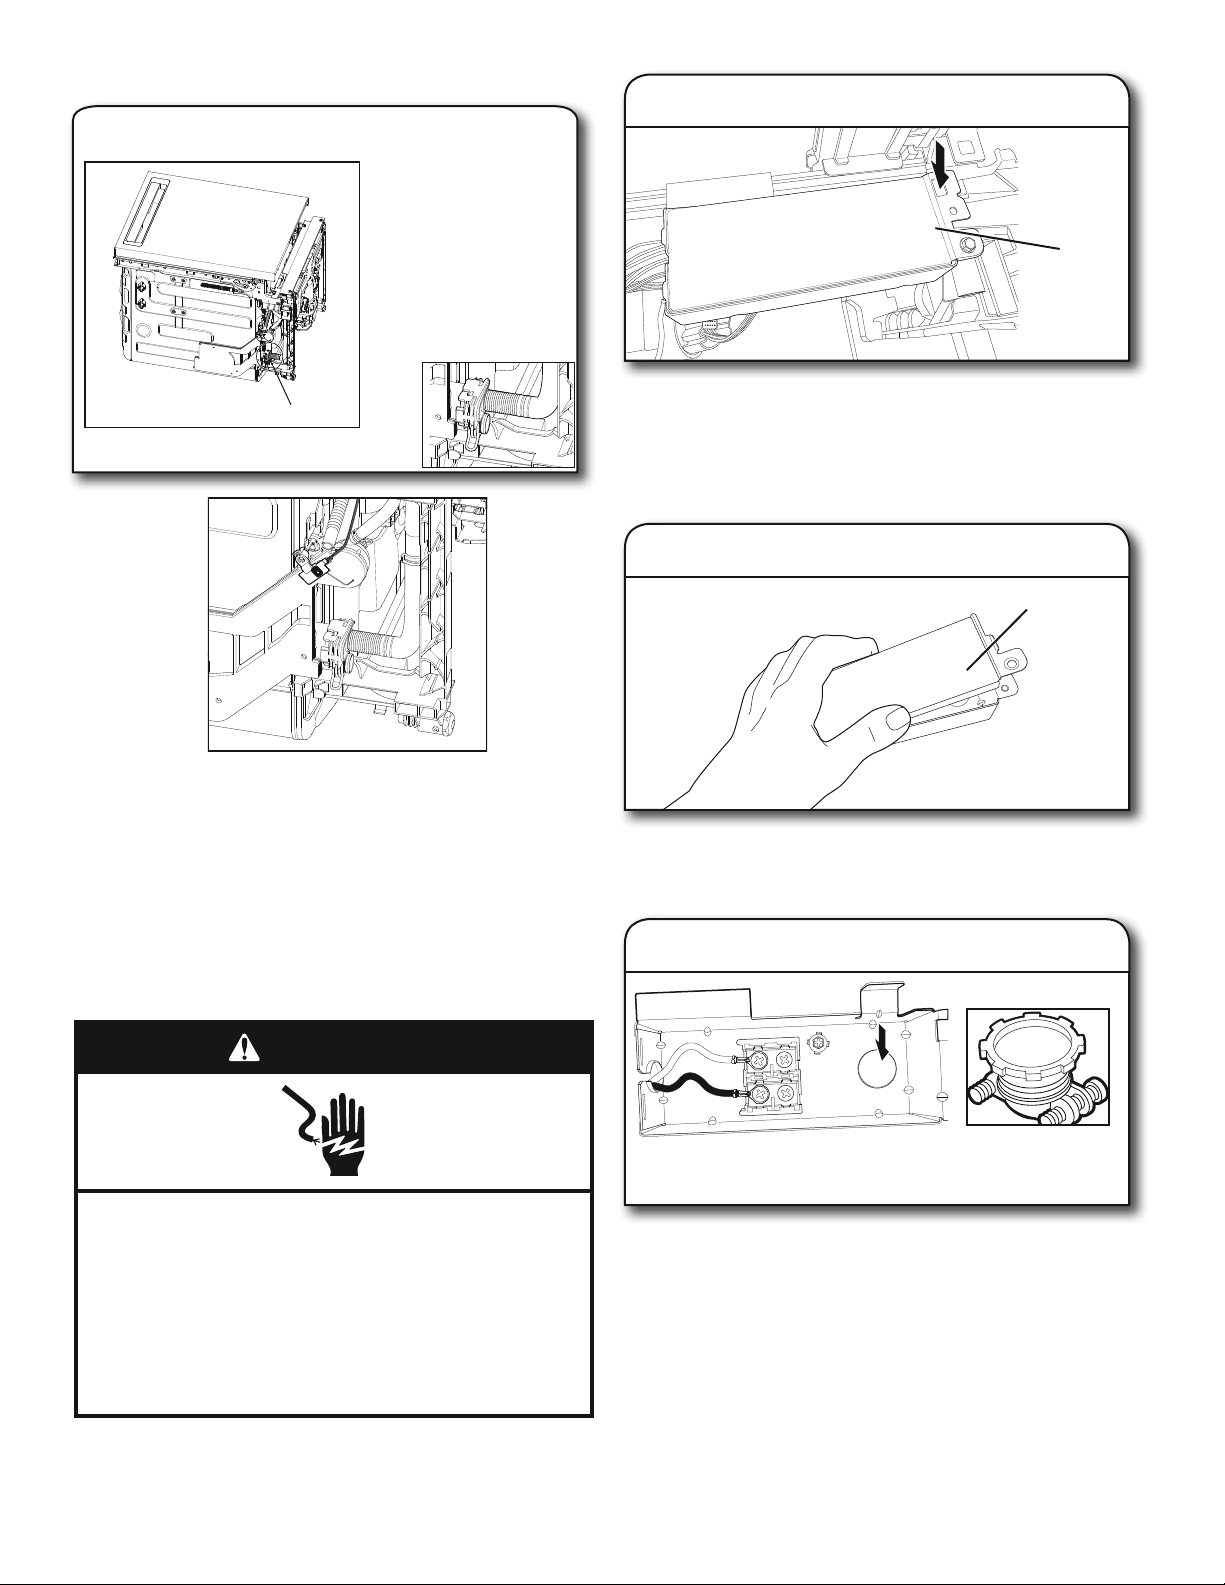
To remove the terminal box, depress the plastic latch, slide the
box toward the left of the unit along the metal tube and rotate the
left side of the box forward. Make sure that the product wiring will
still be attached within the terminal box.
Using 1/4" (6.4 mm) nut driver remove the screw holding the
terminal box cover. Remove the cover by lifting it out of the box.
Keep the cover for later use.
Install a UL Listed/CSA Approved metallic strain relief. Make
sure screw heads are facing up when tightening conduit nut.
Strain relief is provided with the power cord kit.
Terminal
box
Drain Hose Location
17. Connect drain hose
18. Remove terminal box
Electrical Shock Hazard
Plug into a grounded 3 prong outlet.
Do not remove ground prong.
Do not use an adapter.
Do not use an extension cord.
Failure to follow these instructions can result in death,
fire, or electrical shock.
WARNING
19. Remove terminal box cover
Terminal
box cover
20. Install strain relief
Loading ...
Loading ...
Loading ...