Loading ...
Loading ...
Loading ...
-7-
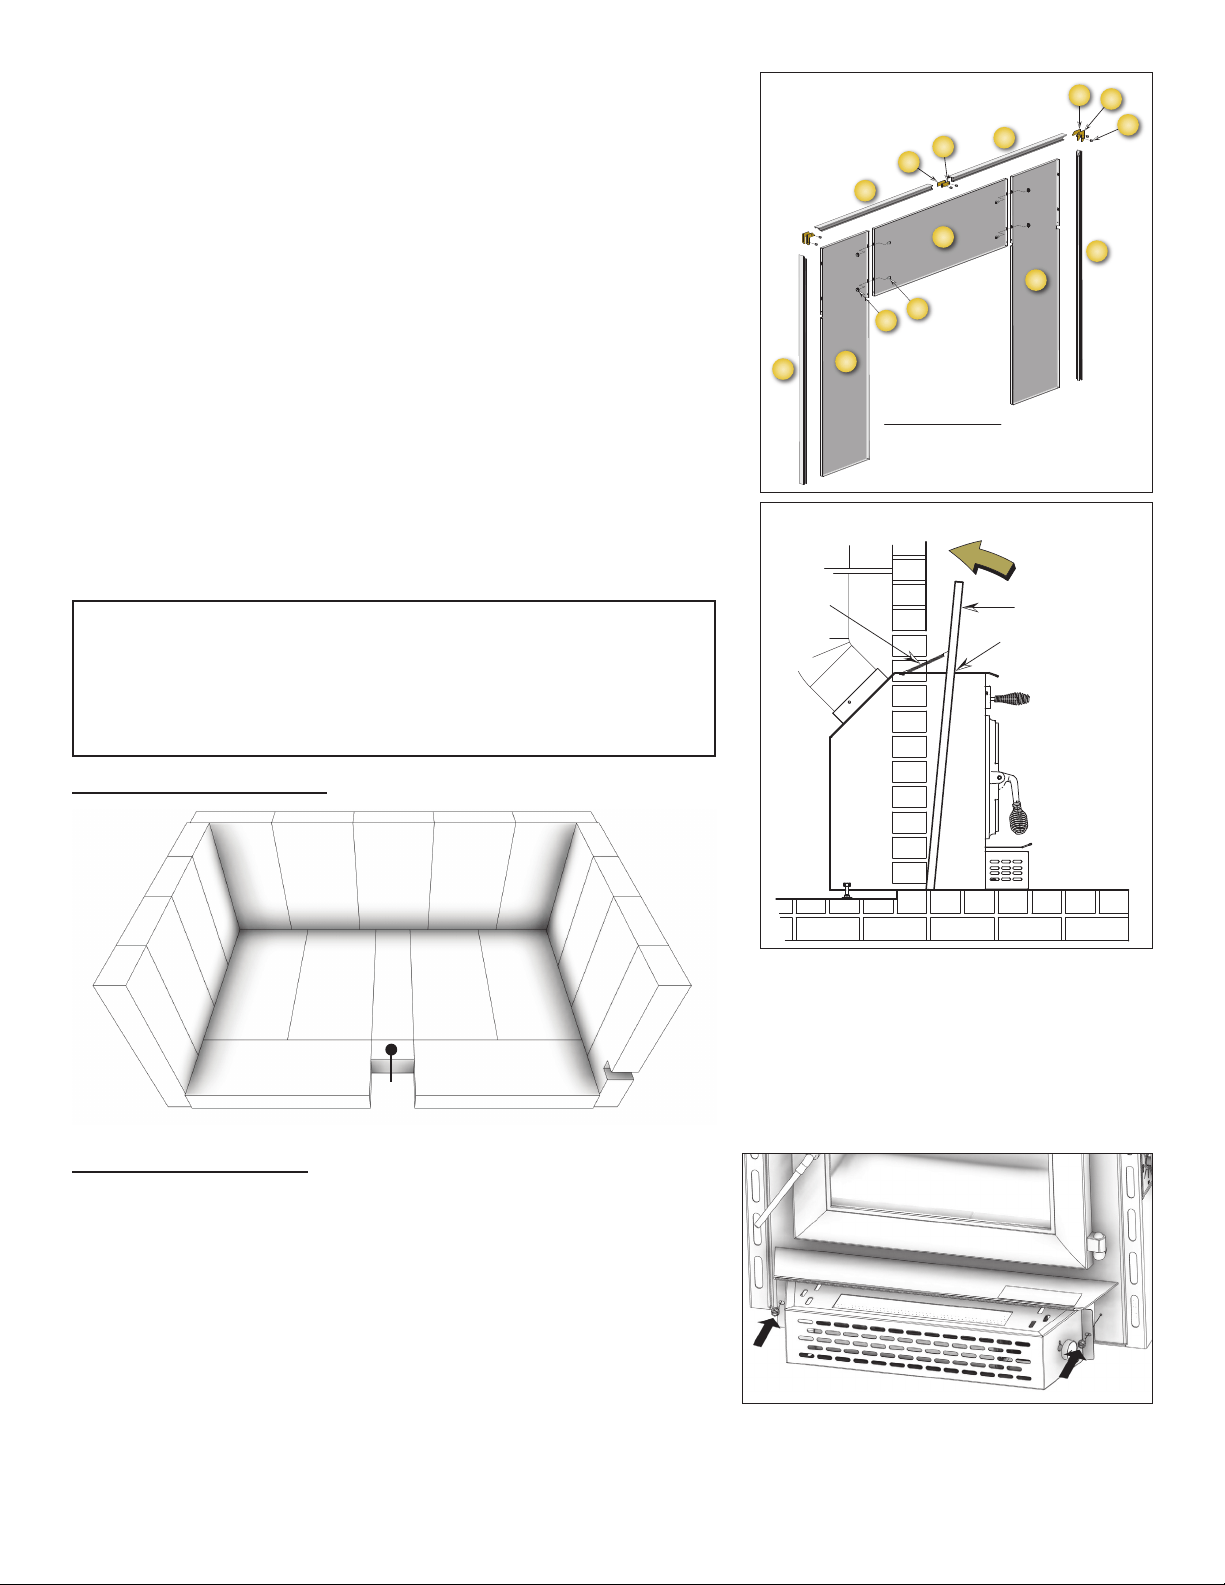
11. Assemble the trim frame. The trim consists of a left (6) and right
(5) side piece and a split top piece (left #8, right #7). These
are joined by corner connectors (11-13) and two straight center
connectors (9-10). These slide into the channel on the back of
the frame and are secured with two set screws (13) in each
piece.
12. The trim slides over the surround assembly and is secured at the
base of each side with a machine screw.
13. The Surround Assembly is then slid over the appliance. Slots in
the two side panels accommodate the hood at the top of the
appliance (gure 6).
14. The surround assembly is held in place with two springs at the
top of either corner of the appliance (gure 6).
15. Connect power cord of blower to grounded receptacle.
16. Firebrick extends the life of your stove and radiates heat more
evenly. If rebricks were removed to position appliance, replace
them before ring appliance. See gure 7 for proper orientation
and positioning. Install the back row rst, then sides and nally
install bottom rebricks.
1
14
2
6
5
7
8
3
4
9
10
11
12
13
SURROUND ASSEMBLY
VIEW FROM BACK
SPRING
SURROUND
Slots in surround
slide of rebox top
Figure 6. Surround Installation
BLOWER INSTALLATION
1. Remove blower assembly from packaging and check for any
damage. Notify your dealer if any damages exist.
2. Securely mount the blower to the heater with the two (2) screws
and washers provided.
CAUTION: RISK OF FIRE!
• Replace rebricks before ring woodstove. Position rebricks
so no gaps remain between bricks.
• Never operate this appliance with missing or cracked rebrick.
• Keep furnishings and other combustible materials away from
the stove and outside minimum clearances.
FIREBRICK INSTALLATION
A
A A AD
E
A
A A A A
B
B
B
C C
F
G
B
B
B
Loading ...
Loading ...
Loading ...