Loading ...
Loading ...
Loading ...

8
NS-27HTV 27-inch Color TV
www.insignia-products.com
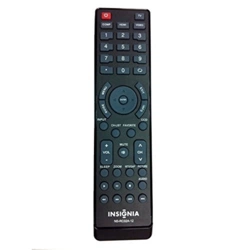
SELECTING AN AUDIO MODE
Press the SOUND button on the remote control
to display sound mode (Custom, Live, Pop, and
Rock), then press or to select a different
mode.
G
EOMAGNETIC CORRECTION
Press the ROTATE button on the remote control
to set a geomagnetic correction.
Using the OSD menu
1 Press the MENU button on the television or
on the remote control to display the menu.
2 Press the arrow buttons to choose a desired
option.
3 Press the OK button or on the remote
control to enter the menu, then use the arrow
buttons to select the item you want.
4 Press the OK button to confirm.
5 Press the EXIT button to return to the
previous menu or press the MENU button to
exit the menu.
U
SING THE VIDEO MENU
The Video menu allows you to adjust your
picture settings.
Picture—Adjusts the picture mode (Custom,
Standard, Vivid, and Mild).
Contrast—Adjusts the difference between
the light and dark areas of the picture (from
00 to 100).
Brightness—Adjust left or right to darken or
brighten the picture (from 00 to 100).
Color—Adjust left or right to decrease or
increase color intensity or saturation (from 00
to 100).
Hue—Adjusts the balance between the red
and green levels (from -50 to 50).
Sharpness—Adjust left or right to soften or
sharpen the picture detail (from 00 to 20).
Color Temp—Provides three color adjustments
(Normal, Warm, and Cold).
DNR—Selects DNR as Off, Low, or High.
Blue Screen—Turns the blue screen on or off.
SVM—Turns the SVM on or off.
U
SING THE AUDIO MENU
The Audio menu allows you to adjust your
sound settings.
EQUALIZER—Provides Custom, Live, Pop, and
Rock modes.
BALANCE—Adjusts the balance. Adjust left or
right to emphasize left or right speaker balances
(from -50 to 50).
Digital Audio—Press or to choose Dolby
Digital or PCM.
U
SING THE CHANNEL MENU
The Channel menu allows you to select the
channels your television can receive.
Auto Search—Selects the scan source: Air,
Cable, or Air+Cable. Press the OK button to start
channel searching. After Auto Search finishes, a
prompt menu is displayed on the screen. Press
the EXIT button to exit AUTO SEARCH.
Hand Search—Selects one RF type. Enter the
channel number, then press the OK button to
start searching. The searching channel
frequency is displayed on the screen when hand
searching.
Edit Channel—Press or to choose Fav,
Lock, and Skip. Press the EXIT button to return
to the previous menu.
To change the channel order, press the OK
button to select the channel you want to move.
Press or to move the cursor to the position
you want to move to, then press the OK button to
change this channel order.
Info—Sets the channel number and edits the
channel name.
U
SING THE CC MENU
The Closed Caption menu allows you to adjust
your closed captioning settings.
CC Mode—Select from ON/OFF/On When Mute
mode. If you choose the On When Mute mode,
closed captioning will turn on automatically when
you set the television to mute. If the sound is
restored, closed captioning will turn off
automatically.
Analog Caption—If the input source is RF or
external equipment signal input, the analogue
closed captioning display is available.
Digital signals may have this feature depending
on the program signal broadcasted by the
television station. You can set it to C1, C2, C3,
C4, T1, T2, T3, or T4.
Press the EXIT button to return to the previous
menu.
Digital Caption—When you receive digital
television signals, this feature is available.
SERVICE can be set to one of six modes.
Style—Sets your CC style.
Style—Sets the style from the following:
Style1, Style2, Style3, Style4, Style5, Style6,
Style7, Style8, Style9, and Style10. Every
style can be set by you
Size—Sets the picture size.
Font—Sets the font.
Text Color—Sets the text color.
Text Opacity—Sets the opacity.
BG Color—Sets the background color.
BG Opacity—Sets the background
transparency.
Note
If you enter the wrong character, you can
press the button to erase it.
Note
You can only choose one mode for the
picture. Press the OK button to choose the
mode. A bar shows the level and the
corresponding value is displayed on the right.
You can only set individual values if the
picture mode is Custom.
Note
You can only choose one mode for the
equalizer. Press the OK button to choose the
mode. A bar shows the level and the
corresponding value is displayed on the right.
You can only set individual values if the audio
mode is Custom.
Note
If you choose Cable or Air+Cable, you need
to select a mode from STD, HRC, or IRC.
Loading ...
Loading ...
Loading ...