Loading ...
Loading ...

Page 3 of 6
ASSEMBLY INSTRUCTIONS (continued)
Installation Steps
1.The fixture mounting bracket is
pre-assembled on the light
fixture (E). Unscrew ball
nuts (C) in order to remove the
mounting bracket.
3. Fixture wires thread through
gasket (EE), and then attach
the gasket (EE) to the back of
mounting bracket.
C
D
E
D
B
B
E
4. Pull out the source wires from
the outlet box. Make wire
connections using wire
nuts (FF) as follows:
---Connect the black wire from
the fixture to the “hot” wire
from the power source.
(usually black)
---Connect the white wire from
the fixture to the neutral wire
from the power source.
(usually white)
Carefully tuck the wires back into the outlet box.
Outlet Box
1
3
EE
FF
4
5
5. Place mounting bracket
against the outlet box,
insert the mounting bracket
screw (DD) through the
mounting bracket hole,
thread mounting bracket
screw (DD) into the center
hole of the mounting strap
(BB). Tighten the mounting
bracket screw (DD)
securely.
NOTE: the “UP” arrow
must point upward.
6. Attach the back plate (D) of
the light fixture (E) to the
mounting bracket, secure it
with the ball nuts (CC).
Mounting Bracket
Mounting Bracket
Gasket
Mounting Bracket
Mounting Bracket
6
2.Install the mounting strap (BB)
to the outlet box with the
stamped word “FRONT” facing
away from the outlet box, using
two mounting screws (BB) that
best fit the outlet box. Mounting
bracket should sit flush
against wall surface when
secured. (Choose one
matching pair of suitable
mounting screws (AA) from the 3 pairs provided)
Outlet Box
2
BB
AA
Outlet Box
DD
BB
CC
With silicone caulking
compound, caulk completely
around where the mounting
bracket meets the wall surface.
CAUTION: Be sure to caulk completely where the
mounting bracket meets the wall surface to prevent
water from seeping into the outlet box.
Turn off the power at fuse or
circuit box.
Turn on the power at fuse or circuit box.
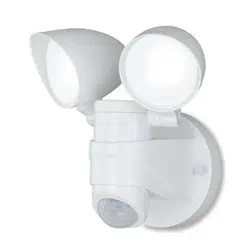
Adjusting the Sensor Head:
Fig. 1
1. Rotate the sensor head (B) to make the controls show
up. After setting the controls, rotate the sensor head (B)
so the controls are facing the rear of the fixture and the
two dots are in alignment. You can also rotate the
motion sensor left or right to get your desired dection
area. (see Fig.1)
Loading ...
Loading ...
Loading ...