Loading ...
Loading ...
Loading ...
7
INSTALLATION INSTRUCTIONS
Unpacking Instructions
WARNING
Excessive Weight Hazard
Use two or more people to move and install
microwave oven.
Failure to do so can result in back or other injury.
1. Unpack the microwave oven and check if all parts are
supplied and screw pack is included. See “Screw Pack
Supplied” and “Parts Supplied” sections. They are needed
for installation.
2. Dispose of/recycle all packing materials.
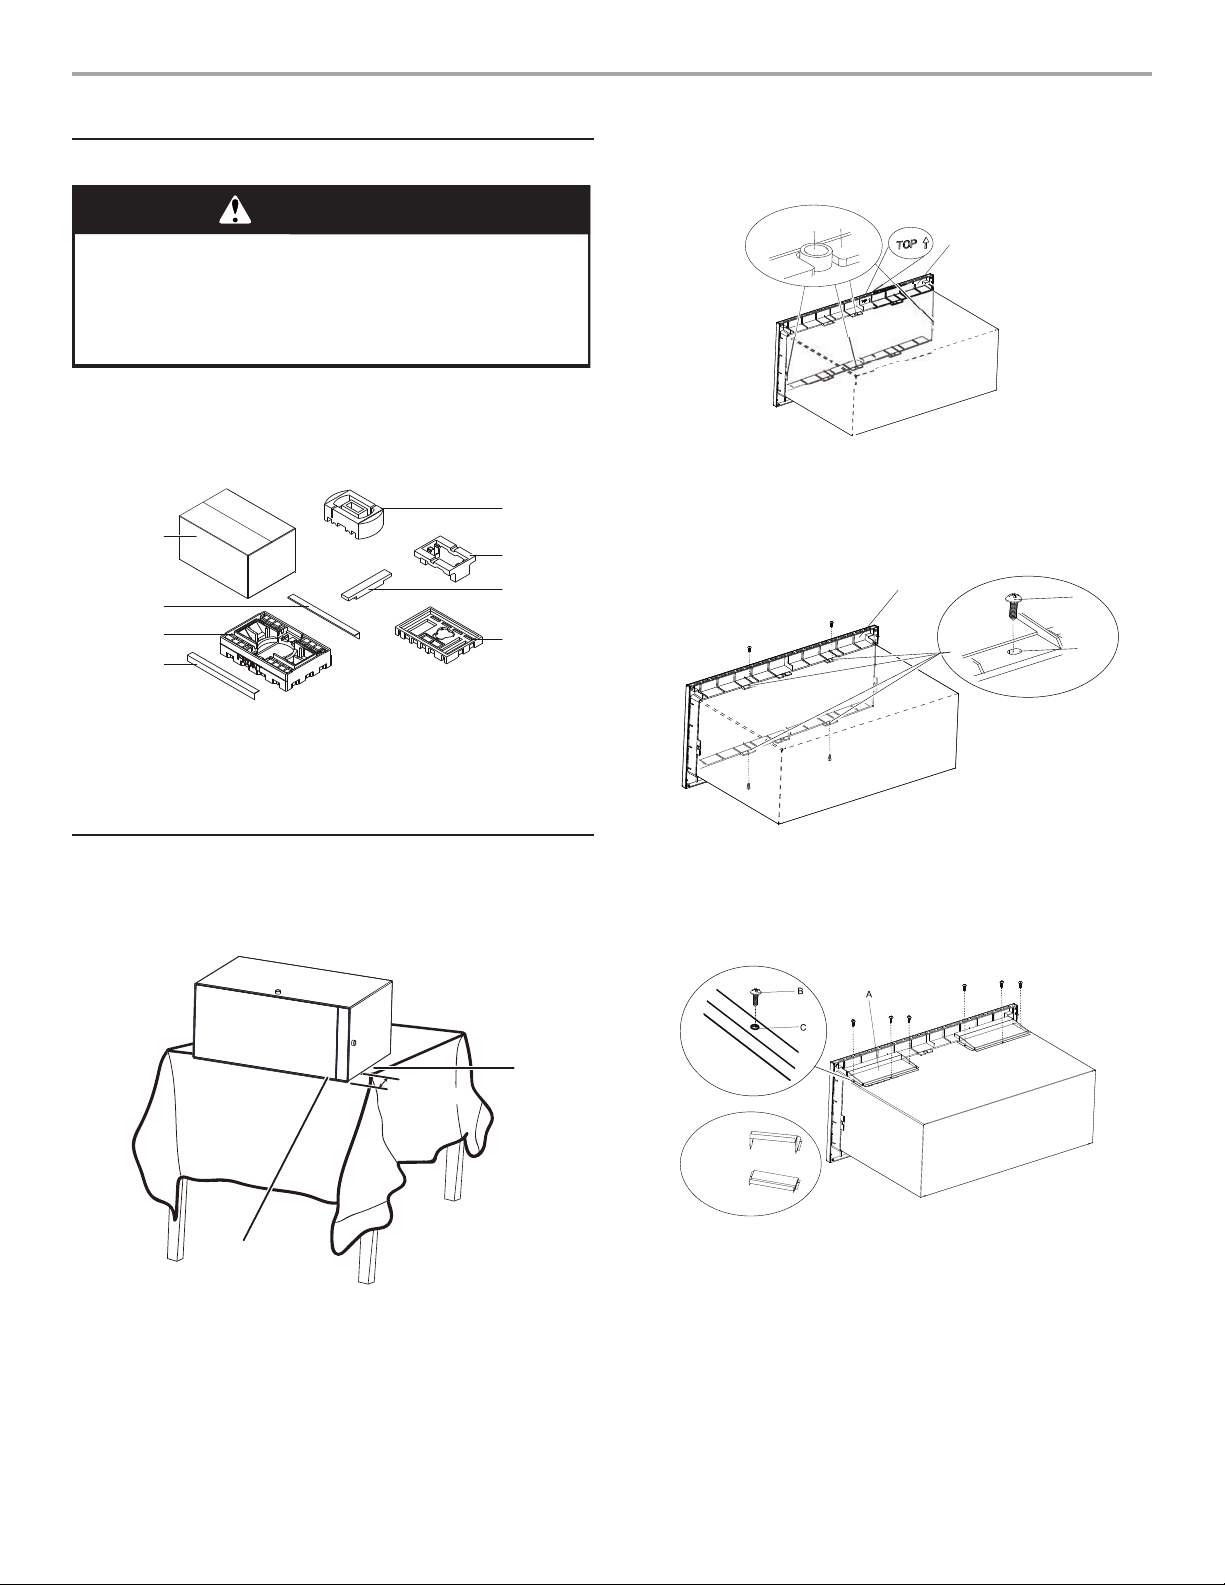
Prepare Microwave Oven
1. Remove any loose items from inside the microwave oven.
2. Place the microwave oven on a stable surface with the door
slightly beyond the edge of the surface as shown.
3. Attached the trim kit frame to the microwave oven in the
following steps:
■ Remove the protective lm on door before installation.
■ Insert the four trim kit frame locating holes to the four
microwave oven locating pins. Install the trim kit frame in
the proper orientation. “TOP” side is marked.
■ Secure the trim kit frame to the microwave oven using
four #7-18x7/16" round-head sheet metal screws.
4. Secure the two cooling ducts to the top of the microwave
oven using six #7-18x7/16" round-head sheet metal screws.
NOTE: The cooling duct may have slightly different
appearance, depending on your model.
A. Carton box (1)
B. Angle bar (2)
C. Top cushion (1)
D. Small cushion (1)
E. Inner cushion (Standard
models only)
F. Inner cushion bar
(Standard models only)
G. Bottom cushion
A
B
C
B
D
E
F
G
B
A
< 3.5" (9 cm)
A. Edge of table
B. Edge of microwave-lower front door
A
B
C
A. Trim Kit Frame
B. Locating pin (4)
C. Locating hole (4)
A. Trim Kit Frame
B. #7-18x7/16" round head sheet metal screw (4)
C. Screw holes (4)
A
B
C
A. Cooling Duct (2)
B. #7-18x7/16" round head sheet metal screws (6)
C. Screw holes (6)
Standard
Slim
Loading ...
Loading ...
Loading ...