Loading ...
2
INSTALLATION REQUIREMENTS
Tools and Parts
Tools Needed
Gather the required tools and parts before starting installation.
Read and follow the instructions provided with any tools listed
here.
■ Measuring tape ■ Pencil ■ Phillips screwdriver
■ 7/64" drill bit ■ Drill
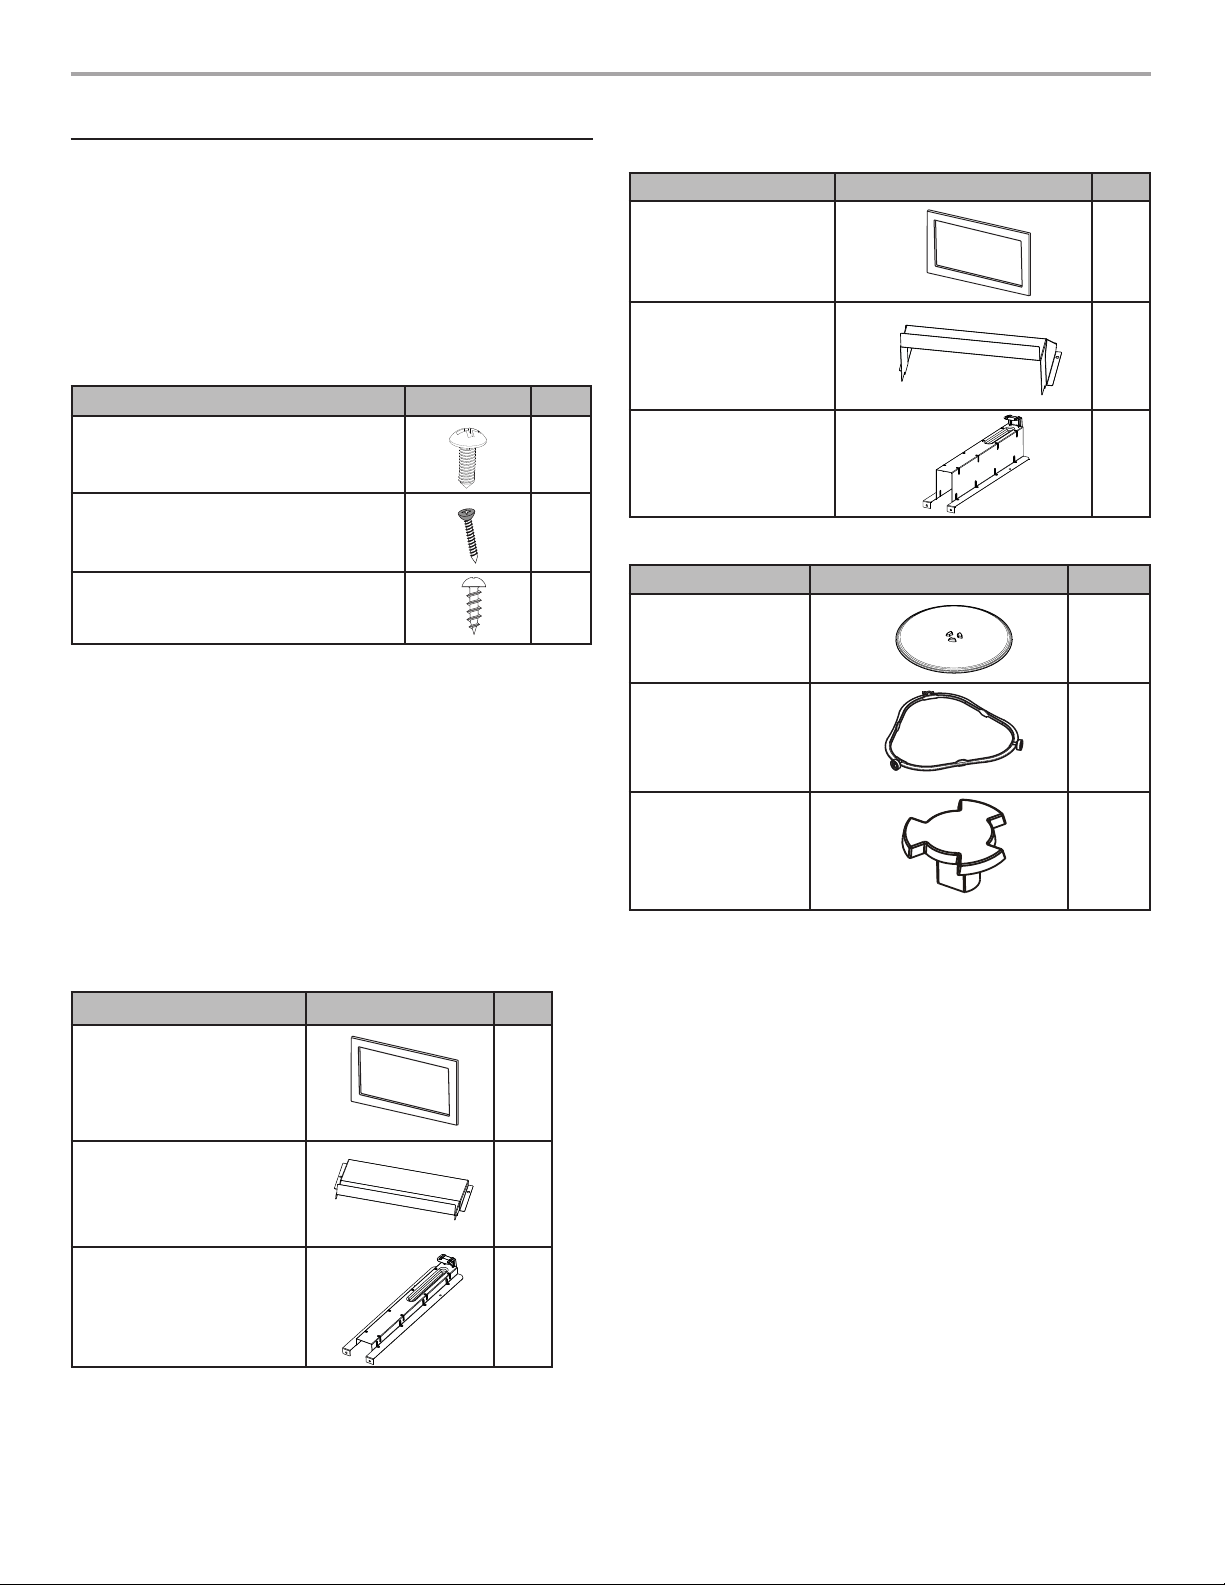
Screw Pack Supplied (not shown to scale)
SCREW SCREW ART QTY
#7-18x7/16" round-head sheet metal
screw
14
#7-16x15/16" flat head wood screw 6
#7-16x7/16" round-head wood screw 10
NOTE: There are some extra screws in the screw pack. They are
spares for your use during installation if needed. See below:
■ #7-18x7/16" round-head sheet metal screw: 4 extra.
■ #7-16x15/16" flat head wood screw: 2 extra.
■ #7-16x7/16" round-head wood screw: 4 extra.
Parts Supplied (not shown to scale)
This installation instruction is for various models. Some parts
supplied may have different appearance, depending on your
model.
NOTE: Trim kit frame (1), Cooling Ducts (2) and Rail (2) parts will
need to be purchased to convert from Standard to Slim or from
a Slim to a Standard installation.
Parts supplied for model: WMT50011K and KMBT5011K
PART PART ART QTY
Trim kit frame (slim)
1
Cooling duct (slim)
2
Rail (slim)
2
Parts supplied for model: WMT55511K and KMBT5511K
PART PART ART QTY
Trim kit frame
(standard)
1
Cooling duct (standard)
2
Rail (standard)
2
Parts supplied for all models
PART PART ART QTY
Turntable
1
Turntable ring
1
Turntable driver
1
NOTE: The turntable driver is located inside the microwave oven
cavity. Remove the tape before use.
Loading ...
Loading ...
Loading ...