
USER MANUAL
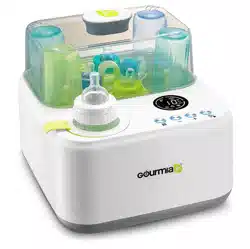
BOTTLE STERILIZER
& DRYER
Model# JBS-200

2
Read this manual thoroughly
before using and save it for
future reference
FOR CUSTOMER SERVICE
QUESTIONS OR COMMENTS
VISIT US @ GOURMIA.COM
OR CALL 888.552.0033
Visit GourmiaJr.com for important product information and
regularly updated manuals
Model: JBW-200
© 2018 Gourmia
www.gourmia.com
The Steelstone Group
Brooklyn, NY
All rights reserved. No portion of this manual may be reproduced by any means
whatsoever without written permission from The Steelstone Group, except for
the inclusion of quotations in a media review.
Although every precaution has been taken in the preparation of this manual, The
Steelstone Group assumes no responsibility for errors or omissions. Nor is any
liability assumed for damages resulting from the use of the information
contained herein. Although every effort has been made to ensure that the
information contained in this manual is complete and accurate, The Steelstone
Group is not engaged in rendering professional advice or services to the
individual consumer; further, The Steelstone Group shall not be held responsible
for any loss or damage allegedly arising from any information or suggestion in
this manual.
Welcome to the Convenient World
of 2-in-1
Bottle Sterilizing and Drying
from Gourmia
Thank you for purchasing a Gourmia Sterilizer and Dryer!
the functions and features of the Gourmia Bottle Sterilizer and Dryer. Inside this
step-by-step instructions for the operation, assembly, cleaning, and maintenance
of your appliance.
Please read all safety instructions thoroughly to ensure safe usage at all times.
Thank you for your purchase. We sincerely hope you will enjoy this as well as all
the many innovative products brought to you by Gourmia.
3
IMPORTANT SAFEGUARDS
4
IMPORTANT SAFEGUARDS
Before using this product please read this manual carefully,
and save for future reference.
SAFETY INSTRUCTIONS
When using any electric appliance, basic precautions should
injury, including the following:
1. Never use the appliance with a damaged cord or plug or after the appliance has
been damaged in any way. Contact customer service for any damages on the
appliance.
2. This appliance is for adult use only. Persons under the age of 13 should not use
this product.
3. Close supervision is required when any appliance is used near children.
4. Do not exceed the maximum level of water- the appliance will not work.
6. Do not move the appliance during use.
7. Do not touch the appliance while it is in use, the appliance gets very hot!
8. Beware of the hot steam which escapes from the lid.
9. Never immerse the base of the appliance in water or any other liquid.
temperatures.
11. Always unplug the appliance before cleaning. Make sure the appliance is cleaned
and dry before each use.
12. Do not use the appliance for anything other than its intended use.
13. This appliance is intended for household use only.
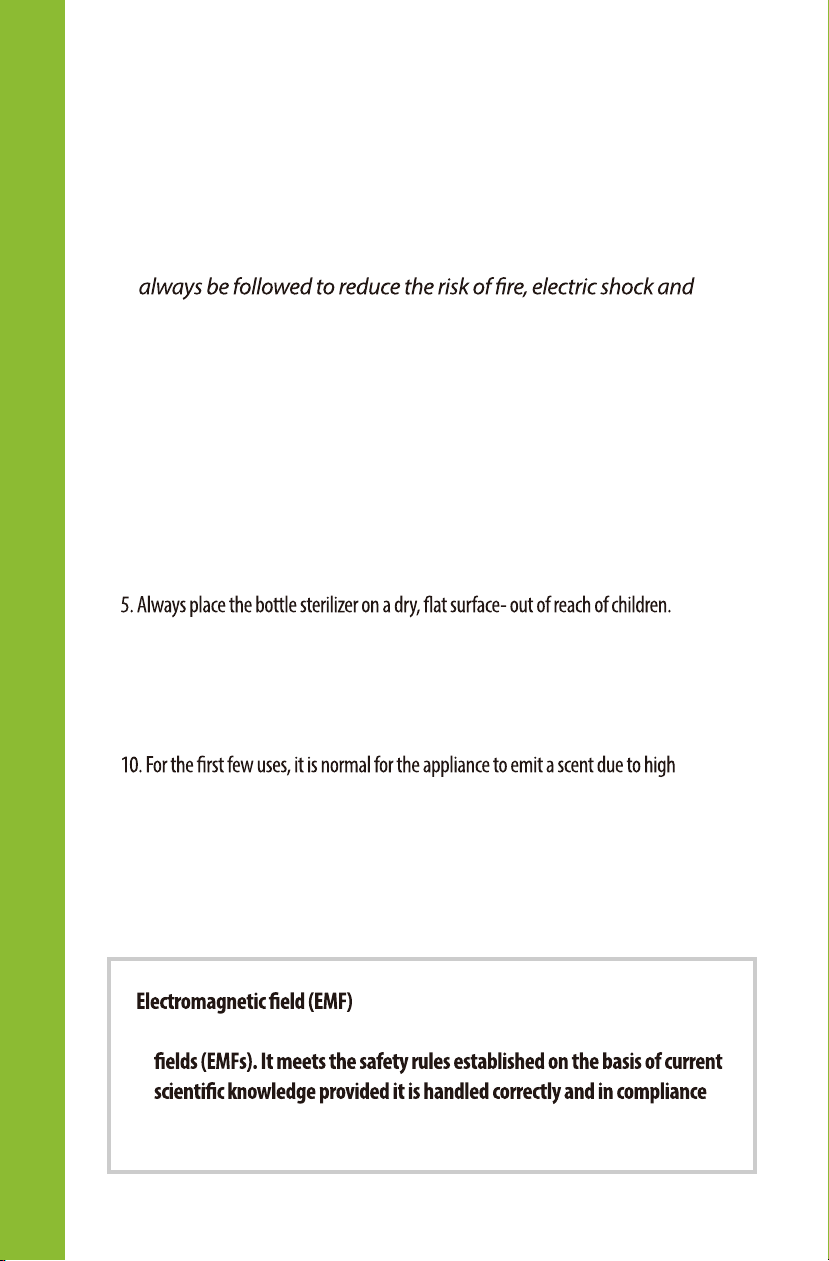
This appliance complies with all standards relating to electromagnetic
with these instructions.

TABLE OF CONTENTS
TABLE OF CONTENTS
5
Know Your Bottle Sterilizer & Dryer......6
Using Your Bottle Sterilizer & Dryer......7
Cleaning & Maintenance.................. 10
Troubleshooting...........
................. 11
6
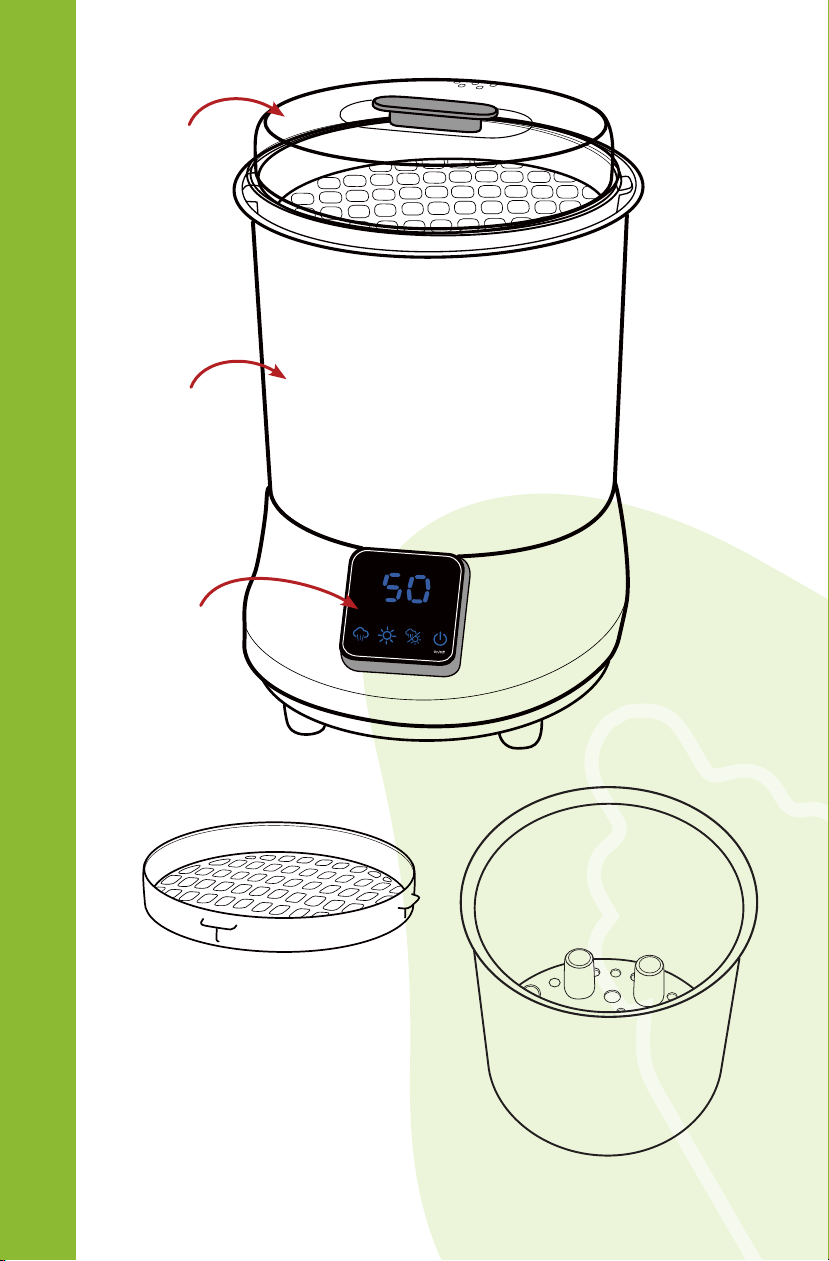
KNOW YOUR BOTTLE STERILIZER & DRYER
Ster
li
ze
Dry
Ster
ilize/Dry
min
Sterilize/Dry
Bottle Tube
Display
Screen
Nipple Shelf
Bottle Tube
Inside View
Sterilizer Lid
USING YOUR AIR FRYER
7
USING YOUR BOTTLE STERILIZER & DRYER
Sterlize
min
Dry
Sterilize/Dry
Sterilize/Dry
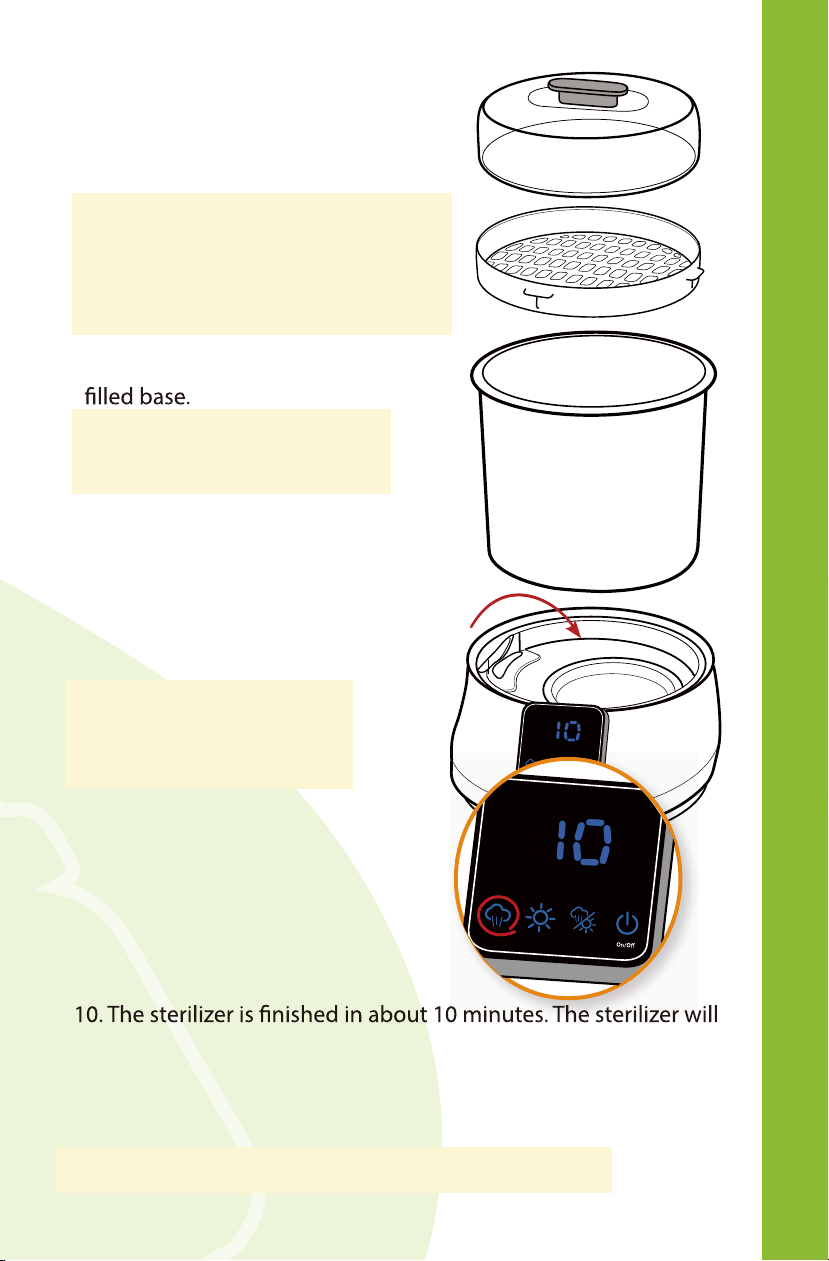
STERILIZING FUNCTION
1. Plug in the sterilizer.
2. Fill the metal heater with
120-140 ml (4-4.75 oz) of water
Note: Always pour the
water directly
onto the heating plate.
Note: If the water level is too low,
the unit will stop automatically.
3. Place the bottle tube on top of the
Note: Do not place the bottles
directly into the sterilizer base.
4. Place the bottles onto the
bottle grips in the bottle tube.
5. Place the nipple shelf on top of
the bottle tube.
6. Place your bottle caps and
nipples onto the top shelf.
Note: The sterilizer can
hold 6-8 bottles with
bottle caps and nipples.
7. Place the sterilizer lid over
the shelf.
8. Tap the power icon to turn
on the sterilizer.
9. Tap the sterilizing icon. The time
will be displayed and a countdown
will begin.
beep when completed.
Note: To stop the sterilizing process in middle, tap the power icon.
11. Use the handle on the lid to lift the lid after use.
CAUTION: Hot steam will escape from the sterilizer!
Fill
with
water
Sterlize
Dry
Sterilize/Dry
min
St erilize/Dry
8
8
USING YOUR BOTTLE STERILIZER & DRYER
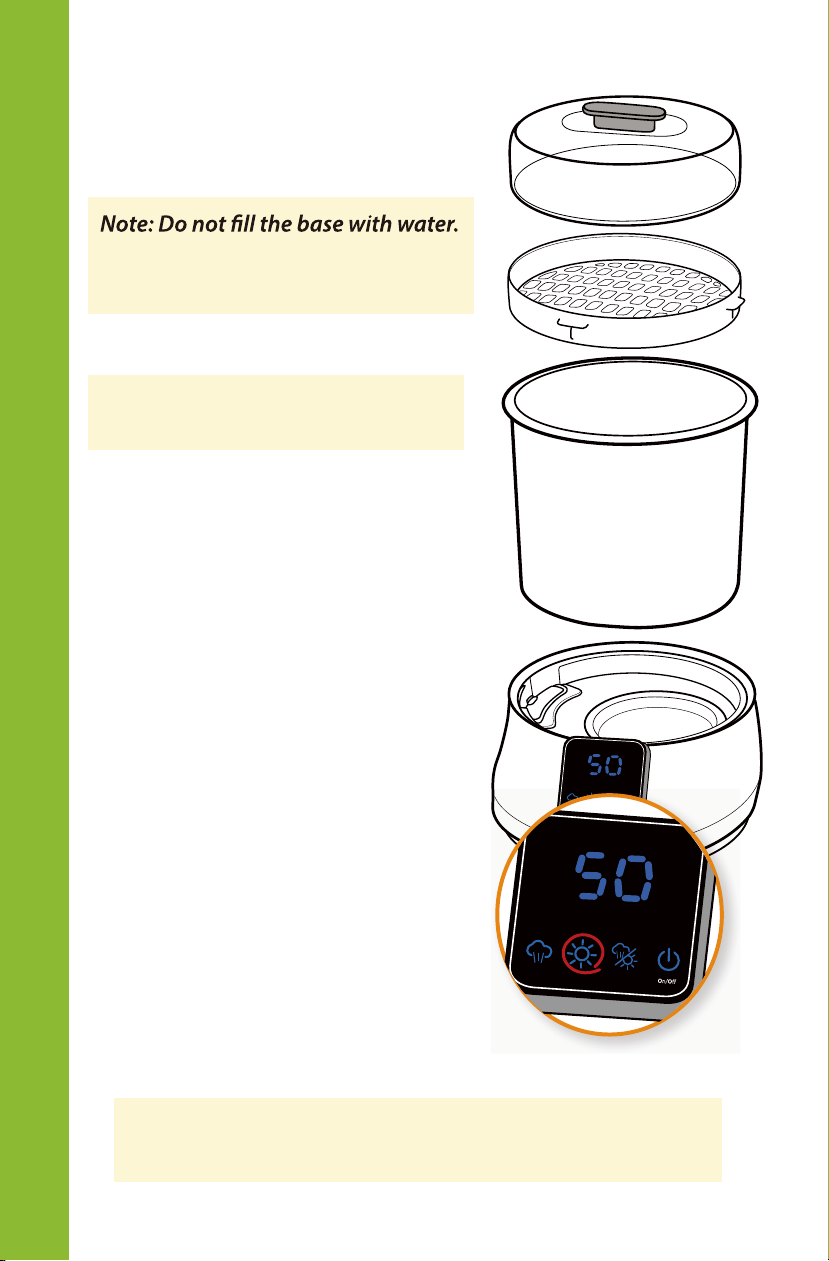
DRYING FUNCTION:
1. Plug in the appliance.
2. Place the bottle tube on top of
the base.
Note: Do not place the bottles
directly into the sterilizer base.
3. Place the bottles upside down
into the bottle tube.
Note: Make sure the bottle mouths
are placed over the raised vents
4. Place the nipple shelf on top of
the tube.
5. Place bottle nipples and caps on
the shelf.
6. Place the sterilizer lid over the
shelf.
7. Tap the power icon to turn
on the sterilizer.
8. Tap the drying icon, the icon
will light up. The display screen
will show the amount of time and
the sterilizer will start counting
down. The drying function can be
set for 30, 40, or 50 minutes. Tap
the drying icon twice to change
the time.The time will appear on
the display screen and will start
counting down.
9. The sterilizer will beep when
completed.
8. Use the tongs to remove all the
objects from the sterilizer.
USING YOUR BOTTLE WARMER
Sterlize
min
Dry
Sterilize/Dry
Steril ize/Dry
Sterlize
Dry
Sterilize/Dry
min
St erilize/Dry
Do Not
Fill with
water
CAUTION: The sterilizer and objects inside are still hot use
caution when removing!
9
9
USING YOUR BOTTLE STERILIZER & DRYER
USING YOUR BOTTLE WARMER
Sterli
ze
min
Dry
Sterilize/Dry
Steril ize/Dry
Fill
with
water
Sterlize
Dry
Sterilize/Dry
min
St erilize/Dry
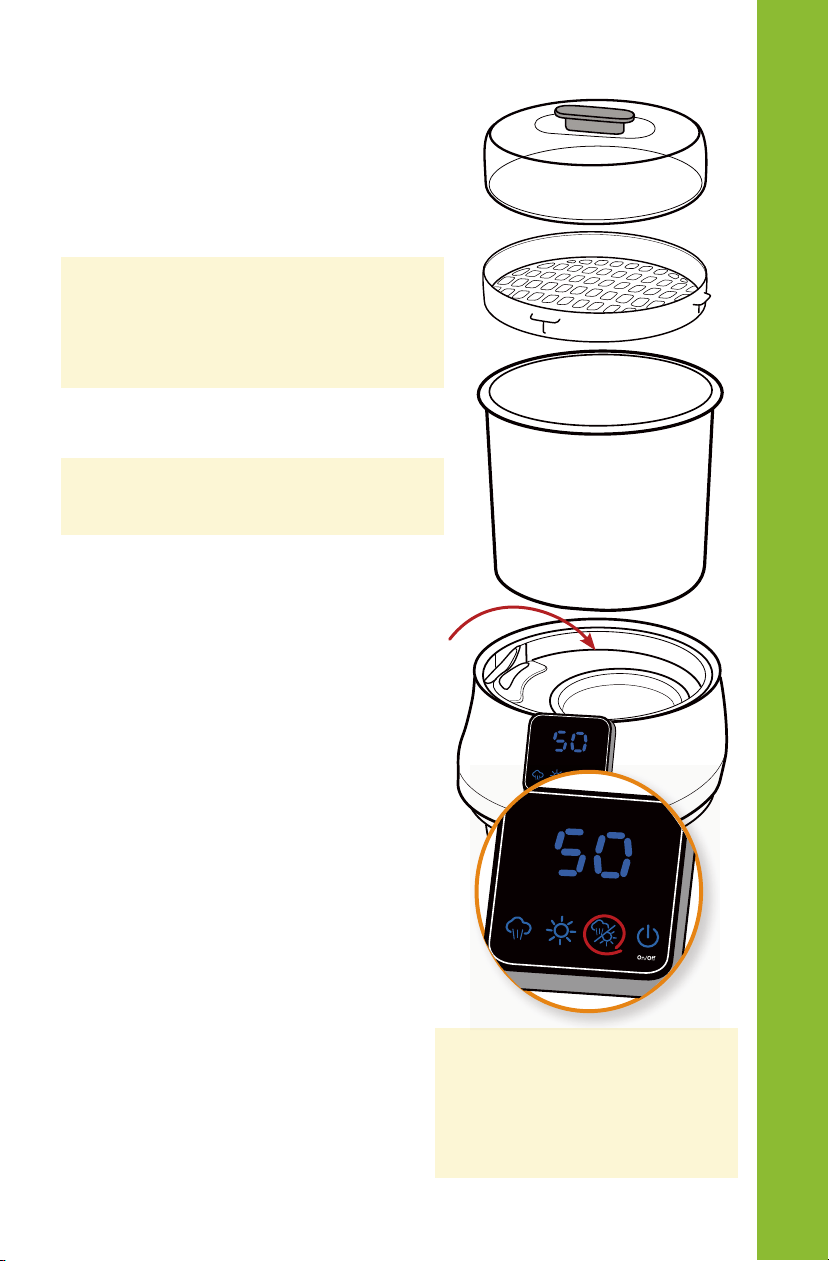
STERILIZER & DRYING FUNCTION:
1. Plug in the appliance.
2. Fill the metal heater with
120-130 ml (4-4.4 oz) of water.
3. Place the bottle tube on top of
the base
Note: Do not place the bottles
directly into the sterilizer base.
Note: Always pour directly into the
heating plate.
4. Place the bottles upside down
into the bottle tube.
Note: Make sure the bottle mouths
are placed over the raised vents
5. Place the nipple shelf on top of
the tube.
6. Place bottle nipples and caps
on the shelf.
7. Place the sterilizer lid over
the shelf.
8.
9.
Tap the power icon to turn
on the sterilizer.
Tap the sterilizer/drying icon,
The display will show 50 minutes.
Press the ic
on again to change
between 40, 50, and 60 minutes.
In each, the sterilize cycle will
take approximately 10 minutes.
After choosing the desired set-
ting, wait a few seconds, and the
countdown will begin.
10. The sterilizer will beep when
completed.
Note: You can cook using
the steam from the
sterilize function by placing
food on the nipple shelf.
If there is still water left in the
heating element before the
drying cycle, use 10 ml (1/3 oz)
water less for your next use.
10
CLEANING & MAINTENANCE
1. Clean the appliance after each
use. Use a a soft non
abrasive sponge. Do not use
steel wool or any abrasive
sponge to clean the appliance.
2. Never immerse the sterilizer
base in water.
3. Do not use bleach or any
chemical disinfecting solutions
to clean the appliance.
4. All compenents but the base are
dishwasher safe. Only use the
top rack of the dishwasher!
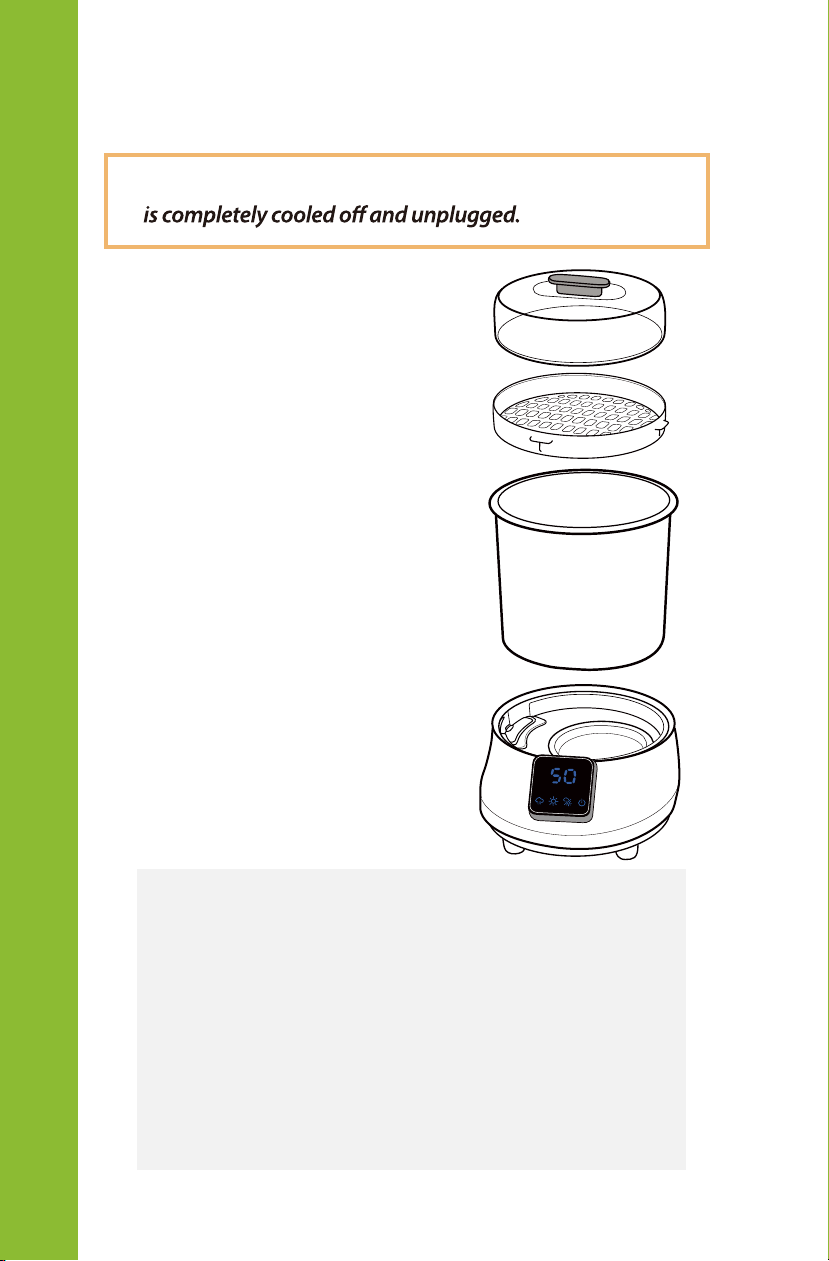
CLEANING AND MAINTENANCE
Storage
• Before storing the appliance empty all the water.
• Before storing the appliance, make sure that all
parts are clean and dried.
• To prevent discoloration, do not use this warmer
in direct sunlight.
• After using the appliance you can use the cord
storage to store the cord until next use.
Before cleaning the appliance make sure the appliance
Ster
li
ze
min
Dry
Sterilize/D
ry
Ster ilize/Dr y

Troubleshooting, Tips, and Qs
are some quen asd quns:
1. Why is there a
range for the sterilizing water volume?
a. There are many environmental conditions that can
affect how quickly your water boils. The first time that
you use your product, fill it with bottles and accessories
as you normally would, then use 120 ml. If your cycle
ends before 10 minutes, use 130
-
140 ml.
b. On the other hand, if your unit has a great deal of water
left in the heating plate after sterilizing, try using 10 ml
less water next time. (
D
on't go below 120 ml)
2.
I used the recommended amount of water, but my sterilizing cycle
keeps ending early.
a.
See the answer to qu estion 1.
b.
If you still have the same issue, these may be the causes:
i.
Please use the measuring cup provided to
measure water.
ii.
Make sure you are placing you r sterilizer on a level
surface. If it isn't, the water may not stay over the
heating element.
iii.
Make sure that you are pouring your w ater directly
onto the metal heating element. Don't pour the
water to the side or pour through the bottle holder.
3.
Should I remove the lid right after sterilizing?
a.
No, you must let the steam dissipate after the cycle is
complete. Wait 2-3 minutes after sterilizing.
4.
H
ow should I organize items in the sterilizer?
a.
D
on't pack ob
j
ects tightly. Steam must reach every surface
of your items.
P
lace bottles upside down.
Troubleshooting, Tips, and FAQs
11
AIR FRYING TIPS
WARRANTY & SERVICE
This Limited Warranty is for one full year from the date
of purchase. It is applicable to the original purchaser
only and is not transferable to a third party user. Repair
or replacement of defective parts is solely at the seller’s
discretion. In the event that repair isn’t possible, the
seller will replace the product/part. If product repair/
refunding the cash value of the product or component
returned.
Product defects not covered under the Warranty
provisions include normal wear and damage incurred
from use or accidental negligence, misuse of instruction
The manufacturing company is not liable for any
incidental or consequential damages incurred by such
circumstances.

FOR CUSTOMER SERVICE
QUESTIONS OR COMMENTS
VISIT US @ GOURMIA.COM
INFO@GOURMIA.COM
OR CALL 888.552.0033