Loading ...
Loading ...
Loading ...
5
825
75
362
50
50
INSTALLATION INSTRUCTIONS
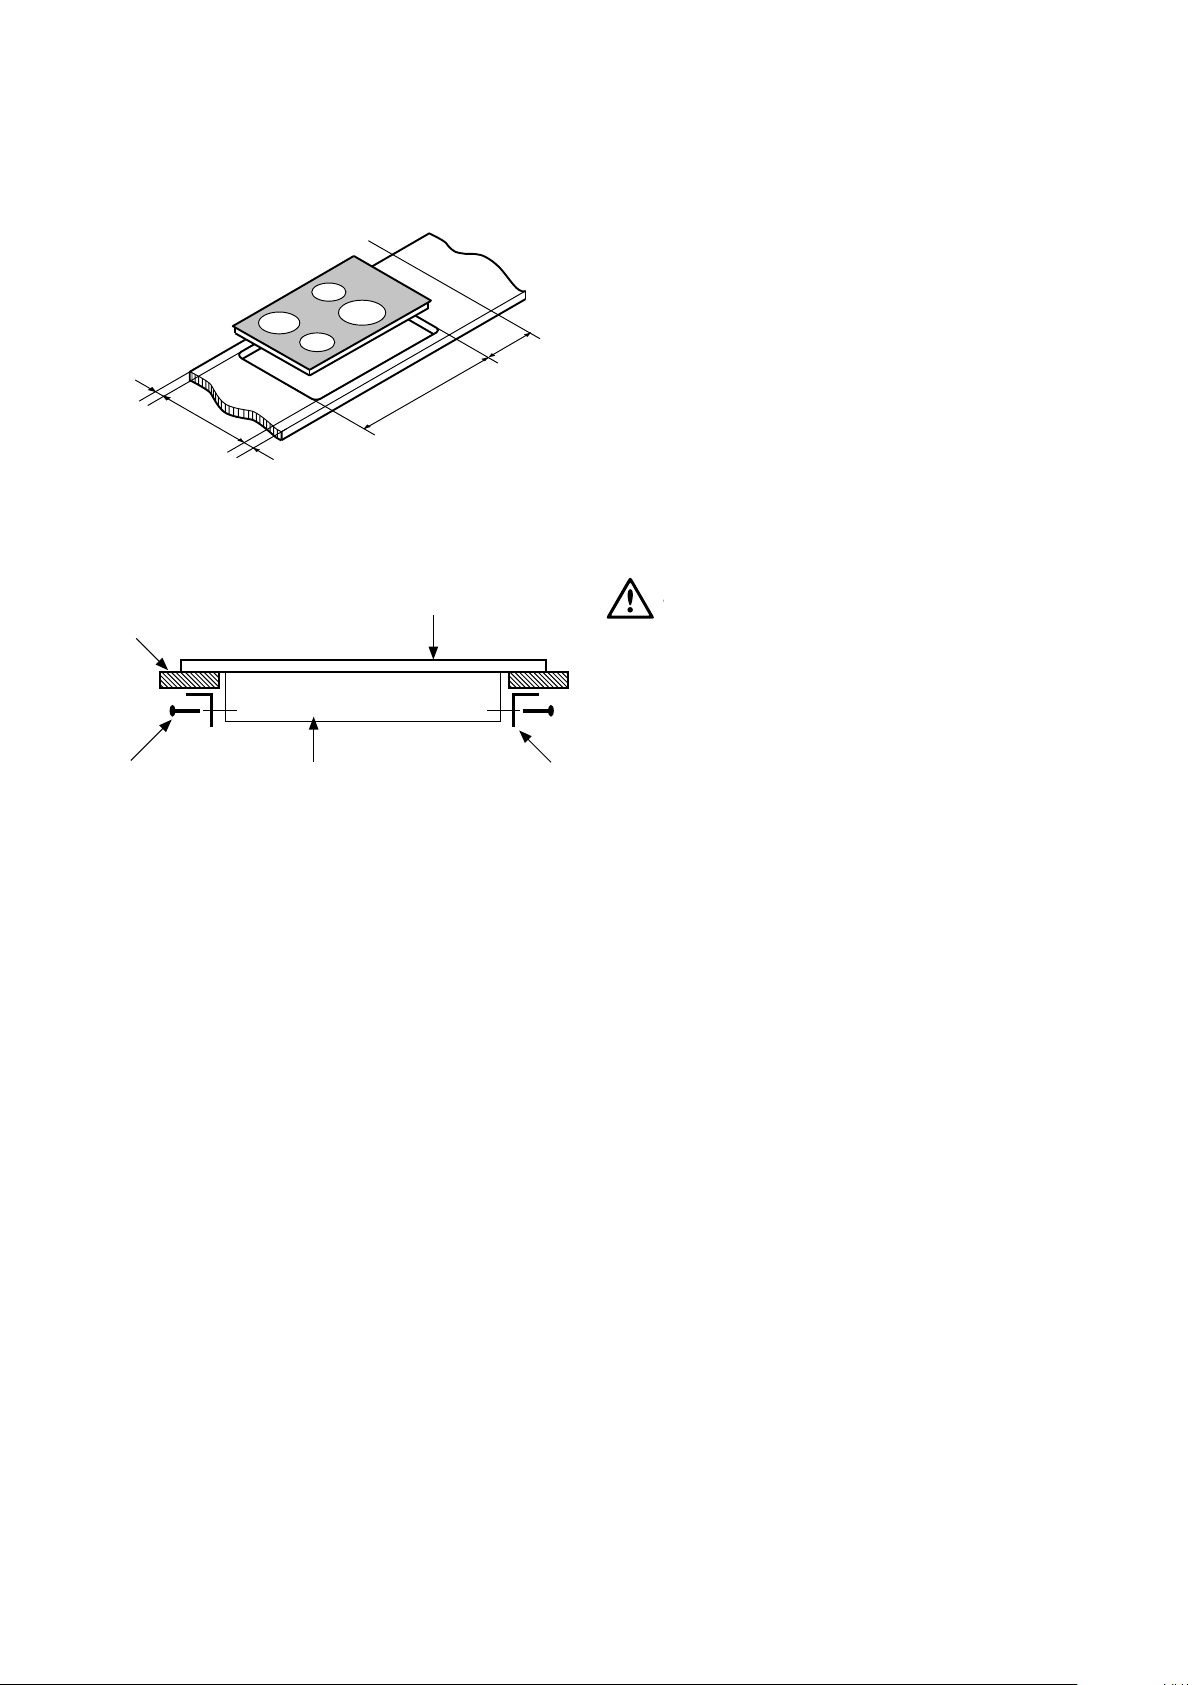
Rectangle cutout
Fig. 2A
Electrical connection
• The cooktop must be installed by a qualified
electrician .
• Ensure that the wiring installation complies with
the cooktop loading prescribed on the cooktop
data plate. The data p la te can be found on the
underside of the cooktop.
• Electrical connection is 220-240 volts AC 50Hz.
• The cooktop must be installed in compliance with
wiring regulations AS/NZS 3000.
• Local regulations, municipal building codes and
other statutory regulations.
• The cooktop must be properly earthed.
WARNING
WARNING
The cooktop must be installed by an authorized person.
Considerable danger to the user or damage to the
cooktop may result from unauthorized installation.
A visit from customer service because of an error in
installation may not be free of charge even during the
warranty period.
Supply cable installation
The electric hobs a re supplied without cable. Use a
cable: H05 VV-F 3x2.5mm
2
T90˚C, or higher.
• Open the terminal box cover by using screwdriver
inserted into the Two rectangular holes. (Refer to
terminal block cover)
• Connect the wires according to circuit diagram
(refer to the base of the hob). The cable
connections must be made in a accordance with
regulations and the terminal screws tightened
securely.
• Fix the cable in place with the cable clamp. Close
the cover.
• Means for diconnection must be incorporated in the
fixed wiring in accordance with local wiring rules.
The hob is to be connected to the mains using a
device that a llows the appliance to be disconnected
from the mains at all poles with a contact opening
width of at least 3mm.
Before first use
The top surface of the hotplates are sealed with a heat
resistant coating. Before using for the first time the
hotplates should be heated for a short period without a
pan to harden the protective coating.
Turn the heat setting to high for approx 3 minutes
to fully harden the coating. When the hotplates have
cooled, apply a thin coating of cooking oil to the
hotplate to seal and protect the surface.
Benchtop
Hob
BracketBurner boxScrew
Brackets
Fig. 2B
Loading ...
Loading ...
Loading ...