Loading ...
Loading ...
Loading ...
4 INSTALLATION INSTRUCTIONS
INSTALLATION INSTRUCTIONS
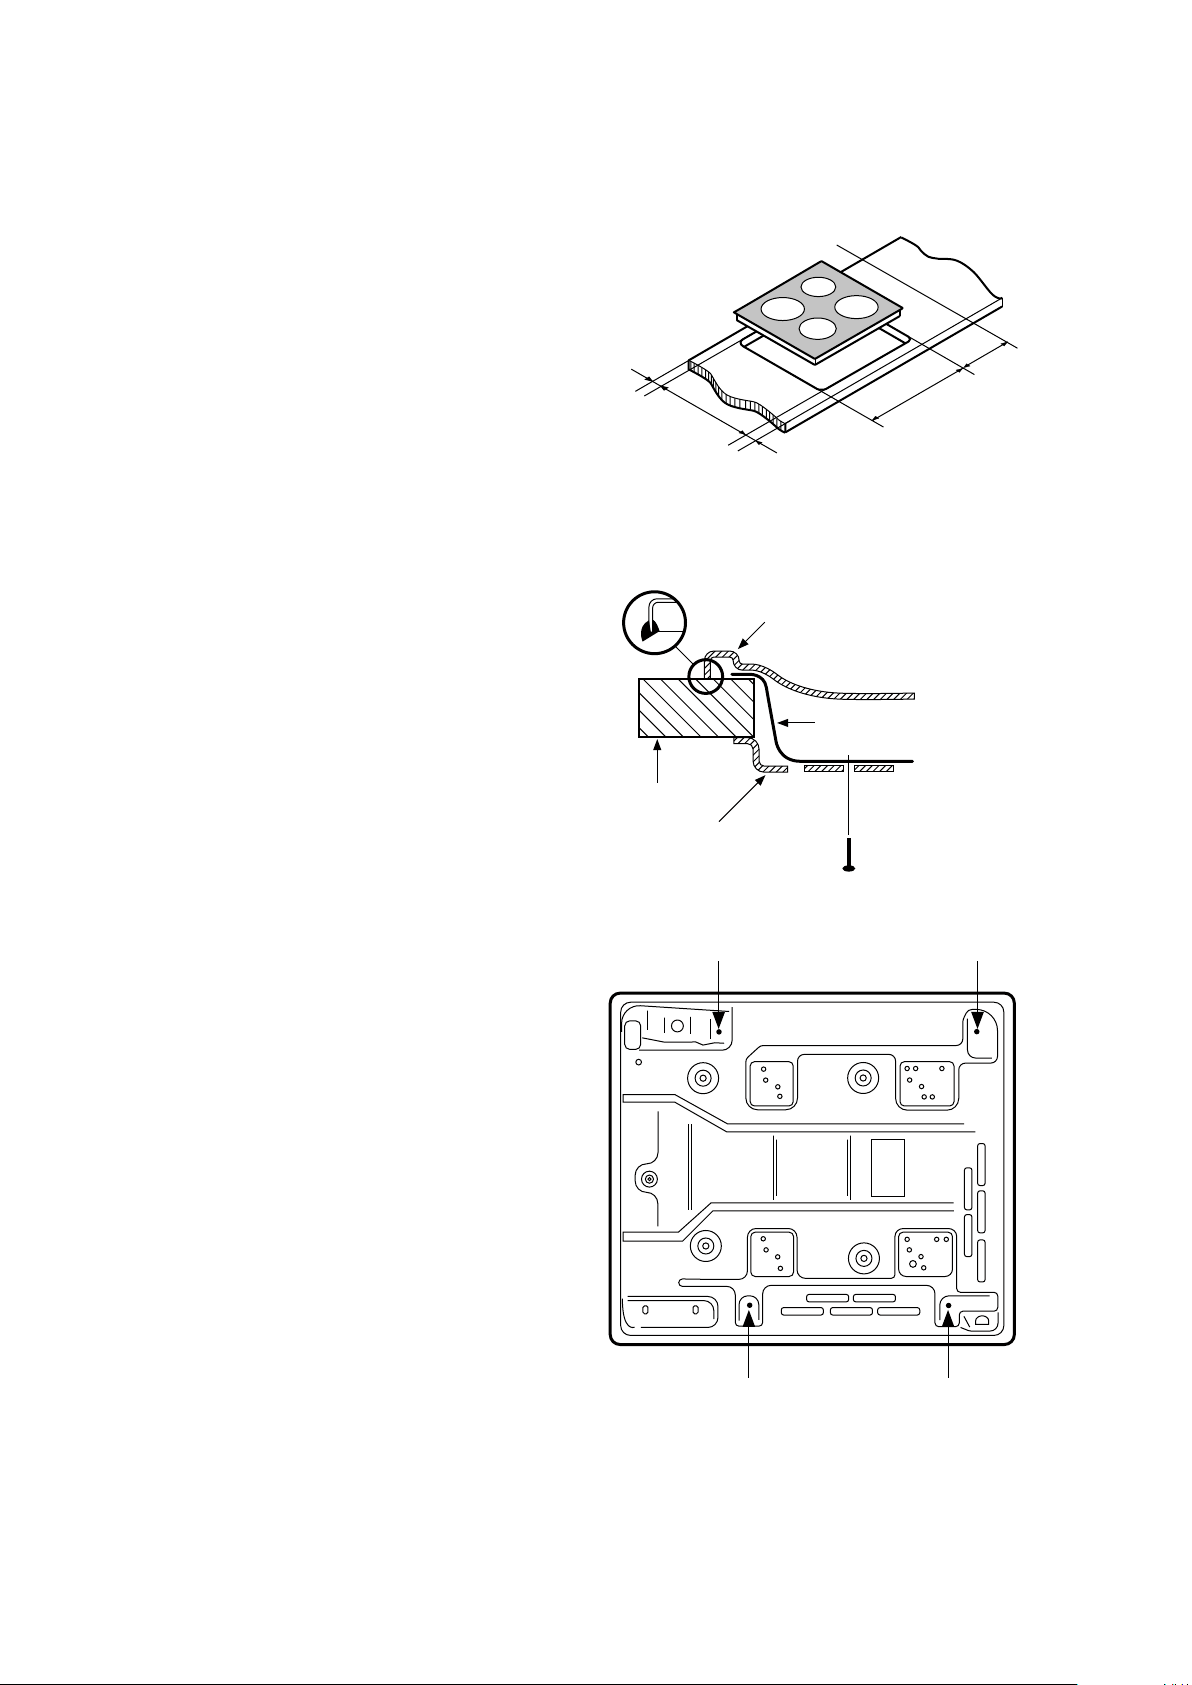
1. The bench cutout should be made as per diagram
(Refer Fig 1A).
2. Adjacent walls (for square & rectangular cooktops)
must be of suitable material to withstand
temperatures of 105˚C for 150mm high,
i.e. ceramic tiles.
3. A rubber seal has been provided for square metal
cooktops only. This is to be applied around the edge
of the hob (Fig. 1B). Note: The rubber seal has had
talc powder applied to its surface which should be
wiped off with a damp cloth after the unit has been
installed.
4. Pull down clamps (Square cooktops) are supplied.
When the appliances is in position attach the clamps
to the underside of the benchtop and lightly tighten
(Fig. 1B).
• Fit the pull-down clamps supplied to ensure that
the Cooktop cannot move after installation.
• Use the 4 clamps and 4 screws supplied in the
parts bag.
• To assemble, attach the 4 clamps to each corner
of the Burner box via the screws provided
(Fig. 1C).
• Position the cooktop so it is centred, then swing
the Clamps under the benchtop and tighten.
5. The rectangular bench cutout should be made per
diagram. (Refer to Fig 2A.)
6. Retaining brackets (Refer to Fig 2B)
• Rectangular cooktops are supplied attached to
the sides of the unit. These must be removed to
insert the into the bench.
• When the unit is in place, using the screws
provided, fix brackets with flange against
underside of the bench through several
alternative holes provided in the sides of the
burner box.
• Protrusions of brackets below the unit should be
bent under the unit for safety.
7. Model identification sticker for model identification
after installation, an additional data plate sticker
has been provided. This sticker is to be attached to
adjacent cabinetry.
570
75
490
50
50
Square cutout
Fig. 1A
Hob
Burner box
screw
Clamp
Benchtop
Rubber seal (metal only)
Fig. 1B
Clamps position
Fig. 1C
Loading ...
Loading ...
Loading ...