Loading ...
Loading ...
Loading ...
SIMPLE INSTALLATION
7
Dryer wall mounting instructions
WARNING: Make sure that the mounting wall is of sufficient strength to support the dryer
weight. Use two or more people to move and install the dryer, failure to do so can result in
personal injury.
Determine the position of the dryer on the wall ensuring that the power outlet is easily accessible.
Note: It is not recommended that the dryer is connected to an extension lead.
- A minimum of 50mm is needed between the top of the dryer and the ceiling for ease of
installation.
- If mounting above a top load washer, allow sufficient room to open the lid of the washer.
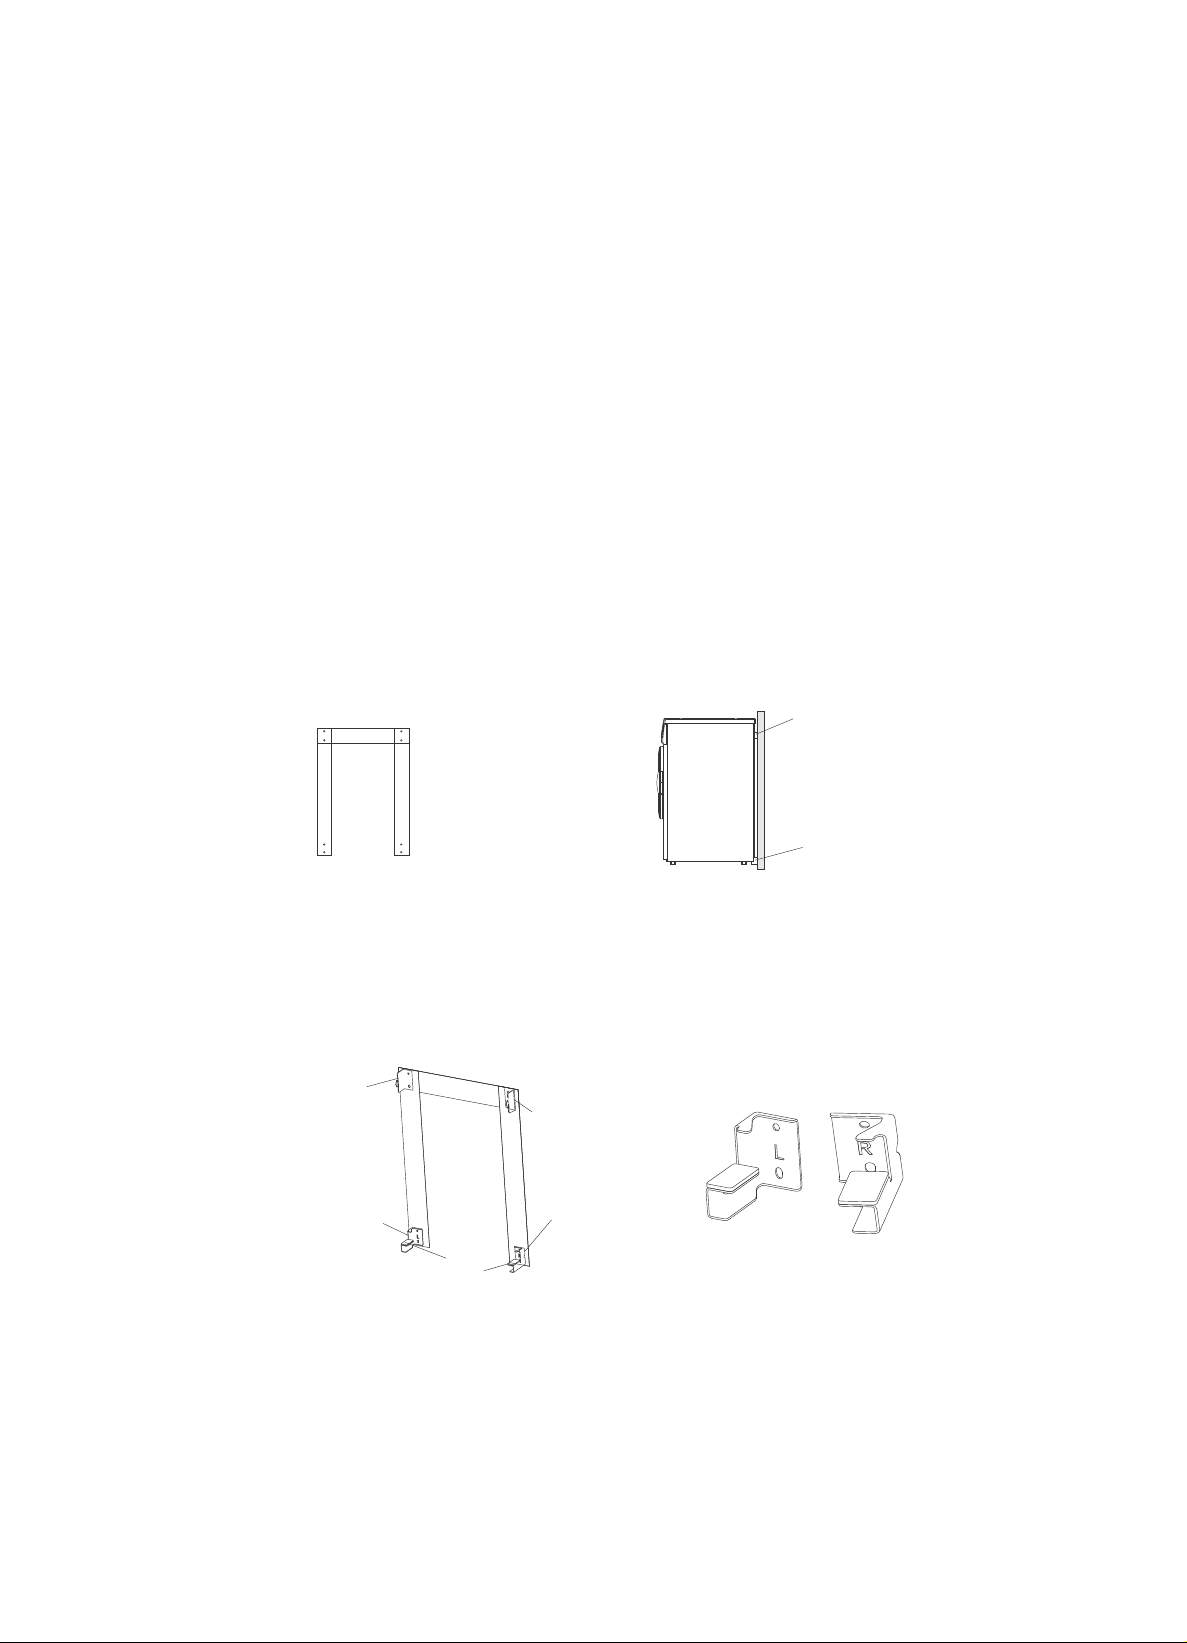
1. Use a leveller or measure to determine the position of the horizontal drilling template on the wall.
Temporarily fix in place with tape, then adhere the two vertical templates to the left and right sides
ensuring a 90 angle (Fig.1).
Note: Allow at least 100mm from the top of the horizontal drilling template to the ceiling as once in
place, the dryer will sit approximately 50mm above the hanging hooks (Fig. 2).
2. Use a 12mm drill bit to drill 8 holes into the wall as positioned on the template.
3. Fit the expansion screw bolts into each hole and remove the template from the wall.
4. Attach the 2 hanging hooks to the top bolts, and the left and right support brackets and damper
gaskets to the bottom bolts (Fig.3).
5. The dryer can be mounted in an upright or inverted position (inverting the dryer will make the
control panel more accessible). Carefully lift the dryer and hang it on the top 2 hanging hooks.
Ensure the hooks are securely sitting inside the holes and slowly release the weight of the dryer
onto the bottom support brackets.
6. If the dryer has been inverted, install the plastic cover on the top of the machine, and replace the
control panel with the inverted panel sticker.
Note: All tapes must be removed before operating the dryer.
Fig.1
Fig.2
Support brackets
Hook
Fig.3
Left Support
parts
Right Support
parts
Damper
Gasket
Hook
Hook
Loading ...
Loading ...
Loading ...