The fresh food control and the freezer control should be adjusted one increment at a time. Allow 12 hours after each adjustment for the compartment to reach the temperature you have set.
After each adjustment, check both the freezer and the fresh food compartments. Changing the fresh food control will affect the temperature of the freezer compartment. Likewise, changing the freezer control can affect the temperature of the fresh food compartment.
Control settings will vary based on personal preferences, usage and operating conditions and may require more than one adjustment. Factors that affect temperature include the amount of food in the fresh food and freezer compartments, frequency of door opening, and temperature of food when placed in either compartment.
Storage Drawers
Fruit and Vegetable Drawers
These storage drawers provide space to store fruits, vegetables and meats.
To remove and replace the drawers and the cover above them, the door must be fully opened. In some installations, the refrigerator may have to be moved away from the wall for the door to be fully opened.
Ice Service
Ice Trays
To make ice, fill the ice tray with water and set it on a level surface in the freezer compartment. Ice cubes will form in a few hours.
To release ice cubes, turn the tray upside down, hold it over a container and twist both ends.
For only one or two ice cubes, leave the tray right-side up, twist both ends slightly and remove as many cubes as you want.
Wash ice trays in lukewarm water only-do not put them in an automatic dishwasher.
Ice maker Accessory Kit
An ice maker accessory kit is available from your dealer. The IM-4A or IM-6 accessory kit will work with your refrigerator. To order, go to GEApplianceparts.com or call 800.626.2002.
Water Supply Kits
Kits containing copper tubing, shutoff valve, fittings and instructions needed to connect the ice maker to your cold water line are available at extra cost from your dealer or from Parts and Accessories. In the U.S., call 800.626.2002.
Care and Cleaning
Cleaning the Outside
Keep the outside clean. Wipe with a clean cloth lightly dampened with mild liquid dish detergent. Dry with a clean, soft cloth. Do not wipe the stainless steel door with a soiled dishcloth or wet towel. These may leave a residue that can erode the finish. Do not use scouring pads, powdered cleaners, bleach or cleaners containing bleach because these products can scratch and weaken the finish. Use only a liquid cleanser free of grit and rub in the direction of the brush lines.
The stainless steel door and door handle can be cleaned with a commercially available stainless steel cleaner. Cleaners with oxalic acid (e.g. Bar Keepers Friend Soft Cleanser) will remove rust, lime, and other tarnish. Do not use appliance wax or polish on the stainless steel.
Protect the paint finish. The finish on the outside of the refrigerator is a high-quality, baked-on paint finish. With proper care, it will stay new-looking and rust-free for years. Apply a coat of kitchen/appliance wax when the refrigerator is new, and then at least twice a year.
Cleaning the Inside
To help prevent odors, leave an open box of baking soda in the fresh food and freezer compartments.
Unplug the refrigerator before cleaning.
If this is not practical, wring excess moisture out of sponge or cloth when cleaning around switches, lights or controls.
Use warm water and baking soda solution— about a tablespoon (15 ml) of baking soda to a quart (1 liter) of water. This both cleans and neutralizes odors. Rinse and wipe dry.
Other parts of the refrigerator-including door gaskets, fruit and vegetable drawers, and all
plastic parts—can be cleaned the same way.
After cleaning the door gaskets, apply a thin layer of petroleum jelly to the door gaskets at the hinge side. This helps keep the gaskets from sticking and bending out of shape. Do not use cleansing powders or other abrasive cleaners.
Do not wash any plastic refrigerator parts in the dishwasher.
Avoid cleaning cold glass shelves (on some models) with hot water because the extreme temperature difference may cause them to break. Handle glass shelves carefully. Bumping tempered glass can cause it to shatter.
Replacing the Light Bulb
Unplug the refrigerator.
Remove the shelves (if necessary).
The light bulb is located behind a light lens in the ceiling of the refrigerator section. The light lens is snapped in. To remove the light lens, use a flat-head screwdriver to push one of the tabs
Unscrew the light bulb from the socket.
Replace the bulb with a 25W/120V appliance bulb.
Replace the light lens.
Preparing for Vacation
For long vacations or absences, remove food and unplug the refrigerator. Clean the interior with a baking soda solution of one tablespoon (15 ml) of baking soda to one quart (1 liter) of water. Leave the doors open.
Preparing to Move
Remove food and unplug the refrigerator. Secure all loose items such as shelves and drawers by taping them securely in place to prevent damage.
Be sure the refrigerator stays in an upright position during moving
Installation Instructions
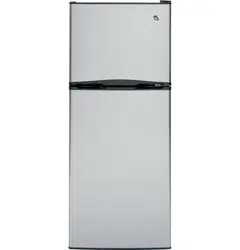
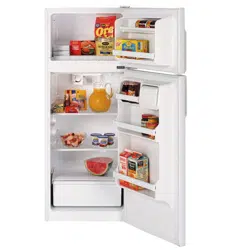
REFRIGERATOR FEATURES
REVERSING THE DOOR SWING
TOOLS YOU WILL NEED
1. REMOVE THE FREEZER DOOR
Remove the hinge cover. Unscrew and remove the top hinge.
Lift the freezer door up and away from the appliance.
Set the door on a non-scratching surface with the outside up.
2. REMOVE THE FRESH FOOD DOOR
Tape the door shut with masking tape. Remove the center hinge by removing the screws. Lift up the hinge to remove it.
NOTE: Some models have a washer between the center hinge and the top of the fresh food door. Be careful not to lose them.
Remove the tape holding the door shut.
Lift the fresh food door up and off the bottom hinge. Set the door outside up on a non-scratching surface.
NOTE: When removing the door, watch for washer(s) between the bottom hinge and the bottom of the fresh food door that may stick to the door. Do not lose.
3. BOTTOM HINGE
Remove the screws and bottom hinge from the right side. Remove the screw covers from the left corner.
Using the left hinge included with the parts that came with your refrigerator along with the screws (and washers if applicable) removed earlier, install the left hinge onto the bottom left of your refrigerator.
Place the screw covers into the holes now vacant on the right.
4. TRANSFER FRESH FOOD DOOR STOP TO THE LEFT
Remove the door stop from the bottom of the right side of the door. Transfer the screw covers from the bottom left side to the right side.
Using the left door stop included with the parts that came with your refrigerator, install the left door stop
5. REHANG THE FRESH FOOD DOOR
Make sure the washer(s) are in place on the bottom hinge pin. Make sure the door is aligned horizontally and vertically. Place the fresh food door on the bottom hinge, close the door and tape it in place with masking tape.
Remove the screw covers from the left edge of the door and insert it into the hole on the opposite side.
6. INSTALL CENTER HINGE ON THE LEFT
Remove the two screw covers on the left side and install them on the right.
Using the middle hinge and screws (and washers if applicable) removed earlier, install the left middle hinge on the left side.
Remove the tape holding the door shut.
ATTENTION: The screws must be properly tightened. Turn the screws until snug. Then tighten the screws a minimum of 1/2 turn using both hands.
7. TRANSFER TOP HINGE TO THE LEFT
Using a putty knife with the edge covered with masking tape, remove the screw cover on the left.
Be careful of the paint finish.
Reinstall the screw cover on the right side.
8. TRANSFER FREEZER DOOR STOP TO THE LEFT
Remove the door stop from the bottom of the right side of the door. Transfer the screw covers from the bottom left side to the right side.
Using the left door stop included with the parts that came with your refrigerator, install the left door stop.
9. REHANG THE FREEZER DOOR
Transfer the screw cover on top of the door to the opposite side.
Place the freezer door on the center hinge over the pin. Assure the door is aligned horizontally and vertically, and that the gasket seals on all sides.
Attach the top hinge removed earlier on the left side of your refrigerator and replace the hinge cover
Normal operating sounds.
Do you hear what I hear? These sounds are normal.
The new high-efficiency compressor may run faster and longer than your old refrigerator and you may hear a high-pitched hum or pulsating sound while it is operating.
You may hear a whooshing sound when the doors close. This is due to pressure equalizing within the refrigerator.
You may hear the fans spinning at high speeds. This happens when the refrigerator is first plugged in, when the doors are opened frequently or when a large amount of food is added to the refrigerator or freezer compartments. The fans are helping to maintain the correct temperatures.
You may hear cracking or popping sounds when the refrigerator is first plugged in. This happens as the refrigerator cools to the correct temperature.
The compressor may cause a clicking or chirping sound when attempting to restart (this could take up to 5 minutes).
Expansion and contraction of cooling coils during and after defrosting can cause cracking or popping sound.
On models with an ice maker, after an ice-making cycle, you may hear the ice cubes dropping into the ice bucket.
The flow of refrigerant through the freezer cooling coils may make a gurgling noise like boiling water.
Water drops on the defrost heater can cause a sizzling, popping or buzzing sound during the defrost cycle.
A water-dripping noise may occur during the defrost cycle as ice melts from the evaporator and flows into the drain pan.
Closing the door may cause a gurgling sound due to pressure equalization
Troubleshooting Tips
Problem
Possible Causes
What To Do
Refrigerator does not operate
Refrigerator in defrost cycle.
• Wait about 30 minutes for defrost cycle to end.
Refrigerator is unplugged.
• Push the plug completely into the outlet.
The fuse is blown/circuit breaker is tripped.
• Replace fuse or reset the breaker.
Vibration or rattling (slight vibration is normal)
Front leveling legs need adjusting.
• See Leveling Legs.
Motor operates for long periods or cycles on and off frequently. (Modern refrigerators with more storage space and a larger freezer requires more operating time. They start and stop often to maintain even temperatures.)
Normal when refrigerator is first plugged in.
• Wait 24 hours for the refrigerator to completely cool down.
Often occurs when large amounts of food are placed in refrigerator.
• This is normal.
Door left open.
• Check to see if a package is holding door open.
Hot weather or frequent door openings.
• This is normal.
Temperature control set at the coldest setting.
• See About the control.
Fresh food or freezer compartment too warm
Temperature control not set cold enough.
• See About the control.
Warm weather or frequent door openings.
• Set the temperature control one step colder. See About the control.
Door left open.
• Check to see if a package is holding door open.
Frost or ice crystals on frozen food (frost within package is normal)
Door left open.
• Check to see if a package is holding door open.
Too frequent or too long door openings.
Ice cubes have odor/taste
Food transmitting odor/taste to ice cubes.
• Wrap foods well.
Interior of refrigerator needs cleaning.
• See Care and cleaning.
Slow ice cube freezing
Door left open.
• Check to see if package is holding door open.
Temperature control not set cold enough.
• See About the control.
Refrigerator has odor
Foods transmitting odor to refrigerator.
• Foods with strong odors should be tightly wrapped.
• Keep an open box of baking soda in the refrigerator; replace every three months.
Interior needs cleaning.
• See Care and cleaning.
Moisture forms on outside of refrigerator
Not unusual during periods of high humidity.
• Wipe surface dry.
Moisture collects inside (in humid weather, air carries moisture into refrigerator when doors are opened)
Too frequent or too long door openings.
Interior light does not work
No power at outlet.
• Replace fuse or reset the breaker.
Light bulb burned out.
• See Replacing the light bulb.
Food is freezing in the refrigerator
Food too close to the air vent at the back of the refrigerator.
• Move the food away from the air vent.
Refrigerator control is set too cold.
• Move the refrigerator control to a warmer temperature setting one increment at a time. See About the controls.
Rust, tarnish, or grime on stainless steel doors
Moist environment or salt air.
• Clean stainless steel with cleaners containing oxalic acid (e.g. Bar Keepers Friend Soft Cleanser) will remove rust, lime, and other tarnish. Do not wipe the refrigerator with a soiled dish cloth or wet towel. Do not use scouring pads, powdered cleaners, bleach or cleaners containing bleach because these products can scratch and ruin the brush finish of the stainless steel.