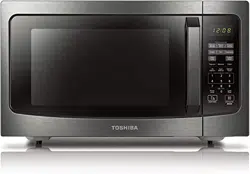
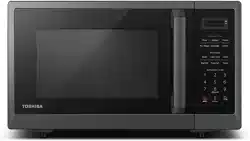
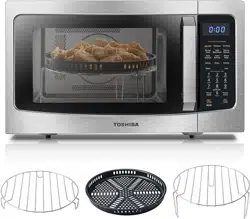
A. Control panel B. Glass tray C. Turntable shaft D. Turntable ring assembly
E. Door assembly F. Observation window G. Safety interlock system
OPERATION
1. POWER LEVEL
Ten power levels are available.
2. CLOCK SETTING
When the microwave oven is plugged into a outlet, the oven will display " 0:00 ".
a. Press "CLOCK/TIMER" once, the screen will display 00:00 . The hour gure will flash; ":" and other "0" will be lighted.
b. Press the number keys and enter the correct time. For example, time is 10:12 now, please press " 1, 0, 1, 2 " in turn.
c. Press "CLOCK/TIMER" to finish clock setting. ":" will flash and the clock will be lighted.
d. If the numbers input are not within the range of 1:00--12:59, the setting will be invalid until valid numbers are input.
NOTE • In the process of clock setting, if the " STOP/CANCEL " button is pressed or if there is no operation within 1 minute, the oven will go back to the former state automatically.
3. KITCHEN TIMER
a. Press "CLOCK/TIMER" twice, the screen will display 00:00
b. Press the number keys and enter the correct timer. (The maximum time is 99 minutes and 99 seconds)
c. Press "START/+30SEC" to confirm setting.
d. When the kitchen time arrives, the buzzer will ring 5 times and the screen will display "End". Press "STOP/CANCEL" or open the door, the screen will display the current time if the clock be set 12-hour system.
NOTE
The kitchen time is differfrom 12-hour system, Kitchen Timer is a timer. That is to say it poccesses the function of alarming clock.
During timer process,any program cannot be set. Time cannot be increased by pressing "START/+30SEC" key
4. MICROWAVE COOK
a. Press "COOK TIME" once, the screen will display "00:00"
b. Press number keys to input the cooking time; the maximum cooking time is 99 minutes and 99 seconds
c. Press "POWER" once, the screen will display "PL10". The default power is 100% power. Now you can press number keys to adjust the power level.
d. Press "START/+30SEC" to start cooking
NOTE • In the process of cooking, if the " STOP/CANCEL " button is pressed or if there is no operation within 1 minutes, the oven will go back to the former setting automatically.
5. SPEEDY COOKING
a. In waiting state, instant cooking at 100% power level can be started by select a cooking time from 1 to 6 minutes by pressing number pads 1 to 6.
b. In waiting state, instant cooking at 100% power level with 30 seconds' cooking time can be started by pressing "START/+30SEC". Each press on the same button will increase cooking time by 30 seconds. The maximum cooking time is 99 minutes and 99 seconds.
NOTE • Under microwave and auto menu cooking states, press "START/+30SEC" button to increase cooking time by 30 seconds
6. CUSTOM DEFROST FUNCTION
a. Press "DEFROST" once, the screen will display "dEF1". Press "DEFROST " repeatedly to choose "dEF1","dEF2" or "dEF3".
b. Press number button to set the weight of food.
c. Press "START/+30SEC" to start defrosting and the cooking time remained will be displayed.
7. SENSOR COOK
a. In waiting state, put the food in the oven, press the menu key in the sensor cook.
b. Press "START/+30SEC" to start sensor cook function and no need to set time.
c. When the steaming is emanated, the surplus time will display. The buzzer will sound 5 beeps when finishing. At last, the oven will turn back to the waiting state.
NOTE
When cooking or reheating food, you should do these in order to have the best effect.
a. The room temperature cannot be over 35 degrees.
b. The weight of food must be more than 110g (4 Oz).
c. The cavity, glass tray and utensils must kept drying before putting the food in.
d. The reheat food can be covered with the lid. But the lid must has vent hole in order to emanate the steam. Sealed utensil is forbidden.
During cooking process, following points must be done.
a. Keep the door close when the surplus time not displays or the buzzer does not sound twice.
b. When the buzzer sound twice, the time will count down and display the surplus time, you can open the door to mix the food up, turn over or replace the food. And then go on the next operation.
Please leave the food alone for a while after cooking have been finished.
During sensor cooking process, if the time not count down,please do not open the oven door or press " STOP/CANCEL " key. Otherwise, the sensor will make mistakes.
EXAMPLE: Sensor Reheat Menu
In waiting states, put the food into the microwave oven, press "REHEAT " "SC-1" is displayed.
Press "START/+30SEC" to start sensor reheat function and no need to set time.
The buzzer will sound 5 beeps when finishing. At last, the oven will turn back to the waiting state.
NOTE
Food to be avoided in sensor reheating.
a. Bread and other dry food, such as biscuit,cake.
b. For raw or uncooked foods.
c. Beverage and frozen food.
The oven cannot cook automatically when the temperature of the oven cavity is high.
The reheat food can be covered with the lid. But the lid must has venthole in order to emanate the steam. Sealed utensil is forbidden.
During sensor cooking process, please do not open the oven door or press "STOP/CANCEL" key. Otherwise,the sensor will make mistakes.
The sensor reheat has different request for different food.
Casseroles- Add to 4 tablespoons of water, cover with lid or vented plastic wrap. Stir when time appears in the display window.
Canned foods-Empty contents into casserole dish or serving bowl,cover dish with lid or vented plastic wrap. A fter reheating, let stand for a few minutes.
Plate of food- Arranged food on plate; top with butter, gravy,etc. Cover with lid or vented plastic wrap. A fter reheating, let stand for a few minutes.
Sensor Cook Chart.
8. CUSTOM COOK
a. Press "AUTO COOK" repeatedly until the menu you needed appears in the display
b. After choosing the menu, press a number pad to select the weight or portion of the food.
c. Press "START/+30SEC" to cook
9. SOFTEN/MELT
a. Press "SOFTEN/MELT" repeatedly until the menu you needed appears in the display.
b. After choosing the menu, press a number pad to select the weight or portion of the food.
c. Press "START/+30SEC" to cook.
Auto Menu Chart:
10. MEMORY FUNCTION
a. Press "MEMORY" to choose memory 1-3 procedure. 1, 2, 3 will display.
b. If the procedure has been set, press "START/+30SEC" to use it. If not, continue to set the procedure. Only one or two microwave stages can be set.
c. After finishing the setting, press "START/+30SEC" to save the procedure and turn back to the waiting states. If press "START/+30SEC " twice , it can save and operate the setting.
Example: save one program as memory 2. To cook the food with 80% microwave power for 3 minutes and 20 seconds. Operate the following steps:
In waiting states, press "MEMORY" twice, "2" displays.
Press "COOK TIME", then input number keys "3","2","0" to choose the cooking time.
Press "POWER " once,then press number button "8", "PL8" displays.
Press "START/+30SEC" once to save the current setting. If press "START/+30SEC" again, the cooking program can be operated and save it as memory 2.
To run the saved program, in waiting states, press " MEMORY " twice, "2" displays and press "START/+30SEC" to run the saved cooking program.
NOTE • Auto menu cannot be set as memory cooking.
11. MULTI-SECTION COOKING
At most 2 sections can be set for cooking. In multi-section cooking, if one section is defrosting, then defrosting shall be placed in the first section. When the first stage finish, the buzzer will sound once and the next stage will begin cooking.
Example: if you want to cook with 80% microwave power for 5 minutes + 60% microwave power for 10 minutes. The cooking steps are as following.
Press "COOK TIME" once, then press "5", "0", "0" to set 5 minutes.
Press "POWER" once.
Press number button "8" to set 80% microwave power.
Press "COOK TIME" once, then press "1", "0", "0", "0" to set 10 minutes.
Press "POWER" once.
Then press press number button "6" to set 60% microwave power
Press "START/+30SEC " to start cooking.
NOTE • Auto menu cannot be set as one of the multi-section.
12. INQUIRING FUNCTION
a. If the clock has been set, in cooking state, press "CLOCK/TIMER", the clock will displays for three seconds. After that, the oven will turn back to the clock state.
b. In the microwave cooking state, press "POWER" to inquire microwave power level the current microwave power will be displayed. After three seconds, the oven will turn back to the previous state.
13. LOCK FUNCTION FOR CHILDREN
a. Lock: In waiting state, press "STOP/CANCEL" for 3 seconds, there will be a long "beep" denoting the entering into the childrenlock state. The lock icon will display
b. Lock quitting: In locked state, press "STOP/CANCEL" for 3 seconds, there will be a long "beep" denoting that lock is released. The lock icon will disappear.
14. COOKING END REMINDING FUNCTION
a. When the cooking is over, the screen will display "End" to reminds user the cooking is finished. In order to make the appliance into the normal operating state, please press "STOP / CANCEL" or open the door
15. OTHER SPECIFICATIONS
a. "START/+30SEC" must be pressed to continue cooking if the door is opened during cooking.
b. The buzzer sounds once by effcient press, ine cient press will be no responce.
16. TURNTABLE RESET FUNCTION
When cooking finished, if the turntable is not at the initial position, it will enter the turntable reset function. At this time, the lamp, fan and turntable are working, " " will dynamic display. After the turntable has reset, the oven stops cooking and reminds cooking is finished.
a. This function only works for one completed cooking. If pause or open the oven door during cooking, the current cooking cannot enter the turntable reset function.
b. In waitting state, press number key "5" for 3 seconds, there will be a long "beep" and the turntable reset function is turnned off. To turn on the turntable reset function, in waiting state press number key "5" for 3 seconds, there will be a long "beep" denoting that turntable reset function is released.
NOTE
Under the reset state, opening the door or “ STOP/Cancel ” button is pressed, the oven will go back to waiting state.
The function will be reserved after power loss.
17. SCREEN-OUT FUNCTION
a. In standby, click the “STOP/Cancel” key(less than 3 seconds, and lift the button to respond, because “ STOP/Cancel ” has already attached 3 seconds long pressing the child lock event, so you must click and lift to respond) into the black screen save electricity mode.
b. Under the child lock, click the “STOP/Cancel” key(less than 3 seconds, and lift) into the black screen save electricity mode
c. Other modes other than the above can not enter the power saving mode, and can not enter the black screen power saving mode under the opening the door.
18. MUTE FUNCTION
a. Press the number key “8” for 3 seconds, there will be a “beep”, the oven will open or close the quitly function.
NOTE • In the sound shutdown state, all keys have no sound response. Including the end of the cooking note.
CLEANING
With good care and cleaning, your appliance will retain its appearance and remain fully functioning for a long time to come. We will explain here how you should correctly care for and clean your appliance.
WARNING
Scratched glass in the appliance door may develop into a crack. Do not use a glass scraper, sharp or abrasive cleaning aids or detergents.
The surface of the appliance may become damaged if it is not cleaned properly. Microwave energy may escape.
Clean the appliance on a regular basis, and remove any food remnants immediately.
Do not immerse the appliance in water or clean under a jet of water.
Cleaning agent
To ensure that the different surfaces are not damaged by using the wrong cleaning agent, observe the information below. Wash new sponge cloths thoroughly before use.
Do not use:
Harsh or abrasive cleaning agents
Metal or glass scrapers to clean the door panels
Metal or glass scrapers to clean the door seal
Hard scouring pads or sponges
Cleaning agents with a high alcohol content
APPLIANCE FRONT
Hot soapy water:
Clean using a dish cloth and then dry with a soft cloth. Do not use metal or glass scrapers for cleaning.
APPLIANCE FRONT PLATE
Hot soapy water:
Clean using a dish cloth and then dry with a soft cloth.
Remove splashes and patches of limescale, grease, starch and albumin immediately. Corrosion can form under these patches or splashes. Do not use glass cleaners or metal or glass scrapers for cleaning.
APPLIANCE CAVITY
Hot soapy water or vinegar solution:
Clean using a dish cloth and then dry with a soft cloth. Do not use oven spray or any other aggressive oven cleaners or abrasive materials. Scouring pads, rough sponges and pan cleaners are also unsuitable. These items scratch the surface.
Allow the interior surfaces to dry completely.
RECESS IN THE COOKING COMPARTMENT
Damp cloth:
Water must not be allowed to run into the appliance through the turntable drive. Dry the turntable drive with a cloth.
TURNTABLE AND ROLLER RING
Hot soapy water:
When placing the turntable back into its recess, it must engage properly.
DOOR PANEL
Glass cleaner:
Clean with a dish cloth. Do not use glass scrapers
TROUBLESHOOTING
TROUBLE
POSSIBLE CAUSE
POSSIBLE REMEDY
Oven will not start
a.Electrical cord for oven is not plugged in.
b.Door is open.
c.W rong operation is set.
a.Plug into the outlet.
b.Close the door and try again.
c.Check instructions.
Arcing or sparking
a.Materials to be avoided in microwave oven were used.
b.The oven is operated when empty.
c.Spilled food remains in the cavity.
a.Use microwave-safe cookware only.
b.Do not operate with oven empty.
c.Clean cavity with wet towel.
Unevenly cooked foods
a.Materials to be avoided in microwave oven were used.
b.Food is not defrosted completely .
c.Cooking time, power level is not suitable.
d.Food is not turned or stirred.
a.Use microwave-safe cookware only.
b.Completely defrost food.
c. Use correct cooking time, power level.
d. Turn or stir food.
Overcooked foods
Cooking time, power level is not suitable.
Use correct cooking time, power level.
Undercooked foods
a.Materials to be avoided in microwave oven were used.
b.Food is not defrosted completely .
c.Oven ventilation ports are restricted.
d.Cooking time, power level is not suitable.
a.Use microwave-safe cookware only.
b.Completely defrost food.
c.Check to see that oven ventilation ports are not restricted.
d.Use correct cooking time, power level.
Improper defrosting
a.Materials to be avoided in microwave oven were used.
#1 Unit does not turn on when pressing ON/OFF button
P1 Error Code. The water collection tray is full. Turn off the unit, drain the water from the water collection tray and restart the unit. In COOL mode: room temperature is lower than the set temperature. Reset the temperature.
The air filter is blocked with dust or animal hair. Exhaust hose is not connected or is blocked. Turn off the unit, disconnect the hose, check for blockage and reconnect the hose. The unit is low on refrigerant. Call a service technician to inspect the unit and top off refrigerant. Temperature setting is too high. Decrease the set temperature. The windows and doors in the room are open. Make sure all windows and doors are closed. The room area is too large. Double-check the cooling area. There are heat sources inside the room. Remove the heat sources if possible.