OWNER’S MANUAL Oven
BEFORE USE
Unpacking & Installing
By following the basic steps on these two pages you will be able to quickly check that your oven is operating correctly. Please pay particular attention to the guidelines on where to install your oven. When unpacking your oven make sure you remove all accessories and packing materials. Check to make sure that your oven has not been damaged during shipping.
1. Unpack your oven and place it on a flat level surface
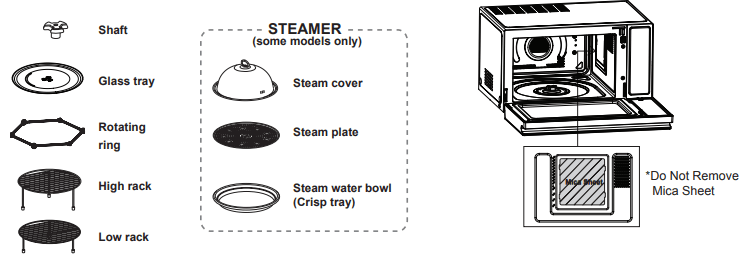
Method to use Accessories As per Mode

Caution: Use accessories in accordance with cooking guides!
- O Acceptable
- - Not Acceptable
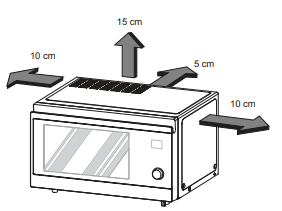
2. Place the oven on a level location of your choice with more than 85cm height but make sure there is at least 15 cm of space on the top and 10 cm at the left & right for proper and 5 cm at the rear ventilation. The front of the oven should be at least 8 cm from the front edge of the surface to prevent tipping. An exhaust outlet is located on the bottom and side of the oven. Blocking the outlet can damage the oven. Do not use the microwave oven in an enclosed space or cupboard, The air flow for cooling the product could be compromised. It may result in lower performance and reduced service life and possible malfunction due to overheating.
3. Plug your oven into a standard household socket. Make sure your oven is the only appliance connected to the socket. If your oven does not operate properly, unplug it from the electrical socket and then plug it back in.
4. Plug your oven into a standard household socket. Make sure your oven is the only appliance connected to the socket. If your oven does not operate properly, unplug it from the electrical socket and then plug it back in.
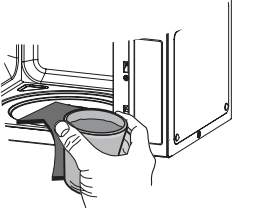
5. File a microwave safe container with 300 ml (1/2 pint) of water. Place on the glass tray and close the oven door. If you have any doubts about what type of container to use please refer to Microwave-safe utensils.
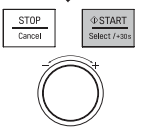
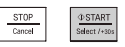
6. Press the STOP/CANCEL button, and press the START button one time to start 30 seconds of cooking time.

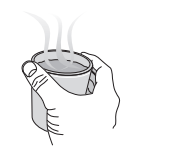
7. The DISPLAY will count down from 30 seconds. When it reaches 0 it will chime briefly. Open the oven door and test the temperature of the water. If your oven is operating the water should be warm. Be careful when removing the container as it may be hot. YOUR OVEN IS NOW INSTALLED
8. The contents of feeding bottles and baby food jars must be stirred or shaken and the temperature checked before consumption in order to avoid burns.
9. Button recognition may be hampered in the following circumstances:
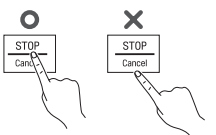
- Only the outside area of the button is pressed.
- The button is pushed using a nail or the tip of the finger.
10. The setting of the cooking time should be shorter than common microwave ovens (700 W, 800 W) due to the relatively high output power of the product. Excessive heating of food product may cause moisture on the door. This is not a malfunction.
11. All of the recipes in this book give a range of cooking times. In general, you will find that the food remains under-cooked at the lower end of the time range, and you may sometimes want to cook your food beyond the maximum time given, according to personal preference. The governing philosophy of this book is that it is best for a recipe to be conservative in giving cooking times because overcooked food is undesirable.
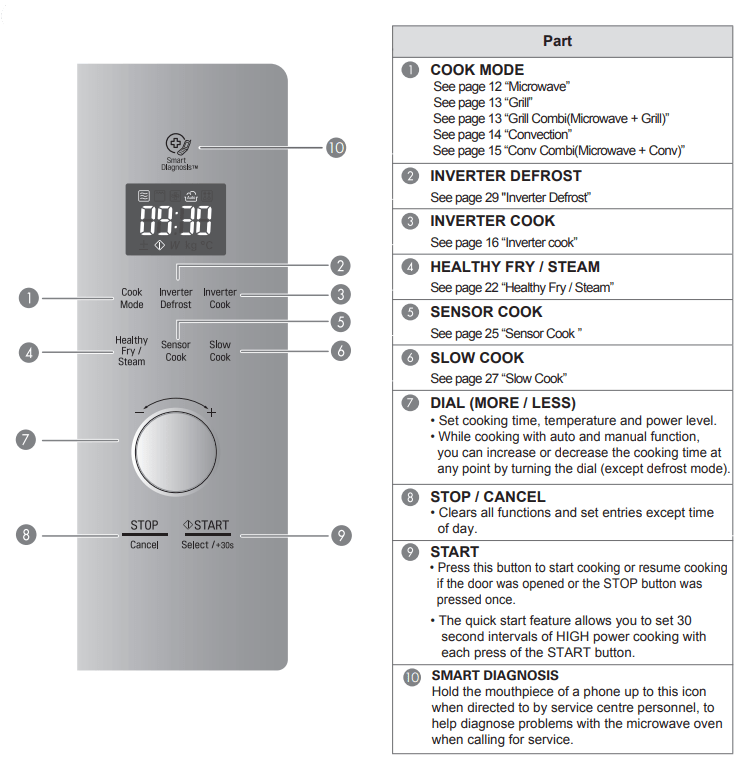
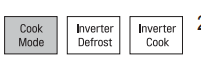
CONTROL PANEL
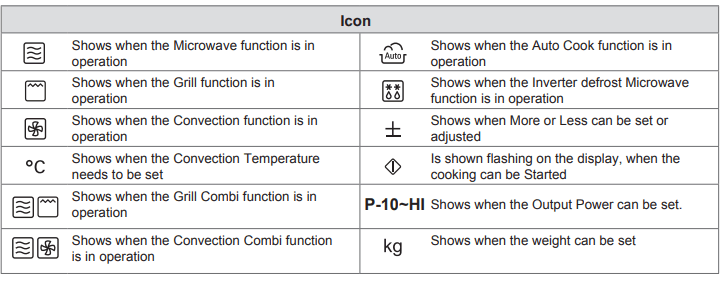
DISPLAY ICON MEANINGS
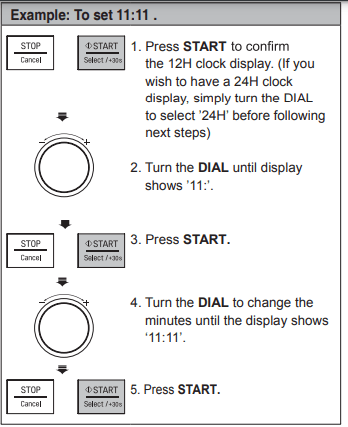
SETTING THE CLOCK
- When your oven is plugged in for the first time or when power resumes after a power interruption, the numbers in the display reset to '12H'.
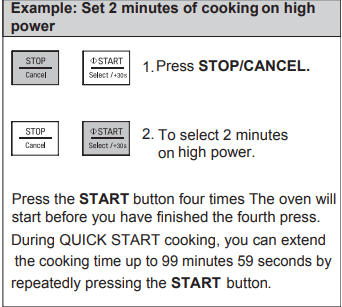
QUICK START
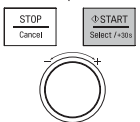
- The QUICK START feature allows you to set 30 seconds intervals of HIGH power cooking with each touch of the START button.
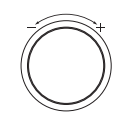
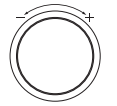
MORE/LESS
- By turning the dial, manual cook settings can be adjusted to cook food for a longer or shorter time. Turning the dial will increase 10 seconds or decrease 10 seconds to the cooking time each time. The max cooking time possible in the manual cook mode will be 99 minutes 59 seconds

ENERGY SAVING
- Energy saving means saving energy by automatically turning off the display. This feature only operates when the Microwave Oven is in standby and the display will automatically go out.
- NOTE: If the clock has been set, the Energy saving mode will not operate. The Energy saving mode will only operate if the clock was not set
HOW TO USE
MANUAL COOKING (timed cooking)
- This function allows you to cook food for a desired time. There are 10 power levels available. The example below shows how to set a 90 % power level for 5 minutes and 30 seconds
Example: To cook food on 90 % Power for 5 minutes 30 seconds
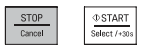
1. Press STOP/CANCEL.
2. Press COOK MODE once. The Display will show P-HI (1st time P-HI appears in the display. This is to tell you that the oven is set on 100% power unless a different power setting is chosen.)
3. Turn the DIAL until display shows ‘P-90’.
4. Press START.

5. Turn the DIAL until display shows ‘5:30’.
6. Press START.

- When cooking is complete, a chime will sound. The word End shows in the display window. 'End' remains in the display and the chime will sound every minute for 5 minutes, or until the door is opened or any button is pressed.
- NOTE: If you do not select a power level, the oven will operate at power HIGH. To set HI-POWER cooking, skip step 3 above.
MICROWAVE POWER LEVELS
Your microwave oven is equipped with 10 power levels to give you maximum flexibility and control over cooking. The adjacent table will give you some idea of which foods are prepared at each of the various power levels.
- The adjacent chart shows the power level settings for your oven.
MICROWAVE POWER LEVEL CHART
Power Level
- P-HI (100 %) 1100 W
- Boiling water.
- Browning ground beef.
- Making candy.
- Cooking poultry pieces, fish, & vegetables.
- Cooking tender cuts of meat
- P-90 990 W
- Reheating rice, pasta, & vegetables.
- P-80 880 W
- Reheating prepared foods quickly.
- Reheating sandwiches.
- Reheating Quiche: about 8 minutes for 600 g
- P-70 700W
- Cooking egg, milk and cheese dishes.
- Cooking cakes and breads.
- Melting chocolate
- P-60 660 W
- Cooking veal.
- Cooking whole fish.
- Cooking puddings and custard.
- P-50 550 W
- Cooking ham, whole poultry and lamb.
- Cooking rib roast and sirloin tip.
- P-40 440 W
- Thawing meat, poultry and seafood.
- P-30 330 W
- Cooking less tender cuts of meat.
- Cooking pork chops and roast.
- P-20 220 W
- Taking chill out of fruit.
- Softening butter.
- P-10 110 W
- Keeping casseroles and main dishes warm
- Softening butter and cream cheese.
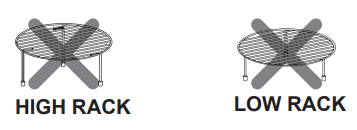
NOTE: Do not use the following accessories in Microwave mode.
GRILL COOKING
- This feature will allow you to brown and crisp food quickly.
- Always use gloves when removing food and accessories after cooking as the oven & accessories will be very hot.
Example: Use Grill to cook food for 5 minutes 30 seconds
1 Press STOP/CANCEL.

2. Press COOK MODE until display shows ‘GrIL’.

3. Press START

4 Turn the DIAL until display shows ‘5:30’ .

5. Press START.
CAUTION: Always use oven gloves when removing the food and accessories after cooking as the oven & accessories will be very hot.
NOTE
- This feature will allow you to brown and crisp food quickly.
- For the best result use the High Rack.
- Not necessary to preheat.
- Do not use any plastic container or trays, or, the Steamer accessory for any Convection or Grill functions

GRILL COMBI. COOKING
- Your oven has a combination cooking feature which allows you to cook food using the built in Grill heater and microwave.
Example: Programme your oven with micro power 330 W and grill for a cooking time of 25 minutes
1 Press STOP/CANCEL
2. Press COOK MODE until display shows ‘GC-1’.
3. Turn the DIAL until display shows ‘GC-2

4. Press START.

5. Turn the DIAL until display shows ‘25:00

6. Press START. When cooking you can turn the DIAL to increase or decrease the cooking time. Be careful when removing your food as the cooking vessel will be hot!
NOTE
- Your oven has a combination cooking feature which allows you to cook food using the built in Grill Heater and Microwave. This generally means it takes less time to cook your food.
- You can select three different levels of microwave power in the Grill Combi. function (GC-1: 220 W, GC-2: 330 W, GC-3: 440 W). in grill combi mode.
- For the best result use the High Rack.
- Do not use any plastic container or trays, or, the Steamer accessory for any Convection or Grill functions.
CONVECTION PREHEAT
- Always use gloves when removing food and accessories after cooking as the oven & accessories will be very hot.
Example: To preheat the oven to a temperature of 200 °C
1 Press STOP/CANCEL.
2 Press COOK MODE until display shows ‘180 °C’.
3 Turn the DIAL until display shows ‘200 °C’.

4 Press START to lock in the temperature and to set a preheating time if desired. If a time is entered, the set temperature may not be achieved
5 Press START. Preheating will start and show 60° in the display. The temperature on the display will then rise to reflect the actual cavity temperature.

CONVECTION COOKING
- The metal tray or metal rack must be used during convection cooking.
Example: To cook some food at a temperature of 200 °C for 50 minutes.
1 Press STOP/CANCEL.

2 Press COOK MODE until display shows ‘180 °C
3 Turn the DIAL until display shows ‘200 °C’.
4 Press START for temperature confirmation
5 Turn the DIAL until display shows ‘50:00’.

6 Press START. When cooking you can turn the DIAL to increase or decrease the cooking time.
CONVECTION COMBI COOKING
- In the following example, it shows you how to is set, no cooking can take place. program your oven at a microwave power of 330 W and at a convection temperature of 200 °C for a cooking time of 25 minutes.
Example: To cook food at a convection combi. mode for 25 minutes.
1. Press STOP/CANCEL.

2. Press COOK MODE untily display shows ‘CC-1’.
3. Turn the DIAL until display shows ‘CC-2’.

4. Press START. Turn the DIAL until display shows ‘200 °C’.
5. Press START. Turn the DIAL until display shows ‘25:00’ .
6 Press START. When cooking you can turn the DIAL to increase or decrease the cooking time. Be careful when removing your food as the cooking vessel will be hot!

CHILD LOCK
- This is a unique safety feature that prevents unwanted oven operations. Once the CHILD LOCK is set, no cooking can take place.
Example: To set the CHILD LOCK
1. Press STOP/CANCEL

2. Press and hold STOP/CANCEL until ‘Loc’ appears in the display and a chime is heard.

If the time of day was already set, the time of day will appear on the display window after 1 second.
- If the CHILD LOCK is enabled and you touch a key pad, the word Loc shows in the display.
- You can cancel the CHILD LOCK according to below procedure
Example: To cancel the CHILD LOCK
- Press and hold STOP/CANCEL until ‘Loc’ disappears in the display

After the CHILD LOCK is turned off, the oven will operate normally
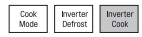
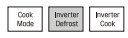
INVERTER COOK
- INVERTER COOK is included with INVERTER COOK 1(DEFROST & COOK), INVERTER COOK 2( POPULAR MENU) & INVERTER COOK 3(ROAST & BAKE MENU).
- Your oven’s menu has been preprogrammed to automatically cook food. Select a menu from the below, INVERTER COOK is included with INVERTER COOK 1(DEFROST & COOK), INVERTER COOK 2( POPULAR MENU) & INVERTER COOK 3(ROAST & BAKE MENU). select the weight and then allow the microwave oven to do the rest. To select the different menu Codes, turn the dial (as in step 3) until the respective menu code appears.
- Note: When using grill and convection mode to reduce heat loss keep door closed when turning or stirring the food.
Example: To cook 0.3 kg Cheese Sticks
1. Press STOP/CANCEL
2. Press INVERTER COOK until display shows ‘1’.
3. Turn the DIAL until display shows ‘1-2’.

4. Press START

5. Turn the DIAL until display shows ‘0.3 kg

6. Press START.
DEFROST & COOK MENU INSTRUCTIONS
- Adjust cook time according to the size, thickness, and your preference of doneness.
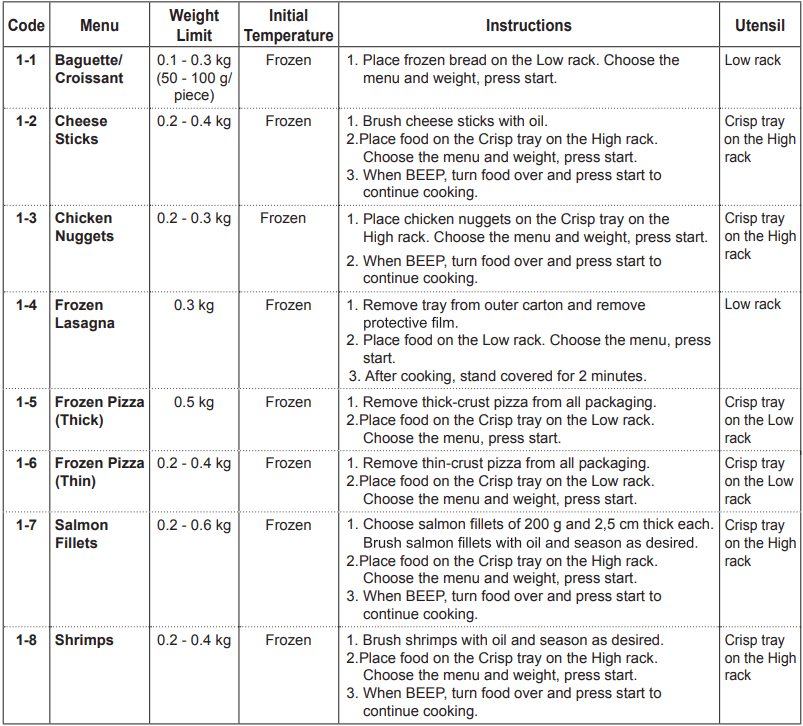
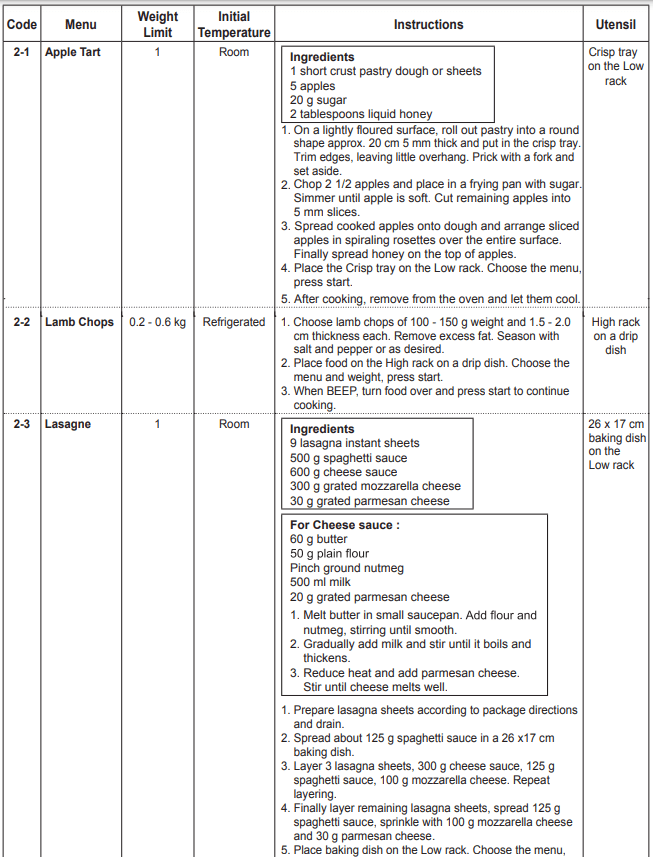
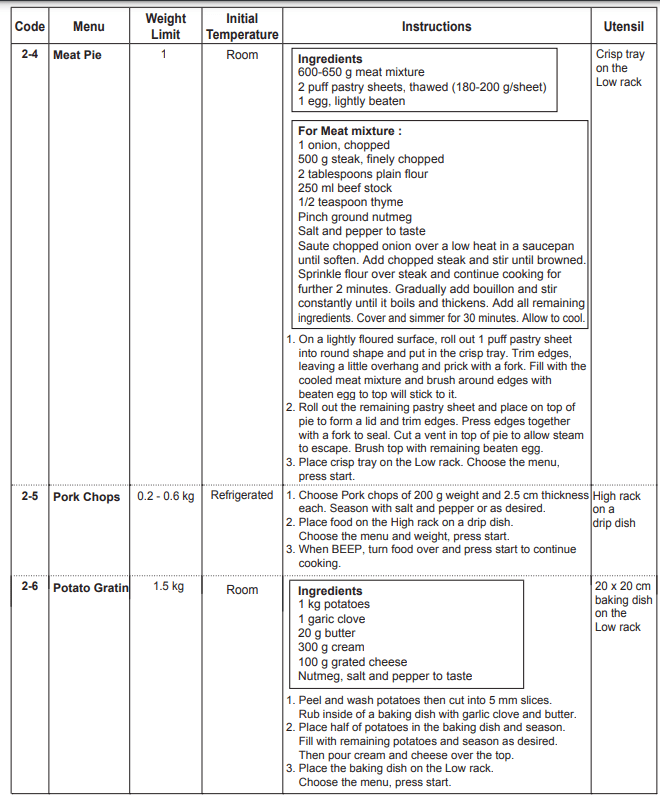
POPULAR MENU INSTRUCTIONS
- Adjust cook time according to the size, thickness, and your preference of doneness.
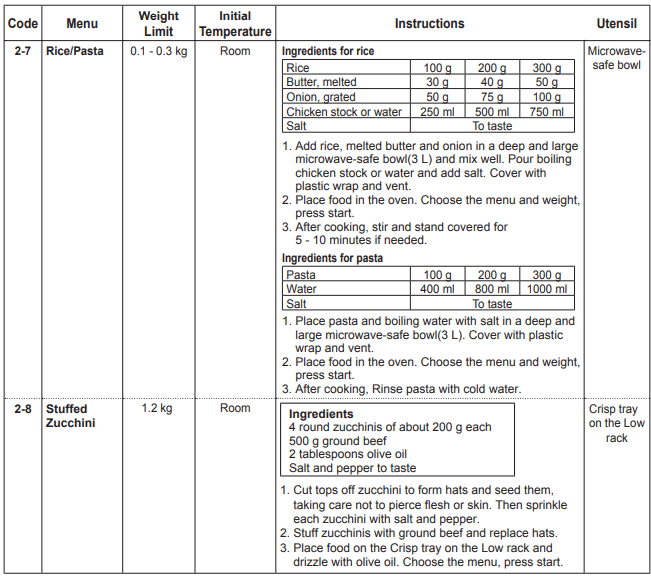
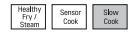
HEALTHY FRY / STEAM
- Your oven’s menu has been preprogrammed to automatically cook food. Select a menu from the below, select the weight and then allow the microwave oven to do the rest. To select the different menu Codes, turn the dial (as in step 3) until the respective menu code appears.
Example: To cook 0.6 kg Prawns
1. PressSTOP/CANCEL.

2. Press HEALTHY FRY / STEAM until the display shows ‘2’.
3. Turn the DIAL until display shows ‘2-8’.

4. Press START

5. Turn the DIAL until display shows ‘0.6 kg’.

6. Press START.

SENSOR COOK
- Your oven’s menu has been preprogrammed to automatically cook food. Select one of the Sensor Cook menus and then dial in the weight of the food before pressing START to allow the microwave to cook your selection.
Example : To reheat 0.4 kg Fresh Vegetables
1. Press STOP/CANCEL.

2 SENSOR COOK
3 Turn the DIAL until display shows ‘2’.

4 Press START.
SLOW COOK
Example : How to set 60° for 5Hrs (Food drying)
1. Press STOP/CANCEL.

2. Press SLOW COOK until display shows ‘2’.
3. Turn the DIAL until display shows ‘60 °C’.

4 Press START. ‘10:00’ will show in the display.
5 Turn the DIAL until display shows ‘5h00’.

6 Press START. When cooking you can increase or decrease the cooking time by turning the DIAL.
INVERTER DEFROST
- Four defrost sequences are preset in the oven. The INVERTER DEFROST feature provides you with the best defrosting method for frozen foods. The cooking guide will show you which defrost
- For added convenience, the INVERTER DEFROST includes an audible beep function that reminds you to check, turn over, separate, or rearrange to get the best defrost results. Four different defrosting levels are provided.
(MEAT /POULTRY / FISH / BREAD)
Example: To defrost 1.2 kg of Meat
1. Press STOP/CANCEL

2. Press INVERTER DEFROST until display shows ‘dEF1’.
3. Turn the DIAL until display shows ‘1.2 kg’ .

4. Press START.
TO CLEAN YOUR OVEN
1 Keep the inside of the oven clean
- Food spatters or spilled liquids stick to oven walls and between the seal and door surfaces. Its best to wipe up spillovers with a damp cloth right away. Crumbs and spillovers will absorb microwave energy and lengthen cooking times and may even damage the oven. Use a damp cloth to wipe out crumbs that fall between the door and the frame. It is important to keep this area clean to assure a tight seal. Remove greasy spatters with a soapy cloth then rinse and dry. Do not use harsh detergent or abrasive cleaners. The metal tray can be washed by hand or in the dishwasher.
2 Keep the outside of the oven clean
- Disconnect the mains plug from the power outlet before cleaning the oven to eliminate the possibility of electric shock. Clean the outside of your oven with soap and water then with clean water and dry with a soft cloth or paper towel. To prevent damage to the operating parts inside the oven. the water should not be allowed to seep into the ventilation openings. To clean control panel. open the door to prevent the oven from accidentally starting, and wipe a damp cloth followed immediately by a dry cloth. Press STOP after cleaning.
3 If steam accumulates inside or around the outside of the oven door. wipe the panels with a soft cloth. Steam or condensation build up inside the door is normal if foods are heated for a long period on higher power levels. this is not a malfunction. the condensation will eventually evaporate. Try covering the food or vary the heating levels and time to reduce any condensation forming in the door. this may also occur when the oven is operated under high humidity conditions and in no way indicates a malfunction of the unit.
4 The door and door seals should be kept clean. Use only warm, soapy water. rinse then dry thoroughly. DO NOT USE ABRASIVE MATERIALS. SUCH AS CLEANING POWDERS OR STEEL AND PLASTIC PADS. Metal parts will be easier to maintain if wiped frequently with a damp cloth.
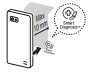
USING THE SMART DIAGNOSIS™ FUNCTION
Use this function if you need an accurate diagnosis by an LG Electronics service centre when the product malfunctions or fails. Use this function only to contact the service representative, not during normal operation.
- When instructed to do so by the call centre, hold the mouthpiece of your phone over the Smart Diagnosis™ logo on the controller.
- With the door closed, press and continue to hold the STOP/Cancel button for 3 seconds so that 'Loc' appears on the display. Continue to hold the STOP/Cancel button for a further 5 seconds until '5' appears in the display. (so, the STOP/Cancel button will need to be held for 8 seconds continuously). A tone will then emit from behind the Smart Diagnosis symbol.
- Keep the phone in place until the tone transmission has finished. The display will count down the time
- Once the countdown is over and the tones have stopped, resume your conversation with the call center agent, who will then be able to assist you in using the information transmitted for analysis.
QUESTIONS & ANSWERS
1. What's wrong when the oven light will not glow?
- There may be several reasons why the oven light will not glow. Either the light bulb has blown or the electric circuit has failed.
2. Does microwave energy pass through the viewing screen in the door?
- No. The holes, or ports, are rade to allow light to pass; they do not let microwave energy through.
3. Why does the BEEP tone sound when a button, on the control panel is touched?
- The BEEP tone sounds to assure that the setting is being properly entered
4. Will the microwave function be damaged if it operates empty?
5. Why do eggs sometimes pop?
- When baking, frying, or poaching eggs, the yolk may pop due to steam build up inside the yolk membrane. To prevent this, simply pierce the yolk before cooking. Never microwave eggs in the shell
6. Why is standing time recommended after microwave cooking is over?
- After microwave cooking is finished, food keeps on cooking during standing time. This standing time finishes cooking evenly throughout the food. The amount of standing time depends on the density of the food.
7. Why doesn't my oven always cook as fast as the cooking guide says?
- Check your cooking guide again to make sure you've followed directions correctly, and to see what might cause variations in cooking time. Cooking guide times and heat settings are suggestions, chosen to help prevent overcooking. the most common problem in getting used to this oven. Variations in the size. shape. weight and dimensions of the food require longer cooking time. Use your own judgment along with the cooking guide suggestions to test food conditions. just as you would do with a conventional cooker.
8. Coo! appears on the display and the cooling fan continues to run after the cooking or heating time is over.
- After cooking is complete, the fan may operate to cool the oven. The display will show Cool! If you open the door or press once STOP before the cooking time is complete, the remaining ooking time will show on the display. This is not a malfunction
When operating the microwave oven, If you use a product such as radio, TV, wireless LAN, Bluetooth, medical equipment, wireless equipment etc. Using the same frequency as the microwave oven, the product may receive interference from these products. This interference does not indicate a problem of the microwave or the product and is not a malfunction. Therefore, it is safe to use. However, medical equipment may receive interference as well, so use caution when using medical equipment near the product.
TECHNICAL SPECIFICATIONS
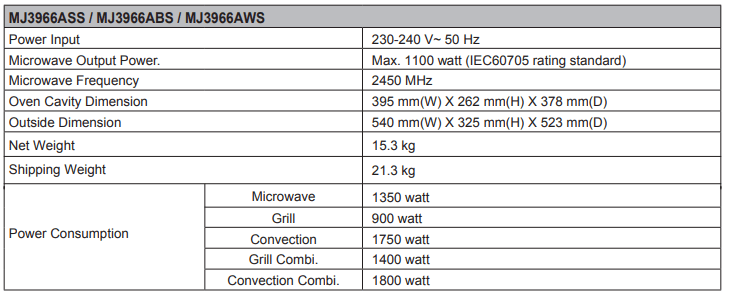
* at the 1100 W and 990 W settings (P-HI, & P-90) output power will gradually reduced to avoid overheating.
Microwave Frequency : 2450 MHz +/- 50 MHz (Group 2 / Class B) **
Group 2 equipment: group 2 contains all ISM RF equipment in which radio-frequency energy in the frequency range 9 kHz to 400 GHz is intentionally generated and used or only used, in the form of electromagnetic
Class B equipment is equipment suitable for use in domestic establishments and in establishments directly connected to a low voltage power supply network which supplies buildings used for domestic purposes.