Loading ...
Loading ...
Loading ...
en Installation
14
Preparing the appliance
Exhaust-air mode
If the extractor hood is used in exhaust-air mode, a one-
way flap must be installed.
Note: The label or stamping on the one-way flap must
face outwards.
1. Click the two spigots on the one-way flap into place
in the holes on the air outlet and/or on the air inlet.
2. Check that the one-way flap is working correctly.
Air recirculation mode
If the extractor hood is used in circulating-air mode, the
blow opening must be secured using a circulated air
grille. The circulated air grille prevents mechanical and
electrical hazards.
Rectangular air outlet
If the dust extractor hood has a rectangular air outlet,
the air inlet provided must be screwed in tightly via the
air outlet.
5Installation
I nst al l at i on
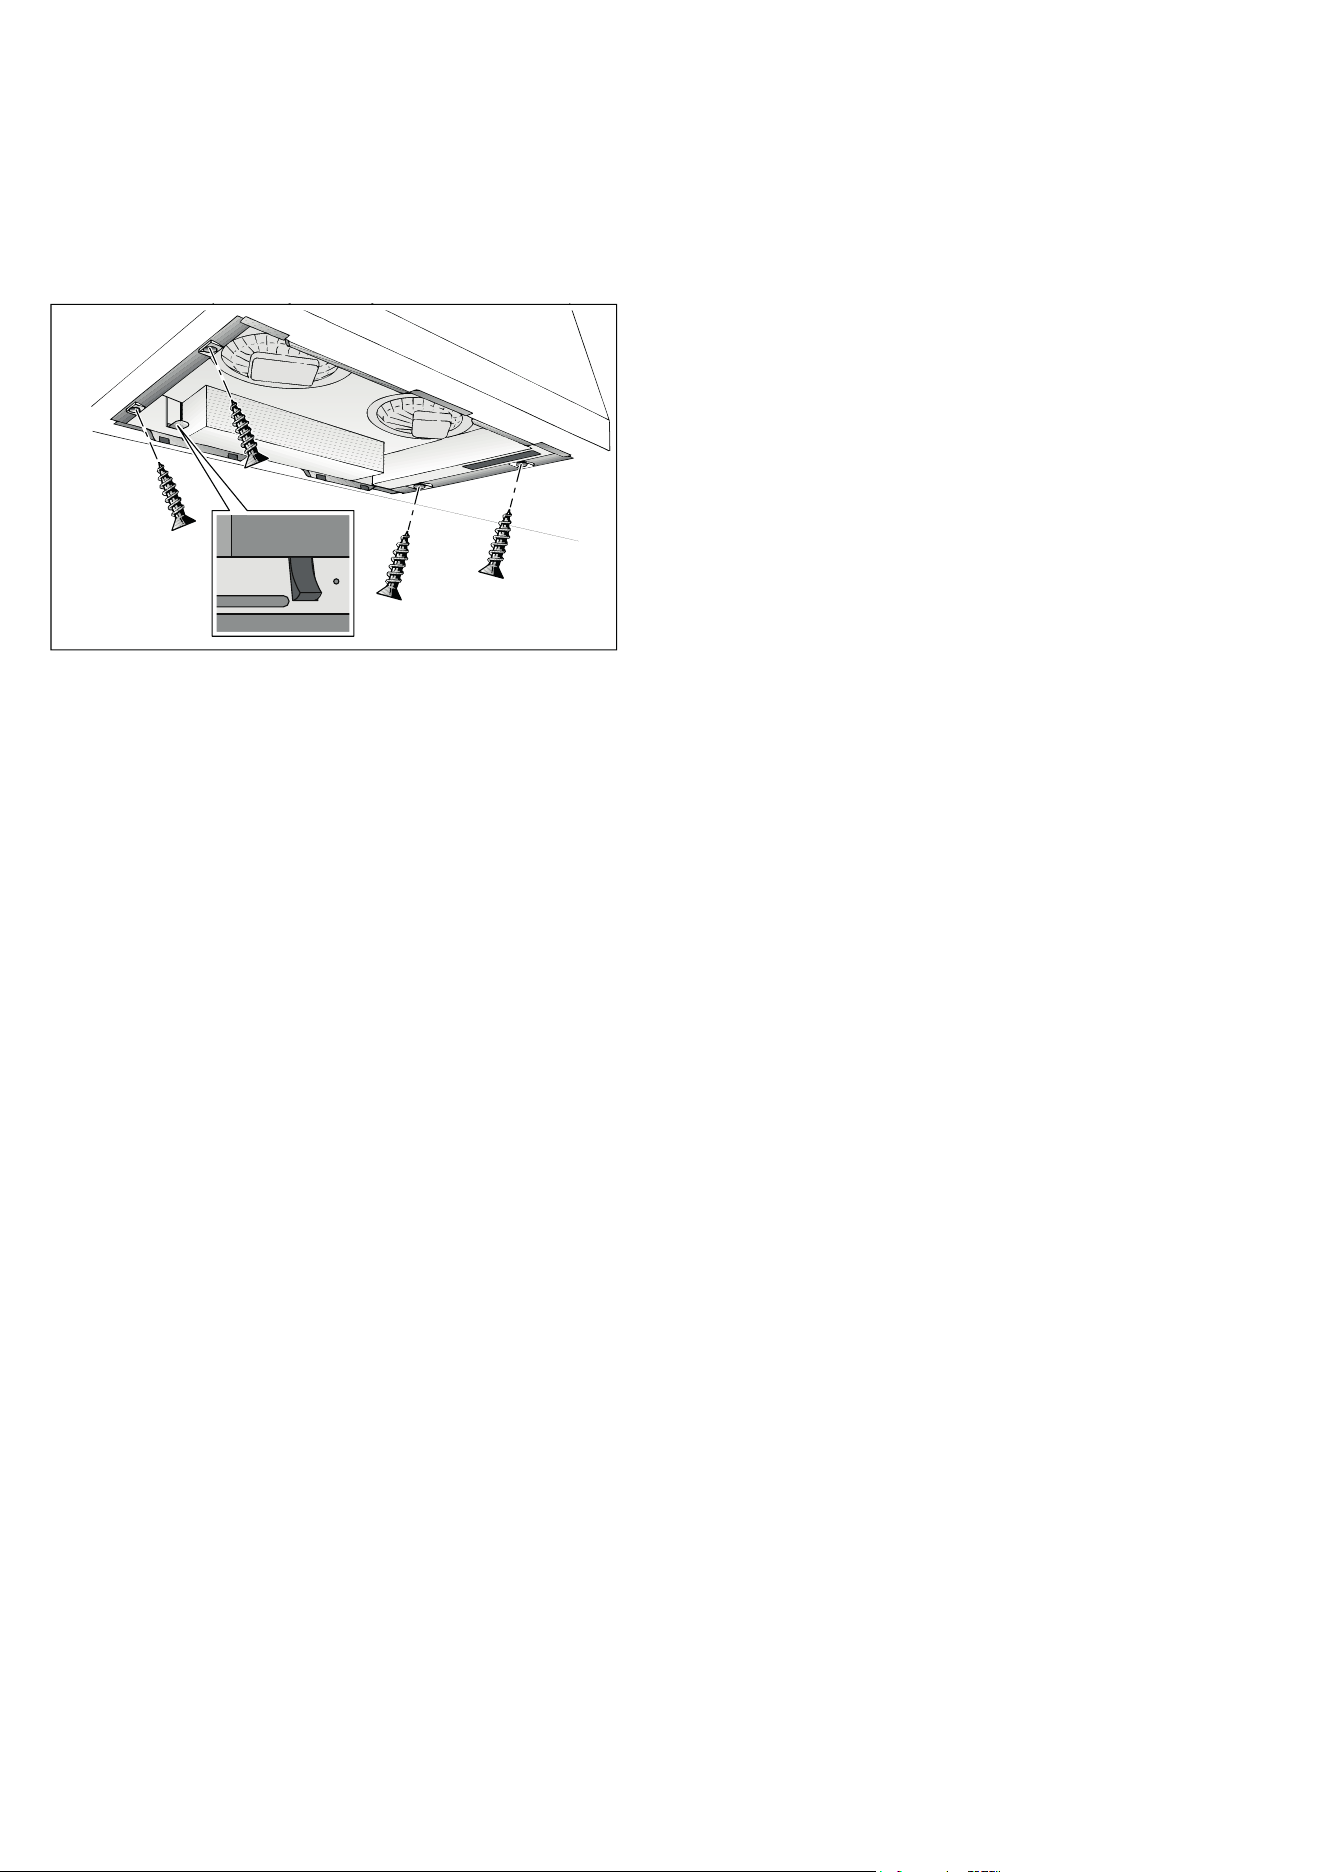
Final fitting stage
1. Remove the metal grease filter.
2. Establish the electrical connection.
3. Push the extractor hood in the housing up until the
mounting spring at the front and rear clicks into
place.
4. Screw the extractor hood in tightly.
5. Insert and lock the metal grease filter.
Connecting the pipes
Note: If an aluminium pipe is used, smooth the area
where it is to be connected before you connect it.
Exhaust air pipe, dia. 150 mm (recommended size)
Fit the exhaust air pipe directly to the air-pipe connector
and seal the joint.
Exhaust air pipe, dia. 120 mm
1. Fit the reducing connector directly to the air-pipe
connector.
2. Attach the exhaust air pipe to the reducing
connector.
3. Seal both joints appropriately.
Installation en
15
Removing the appliance
1. Disconnect the electrical connection.
2. Undo the screws.
3. Disconnect the pipes.
4. Hold the extractor hood down. Pull at the front and
rear of the mounting spring.
5. Pull the extractor hood downwards and out.
Loading ...