Loading ...
Loading ...
Loading ...
10 www.oster.com 11Customer Service: 1-800-334-0759
positioning pan
• To accommodate a wide variety of foods the oven has two pan positions.
The pan can be placed on top of the rack or inserted into the guide rails
below the rack. (See Figure Below)
• Before removing the pan allow the unit to cool.
• Positioning of the oven pan will depend on the desired cooking method. For
baking, place the pan on top of the rack. For grilling or broiling, insert the
pan into the guide rails below the rack and place the food on top of the rack.
PLEASE NOTE: Do not to use the broil pan under the rack in the lower position.
for
baking
for
griLLing or
broiLing
CLeaning Your Countertop oven
CAUTION: to protect against electrical shock, do not immerse the appliance
in water or any other liquids.
Step 1. Turn all knobs to “OFF” position and remove plug from electrical
outlet. Allow to cool.
Step 2. Wipe unit down with damp cloth. Make sure to only use mild, soapy
water. Abrasive cleaners, scrubbing brushes and chemical cleaners will
damage the coating on this unit.
CAUTION: Do not clean with metal scouring pads. Pieces can break off the
pad and touch electrical parts involving a risk of electrical shock.
Step 3. Remove crumb tray by pulling out of Countertop Oven.
Step 4. Shake off crumbs from crumb tray. Cleaning the crumb tray often will
avoid any accumulations.
Step 5. Remove wire rack and clean with damp cloth or place in top rack of dishwasher.
This appliance has no user serviceable parts. Any servicing beyond that
described in the Cleaning Section should be performed by an Authorized
Service Representative only. See Warranty Section.
storing Your Countertop oven
Allow the appliance to cool completely before storing. If storing the
Countertop Oven for long periods of time make certain that the Countertop
Oven is clean and free of food particles. Store the Countertop Oven in a dry
location such as on a table or countertop or cupboard shelf. Other than the
recommended cleaning, no further user maintenance should be necessary.
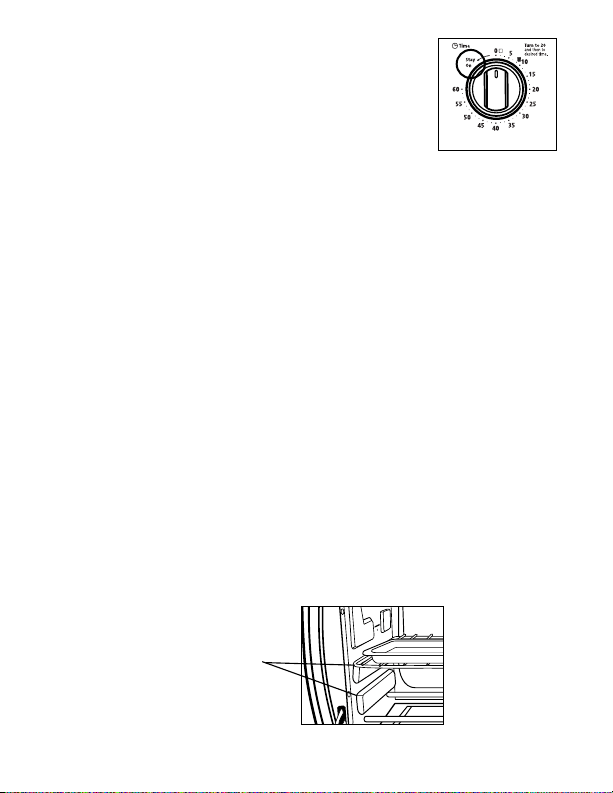
to use the timer anD staY on feature
(see fig. 11)
After rotating the Temperature Dial to your desired
temperature, then you must select from the following
options on the Timer Dial.
• For items requiring shorter cooking times, rotate the Timer Dial
clockwise to the desired time. At the sound of the bell, the oven will
automatically turn “Off.”
• For longer cooking times, rotate the Timer Dial counterclockwise to the
“Stay On” setting. Cooking will continue until the Timer Dial is manually
turned to the “Off” position and the bell will sound.
positioning raCk
• To accommodate a wide variety of foods the oven has two rack positions.
The rack can be inserted in the oven in the upper or lower rack guides. The
rack will fit into either of the rack guides inside of the Countertop Oven.
(See Figure Below)
• Before removing the rack allow the unit to cool.
• To remove the rack, open the oven door and pull the rack towards the front
of the oven. The rack will slide on the rack guides on the inside of the oven.
PLEASE NOTE: the oven rack may tilt downward causing food to shift when
the rack is pulled out, proceed with caution.
• Positioning of the oven rack will depend on the size of the food and desired
browning. Move the rack to the lower rack position to prevent top browning
and move the rack to the upper rack position to prevent bottom burning.
• For best toasting results, position the rack in the upper rack guide.
raCk guiDe
options
Figure 11
Loading ...
Loading ...
Loading ...