Loading ...
Loading ...
Loading ...
12
ENG
ENGLISH
CUSTOMIZING SETTINGS
CUSTOMIZING SETTINGS
1
Press a button at the bottom of the monitor.
2
Use the ◄, ►, and ▼ buttons to adjust options.
To return to the upper menu or set other menu items, use the up arrow ( ) button.
3
Select EXIT to leave the OSD menu.
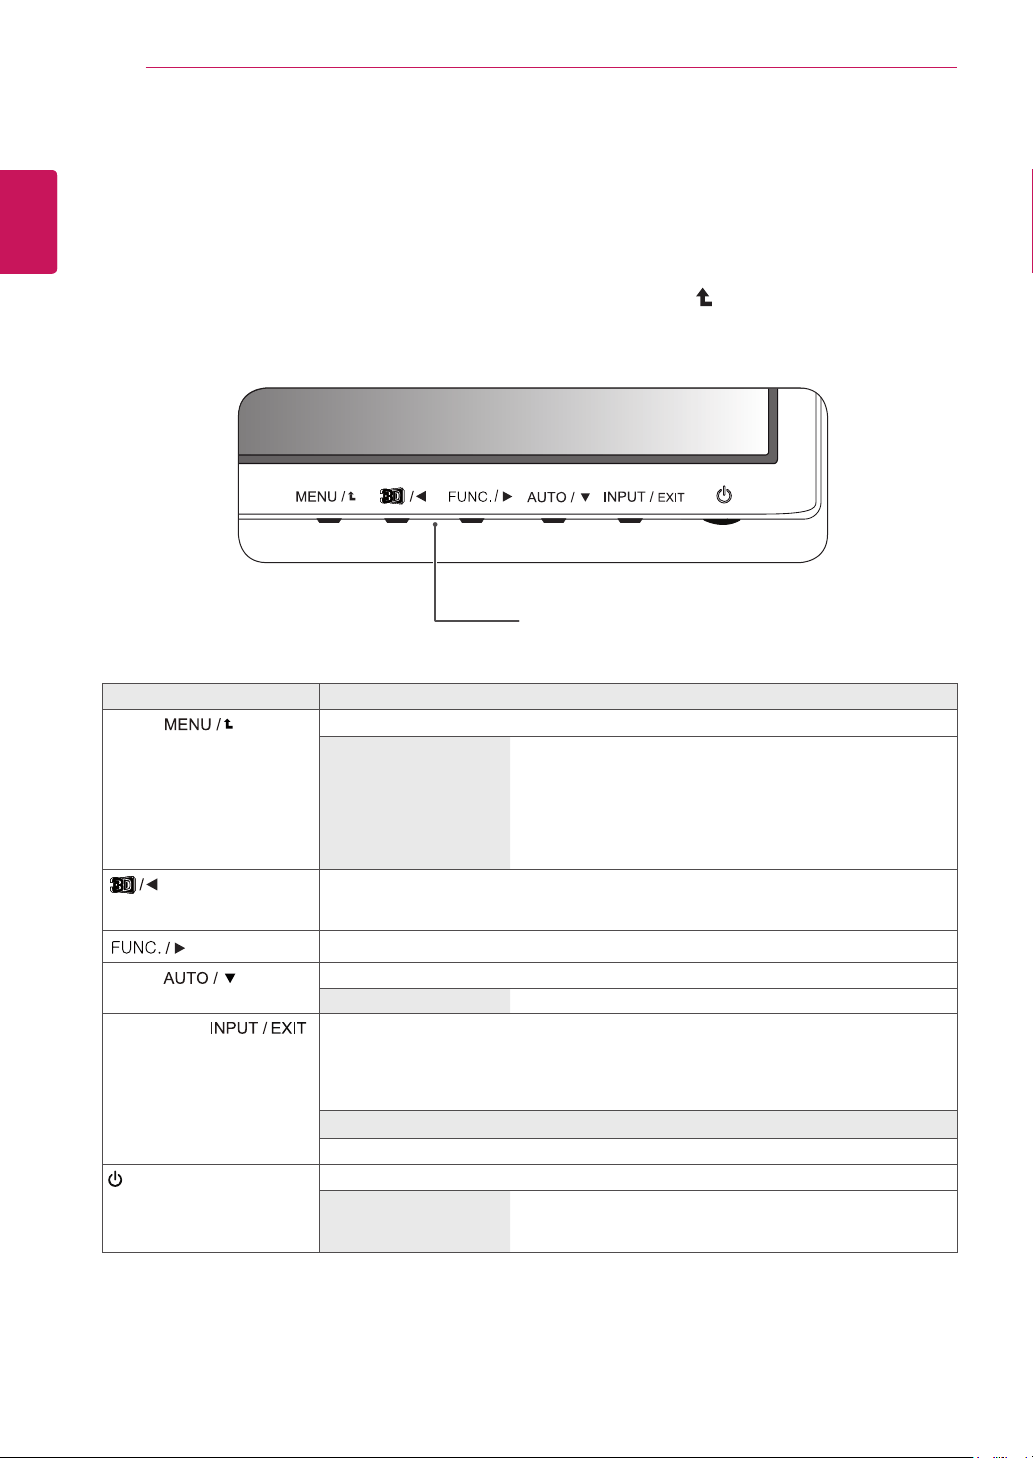
Monitor Setting Buttons
Button Description
MENU ( )
Activates the main menu. (See p.13))
OSD LOCKED/UN-
LOCKED
Locks/unlocks the OSD screen.
y
To lock the OSD screen, press and hold the MENU button
for several seconds. / The "OSD LOCKED" message will
be displayed and the screen will be locked.
y
To unlock the OSD screen, press and hold the MENU
button again for several seconds. The "OSD UNLOCKED"
message will be displayed and the screen will be unlocked.
The 2D → 3D hot key is used to move to the 3D Settings menu.
Recognizes the input image automatically and displays 3D images without having the
3D mode on manually.
Activates menus to select and adjust various functions.
AUTO ( )
Adjusts the monitor setting for optimum viewing (only available for analog signals).
Optimal Resolution 1920 x 1080
INPUT/EXIT ( )
Allows you to select the input signal.
y
If two or more input signals are connected, you can select an input signal as you want
(D-SUB/DVI/HDMI).
y
If only one computer is connected to the monitor, the input signal is detected automati-
cally. The default input signal is analog (D-SUB).
EXIT
Exits the OSD menu.
(Power Button)
Power On or Off.
Power Indicator When the monitor is working correctly (Power On), the Power
Indicator is red. If the monitor is in power saving mode, the
Power Indicator blinks red.
Loading ...
Loading ...
Loading ...