Loading ...
Loading ...
Loading ...
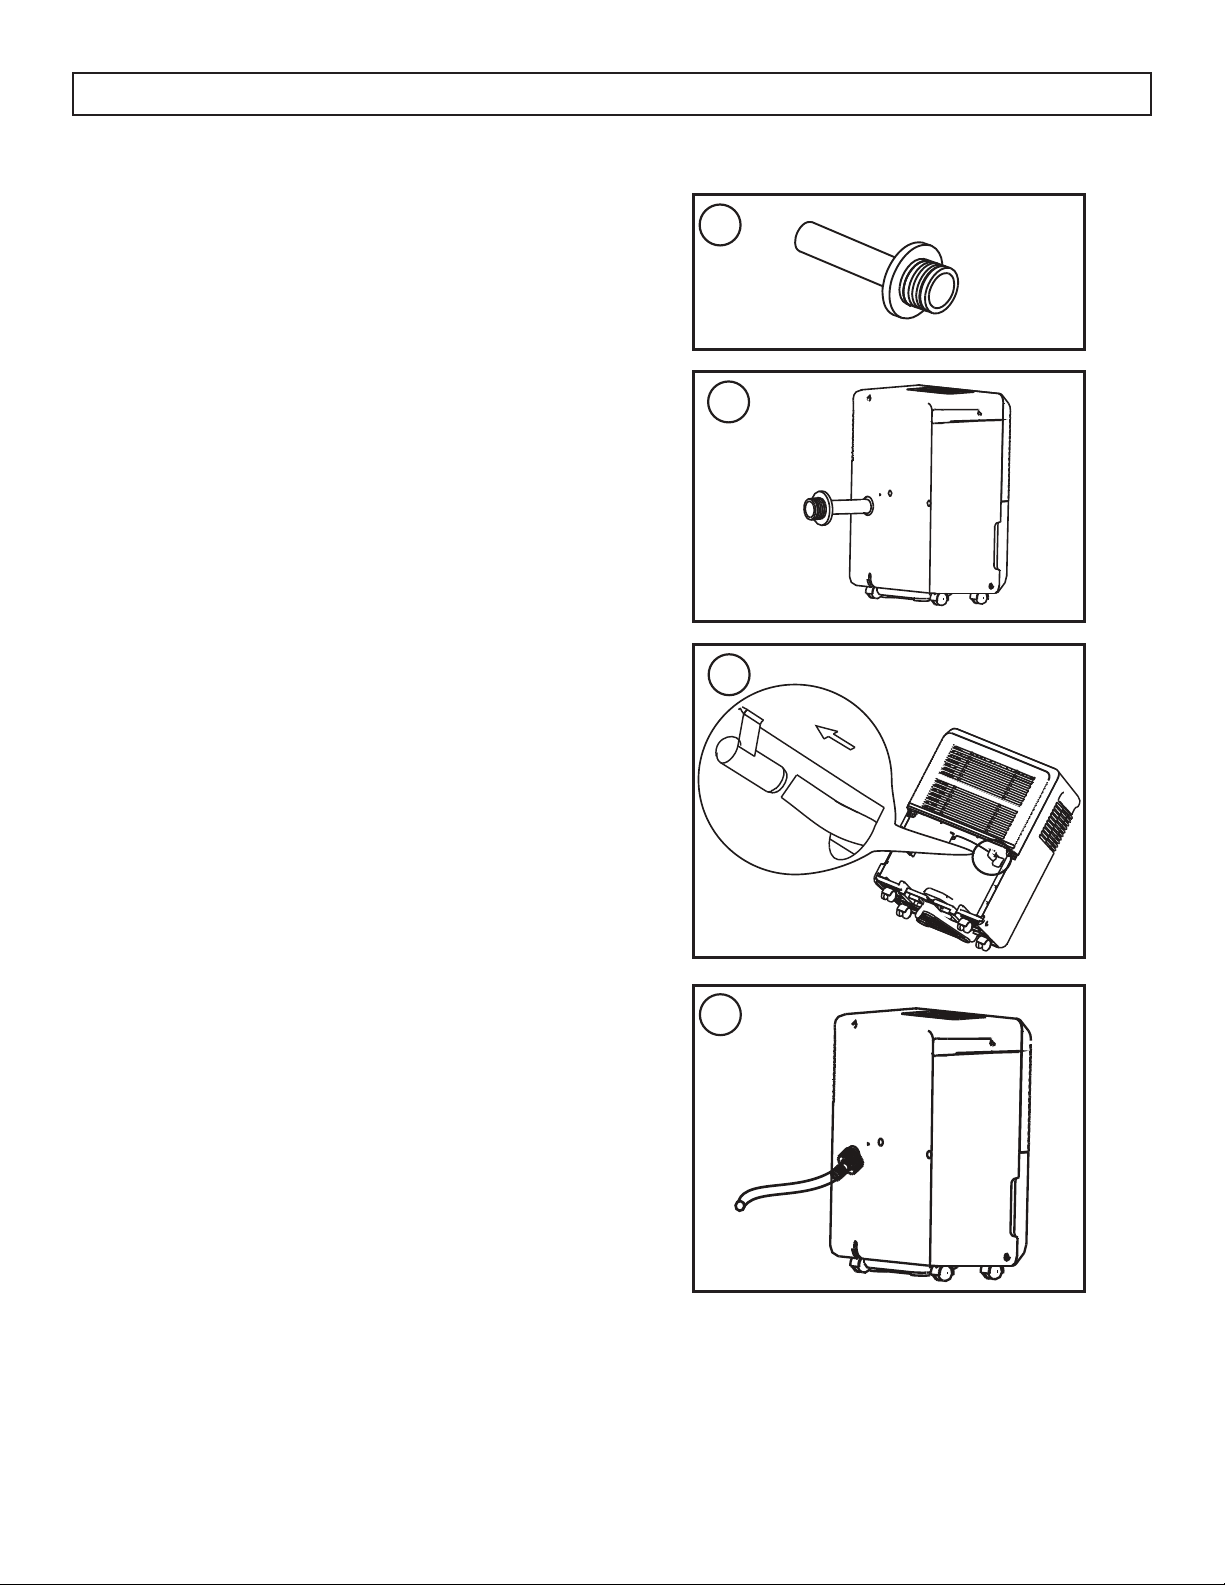
WATER REMOVAL
2. Continuous Drain
Water can be removed from the appliance using the
continuous drain and a standard garden hose (not
provided).
Before using any automatic drain functions,
check that all drain ports are clean and free of
debris. There is one drain port inside the bucket
compartment of the appliance, remove the bucket
to see it. There is one drain port on the back of the
appliance where the drain hose attaches. All drain
ports should be cleaned with a pipe cleaner prior to
use.
Note: Do not clean the drain ports with anything
more rigid than a pipe cleaner as this can damage
the appliance.
Note: If the drain ports are clogged or dirty it
can cause water to leak from the bottom of the
appliance.
1. Before attaching the garden hose, fi rst install the
provided adapter and drain hose.
2. Remove the cover from the continuous drain
outlet and insert the drain hose into the
appliance until it connects to the drip point
inside the bucket compartment.
3. The drip point is visible when the bucket is
removed.
4. Attach the female threaded end of the garden
hose to the adapter on the back of the
appliance. Direct the other end of the garden
hose to a bucket or fl oor drain.
Ensure that the garden hose is not bent and goes
straight down from the back of the appliance. The
continuous drain is only activated by gravity so any
bends or upward motion in the hose will stop the
water from draining.
The garden hose should be cut so that it is no more
than 1.8 m (6 feet) long. If the drain hose is too
long water may not drain completely which can
lead to stagnant water and mildew build up inside
the hose.
OPERATING INSTRUCTIONS
1
2
3
4
6
Loading ...
Loading ...
Loading ...